Table of Contents
Advertisement
Quick Links
Advertisement
Table of Contents

Related Manuals for ANEMOI AIRSLIM L Series


Summary of Contents for ANEMOI AIRSLIM L Series
- Page 1 AIRSLIM [L] Installation Manual Issued June 2020 ANIM14DI Rev. D...
- Page 2 Fixing and control connections 29 / 01 / 2020 Update Technical Characteristics 03 / 06 / 2020 Update Fixation System Technical documents are regularly updated. Anemoi reserves the right to modify the contents of this manual, in full or in part, without warning.
-
Page 3: Table Of Contents
AIRSLIM [L] TABLE OF CONTENTS SAFETY .................................. 4 INTRODUCTION ............................5 TECHNICAL CHARACTERISTICS ....................... 6 DIMENSIONS ..............................7 DELIVERY ..............................8 Package Dimensions & Weights ......................8 Packing list ............................8 MECHANICAL INSTALLATION ........................10 Clearances ............................10 Installation Tools ..........................12 Ceiling Fixation ............................ -
Page 4: Safety
AIRSLIM [L] SAFETY Before the installation, read the following warning and caution instructions: WARNING! Do NOT install, repair or clean the fan while it is in operation or connected to the power supply. Failure to do so may result in serious injury or death. Do NOT install, handle, repair or clean the fan with wet hands. -
Page 5: Introduction
AIRSLIM [L] 1 INTRODUCTION The Anemoi AIRSLIM [L] fans have been designed to generate a huge volume of air from the ceiling in industrial and commercial installations. This low consumption fan is used to increase comfort in summer by generating a smooth breeze and also in winter using the heat located in the top coats of the building. -
Page 6: Technical Characteristics
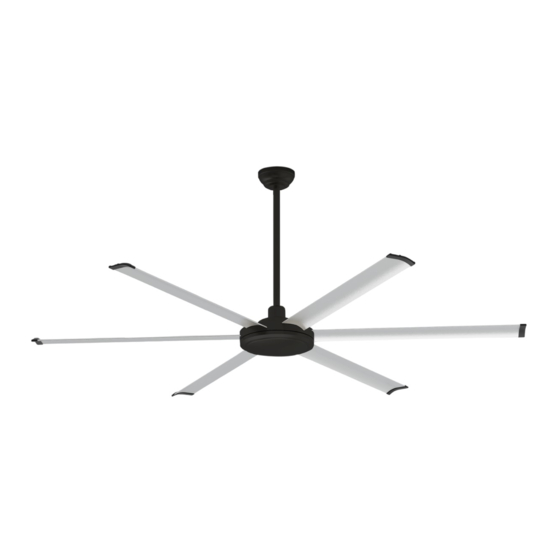
AIRSLIM [L] 2 TECHNICAL CHARACTERISTICS AIRSLIM 400L AIRSLIM 550L AIRSLIM 700L GENERAL CHARACTERISTICS Diameter 4.3m 5.5m 7.3m Blades number 5 aluminium blades Standard colour Black matte colour and aluminium blades MOTOR CHARACTERISTICS Motor power 1000W 1000W 1500W Supply voltage 110VAC – 240VAC single phase, 50/60 Hz Maximum consumption 500W 830W... -
Page 7: Dimensions
3 DIMENSIONS The Anemoi AIRSLIM [L] comes in five different diameters. The height of the fan can also be adjusted by modifying the length of the extension bar. The following figure shows the dimensions of the fan with a standard extension of... -
Page 8: Delivery
AIRSLIM [L] 4 DELIVERY The Anemoi AIRSLIM [L] fan is delivered in two wood boxes, one including the motor parts and the other the blades. Handle the fan boxes carefully and with proper lifting equipment to avoid any damage CAUTION! Use proper lifting equipment to handle the motor and blade boxes. - Page 9 AIRSLIM [L] The motor box also includes the following screws: BOLTS Connecting with Screw standard Mounting system M12*55 bolts M12 Spring washer M12 Nut Extension rod to mounting system M10*70 bolts M10 Spring washer M10 Nut Extension rod to motor M10*70 bolts M10 Spring washer M10 Nut...
-
Page 10: Mechanical Installation
The Anemoi AIRSLIM [L] series fan is designed for ceiling installation. Ensure that the ceiling area chosen can hold the weight of the fan and that there are no obstacles in its operating range. The maximum weight of the fan is about 100kg. - Page 11 AIRSLIM [L] If the fan is installed in an inclined roof, ensure that these minimum distances are achieved and add a higher extension rod if necessary, to allow the fan take enough air and provide the maximum performance. CAUTION! Ensure that the minimum distances are achieved. Otherwise, the fan could be damaged. It is recommended to protect the fan if there is the possibility to receive impacts.
-
Page 12: Installation Tools
5.3 Ceiling Fixation The Anemoi AIRSLIM [L] comes with mounting brackets to anchor the fan to the ceiling. As standard, all tooling is provided so that the fan can be mounted in I beams, concrete beams and directly to the ceiling. The fan is prepared to be installed in inclined roofs. -
Page 13: Extension Rod Assembly
AIRSLIM [L] Push I-Beam clamp inward to center of mean for max clamping. CAUTION! Ensure that the M12 bolts are properly tightened. Failure to do so may result in equipment damage. 5.4 Extension Rod Assembly CAUTION! Ensure that power cables, control cables and safety cable pass through the ceiling bracket and through the extension rod. - Page 14 AIRSLIM [L] Part list: 1. M10mm Locked nut (2x) 2. M10 Spring washer (4x) 3. M10*70mm Bolt (2x) 4. Tubo de extensión rod Tools: 14mm Wrench 14mm Socket Torque Wrench Torque = 60 NM Use the level so that the extension bar is fully vertical.
- Page 15 AIRSLIM [L] The length of the extension rod can be customized according to the installation requirements between 500, 1000, 1500 y 2000 mm. The variation of the extension rod length allows adjusting installation height of fan. If the extension rod exceeds one meter, winds must be installed to avoid oscillations. The variation of the extension rod allows adjusting the height at which the fan is installed.
-
Page 16: Motor Assemby
AIRSLIM [L] 5.5 Motor Assemby CAUTION! Ensure that the cables which pass through the top of the motor are on the same side as the rectangular window of the extension rod. Failure to do so may result in equipment damage. Do not lift the motor weight alone. -
Page 17: Safety Cable Installation
AIRSLIM [L] 5.6 Safety Cable Installation The motor comes with an already fixed safety cable that must be fixed to prevent a motor crash once installed. Place the safety wire on a fixed roof element. • If the fan is installed in a concrete ceiling, drill the ceiling and insert a ring that supports the weight of the fan at 2 to the fan’s ceiling fra e. -
Page 18: Controller Installation
AIRSLIM [L] 5.7 Controller Installation The fan motor is connected to a control board that is installed on the extension rod, just above the motor. The control board carries a hole to pass the power and communications cables that come out through the hole of the extension tube. -
Page 19: Guy Wires Fixation (Optional)
AIRSLIM [L] 5.8 Guy Wires Fixation (Optional) When the extensión rod esceeds one meter, it is needed guy wires fixation to secure the fan, in order to avoid oscillations. The extension rod must be ordered specially prepared with four perforations to connect the four safety cables. -
Page 20: Blades Assembly
AIRSLIM [L] 5.9 Blades Assembly The Anemoi AIRSLIM [L] fan has five blades. To assemble the blades, it is necessary to introduce and fix them to the motor guides. Use the M6x25 screws, M6 nuts and M6 washer provided by applying a tightening torque of 37Nm as shown in... -
Page 21: Cover Fixation
AIRSLIM [L] 5.10 Cover Fixation The fan includes a special cover to hide the screws. Use the screws provided to cover the bottom of the motor as shown in picture: Part List: 1. Bottom Cover (1x) 2. M6x12 Screw... -
Page 22: Electrical Installation
Follow the instructions and recommendations contained in this section. Failure to do so may result in serious injury or death. The Anemoi AIRSLIM [L] fan motor is controlled by a control plate located above the motor. To ensure the operation of the fan, the user must connect power and control cables. -
Page 23: Connectors And Switches Location
AIRSLIM [L] 6.1 Connectors and Switches Location The Anemoi AIRSLIM [L] fan has all the connectors on the control board that is installed on the motor. This board also has several switches that allow you to configure communications. The following image shows the location of the connectors and switches: Nº... -
Page 24: Power Connections
6.1 you can see where to connect the cables directly to connectors 5, 6 and 7. The Anemoi AIRSLIM [L] fan control board must be connected to an electrical voltage of 110VAC - 240VAC I, 50 / 60Hz. These cables are connected to connector 1 of the figure in section 6.1. The labels L1/N, L2/F, L3 , and GND can be read on the plate. -
Page 25: Control Connections
AIRSLIM [L] 6.3 Control Connections The Anemoi AIRSLIM [L] fan needs an external control to work. The external control is connected directly to the fan control board using shielded cable type modbus cable RS485 2x2x0.50 mm² POSCY. The control connections of the fan are located in connector 2 of the figure in section 6.1. -
Page 26: Multi Fans Installation
AIRSLIM [L] 6.4 Multi Fans Installation In installations with multiple fans, it is possible to control the fans using a single controller. In this case, the controller is connected to the different by using control connections described in section 6.3. The connection must be made in series. - Page 27 AIRSLIM [L] The fans connected in a network can be operated individually with a customized Modbus address in each of them. There are two options to customize the Modbus address: • Connecting a computer and writing the value in address 29 as long as Pin8 of switch 2 is in the ON position.
-
Page 28: Wiring Installation Recommendations
AIRSLIM [L] 6.5 Wiring installation recommendations To ensure correct installation and functioning of the Modbus control fan, please keep in mind following recommendations: 1- Please strip the wire 5cm as a maximum as shown below: 2- Communication cables cannot be wound. If it were done, they could act as an antenna. Communication cables that are not used have to be cut and left inside the shielded tube as shown below. - Page 29 AIRSLIM [L] 4- The data cable should follow the shortest path and he should avoid areas of power drive, as shown below: Communications cable must be performed shortly and directly Avoid power zones marked in red WARNING! Maintain a minimum distance between electrical and communications wiring. Failure to do so may lead interferences.
-
Page 30: Mantenaince
AIRSLIM [L] 7 MANTENAINCE WARNING! Do NOT repair or clean the fan while it is in operation or connected to the power supply. Doing so may result in serious or fatal electrical shock. Please maintain the fan as follows: Every three months: •... - Page 31 www.anemoifans.com...
Need help?
Do you have a question about the AIRSLIM L Series and is the answer not in the manual?
Questions and answers