Table of Contents
Advertisement
Quick Links
Advertisement
Table of Contents

Related Manuals for ANEMOI AIRPRO S Series


Summary of Contents for ANEMOI AIRPRO S Series
- Page 1 AIRPRO [S] Installation Manual Issued July 2020 ANIM07GI Rev. G...
- Page 2 02 / 09 / 2019 Modbus control 10 / 01 / 2020 Update Technical Characteristics 15 / 07 / 2020 Update Technical documents are regularly updated. Anemoi reserves the right to modify the contents of this manual, in full or in part, without warning.
-
Page 3: Table Of Contents
AIRPRO [S] TABLE OF CONTENTS SAFETY ..........................................4 INTRODUCCIÓN ....................................5 TECHNICAL CHARACTERISTICS ............................... 6 DIMENSIONS......................................7 DELIVERY ......................................8 Package Dimensions & Weights ..............................8 Packing List ....................................8 MECHANICAL INSTALLATION ................................9 Ceiling Mounting ..................................9 Securing the Down Rod to the Engine ............................10 Securing the Fan to the Ceiling .............................. -
Page 4: Safety
AIRPRO [S] SAFETY Before the installation, read the following warning and caution instructions: WARNING! Do NOT install, repair or clean the fan while it is in operation or connected to the power supply. Failure to do so may result in serious injury or death. Do NOT install, handle, repair or clean the fan with wet hands. -
Page 5: Introducción
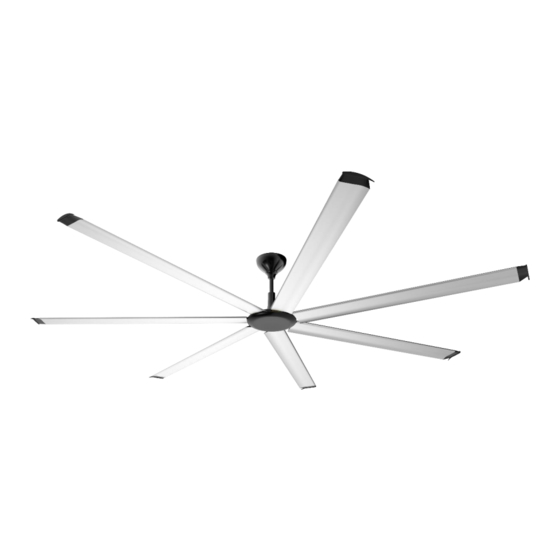
AIRPRO [S] 1 INTRODUCCIÓN The AIRPRO [S] series is the perfect ceiling fan to be installed in up to five meters height ceilings. The innovative motor design with only 5cm height makes this HVLS fan very light and easy to install. This fan is built in seven blades and the drive is integrated in the ceiling mount. -
Page 6: Technical Characteristics
AIRPRO [S] 2 TECHNICAL CHARACTERISTICS AIRPRO 150 S AIRPRO 200 S AIRPRO 250 S AIRPRO 300 S GENERAL CHARACTERISTICS Diameter 1.5 m 2.0 m 2.5 m 3.0 m Blades number 7 aluminium blades Standard colour Black matte colour and aluminium blades MOTOR CHARACTERISTICS Motor power 100W... -
Page 7: Dimensions
3 DIMENSIONS The Anemoi AIRPRO [S] comes in four different diameters. The height of the fan can also be adjusted by modifying the length of the extension bar. The following figure shows the dimensions of the fan with a standard extension:... -
Page 8: Delivery
AIRPRO [S] 4 DELIVERY The Anemoi AIRPRO [S] fan is delivered in two wood boxes, one including the motor parts and the other the blades. Handle the fan boxes carefully and with proper lifting equipment to avoid any damage. CAUTION! Use proper lifting equipment to handle the motor and blade boxes. -
Page 9: Mechanical Installation
5 MECHANICAL INSTALLATION The Anemoi AIRPRO [S] fan has been designed for ceiling installation. Ensure that the ceiling area chosen can hold the weight of the fan and that there are no obstacles in its operating range. Make sure that the fan is installed at a height greater than 2.6m. -
Page 10: Securing The Down Rod To The Engine
AIRPRO [S] 5.2 Securing the Down Rod to the Engine Take the extension and motor out of the box. Loosen the screws and caps on the extension tube and pass the safety cable and electrical cables through the tube. Attach the extension to the motor using the extension screws. The safety cable must be fixed to the motor screw as shown in the figure. -
Page 11: Securing The Fan To The Ceiling
AIRPRO [S] 5.3 Securing the Fan to the Ceiling To attach the fan to the ceiling, simply place the extension ball joint in the center of the anchor previously attached to the ceiling, as shown in the images below. NOTE: Be careful not to pinch the cables during operation. S Type F Type CAUTION! -
Page 12: Electrical Connections To Receiving Unit
AIRPRO [S] Tipo F CAUTION! Ensure all cables are protected inside the top bezel. Otherwise, the fan may be damaged. 5.5 Electrical Connections to Receiving Unit The receiving unit of the remote control should be wired as explained below: Connect the ground wire to the Screw 2 of the hardware as shown in the figure: S Type F Type... -
Page 13: Mounting The Blades
AIRPRO [S] 5.6 Mounting the Blades S Type / F Type engine seven projections that allow to fix the seven blades to it. Each blade is inserted in the projection by the part that has three holes and is fixed to the motor with: Three M6x30mm screws... -
Page 14: Control
AIRPRO [S] 6 CONTROL The Anemoi AIRPRO [S] fan can be purchased with remote control or with Modbus control. Next, the particularities of each of the two models are established. 6.1 Remote control 6.1.1 Remote control S Type The Anemoi AIRPRO [S] fan is operated through a remote control. You must pair the remote control to the fan before using it. -
Page 15: Remote Control S Type
6.2 Modbus control The Anemoi AIRPRO [S] fan needs an external control to work. The external control is connected directly to the fan control board using shielded cable type modbus cable RS485 2x2x0.50 mm² POSCY. -
Page 16: Multiple Fan Installation
AIRPRO [S] 6.2.1 Multiple Fan Installation In installations with multiple fans, it is possible to control the fans using a single controller. In this case, the controller is connected to the different by using control connections A, B and GND. The following figure shows the detail of the control connectors: WARNING! The earth meshes of each cable section must remain together. -
Page 17: Wiring Installation Recommendations
AIRPRO [S] 6.3 Wiring installation recommendations To ensure correct installation and functioning of the Modbus control fan, please keep in mind following recommendations: 1- Please strip the wire 5cm as a maximum as shown below: 2- Communication cables cannot be wound. If it were done, they could act as an antenna. Communication cables that are not used have to be cut and left inside the shielded tube as shown below. -
Page 18: Maintenance
AIRPRO [S] 7 MAINTENANCE Please maintain the fan as follows: Every three months: • Clean up the dust of the fan with a dry cloth. • Verify that the fan is working properly. • Ensure that the fan does not make any noises or vibrations. •... - Page 19 www.anemoifans.com...
Need help?
Do you have a question about the AIRPRO S Series and is the answer not in the manual?
Questions and answers