Table of Contents
Advertisement
Quick Links
Advertisement
Table of Contents

Related Manuals for ANEMOI AIRMAX


Summary of Contents for ANEMOI AIRMAX
- Page 1 AIRMAX Installation Manual Fecha de edición: March 2020 ANIM01DI Rev. D...
- Page 2 AIRMAX UPDATES DATE UPDATE DESCRIPTION 16 / 03 / 2020 2020 Products update Technical documents are regularly updated. Anemoi reserves the right to modify the contents of this manual, in full or in part, without warning.
-
Page 3: Table Of Contents
AIRMAX TABLE OF CONTENTS SAFETY .................................. 4 INTRODUCTION ............................5 TECHNICAL CHARACTERISTICS ....................... 6 DIMENSIONS ..............................7 DELIVERY ..............................8 Package Dimensions & Weights ......................8 Packing List ............................9 MECHANICAL INSTALLATION ........................10 Clearances ............................10 Installation Tools ..........................11 Ceiling Mount and Extension rod fixation..................... -
Page 4: Safety
AIRMAX SAFETY Thank you for purchasing our products! Please read this manual carefully before use, use the product accordingly and keep the manual in safe place. Installation work and electrical wiring must be done by qualified person(s) in accordance with all applicable codes and standards. -
Page 5: Introduction
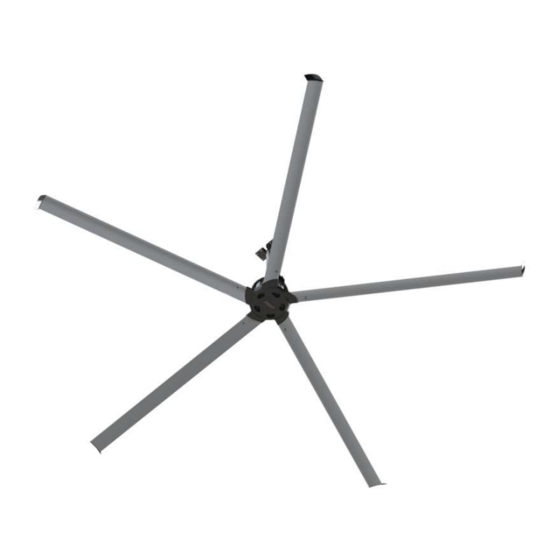
1 INTRODUCTION The Anemoi AIRMAX is a ceiling fan designed to operate in the harshest ambient conditions due to the certified IP65 protection. This fan is built in five blades and the drive is integrated in the EC brushless motor. -
Page 6: Technical Characteristics
AIRMAX 2 TECHNICAL CHARACTERISTICS AIRMAX 300 AIRMAX 400 AIRMAX 500 AIRMAX 600 AIRMAX 660 GENERAL CHARACTERISTICS Diameter 6.6 m Blades number 5 aluminium blades for aviation, 6061-T5 Standard colour Black matte colour and aluminium blades MOTOR CHARACTERISTICS Motor power 1,000W... -
Page 7: Dimensions
AIRMAX 3 DIMENSIONS The Anemoi AIRMAX has five different diameters. The height of the fan can also be varied by changing the length of the extension rod. The fan comes with a standard 800mm extension. The next figure shows the fan dimensions with an extension drop of 800 mm:... -
Page 8: Delivery
AIRMAX 4 DELIVERY The Anemoi Airpro [L] fan is delivered in two wood boxes, one including the motor parts and the other the blades. Handle the fan boxes carefully and with proper lifting equipment to avoid any damage. CAUTION! Use proper lifting equipment to handle the motor and blade boxes. Otherwise, the fan could be damaged and there is risk of accident. -
Page 9: Packing List
AIRMAX 4.2 Packing List The following tables include the different pieces sent inside the boxes. Please check the status and quantity of the fan equipment and the supporting parts immediately after you have opened the box to make sure that the goods received are in accordance with your order. -
Page 10: Mechanical Installation
The Anemoi AIRMAX fan is designed for ceiling installation. Ensure that the ceiling area chosen can hold the weight of the fan and that there are no obstacles in its operating range. The maximum weight of the fan is about 123 kg. -
Page 11: Installation Tools
AIRMAX Model Airmax 300 Airmax 400 Airmax 500 Airmax 600 Airmax 660 ØA (fan diameter) [mm] 3050 4050 5050 6050 6650 B (max ceiling slope) [°] C (min safety distance from side obstruction) [mm] D (fan height with standard downrod) [mm]... -
Page 12: Ceiling Mount And Extension Rod Fixation
5.3 Ceiling Mount and Extension rod fixation The Anemoi AIRMAX comes with mounting brackets to anchor the fan to the ceiling. As standard, all tooling is provided so that the fan can be mounted concrete beams or directly to the ceiling. The fan is prepared to be installed in inclined roofs. -
Page 13: Motor Assembly
AIRMAX 5.4 Motor Assembly The motor is assembled to the extension rod by the M12 bolts provided, it must be tightened to prevent swinging of the extension. It is very important that the extension rod stays vertical to avoid abnormal operation. By using a level we ensure that the extension bar is completely vertical. -
Page 14: Safety Cable Installation
AIRMAX 5.5 Safety Cable Installation The motor contains a safety cable that must be installed to prevent the engine from failing after assembly. Make sure that you have inserted the cable correctly through the extension rod and that you have correctly mounted the safety set as indicated in section 5.3. -
Page 15: Guy Wires Fixation (Optional)
AIRMAX 5.6 Guy Wires Fixation (optional) If oscillations are detected, winds must be installed as part of the assembly process. The use of winds is recommended for extensions greater than the standard extension. To do so, there is an auxiliary hardware with Turn Buckle, Wire Rope Clamp and Beam Clamp set. -
Page 16: Blades Assembly
AIRMAX 5.7 Blades Assembly To assemble the Blades, it is necessary to screw the plastic End Caps, and introduce and fix them to the motor guides. Use the bolts provided to fix the end caps before lifting the blade to the motor. The fan blades must be installed in a specific sense, with the concave side in the bottom. -
Page 17: Electrical Installation
Follow the instructions and recommendations contained in this section. Failure to do so may result in serious injury or death. The Anemoi AIRMAX fan motor is controlled by an integrated motor drive. To ensure fan operation, the user must connect cable power and control cables. -
Page 18: Conexiones De Potencia
AIRMAX 6.1 Conexiones de potencia The Anemoi AIRMAX engine must be connected to the power supply with an electrical voltage of 380-400 VAC (III, 50/60Hz). Please see the voltage and consumption for this HVLS fan on the technical characteristics to guarantee a properly installation. -
Page 19: Conexiones De Control
AIRMAX 6.2 Conexiones de control The Anemoi AIRMAX fan needs an external control to work. The external control is connected directly to the fan control board using shielded cable type modbus cable RS485 2x2x0.50 mm² POSCY. The following figure shows the detail of the control connectors:... -
Page 20: Multi Fans Installation
AIRMAX 6.2.1 Multi Fans Installation In installations with multiple fans, it is possible to control the fans using a single controller. In this case, the controller is connected to the different by using control connections. The connection must be made in series. -
Page 21: Recommendations
AIRMAX 6.2.2 Recommendations To ensure correct installation and functioning of the Modbus control fan, please keep in mind following recommendations: 1- Please strip the wire 5cm as a maximum as shown below: 2- Communication cables cannot be wound. If it were done, they could act as an antenna. Communication cables that are not used have to be cut and left inside the shielded tube as shown below. -
Page 22: Maintenance
AIRMAX 7 MAINTENANCE WARNING! Do NOT repair or clean the fan while it is in operation or connected to the power supply. Doing so may result in serious or fatal electrical shock. Please maintain the fan as follows: Every three months: •... - Page 23 www.anemoifans.com...
Need help?
Do you have a question about the AIRMAX and is the answer not in the manual?
Questions and answers