LG LDF9932 Series Training Manual
Hide thumbs
Also See for LDF9932 Series:
- User manual (52 pages) ,
- Service manual (43 pages) ,
- Specifications (2 pages)
Table of Contents
Advertisement
Quick Links
TRAINING MANUAL
LDF9932XX
IMPORTANT SAFETY NOTICE
The information in this training manual is intended for use by persons possessing an adequate background
in electrical equipment, electronic devices, and mechanical systems. In any attempt to repair a major
appliance, personal injury and property damage can result. The manufacturer or seller maintains no liability
for the interpretation of this information, nor can it assume any liability in conjunction with its use. When
servicing this product, under no circumstances should the original design be modified or altered without
permission from LG Electronics. Unauthorized modifications will not only void the warranty, but may lead
to property damage or user injury. If wires, screws, clips, straps, nuts, or washers used to complete a
ground path are removed for service, they must be returned to their original positions and properly
fastened.
CAUTION
To avoid personal injury, disconnect the power before servicing this product. If electrical power is required
for diagnosis or test purposes, disconnect the power immediately after performing the necessary checks.
Also be aware that many household appliances present a weight hazard. At least two people should be
involved in the installation or servicing of such devices. Failure to consider the weight of an appliance could
result in physical injury.
ESD NOTICE
Some of the electronic components in appliances are electrostatic discharge (ESD) sensitive. ESD can
weaken or damage the electronics in these appliances in a manner that renders them inoperative or
reduces the time until their next failure. Connect an ESD wrist strap to a ground connection point or
unpainted metal in the appliance. Alternatively, you can touch your finger repeatedly to a ground
connection point or unpainted metal in the appliance. Before removing a replacement part from its package,
touch the anti-static bag to a ground connection point or unpainted metal in the appliance. Handle the
electronic control assembly by its edges only. When repackaging a failed electronic control assembly in an
anti-static bag, observe these same precautions.
REGULATORY INFORMATION
This equipment has been tested and found to comply with the limits for a Class B digital device, pursuant
to Part 15 of the FCC Rules. These limits are designed to provide reasonable protection against harmful
interference when the equipment is operated in a residential installation. This equipment generates, uses,
and can radiate radio frequency energy, and, if not installed and used in accordance with the instruction
manual, may cause harmful interference to radio communications. However, there is no guarantee that
interference will not occur in a particular installation. If this equipment does cause harmful interference to
radio or television reception, which can be determined by turning the equipment off and on, the user is
encouraged to try to correct the interference by one or more of the following measures: Reorient or
relocate the receiving antenna; Increase the separation between the equipment and the receiver; Connect
the equipment to an outlet on a different circuit than that to which the receiver is connected; or consult
the dealer or an experienced radio/TV technician for help.
DISCLAIMER
The information in this training manual was accurate at the time of publication. Every effort has been made
to ensure accuracy. Updates, changes, etc. are available via GCSC and LGCSacademy. The information in
this manual is intended for persons with adequate backgrounds in electronics, mechanical, and electronic
servicing. The manufacturer and seller are not to be held responsible for any liability incurred from its use.
COMPLIANCE
The responsible party for this device's compliance is LG Electronics Alabama, Inc.; 201 James Record Road,
Huntsville, AL, 35813.
LDF9932XX
Page 1
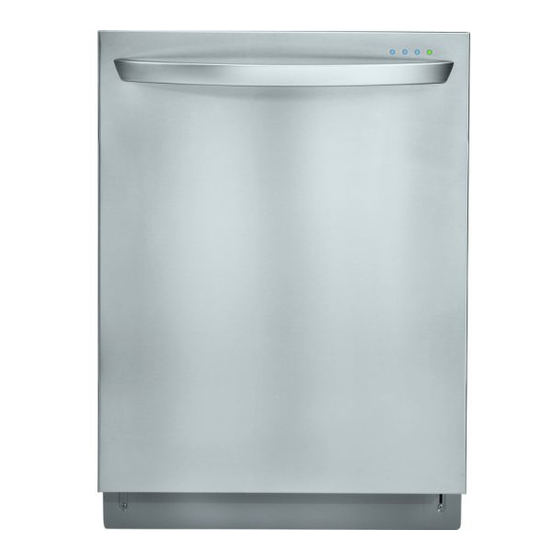
DISHWASHER
Advertisement
Table of Contents
Troubleshooting

Related Manuals for LG LDF9932 Series


Summary of Contents for LG LDF9932 Series
-
Page 1: Important Notices (The Small Print Page)
The manufacturer and seller are not to be held responsible for any liability incurred from its use. COMPLIANCE The responsible party for this device’s compliance is LG Electronics Alabama, Inc.; 201 James Record Road, Huntsville, AL, 35813. LDF9932XX... -
Page 2: Table Of Contents
TRAINING MANUAL LDF9932XX Contents Important Notices (The Small Print Page) Contents Specifications Warranty Installation Electrical Supply Preparation Water Supply Installation Installation Drain Connection Water Connection Electrical Connection Final Installation Features and Parts Control Panel Disassembly Tub Assembly, Lower Cover, and Insulation Door Assembly Fan Assembly (Drying Fan) Door Spring... - Page 3 TRAINING MANUAL LDF9932XX Contents, continued Error Codes Troubleshooting Diagnosis and Repair (Troubleshooting Charts) Test Mode Steam Generator Test Mode Exploded Views Parts List Serial Number Identification Ohm’s Law and Watt’s Law Conversion Information Service Bulletins Changes to Base Drain hose with Siphon Protector Hinge Spring and Connector Change in Vent to Prevent Condensation Ver.
-
Page 4: Specifications
TRAINING MANUAL LDF9932XX SPECIFICATIONS LDF9932XX Page 4 DISHWASHER... -
Page 5: Warranty
TRAINING MANUAL LDF9932XX WARRANTY LDF9932XX Page 5 DISHWASHER... -
Page 6: Installation
TRAINING MANUAL LDF9932XX INSTALLATION Installation is covered briefly for the servicer who may need to uninstall and reinstall the dishwasher for repairs. For new installations, please refer to the installation guide that was supplied with the dishwasher. • We recommend a location as close to the sink as possible (but not directly under it) for easy connection to water and drain lines. -
Page 7: Electrical Supply Preparation
TRAINING MANUAL LDF9932XX ELECTRICAL SUPPLY PREPARATION The dishwasher can be hardwired if necessary and if permitted by local code. We recommend the use of a dishwasher installation kit, available at most hardware and home supply stored. This kit includes a cordset, a flexible water supply line, and the elbow connector necessary to connect it. - Page 8 TRAINING MANUAL LDF9932XX INSTALLATION, continued Exploded view of the left rear leg adjuster assembly. (Right rear similar.) The front legs can be adjusted by using a ¼” drive wrench, as shown. To complete the installation: Remove the lower cover. Make sure the legs are adjusted and the dishwasher is level.
-
Page 9: Drain Connection
TRAINING MANUAL LDF9932XX DRAIN CONNECTION The drain hose must be connected in a manner that meets local plumbing codes. If the end of the drain hose does not fit the available connector, an adapter may be obtained from a local hardware or plumbing supplier. The rubber end can be cut off for the correct size attachment. -
Page 10: Final Installation
TRAINING MANUAL LDF9932XX FINAL INSTALLATION 1. Turn on the water at the valve under the sink. 2. Turn on the power at the fuse or breaker (or plug in the cordset at the outlet under the sink. 3. Run the dishwasher through one QUICK cycle to check the operation and to check for water leaks. -
Page 11: Features And Parts
TRAINING MANUAL LDF9932XX FEATURES and PARTS LDF9932XX Page 11 DISHWASHER... -
Page 12: Control Panel
TRAINING MANUAL LDF9932XX CONTROL PANEL SOAK Heavily soiled loads, with cooked-on foods POWER SCRUB Normal soil level, everyday loads NORMAL Normal soil level, everyday loads STEAM DELICATE Washing delicate items, crystal, stemware QUICK Light soil level, recently used dishes and cutlery RINSE ONLY Rinses only, no washing OPTIONS... -
Page 13: Disassembly
TRAINING MANUAL LDF9932XX DISASSEMBLY The following pages will detail the disassembly and reassembly of the dishwasher during the normal course of diagnosis and repair. Turn off the electric power at the source (or unplug it if your dishwasher is installed using a plug and cordset.) Pull the dishwasher out from under the counter and turn off the water. -
Page 14: Door Assembly
TRAINING MANUAL LDF9932XX DOOR ASSEMBLY Open the door and fold it down. Remove the screws (12) from the perimeter of the door. The cover will drop, so have a blanket or pad on the floor to prevent damage to it. Remove the screws (2) at the latchhook. -
Page 15: Fan Assembly (Drying Fan)
TRAINING MANUAL LDF9932XX FAN ASSEMBLY With the door disassembled as described on the previous page, remove the screws (4) securing the door bracket. Remove the ground screw and ground wire. Remove the wire connections for the fan and for the detergent dispenser. Remove the air duct. -
Page 16: Lower Frame
TRAINING MANUAL LDF9932XX LOWER FRAME Remove the screws (4) to remove the lower frame member. TURN THE DISHWASHER OVER While some technicians like to turn the dishwasher over (180°) to work on it, many find it is much easier simply to pull it out from under the counter and lean it back. -
Page 17: Sump Wiring And Hoses
TRAINING MANUAL LDF9932XX SUMP WIRING HARNESS and HOSES Remove all wiring connections. Check carefully for ground wire connections (screw and ring connector.) Remove all hose connections. Remove the sump holder rings (2) and screws. Use a new gasket if you remove or replace the sump assembly. -
Page 18: Base Assembly
TRAINING MANUAL LDF9932XX FLOAT SWITCH ASSEMBLY The float switches can be removed without removing the assembly from the dishwasher. This allows replacement of the electrical switches and / or the part that holds the switches. Press the tabs with a driver and lift the top of the switch assembly away from the body. -
Page 19: Front Leg Adjustment
TRAINING MANUAL LDF9932XX FRONT LEG ADJUSTMENT The front adjustment legs can be turned by pliers or a screwdriver at the bottom, or by a ¼” drive ratchet from above. REAR LEG ADJUSTMENT The rear legs can be adjusted by using a Phillips screwdriver to turn the adjustment shaft which raises or lowers the rear leg. -
Page 20: Air Breaker Assembly
TRAINING MANUAL LDF9932XX AIR BREAKER ASSEMBLY Release the clamps (3) that secure the hoses to the air breaker. Inside the tub, turn the air breaker vent counterclockwise. Be careful to avoid damaging the O-ring seal. SUMP ASSEMBLY (NOTE: The dishwasher is turned upside- down in this drawing.) After all the wires and hoses are disconnected from the sump, remove the... - Page 21 TRAINING MANUAL LDF9932XX SUMP ASSEMBLY, continued Remove two screws to remove the vario motor. It can be removed and replaced without further disassembly of the sump, even with the sump in place. The turbidity sensor is mounted in the side of the sump.
- Page 22 TRAINING MANUAL LDF9932XX SUMP ASSEMBLY, continued Exploded View Of Sump Assembly When repairing and reassembling the sump assembly, LG recommends replacing the gaskets in it rather than trying to re-use the old ones. LDF9932XX Page 22 DISHWASHER...
-
Page 23: Hinge Supporter And Door Gasket
Insert a screwdriver tip and rotate it away from the tub at the top of the clip. Usually, the plastic end pieces are broken. so LG recommends having replacements available. (Location # F117. See exploded view, page 41.) LDF9932XX... -
Page 24: Dual Intensity Spray Wash
TRAINING MANUAL LDF9932XX CYCLE CHART DUAL INTENSITY SPRAY WASH The spray intensity for the upper lower racks is programmable by the customer. By selecting SOFT SPRAY for the upper rack and STRONG SPRAY for the lower rack, you can wash delicate items like stemware on top while washing pots and pans on the bottom. 1. -
Page 25: Adding Detergent
TRAINING MANUAL LDF9932XX ADDING DETERGENT Detergent must be added to the dispenser before the start of every cycle except RINSE ONLY. The detergent chamber holds 1.4 oz. (40 g) when full, but that is invariably too much detergent. Fill it no more than ¾ full. If the dishes are only moderately dirty, it might be possible to use even less detergent. -
Page 26: Adding Rinse-Aid
TRAINING MANUAL LDF9932XX ADDING RINSE AID Turn the round cap counterclockwise and remove it. Fill the reservoir. It holds 4.8 oz. (145 ml) Replace the cap and lock it. Adjust the rinse-aid setting as necessary. The factory setting for rinse aid dispensing is 3. Too little rinse aid contributes to spotting, streaking, and poor drying performance. -
Page 27: Program Chart
TRAINING MANUAL LDF9932XX PROGRAM CHART LDF9932XX Page 27 DISHWASHER... -
Page 28: Schematic
TRAINING MANUAL LDF9932XX WIRING DIAGRAM LDF9932XX Page 28 DISHWASHER... -
Page 29: Error Codes
TRAINING MANUAL LDF9932XX ERROR CODES and TROUBLESHOOTING ERROR CODE POSSIBLE CAUSE RESOLUTION Water valve is closed. Remedy water supply issue. Water to house is off. Inlet hose is kinked. Water pressure is low (>10 psi) INLET ERROR Inlet valve is defective. Measure resistance of inlet valve (1,125 Ω... - Page 30 TRAINING MANUAL LDF9932XX ERROR CODE POSSIBLE CAUSE RESOLUTION Inlet valve is defective. Replace inlet valve. Main board is defective. Replace main board. FLOW ERROR Excess water Inlet water over temperature Check the wash temperature in Test Mode. (Page 37.) (higher than 194° F / 90° C). Check input water temperature and adjust of over 120°...
-
Page 31: Troubleshooting
TRAINING MANUAL LDF9932XX TROUBLESHOOTING LDF9932XX Page 31 DISHWASHER... - Page 32 TRAINING MANUAL LDF9932XX TROUBLESHOOTING, continued LDF9932XX Page 32 DISHWASHER...
-
Page 33: Diagnosis And Repair (Troubleshooting Charts)
TRAINING MANUAL LDF9932XX DIAGNOSIS and REPAIR LDF9932XX Page 33 DISHWASHER... - Page 34 TRAINING MANUAL LDF9932XX LDF9932XX Page 34 DISHWASHER...
- Page 35 TRAINING MANUAL LDF9932XX LDF9932XX Page 35 DISHWASHER...
- Page 36 TRAINING MANUAL LDF9932XX LDF9932XX Page 36 DISHWASHER...
-
Page 37: Test Mode
TRAINING MANUAL LDF9932XX TEST MODE Test Mode is used to check various components of the dishwasher determine a failure before disassembly and repair are begun. Press STEAM and RINSE and POWER simultaneously to enter the test mode. Then, push the indicated button to test the desired component. -
Page 38: Steam Generator Test Mode
TRAINING MANUAL LDF9932XX STEAM GENERATOR TEST MODE To enter the Steam Generator Test Mode, press POWER and STEAM simultaneously. The error code(s) will display on the LED. If the steam generator is defective, the dishwasher will operate its selected cycle, but without steam. ERROR CODE CAUSE SOLUTION... -
Page 39: Exploded Views
TRAINING MANUAL LDF9932XX EXPLODED VIEW LDF9932XX Page 39 DISHWASHER... - Page 40 TRAINING MANUAL LDF9932XX EXPLODED VIEW LDF9932XX Page 40 DISHWASHER...
- Page 41 TRAINING MANUAL LDF9932XX EXPLODED VIEW LDF9932XX Page 41 DISHWASHER...
- Page 42 TRAINING MANUAL LDF9932XX EXPLODED VIEW LDF9932XX Page 42 DISHWASHER...
- Page 43 TRAINING MANUAL LDF9932XX EXPLODED VIEW LDF9932XX Page 43 DISHWASHER...
- Page 44 TRAINING MANUAL LDF9932XX EXPLODED VIEW LDF9932XX Page 44 DISHWASHER...
- Page 45 TRAINING MANUAL LDF9932XX EXPLODED VIEW LDF9932XX Page 45 DISHWASHER...
-
Page 46: Parts List
TRAINING MANUAL LDF9932XX PARTS LIST Loc # Part No Description *001 AFN31666758 Manual Assembly, Owners *002 3890DZ3015A Box, Carton *003 MFL37554808 Manual, Service A003 ACV34326901 Damper Assembly A008 4980ED2018B Supporter, Holder A040 3551DD2001E Cover Assembly, Lower A050 AGB32598301 Nozzle Assembly A060 5249DD1001A Nozzle Assembly... - Page 47 TRAINING MANUAL LDF9932XX Loc # Part No Description A171 MJS38945601 Tray A172 MGR38994001 Rack A173 AEC33858601 Guide Assembly A174 AEC33858701 Guide Assembly A175 MEG38945701 Holder E005 5001DD4001A Accessory Assembly E010 4830ED4001A Bush F001 3211DD1001B Frame Assembly F004 5249DD2001A Nozzle Assembly F005 4370ED3006A Shaft, Nozzle...
- Page 48 TRAINING MANUAL LDF9932XX Loc # Part No Description F174 4810DD1001A Bracket, Hinge F191 MEA36937101 Guide, Water F192 4974DD3001A Guide, Nozzle F210 4581DD3001B Roller Assembly F230 4810DD4005A Bracket, Tub F240 6913ER4001B Lamp, Incandescent F300 AGB33696301 Nozzle Assembly K001 4924FD2123E Dispenser K002 4810FD3805A Bracket Assembly K005...
- Page 49 TRAINING MANUAL LDF9932XX Loc # Part No Description M028 MBJ32856401 Cam, Switch M031 3920ED4009B Packing M034 5832DD4001A Blade M035 MFZ32863101 Packing M036 4930DD3008A Holder M038 4930DD3012A Holder M050 4681EA2002H Motor Assembly, AC, Pump M060 4681ED1004A Motor Assembly, DC, Washer M081 5301DD1001A Heater Assembly M086...
-
Page 50: Serial Number Identification
TRAINING MANUAL LDF9932XX SERIAL NUMBER IDENTIFICATION The serial number is unique to each product. It gives information concerning the time and place of manufacture. The serial number is required to be paid for warranty service and to get the correct part in the event a running production change was made. Some models may have four (4) letters instead of two (2) for the product code number. -
Page 51: Ohm's Law And Watt's Law
TRAINING MANUAL LDF9932XX OHM’S LAW and WATT’S LAW P = WATTS I = AMPERES Watts = Volts / Ohms Amperes = Volts / Ohms Watts = Amperes x Ohms Amperes = Watts / Volts Watts = Volts x Amperes Amperes = E I •... -
Page 52: Conversion Information
TRAINING MANUAL LDF9932XX CONVERSION INFORMATION FORMULAE °F = (9/5) °C + 32 °C = (5/9) x (°F – 32) LDF9932XX Page 52 DISHWASHER... -
Page 53: Service Bulletins
TRAINING MANUAL LDF9932XX SERVICE BULLETINS LDF9932XX Page 53 DISHWASHER... - Page 54 TRAINING MANUAL LDF9932XX LDF9932XX Page 54 DISHWASHER...
- Page 55 TRAINING MANUAL LDF9932XX LDF9932XX Page 55 DISHWASHER...
- Page 56 TRAINING MANUAL LDF9932XX LDF9932XX Page 56 DISHWASHER...
- Page 57 TRAINING MANUAL LDF9932XX LDF9932XX Page 57 DISHWASHER...
- Page 58 TRAINING MANUAL LDF9932XX LDF9932XX Page 58 DISHWASHER...
- Page 59 TRAINING MANUAL LDF9932XX LDF9932XX Page 59 DISHWASHER...
-
Page 60: Drain Hose With Siphon Protector
TRAINING MANUAL LDF9932XX LDF9932XX Page 60 DISHWASHER... - Page 61 TRAINING MANUAL LDF9932XX LDF9932XX Page 61 DISHWASHER...
- Page 62 TRAINING MANUAL LDF9932XX LDF9932XX Page 62 DISHWASHER...
-
Page 63: Hinge Spring And Connector
TRAINING MANUAL LDF9932XX LDF9932XX Page 63 DISHWASHER... - Page 64 TRAINING MANUAL LDF9932XX LDF9932XX Page 64 DISHWASHER...
-
Page 65: Change In Vent To Prevent Condensation
TRAINING MANUAL LDF9932XX LDF9932XX Page 65 DISHWASHER... - Page 66 TRAINING MANUAL LDF9932XX LDF9932XX Page 66 DISHWASHER...
Need help?
Do you have a question about the LDF9932 Series and is the answer not in the manual?
Questions and answers