
Subscribe to Our Youtube Channel
Related Manuals for Kval Acro-HD


Summary of Contents for Kval Acro-HD
- Page 1 Operation and Service Manual Published: 2/18/20 Innovation, Quality & Honesty Acro-HD Entry Door Center...
- Page 2 Proprietary Notice This Manual is confidential and contains proprietary information and intellectual property of KVAL Inc., and is to be used solely by Customer as an operating manual for KVAL Inc. machines. Neither this Manual nor any of the information contained herein may be reproduced or disclosed under any circumstances without the express written permission of KVAL Inc.
- Page 3 KVAL Acro-HD Operation/Service Manual Your Feedback is Welcome: To help us design products that make your job easier and your business more successful, we'd like to gain your perspective about your user experience with our product - that is, the manual, the machinery, the software, etc.
- Page 4 KVAL Acro-HD Operation/Service Manual...
-
Page 5: Table Of Contents
Table of Contents Introduction to the Acro-HD Chapter 1 Chapter 1 at a Glance.............. 1-1 Overview of the Acro-HD ............1-2 Option(s): ....................1-2 About this Manual .................1-2 Safety First!................1-3 Safety Sheet Sign-Off Sheet..............1-3 Safety Terminology of Labels..............1-3 Safety Guidelines..................1-3 Lockout-Tagout Guidelines ............ - Page 6 Using the Frame Alignment Lifts............2-13 Using the Acrobat (Option) ............2-15 Powering Up and Powering Down the Acro-HD ...... 2-16 How to Power Up the Acro-HD ............2-16 How to Power Down the Acro-HD ............2-17 Emergency Shutdown and Recovery ..........2-17 To Resume Normal Operation after an E-Stop ........2-17...
-
Page 7: Chapter 1 At A Glance
CHAPTER 1 Introduction to the Acro-HD This chapter provides an overview of the KVAL Acro-HD and important safety information to follow when operating the machine. Chapter 1 at a Glance Overview of the Acro-HD ................1-2 About this Manual ..................1-2 Safety First! ...................... -
Page 8: Overview Of The Acro-Hd
Overview of the Acro-HD Overview of the Acro-HD KVAL's Acro-HD Exterior Door Light Insert Station enables light installation and door turn-over for handing both in or out-swing door slabs. Options are available build a door frame complete with a sweep and a sill around the door. The HD designation denotes heavy duty. Hydraulic cylin- ders lift the door rotation fixtures in parallel with flow dividers and a 5 HP hydraulic pump. -
Page 9: Safety First
See “Safety Sign-Off Sheet” on page 1-15. Safety Terminology of Labels In addition to the nameplate, KVAL machines may have other warning labels or decals that pro- vide safety information to operators. Safety labels should be clearly visible to the operator and must be replaced if missing, damaged, or illegible. - Page 10 Before performing any mainte- nance or repairs on this machine turn off the main air disconnect. Lockout and tagout this connection. See “Lockout Tagout Procedure” on page 1-8. KVAL Acro-HD Operation/Service Manual...
- Page 11 This should be done in accordance with applicable state and/or federal code requirements. Laser Warnings On some machines, laser indicators are used to set boundaries. Follow the manufacturers safety precautions. KVAL Acro-HD Operation/Service Manual...
- Page 12 Safety First! Compliance with Codes and Regulations KVAL advises that you request an on-site state safety review of your installation of this machine. This is to ensure conformance to any additional specific safety and health regula- tions which apply in your geographic area.
-
Page 13: Lockout-Tagout Guidelines
O..OFF! Shut off all power sources and isolating devices P..Place lock and tag E..ENERGY: Release stored energy to a zero-energy state R ..Recheck controls and test to ensure they are in the “OFF” state KVAL Acro-HD Operation/Service Manual... -
Page 14: Lockout Tagout Procedure
Turn Switch to the Lock and Tag out Insert Lock into hole. OFF position Note: When multiple people are working on the machine, each person needs to have a lock on the handle in the extra holes provided. KVAL Acro-HD Operation/Service Manual... -
Page 15: Lockout Tagout Air Supply
The lock and tag can now be removed (only by the person(s) who placed them), and the machine can be re-energized. The tags must be destroyed and the locks and keys returned to the lockout center. KVAL Acro-HD Operation/Service Manual... -
Page 16: Zero-Energy To Start-Up
Replace Guards Replace all equipment guards. If part of equipment cannot be properly adjusted after start-up with guard on, contact the KVAL Service team. See “Getting Help from KVAL” on page 1-12. - Page 17 Be sure to follow the P-R-O- P-E-R lockout/tagout procedures, and that those around you do also. Close the Cage Gate Verify all cage gates are securely closed. Ensure all safety protocols are in effect. 1-11 KVAL Acro-HD Operation/Service Manual...
-
Page 18: Getting Help From Kval
• Outside the U.S. and Canada, call (707) 762-7367 or fax (707) 762-0485 • Email address is service@kvalinc.com • Hours: 6:00 AM to 4:00 PM Pacific Standard Time, Monday through Thursday 6:30 AM to 1:30 PM Pacific Standard Time, Friday KVAL Acro-HD Operation/Service Manual 1-12... -
Page 19: On-Line Help
Product Return Procedure If you’ve contacted Kval for help and it is determined that a return is necessary, use the procedure below to return the machine or part. Note: Non-Warranty returns are subject to a 15% restocking charge. - Page 20 Getting Help from KVAL Page Intentionally Left Blank KVAL Acro-HD Operation/Service Manual 1-14...
-
Page 21: Safety Sign-Off Sheet
Note: It is recommended you make a copy of this sheet for new operators. If a copy is needed, you may download a PDF at the KVAL website (http://www.kvalinc.com). You may also contact our Service Department at (800) 553-5825 or email at service@kvalinc.com. - Page 22 Safety Sign-Off Sheet KVAL Acro-HD Operation/Service Manual 1-16...
-
Page 23: Chapter 2 Operation Of The Acro-Hd
CHAPTER 2 Operation of the Acro-HD This chapter describes components, assemblies, and the user interface of the KVAL Acro-HD Entry Door Center. The content is geared to help operators understand the basic operation of the Acro-HD. Chapter 2 at a Glance Operator’s Tour... -
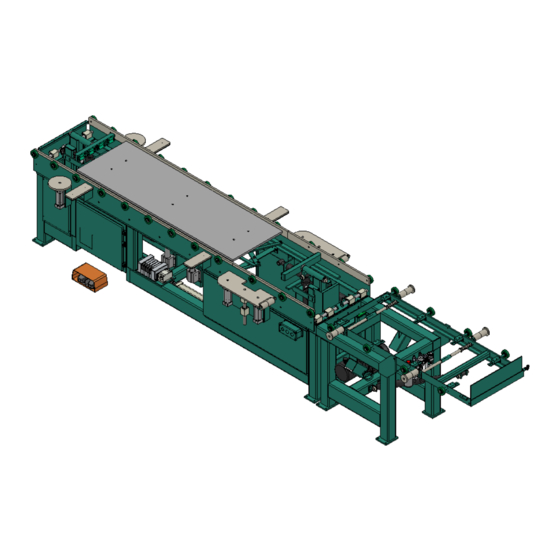
Page 24: Operator's Tour
Operator’s Tour Operator’s Tour This section takes you on a tour of the Acro-HD.The figure below shows locations of selected areas, parts, and assemblies on the machine. Door Light Insert Table Sensors IN-Feed (Transparent for Illustration purposes) I-0007 I-0005 Door Frame Alignment Pads... - Page 25 Operator’s Tour See Figure 2- 2 below, for assembly locations on the side views of the Acro-HD. Out Swing Side Controls Control Electrical Panel Acrobat (Located on Both Sides of Machine)( Hydraulic Lift Acrobat Piston Foot Pedal Controls Out Swing Door Pistons •...
-
Page 26: About The Side Machine Controls
About the Side Machine Controls Controls are located on both sides of the Acro-HD to allow operation from either side. These con- trols are used as part of the setup, such as: select door length, override the down limit, and emer- gency stop. -
Page 27: About The Door Insert Pedals
The door then can be flipped to work on the other side. Pedals are located on each side of the machine. The Pivot Assembly can be raised and lowered in small increments to allow Note: finer control. KVAL Acro-HD Operation/Service Manual... -
Page 28: About Acrobat Control
Lowers the flip assembly down and out of the way. Step 3. About Acrobat Control The Acrobat pedal controls the hydraulic lift on the out-feed of the Acro-HD to unload the door in an efficient manner. KVAL Acro-HD Operation/Service Manual... -
Page 29: About Door Alignment Pads
The Door Alignment Pads lift to support out swing doors for processing. The lift is controlled by a black button located the side of the machine. Each lift is independently controlled. Pull out the button to lift, push the button in to lower. Out Swing Control (X2) KVAL Acro-HD Operation/Service Manual... -
Page 30: About Sensors
There are sensors located on the Clamp Hydraulic Assembly at the lowest and highest points of the piston range.See Figure 2- 1 on page 2- 2, for sensor locations. Sensor Sensor Sensor Sensor Location Movable Clamp- FIGURE 2- 4. KVAL Acro-HD Operation/Service Manual... -
Page 31: About The Electrical Panels
About the Electrical Panels About the Electrical Panels The Acro-HD has a Main Electrical Panel. This section is an overview of the electrical compo- nents. Refer the machine's electrical prints for in-depth information. • Contains the foot pedal terminals The Main Electrical Panel: •... -
Page 32: Description Of The Six Light Panel
Description of the Six Light Panel Description of the Six Light Panel The six lights on this panel indicate the status of the Acro-HD system. See “Troubleshooting with the Status Light Panel” on page 4-7 for information on using this panel for troubleshooting. -
Page 33: Run The Acro-Hd
Run the Acro-HD Run the Acro-HD The Acro-HD can run a door only or run a door and assemble frame, head and sill to the door. Running a Door Only Ensure factory air is present at machine and the Acro-HD main air supply valve is turned on. - Page 34 For greater control, tap the foot-pedal to raise the operate the door pivot in small Note: increments. Press and hold the pedal to Door Pivot Up bring the clamps into position. Press and hold (or tap) the Door Pivot Up pedal a second time to clamp the door. KVAL Acro-HD Operation/Service Manual 2-12...
-
Page 35: Using The Frame Alignment Lifts
Clamp the door and flip it. See steps 15 and 16 on page 2-12. Get frames ready to attach to the door. Pull out the black button on each side to lift the frame alignment pads. 2-13 KVAL Acro-HD Operation/Service Manual... - Page 36 “Using the Acrobat (Option)” on page 2-15. If building a Out Swing Door, Note: engage the Out Swing Pivot Wheels. See Figure 2- 1 on page 2- 2 for location of wheels. KVAL Acro-HD Operation/Service Manual 2-14...
-
Page 37: Using The Acrobat (Option)
To reset the table, press and hold the Acrobat (Tilt) edal. Down p If continuing door process, repeat steps 3 through 23. If powering down the machine, See “How to Power Down the Acro-HD” on page 2-17 2-15 KVAL Acro-HD Operation/Service Manual... -
Page 38: Powering Up And Powering Down The Acro-Hd
Powering Up and Powering Down the Acro-HD Powering Up and Powering Down the Acro-HD This section describes how to power up and to power down the Acro-HD Powering up the system includes: • Applying power to the entire system • Starting the Control Circuit Powering down the system includes: •... -
Page 39: How To Power Down The Acro-Hd
This kills power to the machine. All status lights should be off. KVAL also recommends that you turn the disconnect switch on the electrical cabinet to OFF, this helps reduce possible damage resulting from power surges from electri- cal storms. - Page 40 Powering Up and Powering Down the Acro-HD KVAL Acro-HD Operation/Service Manual 2-18...
-
Page 41: Chapter 3 Maintenance Of Acro-Hd
CHAPTER 3 Maintenance of Acro-HD This chapter describes preventative maintenance steps for KVAL Acro-HD. The content is geared to help technicians keep a regular maintenance schedule for KVAL machine. Keeping your KVAL machine maintained is an important piece for successful operation of your door production pro- cess. -
Page 42: Lubrication Schedule
Lubrication Schedule Lubrication Schedule KVAL recommends the following lubrication schedule to ensure that the machine operates prop- erly. Recommended Lubrication Schedule TABLE 3-2. Type of Recommended Schedule Recommended Assembly Lubrication Type Linear Bearing Pillow Block Bearing Every 250 Hours of Machine Operation... -
Page 43: Lubrication Requirements
Closed Pillow Block Hub Style Opened Pillow Block parallel perpendicular mount Greasing Approximatively 1 Gram (one pump from grease gun) of Dura-Lith Grease (KVAL P/N: Lube EP-2). Every 250 hours of operation. Pillow Block Bearings FIGURE 3-5. KVAL Acro-HD Operation/Service Manual... -
Page 44: Flange Bearing Housings
X,Y, or Z direction. Greasing Ball Rail Bearing Approximatively 1 Gram (one pump from grease gun) of Dura-Lith Grease (KVAL P/ Every 250 hours N: Lube EP-2). of operation. Ball Rail Bearings FIGURE 3-7. KVAL Acro-HD Operation/Service Manual... -
Page 45: Grease Points
Identify zerk fittings and apply EP-2 grease.Use an extender to reach tight areas. Make sure to Lockout/Tagout before maintenance. For recommended greasing schedule, see “Lubrication Schedule” on page 3-2 To get access to the bearings the Hinge Covers will have to be removed. Hub Bearings (X8) Rail Bearings (X10) KVAL Acro-HD Operation/Service Manual... -
Page 46: Description Of Air Input System
Description of Air Input System Description of Air Input System There are two types of air inputs on KVAL machinery. Not all machines have lubricator option installed. Check your machine or Air prints to verify installation. Air Input with Lubrication The air input system takes in shop air and supplies clean dry air (CDA) and lubricated air to the machine. -
Page 47: Air Line Without Lubricator
The air input system takes in shop air and supplies clean dry air (CDA). Shop Clean Dry Air (CDA) t Air Blow Off Input Air On- Off Knob Muffler Filter (purge) Pressure Gauge with adjust Air Distribution Block Air Filter without Lubricator FIGURE 3-9. KVAL Acro-HD Operation/Service Manual... - Page 48 Description of Air Input System KVAL Acro-HD Operation/Service Manual...
-
Page 49: Chapter 4 Troubleshooting The Acro-Hd
Troubleshooting the Acro-HD This chapter describes troubleshooting steps to help technicians solve issues that may occur with your KVAL machine. If help is needed, call or contact our KVAL Service team at (800) 553-5825 or http://www.kvalinc.com. Chapter 4 at a Glance About Sensors .................... -
Page 50: About Sensors
About Sensors About Sensors On the Acro-HD, sensors provide input to the PLC. The application in the machine is similar to a micro-switch. There are 5 proximity sensors on the Acro-HD. For location of the sensors on the machine, Note: Figure 2- 1 on page 2. -
Page 51: Adjusting Limit Switches
(amount of movement from the limit switch arm’s resting position to the position at which the switch actuates – with a “click”) is either 5 or 20 degrees. The Acro-HD has three 5 degree switches. If the arm is moved to the full extent of its travel and you do not hear the limit switch “click”, the switch needs to be adjusted. -
Page 52: Troubleshooting The Air Cylinders
Check the flow controls to see that they are adjusted correctly and to the proper specifications. Check for any obstructions to the cylinders such as Manual over- ride button screws or a misplaced tool etc. FOLLOW ALL SAFETY GUIDELINES AND SIGNS DURING THIS PROCESS. Check the solenoid air valves: KVAL Acro-HD Operation/Service Manual... -
Page 53: Adjusting Cylinder Extension Speed
It might be necessary to call in a specialist or check with KVAL customer service at 1- 800-553-5825. If an Air Leak is coming from an exhaust port on the solenoid air bank: a.Check the solenoid for the manual override. -
Page 54: Troubleshooting With The Status Light Panel
STEP 4: Stop (Amber) If light is OFF go to item page 4-25. STEP 5: Start (Amber) If light is OFF go to item page 4-26. STEP 6: 24VDC (Green light is OFF go to item page 4-26. KVAL Acro-HD Operation/Service Manual... - Page 55 X1 and X2. If no power is measured it is a bad transformer. b.If there is power at X1 and X2, check the other side of the fuse. If now power, replace the fuse. KVAL Acro-HD Operation/Service Manual...
- Page 56 Start button. If no voltage, check the Stop button to make sure it is all the way out and not stuck in, then check the contact to make sure it is closed. If still no voltage, check the wiring. KVAL Acro-HD Operation/Service Manual...
- Page 57 Check for +24VDC at between any –DC and +DC terminal on the DC Terminal block. Reinstall the (+ 24V positive) wires one by one, checking for +24VDC after installing each. If at any point no voltage is found trace the last reinstalled wire and check for shorts. KVAL Acro-HD Operation/Service Manual...
- Page 58 Troubleshooting with the Status Light Panel 4-10 KVAL Acro-HD Operation/Service Manual...
- Page 59 2-10 limit switches 5 degree description adjustment tagout procedure location on EP-1 troubleshooting linear bearing, maintenance schedule using status lights KVAL Acro-HD Operation and Service Manual...
- Page 60 1-10 inspect 1-10 KVAL 990-HB Operation / Service Manual...
- Page 64 Contacting KVAL Customer Service Phone and Fax: Mailing address: In the U.S and Canada, call (800) 553-5825 or fax Customer Support Department (707) 762-0485 Kval Incorporated Outside the U.S. and Canada, call (707) 762-7367 825 Petaluma Boulevard South or fax (707) 762-0485 Petaluma, CA 94952 Email: service@kvalinc.com...
Need help?
Do you have a question about the Acro-HD and is the answer not in the manual?
Questions and answers