Advertisement
Quick Links
Advertisement

Subscribe to Our Youtube Channel
Related Manuals for Anritsu MP1590B


Summary of Contents for Anritsu MP1590B
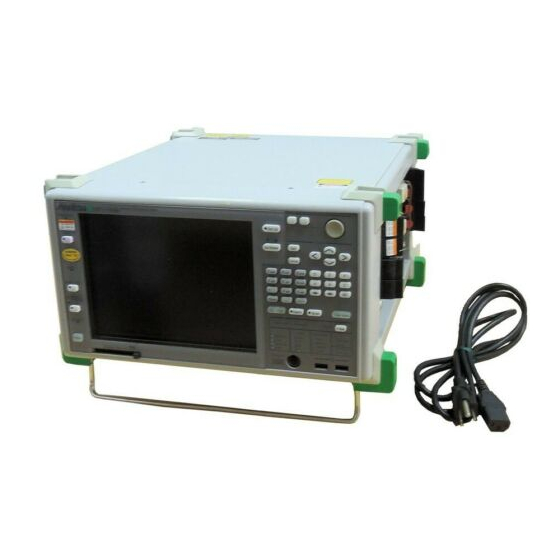
- Page 1 Quick Start Guide MP1590B Network Performance Tester EoS Measurement EoS測定クイックスタートガイド...
- Page 2 CONFIDE NTIAL Copyright ã 2005 by ANRITSU CORPORATION The contents of this manual shall not be disclosed in any way or reproduced in any media without the express written permission of Anritsu Corporation.
- Page 3 1 / 45 Before using MP1590B Before using MP1590B Requisite task before measuring Put in “Key” and “Remote interlock” at the following circle. And turn on the key. In the case of “OFF”, MP1590B cannot transmitted an optical signal. 2 / 45...
-
Page 4: Setup - Setup
MP1590B is not fallen down on. A cooling fan is situated on the rear panel of the MP1590B. Place the MP1590B 10 cm or more apart from obstructions such as walls. Supply power within voltage range of 100 to 115 Vac or 220 to 240 Vac and frequency range of 47.5 to 63 Hz. - Page 5 Setup Setup Power On/Off procedures Power On/Off procedures MP1590B has two power switches, “Main power switch” and “Power switch for stand-by condition”. Main Power Switch Power Switch for Stand-by condition The case of turning on the power (1) Connect a power code after ensuring that main power switch is Off.
-
Page 6: Port Setting
Port setting (1) Port setting (1) Choose bit rate, encapsulation (mapping), and concatenation type (1) Open Port Setting screen Right-click the port icon and choose “Port Setting…” command. (2) Choose bit rate, encapsulation (mapping), and concatenation type Choose the following parameters in pull down menue: •... - Page 7 Connecting Connecting Connecting (1) Connect optical fiber. You have to adjust output optical power using VOA option or external attenuator before connecting because Tx Laser is always on in EoS mode. (2) Check the optical input power in Analyze section. You should adjust the optical input power to the optimum value.
- Page 8 Setting Concatenation Setting Concatenation Virtual (1) Virtual (1) Setting virtual concatenation parameters This setting is available when Concatenation Type is “Virtual” in port setting. (1) Setting Rx-side VCAT group At first, it has to match a concatenation and VCAT group with DUT’s one. Click “Edit…”...
- Page 9 Setting Concatenation Setting Concatenation Virtual (3) Virtual (3) If a VCG setting in Tx is the same as Rx’s one, see the (4-1); If a VCG setting is independent between Tx and Rx, see the (4-2); (4-1) Copy Rx setting to Tx side Click the “Copy from Rx Setting”...
- Page 10 Setting Concatenation Setting Concatenation Virtual (5) Virtual (5) It is possible to change SQ It is possible to choose for each channel in “SQ channel across any AUG Setting mode”. by this TAB in LO-VCAT. HO-VCAT LO-VCAT VCG members and Provisioned channels Choose manually: Click “Add/Remove mode”.
- Page 11 Setting Concatenation Setting Concatenation Virtual (5) Virtual (5) It is possible to change SQ It is possible to choose for each channel in “SQ channel across any AUG Setting mode”. by this TAB in LO-VCAT. HO-VCAT LO-VCAT VCG members and Provisioned channels Choose manually: Click “Add/Remove mode”.
- Page 12 Measurement Measurement LCAS test (2) LCAS test (2) (3) Set Tx CTRL Value Choose a Tx CTRL Value. It recommends “---> DNU” because LCAS equipment also become “DNU” when it receive MST-Fail. (4) Negotiation ON Check this box to start LCAS negotiation. 19 / 45 Measurement Measurement...
- Page 13 Measurement Measurement LCAS test (4) LCAS test (4) Add/Remove channel into/from VCG (1) Create new LCAS commands Click “Generate” tab in LCAS screen, and “ Add “ button to create new LCAS command. (2) Choose command type Double Click on command or Click “Edit…”...
- Page 14 Measurement Measurement LCAS test (6) LCAS test (6) (5) Check a result of LCAS command The result of LCAS command is shown in result field with “Sequence Time”. After LCAS command complete, also check the result in “Summary” screen or DUT side. Application - Sending multiple LCAS send commands Up to 64 LCAS send commands can be registered at the Generator tab.
- Page 15 Checking SDH/SONET frame status of VCG (1) Checking SDH/SONET frame status MP1590B has 3 way to check status of SDH/SONET. Click “Counter” button, then 2 counters are started. One is “counter”, other is VCAT counter. And the other way is Path Monitor, it always works.
- Page 16 Measurement Measurement SDH/SONET test (2) SDH/SONET test (2) Part 3 - Path Monitor The Path Monitor is able to count the detail status of each VCG members. This field is Quick View. It is possible to display a history of status when it check “History”...
- Page 17 Measurement Measurement SDH/SONET test (4) SDH/SONET test (4) (2) Check status of each VCG member When it receive errors/alarms, check status of each VCG member by Path Monitor. Current It is possible to display a history of status when it check “History” box. History 29 / 45 Measurement...
- Page 18 Measurement Measurement VCAT differential delay test (2) VCAT differential delay test (2) Add VCAT differential delay (1) Check current added differential delay in Tx side At first, check current added differential delay in Tx side in “Differential Delay” in “SDH Tx” Tab. The field displays current added delay value and pointer value.
- Page 19 Measurement Measurement VCAT differential delay test (4) VCAT differential delay test (4) (3) Set a way of adding differential delay for Sweep mode It is possible to add delay gradually by Sweep mode. Set a way of adding differential delay as Pointer Justification by “Order”...
- Page 20 Measurement Measurement VCAT differential delay test (6) VCAT differential delay test (6) (6) Monitor VCAT differential delay in Rx side again Measurement example (7) differential delay with Through mode When it adds delay in Through mode, it set through mode in “Port Setting” and check “differential delay”.
- Page 21 Measurement Measurement EoS test (2) EoS test (2) (2) Setting Tx stream transmission method Double-click the Tx stream or click the “Edit…” button to set the Tx stream control and Tx stream repetition pattern at the Stream Control tab of the Tx Stream Edit screen.
- Page 22 Measurement Measurement EoS test (4) EoS test (4) (4) Inserting error frames When it is necessary to set error frames, select the Error Insertion tab. Error frames can be set independently for each GFP, Ethernet, IP, TCP/UDP layer. (5) Starting Tx stream transmission After completing the settings, click the “OK”...
- Page 23 Measurement Measurement EoS test (6) EoS test (6) Capture function for checking actual EoS frame traffic (1) Starting capture Move to the Capture tab and click the “Capture” (ON/OFF) button to start capture. Click the button again to stop capture. (2) Displaying captured data Trigger/Filter condition button...
- Page 24 Others Others Save/Load Save/Load (1) Save and Load a Measurement Condition / Result Click the FD icon at the top of window in order to save a measurement condition / result. And use after stopping measurement, since it cannot be used during measurement, transmission, Counter, Capturing, etc.
- Page 25 Others Others Changing SDH/SONET Changing SDH/SONET • It is possible to change SDH/SONET in GUI Setting window. Click “Unit” in Tree view by the right button, and select “GUI Setting…” in dropped menu. Select SDH view / SONET view at “Standard” in pop-up window, and click “OK”.
- Page 26 ANRITSU COMPANY LTD. 1155 East Collins Blvd., Richardson, TX 75081, U.S.A. Via Elio Vittorini, 129, 00144 Roma EUR, Italy Beijing Representative Office Toll Free: 1-800-ANRITSU (267-4878) Phone: +39-06-509-9711 Room 1515, Beijing Fortune Building, No. 5 North Phone: +1- 972-644-1777 Fax: +39-06-502-2425 Road, the East 3rd Ring Road, Chao-Yang District •...
Need help?
Do you have a question about the MP1590B and is the answer not in the manual?
Questions and answers