Advertisement
Advertisement
Table of Contents

Related Manuals for Speco O4VT1


Summary of Contents for Speco O4VT1
- Page 1 Quick Start Guide O4VT1...
- Page 2 Warning and Caution ■ If the product does not work properly, please contact your dealer or the nearest service center. Never attempt to disassemble the camera yourself. Any unauthorized changes or modifications could void the warranty. ■ Do not allow water or liquid intrusion into the camera. ■...
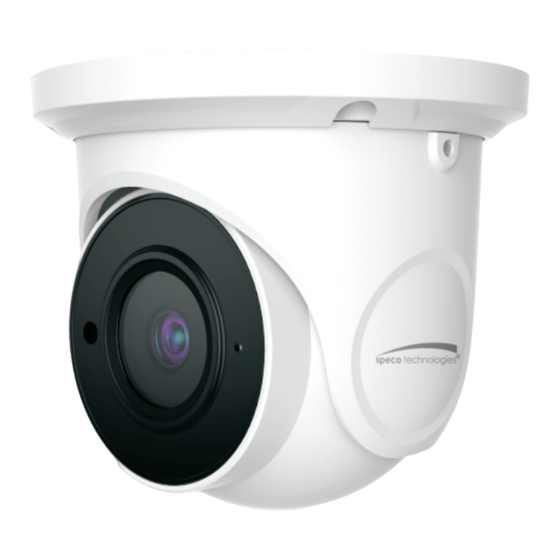
- Page 3 Camera Quick start guide Tapping screws × 3 Drill template ×3 Plastic plug Screwdriver Junction box Rubber plug Overview Overview Ethernet connector Power connector Mounting base Fixed screw Microphone Micro SD card slot Reset...
- Page 4 DC12V * 1 It is recommended to install the security cap for outdoor installations. * 2 DC 12V power supply is not required if a PoE switch or injector is used to power the camera. ► Connecting Network Cable ① Loosen the nut from the main element. ②...
- Page 5 Installation * Before you start, please make sure that the wall or ceiling is strong enough to withstand three times the weight of the camera and the junction box. ① Open the mounting base and the upper cover of the junction box. Mounting Base Upper Cover ②...
- Page 6 ③ Loosen the fixed screw to disassemble the camera. Then remove the cover from the dome to insert the SD card. After that, install the cover back to the dome and fix it firmly with the screws. (Note that the cover should not be installed unevenly .) Cover Insert a micro SD card Fixed Screw...
- Page 7 ⑥ Adjust the camera to obtain an optimum angle. Before adjustment, preview the image of the camera on a monitor. After that, tighten the fixed screw to finish the installation. Fixed screw Web Operation and Login IP Scanner can search for the device on the local network.
- Page 8 The camera is set to DHCP by default. ② Install IP Scanner from the CD and run it after installation. O4VT1 ③ In the device list, you can view the IP address, model number, and MAC address of each device. Select the applicable device and double click to open up the web viewer.
Need help?
Do you have a question about the O4VT1 and is the answer not in the manual?
Questions and answers