Advertisement
Quick Links
GET MORE GEAR!
Use code TOUGH15 for 15% off your
#YourGearUpgraded
next purchase at echogear.com
THE ECHOGEAR PROMISE:
SATISFACTION guaranteeD
Rave reviews
Safety-tested, warranty-backed product.
40K+ positive product reviews
Easy returns + exchanges,
from happy Amazon customers.
no questions asked.
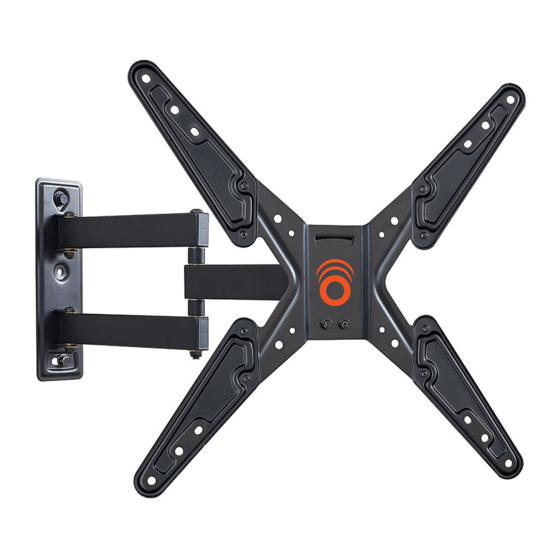
Full Motion
TV Wall Mount
Model EGMF1
100% Real folks
Responsive support
Likable, US-based product nerds
Products designed + sold by
available 7 days a week.
real people in Eden Prairie, MN.
INSTRUCTION MANUAL
Advertisement

Related Manuals for Echogear EGMF1


Summary of Contents for Echogear EGMF1
- Page 1 GET MORE GEAR! Use code TOUGH15 for 15% off your #YourGearUpgraded next purchase at echogear.com THE ECHOGEAR PROMISE: SATISFACTION guaranteeD Rave reviews Safety-tested, warranty-backed product. 40K+ positive product reviews Easy returns + exchanges, from happy Amazon customers. no questions asked.
-
Page 2: Weight Restrictions
Use with products heavier than the maximum weights (27 kg) indicated may result in collapse If your TV weighs more, this mount is NOT compatible. of the mount and its accessories, causing possible injury. Visit echogear.com to find a compatible mount. - Page 3 Verify Your Wall Construction CAUTION: wood UUUUHHH ?!? studs? DO NOT Unsure? install into drywall alone Contact The Echogear Pros Perfect! at 1-855-428-2490 or www.echogear.com Good to Go Grab Your Tools Toy Surprise Surprise Inside Every Box Stud Finder Tape...
- Page 4 Why? Because we like to help and it’s our passion to provide authentic service. We won’t leave you hanging, no matter what. Our U.S. based Echogear Pros answer the phone in all days ending in Y. That means availability to try and stump our expert staff 7 days a week.
- Page 5 What’s in the box ... What's in the booooxx WARNING: DON'T FEED TO CHILDREN — This product contains small items that could be a choking hazard if swallowed. Before starting assembly, verify all parts are included and undamaged. If any parts are missing or damaged, do not return the damaged item to Amazon;...
- Page 6 More STUFF FOR STEP 1 More STUFF FOR STEP 1 Parts for TVs with Large Mounting Hole Patterns: Wall Plate / Arm Face Plate (attached) Extender Extender Bracket Brackets Screws M6 x 8mm M6 x 8mm qty.1 qty. 8 qty. 2 qty.
- Page 7 STEP 1 Attach the TV BRACKET TO YOUR TV TV Screw Diameter TV Screw Length STEP 1.1 STEP 1.2 Only one screw size fits your TV. NO SPACER SPACER NEEDED Flat Back TV Flat Back TV Rounded or Irregular Back TV with Extra Space [TV brackets Needed...
- Page 8 Measure TV Hole Pattern Remove Face Plate STEP 1.3 STEP 1.4 eight idth inches 5 ⅛ 7 ⅞ 11 ¾ 13 ¾ 15 ¾ inch dimensions are approximate IMPORTANT: Save screws for use in STEP 3.
- Page 9 Configure TV Bracket to Fit Your TV Hole Pattern STEP 1.5 200mm x 200mm MORE than or LESS 200mm x 200mm ASSEEEMMMBLE! 400 mm (15 ¾ in.) 340 mm (13 ⅜ in.) 200 mm 300 mm (7 ⅞ in.) (11 ¾ in.) 130 mm (5 ⅛...
- Page 10 Secure the TV Bracket to Your TV STEP 1.6 No Spacer With Spacer Stack it up: The spacers stack up to fit anyone's TV CAUTION: Ensure the TV bracket is CENTERED mounting situation. on your TV AND securely fastened in place.
- Page 11 STEP 2 I nstall the Wall Plate Find a Stud STEP 2.1 CAUTION: Avoid potential personal injuries and property damage! Min. Wood Stud Depth: nominal 4 in. (102 mm) ½ actual 3 in. (89 mm) Min. Wood Stud Width: nominal 2 in. (51 mm) ½...
- Page 12 Secure Wall Plate Mark Drill STEP 2.4 STEP 2.2 STEP 2.3 2¾ in. (6.9 cm) 7/32 in. (5.5 mm) This CAUTION: Avoid potential personal injury or property damage! Lag screws MUST BE firmly tightened to prevent unwanted movement of the wall plate/arm...
- Page 13 STEP 3 Let's Hang HEAVY! You may need assistance with this step. CAUTION: Avoid potential personal injury or property damage! Screws MUST be installed to secure your TV to wall plate/arm...
- Page 14 ADJUSTMENTS Tilt TO ADJUST THE TILT TENSION, first rotate (tighten or loosen) the tilt lever as far as you can, then: Pull and hold the lever outward, Rotate the lever in the opposite direction, Release the lever back into position, Rotate the lever to tighten or loosen.
- Page 15 Level REMOVE YOUR TV Loosen the two screws on the rear of HEAVY! You may need assistance with this step. , using the hex key 2. Level your TV. 3. Retighten screws to secure in place. Righty Tighty Lefty Loosey...
- Page 16 Legrand assumes no responsibility for accuracy, completeness or sufficiency of the information contained in this document. ©2021 Legrand AV Inc. All rights reserved. ECHOGEAR is a Legrand brand. ECHOGEAR and the ECHOGEAR logo are trademarks of Legrand.
Need help?
Do you have a question about the EGMF1 and is the answer not in the manual?
Questions and answers