Advertisement
Quick Links
Advertisement

Related Manuals for GARNI 940


Summary of Contents for GARNI 940
- Page 1 INSTRUCTION MANUAL FOR Wi-Fi WEATHER STATION MODEL GARNI 940 GARNI 940...
-
Page 2: Before Installation
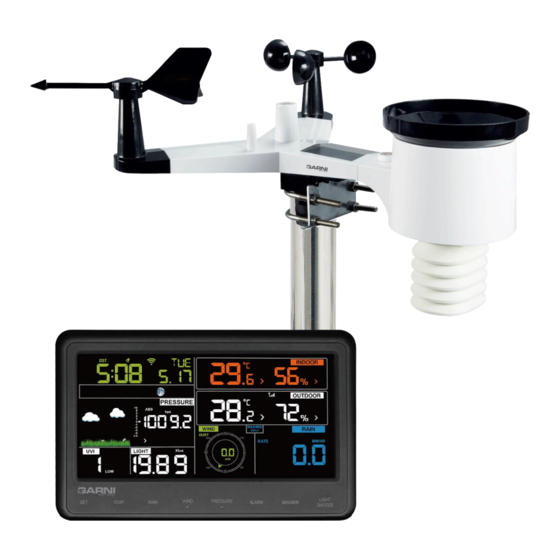
INTRODUCTION Wi-Fi weather station with an integrated wireless sensor, model GARNI 940, has many features providing the weather forecast information. The integrated wireless sensor operates at 868 MHz, measuring temperature and relative humidity, wind speed and direction, precipitation total, temperature, humidity, UV radiation and solar radiation. - Page 3 U-bolts installation Slide the U-bolts into the metal plate on the underside of the integrated wireless sensor and screw the nuts from the other side so that the bar on which the integrated wireless sensor is placed can be inserted into this hole. Weather vane installation Place the vane on the right holder and tighten the bolt.
- Page 4 Battery installation 1) Remove the battery compartment cover on the underside of the integrated wireless sensor 2) Insert 2 AA-type batteries (lithium recommended, do not use rechargeable batteries), note the correct polarity, and close the battery cover 3) The LED on the underside of the integrated wireless sensor lights up for 4 seconds and then flashes every 16 seconds during data transmission to the main unit Note: If the LED does turn on after inserting the batteries, make sure the batteries are inserted with the...
- Page 5 RESET button - The integrated wireless sensor must be located outdoors. - The integrated wireless sensor must be located within an effective signal range (100 m in open space). Walls and other obstacles decrease the signal range. Check the signal reception at the main unit prior to the final installation.
- Page 6 1) Connect the power source plug to the rear of the main unit 2) Insert 3 AAA-type batteries 3) Keep the main unit and the wireless sensor close for 15 minutes 4) To verify functionality, simulate the wind by turning the anemometer propeller. Pour a few drops of water into the rain gauge tank to simulate rain 5) Proceed by placing the wireless sensor after 15 minutes Note: Place the wireless sensor within 1.5 to 3 metres of the main unit and wait a few minutes to...
- Page 7 Description of LCD 1) Time 10) Total precipitation display 2) Moon phase 11) Outdoor temperature 3) Barometric pressure 12) Outdoor humidity 4) Weather forecast icons 13) Wireless sensor signal reception icon 5) UV index 14) Indoor humidity 6) Solar radiation level 15) Indoor temperature 7) Wind speed 16) Date...
- Page 8 Description of main unit buttons 1) SET button – hold to enter the setting mode 2) TEMP. button – press to display the measured values of Wind Chill, dew point, temperature index and temperature 3) RAIN button – press to display the precipitation measurements: •...
- Page 9 Setting mode Hold the SET button for 2 seconds to enter the setting mode. The settings appear in the following order: 1) Beep at button press - press the WIND/+ or PRESSURE/- button to turn ON or OFF the beep at button press 2) MAX/MIN daily values - press the SET button to move to the setting of MAX/MIN daily values, press the WIND/+ or PRESSURE/- button to turn ON or OFF...
- Page 10 6) Setting of temperature units - press the SET button to move to the setting of units of the indoor/outdoor temperature, press the WIND/+ or PRESSURE/- button to select units °C (Celsius) or °F (Fahrenheit) - in the basic display mode, press the TEMP. button to display the measured values of Wind Chill, temperature index and dew point, hold the button for 5 seconds to start searching for a new wireless sensor Note: The main unit measures the indoor temperature, humidity and barometric pressure every 60...
- Page 11 2) Press the ALARM button again to display the set lower alarm limit value Note: Press the RAIN button to display the set precipitation total alarm value (hourly or daily). Press the WIND/+ button to display the set value of alarm for wind speed or gusts. Press the ALARM or LIGHT / SNOOZE button to terminate and return to the basic display.
- Page 12 Press the TEMP. button to display the maximum measured values of Wind Chill, temperature index and dew point. Press the RAIN button to display the maximum measured values of the hourly precipitation total, daily precipitation total and monthly precipitation total. Press the WIND/+ button to display the maximum measured values of wind speed and gusts.
- Page 13 Other functions Restoring factory settings / Erasing all data Disconnect the power adaptor from the main unit and remove the batteries. Reconnect the adaptor to the main unit, the display will show the firmware version number and immediately after that all the display segments will be turned on for about 3 seconds.
-
Page 14: Setting Up The Wi-Fi Connection
This weather station allows the user to send data to his own server. Make the appropriate settings in the application. Note: GARNI technology a.s. does not provide the service of server development or renting. All servers mentioned above are subject to change. - Page 15 Connecting the main unit to a wireless Wi-Fi network - ANDROID 1) Make sure your mobile device is connected to the Wi-Fi network 2) Download the WS View app from Google Play store to your mobile device 3) Run the app Select the device in the upper left Connect (or disconnect and corner and click on NEXT...
- Page 16 The device search will commence. If Click Scan and select the Wi-Fi the device is found successfully, the network to connect the device to. app will automatically switch to the Enter the Wi-Fi network password in the “Password” box and click Next. next screen.
- Page 17 If you already have a Registration to the Upon successful Weather Underground Weather Underground registration, you will receive a “Station ID” and a account, enter the ID server number in the “Station ID” password for the device, box and the password 1.
- Page 18 Customized For highly experienced users, the app offers the option to send data to the user's own server. The settings should be intuitive, please contact us if necessary. Connecting the main unit to a wireless Wi-Fi network - iOS 1) Make sure your mobile device is connected to the Wi-Fi network 2) Download the WS View app to your mobile device from Apple App Store 3) Run the app Note: If you have a dual band modem, make sure that you connect the device to a network...
- Page 19 Click on Sync and select the Select the required Wi-Fi Wi-Fi network to which you network and return to the Ws want to connect the device to View app. and click on Next. Click on “Select Wi-Fi”. Select your device from the After a successful connection list.
- Page 20 Uploading the measured data to a selected server - iOS Ecowitt To connect to Ecowitt, enter the "Station ID" and "Authentication Key" assigned by this service, for registration see www.ecowitt.net. After connecting the AC adapter to the main unit, briefly press the SET button on the main unit to display the MAC address, it is displayed as, eg.: 12: 34: 56: AB: CD: EF: With the MAC address obtained, register your device with Ecowitt or your own server.
- Page 21 Weathercloud To connect to the Weathercloud server, enter the “Weathercloud ID” and “Weathercloud Key” assigned by this service, for registration see the following sub-chapters. Click on Save and then on Next. If you do not want to link the weather station with the Weathercloud account, click on Next without entering the login data.
- Page 22 3) Enter all the information in “Create new device” page, for the “Model*” selection box select the "940" under "GARNI" section. for the “Link type*” selection box select the "SETTINGS", Once you have completed, click “Create”. 4) On the next page, click the "Options" button and then the "Link" button. Jot down your ID and key for the further setup step.
- Page 23 • Cumulus MX • Meteobridge • WeatherCat • MeteoStar • EasyWeather • WeeWX • WS Tool Registration with the web service WeatherObservationWebsite (WOW) Note: We recommend the WeatherObservationWebsite only to more experienced users with advanced command of English. 1) Enter the following web address https://wow.metoffice.gov.uk in your web browser, click on Sign up in the upper right corner and then on New Account and fill the form.
- Page 24 Authentication Key Click on Edit Site on the right side beneath the map on the site’s home page. Enter the 6-digit number “Authentication Key” under point 2. Enter the received identification number (Site ID) and the authentication key (Authentication Key) in the respective boxes in the app, see preceding chapters.
- Page 25 Android: iOS: Measured values and chart To display the measured values, click on Menu in the upper left corner of the app and then on the WU Dashboard. If you have multiple devices connected to Weather Underground in your app, click on the name of the station with measured data you want to browse.
- Page 26 Android: iOS: Note: 1) The data is updated every 5 minutes. 2) This app can display the measured data and charts only for the weather stations connected to the Weather Underground account. To display the measured values and charts from a weather station connected to another server (Weather Cloud or WeatherObservationsWebsite), download the respective app or view these values online on that server's website.
- Page 27 To add a registered device click on Menu in the upper left corner, then on Manage Wunderground and on Add WU Station ID (or just ADD). Fill in the respective boxes. Android: iOS: Unit settings To set the measured values units click on Menu on the main screen and then on Unit Settings: a) Temperature –...
- Page 28 • hPa - Hectopascal • inHg - mercury inches c) Wind – wind speed units • km/h – kilometres per hour • mph – miles per hour d) Rain – precipitation total units • mm – millimetres • in – inches e) Light –...
-
Page 29: Maintenance
GARNI TECHNOLOGY APP The official application "GARNI technology", which is available for free to download on Google Play (for Android) and App Store (for iOS), can also be used to view data. To activate the application, enter the code (eg. 0000 - 1111 - 2222) located on the back side of the weather station main unit, enter without dashes and spaces. -
Page 30: Troubleshooting
TROUBLESHOOTING Problem Solution The integrated wireless Use a thin utensil, for example a paperclip, to press the RESET button sensor does not on the bottom of the integrated wireless sensor. Then remove the communicate with the batteries and wait for one minute until the solar panel energy is main unit consumed. -
Page 31: Safety Precautions
• The contents of this manual may not be reproduced without the consent of the author • Do not throw old batteries to unsorted municipal waste, but use the designated areas TECHNICAL PARAMETERS MAIN UNIT GARNI 940 Dimensions 188 x 118 x 18 mm... - Page 32 Date display format DD/MM, MM/DD day name shortcut Time zone -12 to +12 hours DST (daylight saving time) on or off INTEGRATED WIRELESS SENSOR GARNI 4INT Dimensions 375 x 410 x 175 mm Weight 702 g without batteries Power supply 2 pcs AA batteries 1.5 V (lithium recommended)
-
Page 33: Solar Radiation
DECLARATION OF CONFORMITY GARNI technology a.s. hereby declares that the type of the radio equipment - weather station type GARNI 940 - conform to the Directive 2014/53/EU. The full EU Declaration of Conformity is available on the following website: www.garni-meteo.cz...
Need help?
Do you have a question about the 940 and is the answer not in the manual?
Questions and answers