
Related Manuals for TruVision TVB-5412


Summary of Contents for TruVision TVB-5412
- Page 1 TruVision ANPR IP Camera Configuration Manual P/N 1073573-EN • REV B • ISS 01JUN21...
- Page 2 Carrier, except where specifically permitted under US and international copyright law. Trademarks and TruVision names and logos are a product brand of Aritech, a part of Carrier. patents Other trade names used in this document may be trademarks or registered trademarks of the manufacturers or vendors of the respective products.
-
Page 3: Table Of Contents
Network settings 32 TCP/IP parameters 32 DDNS parameters 33 PPPoE parameters 34 Port parameters 34 NAT parameters 35 SNMP parameters 35 FTP parameters 36 Email parameters 36 HTTP parameters 38 QoS parameters 39 802.1x parameters 39 TruVision ANPR IP Camera Configuration Manual... - Page 4 Real-time LPR results 77 Wiegand 78 Camera operation 79 Log on and off 79 Live view mode 79 Play back recorded video 80 Search snapshots and video clips 82 Search event logs 83 Index 86 TruVision ANPR IP Camera Configuration Manual...
-
Page 5: Important Information
PRODUCTS), SOFTWARE, SERVICES OR OTHER OFFERINGS WILL NOT BE HACKED, COMPROMISED AND/OR CIRCUMVENTED. CARRIER DOES NOT ENCRYPT COMMUNICATIONS BETWEEN ITS ALARM OR OTHER CONTROL PANELS AND THEIR WIRELESS OUTPUTS/INPUTS INCLUDING BUT NOT LIMITED TO, SENSORS OR DETECTORS UNLESS REQUIRED BY TruVision ANPR IP Camera Configuration Manual... -
Page 6: Warranty Disclaimers
CARRIER DOES NOT WARRANT THAT ANY PRODUCT (INCLUDING SECURITY PRODUCTS), SOFTWARE OR SERVICE MANUFACTURED, SOLD OR LICENSED BY CARRIER WILL PREVENT, OR IN ALL CASES PROVIDE ADEQUATE WARNING OF OR PROTECTION FROM, BREAK-INS, BURGLARY, ROBBERY, FIRE, OR OTHERWISE. TruVision ANPR IP Camera Configuration Manual... -
Page 7: Intended Use
Note: Note messages advise you of the possible loss of time or effort. They describe how to avoid the loss. Notes are also used to point out important information that you should read. TruVision ANPR IP Camera Configuration Manual... -
Page 9: Introduction
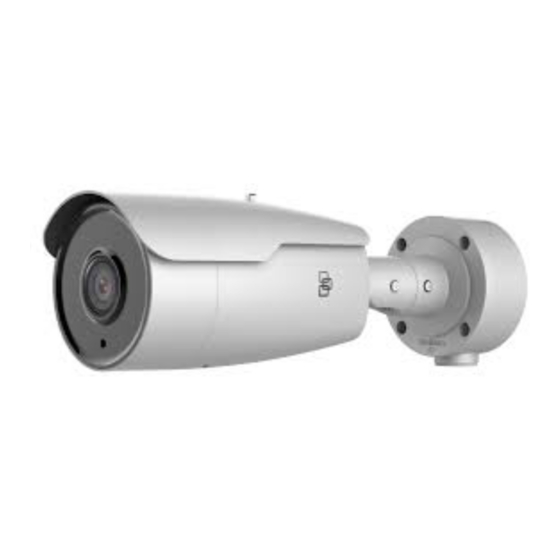
Introduction This is the configuration manual for the following TruVision IP camera models: TVB-5412 (2 MP ANPR IP camera, 2.8 to 12 mm) TVB-5413 (2 MP ANPR IP camera, 8 to 32 mm) TruVision ANPR IP Camera Configuration Manual... -
Page 10: Network Access
This manual explains how to configure the camera over the network with a web browser. TruVision IP cameras can be configured and controlled using Microsoft Internet Explorer (IE) and other browsers. The procedures described use Microsoft Internet Explorer (IE) web browser. -
Page 11: Activating The Camera
There is no default password provided. You can activate a password via a web browser and via TruVision Device Manager (included on the CD to find the IP address of the camera). - Page 12 Activation via TruVision Device Manager: 1. Run the TruVision Device Manager to search for online devices. 2. Select the device status from the device list, and then select the inactive device. 3. Enter the password in the password field and confirm it.
-
Page 13: Overview Of The Camera Web Browser
Log: Click to search for event logs. There are three main types: Alarm, Exception, and Operation. See “Search event logs” on page 83 for further information. Configuration: Click to display the configuration window for setting up the camera. TruVision ANPR IP Camera Configuration Manual... - Page 14 Click the buttons to control the live view or play back. See “Camera operation” on page 79 for more information. Configuration panel Click to select a camera menu to configure. See “Configuration” on page 13 for further information. Configuration parameters Enter the camera parameters. setup TruVision ANPR IP Camera Configuration Manual...
-
Page 15: Configuration Overview
Configuration menu overview Use the Configuration panel to configure the network, camera settings, alarms, users, road traffic, and other parameters such as upgrading the firmware. See Figure 2 below for descriptions of the configuration menus available. TruVision ANPR IP Camera Configuration Manual... - Page 16 RTSP authentication, IP address filter, and preventing illegal logins. See “Security settings” on page 25 for further information. Network Defines the network parameters required to access the camera over the network. See “Network settings” on page 32 for further information. TruVision ANPR IP Camera Configuration Manual...
- Page 17 Road Traffic Defines vehicle license plate detection, black and white lists, real-time LPR results, and Wiegand. Wiegand is a serial data communication for access control. See “Road traffic settings” on page 71 for further information. TruVision ANPR IP Camera Configuration Manual...
-
Page 18: Local Configuration
Specifies the directory for recorded files. Save Downloaded Files to Specifies the directory for downloaded files. Picture and Clip Settings Save Snapshots In Live View Specifies the directory for saving snapshots in live view mode. TruVision ANPR IP Camera Configuration Manual... - Page 19 Save Snapshots during Specifies the directory for saving snapshots in playback mode. Playback To Save Clips during Playback to Specifies the directory for saving video clips in playback mode. TruVision ANPR IP Camera Configuration Manual...
-
Page 20: System Settings
Only the device name and device number can be changed (see Figure 4 on page 19). All other information is read-only. Note: The device number can also be changed under Road Traffic > Camera. See page 74. TruVision ANPR IP Camera Configuration Manual... -
Page 21: Time Settings
IP cameras and computers. Connecting network devices to a dedicated NTP time server ensures that they are all synchronized. To define the system time and date: 1. Click Configuration > Camera Configuration > System > Time Settings. TruVision ANPR IP Camera Configuration Manual... -
Page 22: Rs-485 Settings
RS-485 settings The RS-485 serial port is used to control the PTZ of the camera or connect to light and wiper devices. You need to configure these parameters before you connect any devices. TruVision ANPR IP Camera Configuration Manual... -
Page 23: Maintenance And Firmware Upgrade
Note: The Baud Rate, PTZ Protocol, and PTZ Address parameters must be the same as the PTZ camera parameters. 3. Click Save to save changes. Maintenance and firmware upgrade Use this menu to perform maintenance operations like firmware upgrade, configuration import/export, and rebooting the camera. TruVision ANPR IP Camera Configuration Manual... - Page 24 The camera will select the corresponding firmware file automatically. Cookies and data in the web browser are automatically deleted when the firmware is updated. See page 24 for further information on how to upgrade the TruVision ANPR IP Camera Configuration Manual...
- Page 25 Name Description firmware version. You can also upgrade the firmware version using TruVision Device Manager. See page 24 for further information. To reboot the camera through the web browser: 1. Click Configuration > System> Maintenance. 2. Click the Reboot button to reboot the device.
-
Page 26: About
To upgrade the firmware via TruVision Device Manager: 1. In the FW Upgrade window of TruVision Device Manager, select a device or hold the Ctrl or Shift key to select multiple devices for simultaneous upgrading. 2. Click the Browse button to locate the firmware file to use. -
Page 27: Security Settings
This function allows you to give or deny access rights to defined IP addresses. For example, the camera can be configured so that only the IP address of the server hosting the video management software can be accessed. TruVision ANPR IP Camera Configuration Manual... -
Page 28: Mac Address Filter
This function allows you to give or deny access rights to defined MAC addresses. For example, the camera can be configured so that only the MAC address of the server hosting the video management software can be accessed. This is like the IP address filtering explained above. TruVision ANPR IP Camera Configuration Manual... -
Page 29: Security Service
Security service Enabling this function will lock a user out of the system after a certain number of failed login attempts. To enable the illegal login lock: 1. Click Configuration > Security > Security Service. TruVision ANPR IP Camera Configuration Manual... -
Page 30: User Settings
Note: Keep the admin password in a safe place. If you forget it, please contact technical support. Types of users A user’s access privileges to the system are automatically defined by their user type. There are three types of user: TruVision ANPR IP Camera Configuration Manual... - Page 31 4. Assign the user a password. Passwords can have up to 16 alphanumeric characters. 5. Select the type of user from the drop-down list. The options are Viewer and Operator. 6. Assign permissions to the user. Select the desired options: TruVision ANPR IP Camera Configuration Manual...
- Page 32 4. Click Save to save the changes. Online users Use this menu to see who is currently accessing the camera. You can see the user name, level, IP address and the time spent online. TruVision ANPR IP Camera Configuration Manual...
- Page 33 To see online users: 1. Click Configuration > Security > Online Users. The list of online users appears. Click Refresh to update the display. TruVision ANPR IP Camera Configuration Manual...
-
Page 34: Network Settings
Enter the IPv4 subnet mask. IPv4 Default Gateway Enter the IPv4 gateway IP address. IPv6 Mode Enter the IPv6 mode: Manual, DHCP or Router Advertisement. IPv6 Address Enter the IPv6 address of the camera. TruVision ANPR IP Camera Configuration Manual... -
Page 35: Ddns Parameters
(443 (HTTPS)), and your user name and password used to log into your DDNS account. The domain name displayed under “Host Name” is that which you created on the DynDNS web site. TruVision ANPR IP Camera Configuration Manual... -
Page 36: Pppoe Parameters
HTTP Port: The default port number is 80, and it can be changed to any port number that is not occupied. RTSP Port: The default port number is 554. It can be changed to any port number in the range from 1 to 65535. TruVision ANPR IP Camera Configuration Manual... -
Page 37: Nat Parameters
SNMP port. By setting the Trap Address, the camera can send the alarm event and exception messages to the surveillance center. The SNMP version you select should be the same as that of the SNMP software. TruVision ANPR IP Camera Configuration Manual... -
Page 38: Ftp Parameters
Camera No. as the name of the directory. Upload Picture: To enable uploading the snapshots to the FTP server. 3. Click Save to save changes. Email parameters Enter the email address to which messages are sent when an alarm occurs. TruVision ANPR IP Camera Configuration Manual... - Page 39 User Name: The user name to log in to the server where the images are uploaded. Password: Enter the password. Confirm: Confirm the password. Receiver1: The name of the first user to be notified. TruVision ANPR IP Camera Configuration Manual...
-
Page 40: Http Parameters
2. Select the check box to enable the HTTPS function. HTTPS provides authentication of the web site and associated web server that one is communicating with, which protects against Man-in-the-middle attacks. 3. Click Save to save changes. TruVision ANPR IP Camera Configuration Manual... -
Page 41: Qos Parameters
3. Select the 802.1X protocol (only EAP-MD5 only available) and select the EAPOL version, user name, and password. The EAPOL version must be identical with that of the router or the switch. TruVision ANPR IP Camera Configuration Manual... - Page 42 ONVIF protocol. Refer to ONVIF standard for detailed configuration rules. To enable ONVIF: 1. Click Configuration > Camera Configuration > Network > Integration Protocol. 2. Select Enable ONVIF. 3. Click Save to save changes. TruVision ANPR IP Camera Configuration Manual...
- Page 43 The resolution options listed depend on the type of camera and on whether main sub or third stream is being used. Note: Resolutions can vary depending on the camera model. TruVision ANPR IP Camera Configuration Manual...
- Page 44 1. From the menu toolbar, click Configuration > Camera Configuration > Video/Audio > Video. 2. Configure the video settings. See the list under Video in Figure 8 on page 41. 3. Click Save to save the settings. TruVision ANPR IP Camera Configuration Manual...
- Page 45 Input Volume: Select the volume level between 0 and 100. Environmental Noise Filter: Set it as OFF or ON. When enabled, the noise detected can be filtered. 3. Click Save to save the settings. TruVision ANPR IP Camera Configuration Manual...
- Page 46 Select the ROI level to enhance the image quality of the moving vehicle. The range is between 1 and 6, where 6 is the highest enhancement between inside the region’s rectangle and the background. 6. Click Save to save changes. TruVision ANPR IP Camera Configuration Manual...
- Page 47 A red rectangle appears on screen to mark the cropped region. 3. Select the desired stream type. Only Third Stream is available 4. Select the desired cropping resolution. 5. Click Save to save changes. TruVision ANPR IP Camera Configuration Manual...
- Page 48 Use this menu to also adjust camera behavior parameters such as exposure time, iris mode, video standard, day/night mode, image flip, WDR, digital noise reduction, white balance, and indoor/outdoor mode. See Figure 9 below for more information. Changes are automatically saved. TruVision ANPR IP Camera Configuration Manual...
- Page 49 Normal: Select when the lighting conditions are constant or indoors. Road: Select when the lighting conditions are variable or outdoors. Use this option to better capture vehicle license plates in dark environments when a shorter exposure/shutter time is needed. TruVision ANPR IP Camera Configuration Manual...
- Page 50 Default is Auto. Auto Iris Level This option is only available when the Common tab under “Scheduled D/N Switch” or “Custom 24-h Settings” has been selected. Select the iris level. Default is 50. TruVision ANPR IP Camera Configuration Manual...
- Page 51 Enter the time when night mode changes to day mode. D->N This option is only available when the Scheduled D/N Settings option under “Day/Night Switch” has been selected. Enter the time when day mode changes to night mode. TruVision ANPR IP Camera Configuration Manual...
- Page 52 AWB1: Adjust within a range of 2500 to 9500K, for environments where the lighting is always stable. Locked WB: Locks the WB to the current environment color temperature. Fluorescent Lamp: For use where there are fluorescent lamps installed near the camera. TruVision ANPR IP Camera Configuration Manual...
- Page 53 OSD (On Screen Display) In addition to the camera name, the camera also displays the system date and time on screen. You can also define how the text appears on screen. TruVision ANPR IP Camera Configuration Manual...
- Page 54 • Not transparent & Not flashing. The image is behind the text. This is default. • Not transparent & Flashing. The image is behind the text. The text flashes on and off. TruVision ANPR IP Camera Configuration Manual...
- Page 55 2. Select Enable Privacy Mask. 3. Click Draw Area. Click and drag the mouse in the live video window to draw the mask area. The Draw Area button is renamed Stop Drawing when clicked. TruVision ANPR IP Camera Configuration Manual...
- Page 56 The picture must be in RGB24 bmp format and the maximum size of the picture is 128*128. To overlay a picture: 1. Click Configuration > Camera Configuration > Image > Picture Overlay. TruVision ANPR IP Camera Configuration Manual...
- Page 57 Note: X coordinate and Y coordinate values are the location of the picture on the image. The picture width and height show the size of the picture. 4. Click Save to save changes. TruVision ANPR IP Camera Configuration Manual...
- Page 58 1. Area settings: Define the on-screen area that can trigger a motion detection alarm and the detection sensitivity level (see Figure 10, item 1). 2. Arming schedule: Define the schedule during which the system detects motion (see Figure 10, item 2). TruVision ANPR IP Camera Configuration Manual...
- Page 59 The Copy to pop- up window appears. Select the desired days to which to copy the schedule and click to save the changes. TruVision ANPR IP Camera Configuration Manual...
- Page 60 Note: If you do not want the detected object to be marked with the green frame, select Disable from Configuration > Local Configuration > Live View Parameters > Enable Meta Data Overlay. TruVision ANPR IP Camera Configuration Manual...
- Page 61 Schedule, click the day you want to schedule. The Time pop-box appears. Enter the desired start and end times to detect motion. Enter the start time (hour and minutes) Enter the end time (hour and minutes) TruVision ANPR IP Camera Configuration Manual...
- Page 62 “Select All” or each individual alarm output. Note: This option is only supported by cameras that support alarm output. A->1 Trigger the alarm input A->1. Trigger Recording Trigger the camera to start recording. 14. Click Save to save changes. TruVision ANPR IP Camera Configuration Manual...
- Page 63 See “Email parameters” on page 36 for further information. If you want to send the event snapshot together with the email, select the Attached Snapshot option. Notify Alarm Recipient Send an exception or alarm signal to remote management software when an event occurs. TruVision ANPR IP Camera Configuration Manual...
- Page 64 Note: The IP address is set under Local Configuration. It cannot be changed here. 4. Set the arming schedule for the alarm input. See “To reboot the camera through the web browser” on page 23 for more information. 5. Under Actions, select the desired linkage method. TruVision ANPR IP Camera Configuration Manual...
- Page 65 HDD Full: All recording space of the NAS is full. • HDD Error: Errors occurred while files were being written to the storage, no storage or storage had failed to initialize. • Network Disconnected: Disconnected network cable. TruVision ANPR IP Camera Configuration Manual...
- Page 66 Trigger external alarm outputs when an event occurs. Select “Select All” or each individual alarm output. Note: This option is only supported by cameras that support alarm output. A->1 Trigger the alarm input A->1. 4. Click Save to save changes. TruVision ANPR IP Camera Configuration Manual...
- Page 67 10:00, and the pre-record time is set to 5 seconds, the camera starts to record at 9:59:55. The pre-record time can be configured as No Pre-record, 5 s, 10 s, 15 s, 20 s, 25 s, 30 s, or Not Limited. TruVision ANPR IP Camera Configuration Manual...
- Page 68 Besides configuring the recording schedule, you must set the Alarm Type and select the check box of Trigger Channel in the Linkage Method of Alarm Input Settings interface. For detailed information, please refer to Section Alarm Input. TruVision ANPR IP Camera Configuration Manual...
- Page 69 Network > FTP tab for motion detection or an alarm input, the snapshots will not be uploaded to the FTP if this option is disabled. To set up scheduled snapshots: 1. From the menu toolbar, click Configuration > Camera Configuration > Storage > Snapshot. TruVision ANPR IP Camera Configuration Manual...
- Page 70 5. Enter the time interval between two snapshots. Select the unit of time from the drop- down list: milliseconds or seconds. 6. Under Capture Number, enter the total number of snapshots that can be taken. TruVision ANPR IP Camera Configuration Manual...
- Page 71 3. Define the quota percentage for snapshots and recordings by modifying their values Percentage of Picture Percentage of Record. 4. Click Format. A window appears to check your formatting permission. 5. Click to start formatting. TruVision ANPR IP Camera Configuration Manual...
- Page 72 1. From the menu toolbar, click Configuration > Camera Configuration > Storage > NAS. 2. For each NAS, enter the IP address of the network disk and the NAS file path. 3. Click Save to save changes. TruVision ANPR IP Camera Configuration Manual...
- Page 73 Select the desired detection area on the image. Using the mouse, click and drag the lane line to set the range. Enter the maximum and minimum widths of the license plates to be detected. TruVision ANPR IP Camera Configuration Manual...
- Page 74 Set the arming schedule and linkage action for the white list, the black list, and the other list. TruVision ANPR IP Camera Configuration Manual...
- Page 75 The options are: Device number, capture time, direction, matching result, plate number, camera information, camera number, lane number, validity. You can also change the order in which the overlay text appears on the snapshot from the Sorting column. TruVision ANPR IP Camera Configuration Manual...
- Page 76 You can display on the captured snapshot the device number, camera number as well as camera information. To set up the camera information displayed on the snapshot: 1. From the menu toolbar, click Configuration > Camera Configuration > Road Traffic > Camera. TruVision ANPR IP Camera Configuration Manual...
- Page 77 “1-DKS-140”, in the list it should be written as “1DKS140”. See Figure 13 below. When entering 0 in column C, the license plate will be marked as black listed. Entering 1 in column C marks the license plate as white listed. TruVision ANPR IP Camera Configuration Manual...
- Page 78 The option “Increase the maximum number of license plates from 2048 to 10240” allows you to load 10,240 in the camera but this will affect overall camera performance. It will also delay the load time of this page. TruVision ANPR IP Camera Configuration Manual...
- Page 79 Result. The LPR results can now start to be listed as they are detected and captured. Up to the 20 latest license plate pictures and their data can be displayed. You can also select to display the country of origin of the license plate. TruVision ANPR IP Camera Configuration Manual...
- Page 80 Configuration > Camera Configuration > Road Traffic > Wiegand. 2. Select one of the options from the drop-down list to configure the Wiegand data bit: 26 or 34. 3. Click Save to save changes. TruVision ANPR IP Camera Configuration Manual...
- Page 81 Figure 15 below for a description of Live View. Figure 15: Live View window Buttons Description Click to start/stop live view. Click to take a snapshot. The snapshot will be saved to the default folder in JPEG format. TruVision ANPR IP Camera Configuration Manual...
- Page 82 See “HDD management” on page 69 for more information. To search recorded video stored on the camera’s storage device for playback, click Playback on the menu toolbar. The Playback window displays. See Figure 16 below. TruVision ANPR IP Camera Configuration Manual...
- Page 83 Click a location on the timeline to move the cursor to where you want playback to start. The timeline can also be scrolled to earlier or later periods for play back. Click to zoom out/in the timeline bar. TruVision ANPR IP Camera Configuration Manual...
- Page 84 Make sure the HDD, NAS, or memory card are properly configured before you carry out the snapshot search. • Make sure the capture schedule is configured. Go to Configuration > Storage > Snapshot to set the capture schedule. TruVision ANPR IP Camera Configuration Manual...
- Page 85 The Log window appears. See Figure 17 below. Note: You must have view log access rights to search and view logs. See “Modify user information” on page 30 for further information. TruVision ANPR IP Camera Configuration Manual...
- Page 86 Remote Playback by Time, Remote Export Config file, Remote import config file, Remote Get Parameters, Remote Get Working Status, Establish Transparent Channel, Disconnect Transparent Channel, Start Bidirectional Audio, Stop Bidirectional Audio, Remote Alarm Arming, Remote Alarm Disarming TruVision ANPR IP Camera Configuration Manual...
- Page 87 2. In the Major Type and Minor Type drop-down lists, select the desired option. 3. Select start and end time of the log. 4. Click Search to start your search. The results are displayed. TruVision ANPR IP Camera Configuration Manual...
- Page 88 FTP, 36 HTTP, 38 integration protocol, 40 NAT, 35 Firmware upgrade, 22 port parameters, 34 using TruVision Device Manager, 24 PPPoE, 34 Focus, 49 QoS, 39 SNMP, 35 TC/IP, 32 NTP synchronization, 19 capacity, 69 TruVision ANPR IP Camera Configuration Manual...
- Page 89 Web browser security level Snapshots checking, 8 event-triggered, 67 Web browser window scheduled, 67 overview, 11 search, 82 White balance, 50 specify directory to save, 16 White list license plate detection, 75 Tamper-proof alarms TruVision ANPR IP Camera Configuration Manual...
Need help?
Do you have a question about the TVB-5412 and is the answer not in the manual?
Questions and answers