Pottinger NOVACAT 352 ED Operator's Manual
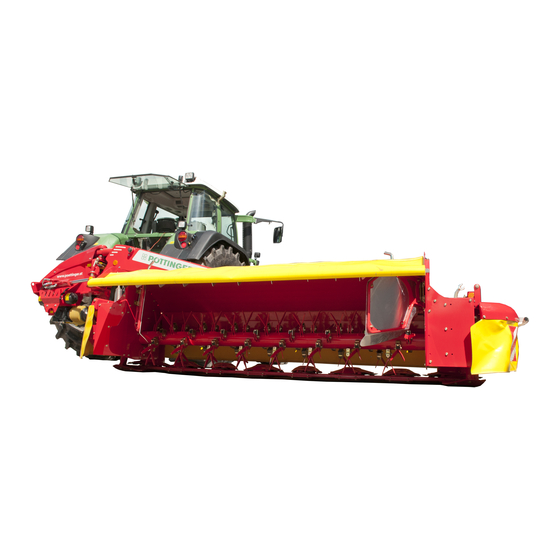
Disc mower
Hide thumbs
Also See for NOVACAT 352 ED:
- Operator's manual (74 pages) ,
- Operating manual (210 pages) ,
- Operator's manual (74 pages)

Subscribe to Our Youtube Channel
Related Manuals for Pottinger NOVACAT 352 ED


Summary of Contents for Pottinger NOVACAT 352 ED
- Page 1 Operator‘s manual + INSTRUCTIONS FOR PRODUCT DELIVERY . . . Page 3 99 3784.GB.80R.1 "Translation of the original Operating Manual" NOVACAT 352 ED/RC/CF (Type PSM 3784 : + . .0291) • Disc mower...
- Page 2 Pöttinger - Trust creates Affi nity - since 1871 "Quality pays for itself." Therefore we apply the highest quality standards to our products which are constantly monitored by our in-house quality management and our management board. Because the safety, perfect function, highest quality and absolute reliability of our machines in operation are the core competencies for which we stand.
- Page 3 INSTRUCTIONS FOR Dokument PRO DUCT DELIVERY PÖTTINGER Landtechnik GmbH Industriegelände 1 A-4710 Grieskirchen Tel. 07248 / 600 -0 Telefax 07248 / 600-2511 According to the product liability please check the above mentioned items. Please check. ❑ Machine checked according to delivery note. All attached parts removed. All safety equipment, drive shaft and operating devices at hand.
-
Page 4: Table Of Contents
TABLE OF CONTENTS Table of contents Attention! WARNING SIGNS Mowing without conditioner ........34 Safety hints to CE sign ..............5 Optional equipment: ..........34 observe in Meaning of warning signs .......... 5 Swath width when mowing without conditioner ..35 supplement! SPECIFICATION Conveying cones (optional) ........ -
Page 5: Warning Signs
WARNING SIGNS CE sign The CE sign, which is affixed by the manufacturer, indicates out ward ly that this machine con forms to the engineering guideline regulations and the other relevant EU guidelines. Recommendations EU Declaration of Conformity (see supplement) for work safety By signing the EU Declaration of Conformity, the ma nu fac tu r er declares that the machine being All points referring... -
Page 6: Specification
SPECIFICATION Overview Designations: (1) Headstock (4) Conditioner (2) Hydraulic relief (5) Foldable side protection (3) Cutter bar Variations Description Description NOVACAT 352 ED / RC Working width: 3.46 m - 6 - 1400-GB-UEBERSICHT_3784... -
Page 7: Tractor Requirements
TRACTOR REQUIREMENTS Tractor To operate this machine the following tractor requirements are necessary: - Tractor power: Novacat 352 ED / RC - from 96 kW / 130 PS, - Hitching: Lower link Cat. III / width 3 - Connections: see table “Necessary hydraulic and power connections”... -
Page 8: Necessary Hydraulic Connections
TRACTOR REQUIREMENTS Necessary hydraulic connections Single-action Dual-action Identification Design Consumer hydraulic connection hydraulic (on the with floating position connection implement) Standard Lift-out cylinder if cross valve at top Hydraulic lower link compensator or swivel cylinder (with active control line) if cross valve at bottom Hydraulic relief Operating pressure Be advised! Check the compatibility of the hydraulic oils before connecting... -
Page 9: Attaching To Tractor
ATTACHING TO TRACTOR Attaching implement to tractor 1. Set lower link on tractor 3 drilled holes Safety - Fix the lower linkage so that the implement cannot hints: swivel out to the side and the headstock is centrally positioned. see Supple- ment-A1, 7.), 8a. -
Page 10: Set Hydraulic Relief
ATTACHING TO TRACTOR - Set the right lower link. Note: 1. Put the mower unit in "floating" position using the single-acting servo Note that the degree of dirt 2. Move the lifting gear in the appropriate direction until accumulation the indicator arrow points (1) on the relief cylinder affects the ground point directly at each other. -
Page 11: Carry Out Trial Run
ATTACHING TO TRACTOR Carry out trial run Be ad- Set right lower link ground clearance vised! - Set the right lower link. During the adjust- 1. Set the mowing unit in "floating" position using the ment process, single-acting servo no one is permit- 2. -
Page 12: Transport- And Working Position
TRANSPORT- AND WORKING POSITION Changing from working position to field Change from field transport position to transport position transport position Safety Precaution! Procedure: Procedure: see supplement- 1) Turn drive off and wait for mower discs to come to a A1 points 7.), 8c. standstill Be alert! - 8h.) -
Page 13: Changing From Transport Position To Working Position
TRANSPORT- AND WORKING POSITION Changing from transport position to working position Safety Precaution! Procedure: see supplement- A1 points 7.), 8c. Be alert! - 8h.) Ensure that no one is standing in the Changing from mower’s swivel range! working positi- on to transport position is only to 1) Pull control line be carried out on... -
Page 14: Dismount And Parking
DISMOUNT AND PARKING Detach machine from tractor Depending on parking situation, mower can be detached Attention! in the transport position (H) or working position (R). • Always park The following procedure applies to both situations: implement stead- fast! • Use support stand - otherwise dan- ger of tipping! •... -
Page 15: Operation
OPERATION Important notes prior to the start of work 5. Remain at a distance when the engine is running. Safety hints: - Keep people out of the danger zone - foreign bodies which See Attachment A, 1. - 7.) can be ejected by the mower could injure them. -
Page 16: Mowing
OPERATION Mowing Settings for operation Tractor hydraulic system 1. Adjust the cutting height by turning the upper link spindle and with the hydraulic upper link - The right lower link is to be set to H1 ≈ 700 mm ground (max. -
Page 17: Working On Slopes
WORKING ON SLOPES Take care when turning on slopes! The tractor's travelling characteristics are influenced by the weight (G) of the mower unit. This can lead to dangerous situations, especially on slopes. Danger of tipping occurs - when the mower unit is facing downhill and in a raised position, - when travelling in a left-hand curve with the mower unit raised,... -
Page 18: Tine Conditioner
TINE CONDITIONER Mode of operation The aim of conditioning is to ream the wax layer (protection layer) on the blade of grass. Consequently, the fodder looses moisture more easily and dries more quickly. Conditioning is carried out using V-shaped tines, placed in a spiral on the conditioner shaft. -
Page 19: Mowing With The Conditioner
TINE CONDITIONER Mowing with the conditioner Rotor tines position Pos. Z1: Rotor tines position for normal operating conditions. The conditioning effect can be modified. Pos. Z2: For difficult operating conditions, e.g. if the fodder - The distance between the adjusting strip and the rotor winds around the rotor. -
Page 20: Swath Width When Mowing With Conditioner
TINE CONDITIONER Swath width when mowing with conditioner The swath width when mowing with conditioner is set using the guide plates. Note: The settings described below are to be regarded as basic settings. The optimum swath width can be determined perhaps only in practical use due to the various types of fodder. -
Page 21: Uncoupling And Coupling The Conditioner
TINE CONDITIONER 7. Relieve the V-belt by pressing the belt tension lever Uncoupling and coupling the conditioner down. 1. Reduce the leader bolt oil pressure in the hydraulic relief by opening the stopcock (1) on the headstock. Read off the reduced oil pressure on the pressure gauge (2). 8. - Page 22 TINE CONDITIONER 13. Fit the conditioner chassis. 15. Always park conditioner (CR) stably. Important! When mowing without condi- tioner, additional safety elements and both swath formers must be attached to the cutter bar. See the spare parts Fitting the conditioner (CR), the swath former (SF) or the list for the parts.
-
Page 23: Roller Conditioner
ROLLER CONDITIONER Safety advice Safety information Before initial operation, read and observe the operating instructions, particularly the safety information. Warning! Rotating components; danger of being pulled in. Never unlock or remove protection devices when motor is running. Operation mode The roller conditioner is suitable for lucerne and clover types. Two power-driven interlocking rollers crush the fodder. In so doing, the plant’s natural wax coating is damaged and the drying time is accelerated. -
Page 24: Possible Settings
ROLLER CONDITIONER Possible settings Conditioner intensity (A): The upper roller is moveable and is tensioned left and When delivered, the roller conditioner is preset for medium right with a spring. The spring tension intensity is always intensity. Make the following adjustments for optimum adjusted using nut (A). -
Page 25: Operation
ROLLER CONDITIONER Operation Remove cutter bar widening 1. Remove screws (1). The number of screws varies Driving speed: according to cutter bar length. Adapt the speed to fodder consistency. Travelling too fast reduces conditioning quality and evenness. Working without roller conditioning: If required the roller conditioner can also be removed and replaced with a tine conditioner or swath former. -
Page 26: Maintenance
ROLLER CONDITIONER Maintenance Reverse the three screws in the centre bearing. Caution! Shut off engine and remove key before carrying out any maintenance or repair work. Cleaning the auxiliary drive: (G) after every 50 operating hours - Insert the three screws (3) in the rear area of the centre bearing. - Page 27 ROLLER CONDITIONER Check belt tension on the shorter belts: (G) Main drive belt tension: (D,E) • Basic setting: Both arrow pairs (8.9) are aligned. Check belt tension: • Basic setting (X): 190 mm Changing belt tension: • Adjust screw (D) Change belt tension for shorter belts Replacing belts: •...
- Page 28 ROLLER CONDITIONER Lubricating the drive: (After every 50 operating hours) with grease • SP1 • SP 2 Gear oil: (After every 100 operating hours) 126-16-109 The gearing is located on the innerside of the conditioner. • Open drain plug (63) and drain oil •...
-
Page 29: Cross Flow
CROSS FLOW Overview 131-16-26 Designations: (1) Additional wiping strip (parking position) (6) Protective apron ejector (2) Drive unit (7) Protective apron (option) (3) V-belt tensioner (8) Protective apron distance setting (option) Shut-off valve of protective apron swivelling (4) Locking lever rear wall (Position open) mechanism (option) (5) Locking lever rear wall (Position closed) Safety advice... -
Page 30: Mode Of Operation
CROSS FLOW Mode of operation Tailgate The silage is deposited in a swath immediately after mowing If having the silage deposited as a swath is not desired, then via the Cross-Flow (CF) unit (option). open the tailgate which allows the silage to be spread out. Overview: CF unit operation The CF unit runs fully automatically and requires no... -
Page 31: Scraper
CROSS FLOW Close the tailgate: Scraper 1. Unlock the tailgate 1. Pull the spring cotter pin (1) out 2. Remove the lever (2) from the lateral position (B) • Set the wiping strip (1) over the slots, so that the wiping strip does not touch the transverse auger and so that 3. -
Page 32: Maintenance
CROSS FLOW Maintenance Lubricate angular gear (1) every 100 operating hours. Before any cleaning or servicing activities, park the tractor on firm, level ground and secure against rolling. Put the machine in the working position. Turn off the engine and remove the ignition key. - Page 33 CROSS FLOW Lubricate cross-feeding auger every 50 operating hours Lubricate grease nipples (3) and (4) on the cross-feeding auger bearing with grease (IV) . 1700-GB CONDITIONER_3784 - 33 -...
-
Page 34: Mowing Without Conditioner
MOWING WITHOUT CONDITIONER Mowing without conditioner Pay particular attention if the conditioner has been removed from the cutter bar! Note A machine with a conditioner (CR) as a complete unit is fitted with proper protection elements. However, if the conditioner has been removed then the mower unit is no longer completely covered. -
Page 35: Swath Width When Mowing Without Conditioner
MOWING WITHOUT CONDITIONER Swath width when mowing without Setting both tension springs conditioner for high, dense forage. basic setting. When mowing without conditioner, the swath width is for short forage. determined by the swath discs. This avoids driving over the crop with wide tractor tyres. Fitting swath discs - Fit the swath discs in Position 1, left and right (see also previous page: frame "Rear Protection") -
Page 36: Collision Safety Device
COLLISION SAFETY DEVICE Collision safety device Be aware! When mowing around trees, fences, boundary stones etc., collisions between the cutter bar and obstacles can If you are unsure occur despite careful and slow driving. Therefore, in order whether the area to prevent such damage, collision protection has been to be mown is planned for the cutting device. -
Page 37: Safety Advice
GENERAL MAINTENANCE MAINTENANCE Safety advice Parking in the open • Switch off engine prior to any adjustment, maintenance Clean and protect the piston rods with Safety advice or repair work. grease prior to longer periods parked outside. • Switch off engine FETT and remove igni- tion key prior to... -
Page 38: Cutter Bar Oil Level Check
The oil level is correct if the gear oil reaches the lower edge of the level opening (63) (OIL LEVEL). OIL LEVEL TD17/99/10 NOVACAT 352 ED: X2 = 300 mm • The side where the oil refill screw is located remains 5. Topping up oil on the ground. -
Page 39: Cutter Bar Oil Change
• It can take some time until the used oil has completely drained. Oil quantity: NOVACAT 352 ED: 3.5 litre SAE 90 - Bring mower bar to max. tilt. - Take out oil drain plug (62), let oil run out and dispose of waste oil correctly. -
Page 40: Oil Change Angular Gear 2
MAINTENANCE Oil change angular gear 2 Installing cutter blades - Change oil after the first 50 operating hours. Be advised! Under normal operating conditions, oil is to be The arrow on the cutter blade shows the replenished annually (OIL LEVEL). cutter disc's direction of turn. -
Page 41: Wear Control Cutting Blades Bracket
MAINTENANCE Wear control cutting blades bracket The following parts are subject to Be advised! wear: Danger of accident • Cutting blade brackets (30) if wear parts are • Cutting blades pins (31) worn off. Such worn off wear parts may not be used further. -
Page 42: Holder For A Quick Change Of Cutter Blades
MAINTENANCE AND SERVICE Holder for a quick change of cutter blades Checking the mowing blade suspension - Normal check every 50 hours. Attention! - Check more often when mowing on stony terrain or in other difficult For Your Safety operating conditions. •... -
Page 43: Changing The Cutter Blades (From 2004 Model)
MAINTENANCE AND SERVICE Changing the Cutter Blades (from 2004 model) 1. Move lever (H) from the left or right to the stop between mower disk and blade holder (30) into position "A" 2. Swivel lever from pos. A to pos. B and thus press the moveable blade holder (30) down. -
Page 44: Technical Data
TECHNICAL DATA Technical data Description NOVACAT 352 ED / RC / CF Type 3784 3-point coupling Coupling Cat. III / Width 3 Working width 3.46 m Transport width < 3.00 m No. of mowing discs No. of cutter blades Area output 3.7 ha/t... -
Page 45: The Defined Use Of The Mower Unit
/ machine. The defined use of the mower unit The mower unit "NOVACAT 352 ED/RC/CF (TYPE PSM 3784)" is intended solely for normal use in agricultural work. • For the mowing of grassland and short stemmed fodder. Any other use is considered to be non-compliant. -
Page 46: Supplement
SUPPLEMENT GB-Anhang Titelblatt _BA-Allgemein... - Page 47 The original cannot be copied ... Things will run better with genuine Pöttinger parts • Quality and precise fitting The decision must be made, ”original” or ”imitation”? The decision is often governed by price and a ”cheap buy” can sometimes be very expensive. - Operating safety.
- Page 48 SUPPLEMENT - A Recommendations for work safety Recommendations for work safety 5.) Spare parts All points refering to safety in this manual are a. The original com po nents and ac ces so ries have been in di ca ted by this sign. de sig ned especially for these machines and appliances.
- Page 49 SUPPLEMENT - A 9.) Transport of persons prohibited a. The transport of persons on the machine is not permitted. b. The machine may only be driven on public roads when in the position sti pu la ted for road trans port. 10.) Driving ability with auxiliary equipment a.
- Page 50 PTO SHAFT Supplement - B Matching driveshaft to tractor Instructions for working To determine the actual length required, hold the two halves The permissible pto speed may not be exceeded when Be advised! of the driveshaft side by side. using the implement. - The hitched implement may continue to run after the Only use the pto is switched off.
- Page 51 PTO SHAFT Supplement - B Information on function when using a cam shifting clutch. This overload clutch switches the torque transmitted to zero if overloaded. To revert to normal operation, stop the p.t.o. drive briefly. The clutch reengages at a speed below 200 rpm. Be advised! Re-engaging is also possible by decreasing the p.t.o.
-
Page 52: Lubrication Chart
Lubrication chart after every X hours operation 40 F all 40 loads 80 F all 80 loads once a year 100 ha every 100 hectares if necessary FETT GREASE Number of grease nipples Number of grease nipples (III), (IV) see supplement „Lubrificants“ Litre Variation See manufacturer’s instructions... - Page 53 FETT X1=235mm (III) (III) (III) (100 ) 1,25 [l] SAE90 0,8 [l] SAE90 3,5 [l] SAE90 131-16-21 131-16-24 1300-SCHMIERPLAN (3784) - 53 -...
-
Page 54: Lubricants
- 54 - 1400_EN-BETRIEBSSTOFFE... - Page 55 - 55 - 1400_EN-BETRIEBSSTOFFE...
- Page 56 - 56 - 1400_EN-BETRIEBSSTOFFE...
-
Page 57: Repairs To The Cutter Bar
REPAIR INSTRUCTIONS Repairs to the cutter bar • Markings aligned (K1, K2). up to 2005 model (Marking K1 = Centre point on the hub) from 2006 model (Marking K1 = Larger countersink when drilling) • Only screw on nut (M) when there is sufficient thread length (L) to prevent any damage. -
Page 58: Assembly Instructions
NOVACAT 442 NOVACAT 402 NOVACAT 351 a-motion ED RC / NOVACAT 352 ED RC /NOVACAT 352V / NOVACAT 351 classic NOVACAT 301 classic / 301 a-motion ED RC / NOVACAT 302 ED RC NOVACAT 261 classic / 261 a-motion ED RC / NOVACAT 262 ED RC... - Page 59 REPAIR INSTRUCTIONS NOVADISC 400 NOVADISC 350 / NOVADISC 900 NOVADISC 305 / NOVADISC 810 NOVADISC 265 / NOVADISC 730 NOVADISC 265 Direction of rotation "towards the centre" / NOVADISC 730 NOVADISC 225 - 59 - 1502-GB-REP HINWEISE_397...
- Page 60 REPAIR INSTRUCTIONS NOVADISC 900 NOVADISC 810 NOVADISC 730 Direction of rotation "towards the centre" NOVADISC 730 - 60 - 1502-GB-REP HINWEISE_397...
-
Page 61: Taper Bushes
TAPER BUSHES Taper bushes installation instructions To assemble 1. Clean and degrease the bore and taper surfaces of the bush and the tapered bore of the pulley. 2. Insert the bush in the pulley hub and line up the holes (half thread holes must line up with half straight holes). -
Page 62: Service
SERVICE Hydraulic plan 1. Unloading 2. Lifting 3. Swing limiter 4. Swath apron (optional for NOVACAT 352 CF) 5. Lower link arm 6. Return swivelling system 7. Tailgate locking (optional for NOVACAT 352 CF) Tractor servo, single-action Tractor servo, double-action 1600_GB-Service_3784 - 62 -... -
Page 63: Combination Of Tractor And Mounted Implement
IMPORTANT! ADDITIONAL INFORMATION Combination of tractor and mounted implement The mounting of implements on the front or rear three point linkage shall not result in exceeding the maximum permissible weight, the permissible axle loads and the tyre load carrying capacities ot the tractor. The front axle of the tractor must always to be loaded with at least 20 % of the unladen weight of the tractor. - Page 64 IMPORTANT! ADDITIONAL INFORMATION 3. CALCULATION OF THE REAL FRONT AXLE LOAD T V tat (If with the front mounted implement (G ) the required minimum front ballasting (G ) cannot be reached, the weight of the front mounted V min implement has to be increased to the weight of the minimum ballasting at the front!) Record the calculated real front axle load and the permissible front axle load of the tractor into the table.
- Page 65 EC Conformity Declaration Original Conformity Declaration Name and address of the manufacturer: PÖTTINGER Landtechnik GmbH Industriegelände 1 AT - 4710 Grieskirchen Machine (interchangeable equipment): mower NOVACAT 352 ED / RC / CF Type 3784 Serial no. The manufacturer declares that the machines adhere to all relevant provisions in the following EU directive: machinery 2006/42/EG In addition to this, the manufacturer also declares adherence to the other following EU...
- Page 66 Im Zuge der technischen Wei ter ent wick lung La société PÖTTINGER Landtechnik GmbH Following the policy of the PÖTTINGER arbeitet die PÖTTINGER Landtechnik améliore constamment ses produits grâce Landtechnik GmbH to improve their products GmbH stän dig an der Verbesserung ih rer au progrès technique.
- Page 67 PÖTTINGER Landtechnik GmbH A-4710 Grieskirchen Telefon: +43 7248 600-0 Telefax: +43 7248 600-2513 e-Mail: info@poettinger.at Internet: http://www.poettinger.at PÖTTINGER Deutschland GmbH Verkaufs- und Servicecenter Recke Steinbecker Strasse 15 D-49509 Recke Telefon: +49 5453 9114-0 Telefax: +49 5453 9114-14 e-Mail: recke@poettinger.at PÖTTINGER Deutschland GmbH Servicecenter Landsberg Spöttinger-Straße 24 Postfach 1561...
Need help?
Do you have a question about the NOVACAT 352 ED and is the answer not in the manual?
Questions and answers