
Related Manuals for Gira HomeServer 0529 00


Summary of Contents for Gira HomeServer 0529 00
- Page 1 Gira HomeServer/FacilityServer Start-up information Gira HomeServer 0529 00 Gira FacilityServer 2075 00...
-
Page 3: Table Of Contents
Contents Contents Introduction ................... General information about the operating instructions / product support..Scope of delivery .................... Interfaces and connection options ..............System requirements ..................Area of application ..................Registration ....................Updates ......................Start-up and installation ................. Basic configuration of the HomeServer in the sample project....... Device description.................. - Page 4 Contents Important IP addresses ................Opening the user interface ................Calling up lists ....................Operating with WAP ..................Short explanation of important terms ............06.2012/V 2.0...
-
Page 5: Introduction
As the software for the device purchased by you is being continuously further developed and updated, information in this manual may no longer be up-to-date. Current product information is always available on the Gira website: http://www.gira.com Current software updates and documentation for your product are also available at http://www.download.gira.de. -
Page 6: Scope Of Delivery
Introduction Scope of delivery The following items are included in delivery: – 1 x HomeServer – 1 x mains cable – 1 x cable for start-up – 1 x start-up manual Interfaces and connection options The HomeServer has the following interfaces and connection options: –... -
Page 7: System Requirements
KNX/EIB devices as well as complete monitoring of all events is via the KNX/EIB. The programming of the HomeServer is via the Expert software, available for free in the download area of the Gira website. This software can be operated on a standard PC with the Microsoft® Windows operating system (from XP). - Page 8 Introduction Please note that Gira assumes no legal responsibility and provides no guarantee of any kind for problems resulting from obsolete firmware or updated firmware. Important: Make sure to install the updates! Please make sure to download the firmware updates from the Gira websites and install them on your HomeServer, even if you are not registered! Follow the information in these installation instructions.
-
Page 9: Start-Up And Installation
Important: Check the current software version before installing! Make sure to check the current software version of the firmware and Expert software before you install and start up the HomeServer. If necessary, download the latest data from the Gira webpage. Address: http://www.gira.com... -
Page 10: Device Description
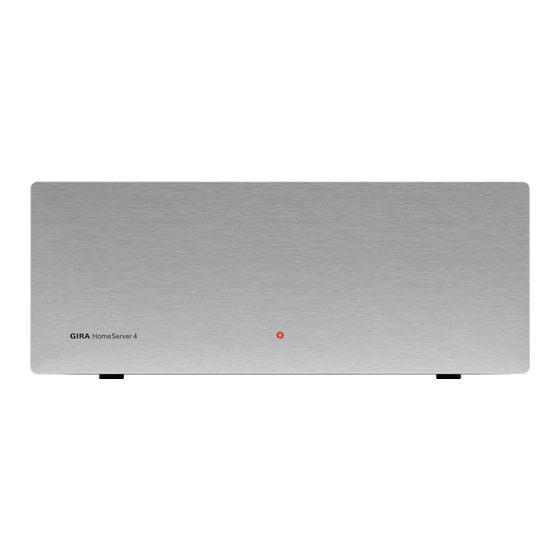
Start-up and installation Device description Fig. 2.1: Operating and control elements on the front of the HomeServer Control elements on the front of the HomeServer and FacilityServer: – operating LED that lights up when the device is switched on. Operating element on the front of the FacilityServer: –... - Page 11 Start-up and installation Fig. 2.2: Interfaces on the rear of the HomeServer Interfaces on the rear of the HomeServer: – Mains connection 230 V (1) and on/off switch – PS2 connection for mouse (2), without function – PS2 connection for PC keyboard (3), for service purposes –...
-
Page 12: Set-Up And Mounting
Start-up and installation Set-up and mounting The HomeServer may only be set up inside buildings. It is not intended and not permitted for mobile operation. Set up the HomeServer at a central location so that connection to the mains voltage, to the network and the KNX/EIB is trouble-free. -
Page 13: Connection To The Mains Voltage
Start-up and installation 2.3.1 Connection to the mains voltage The HomeServer is connected via the power supply unit to the mains voltage (230 V~). Important: Device starts up immediately when connected to mains voltage! The HomeServer starts as soon as it is connected to the mains voltage and the on/off button on the rear is switched on. -
Page 14: Connecting To A Network
How to access the user interface after connecting the HomeServer to the local network is described on “Function test via Internet browser” on page 20 or in the operating instructions for the client program (available via the Internet at http://www.gira.com 06.2012/V 2.0... -
Page 15: Connection To The Knx/Eib
Start-up and installation 2.3.3 Connection to the KNX/EIB The HomeServer can be connected to the KNX/EIB system using the following KNX/EIB devices (not included in delivery:) – Instabus flush-mounted bus coupler 2 (Art. No. 0645 00) – Instabus data interface FT 1.2 (Art. No. 0504 00) –... -
Page 16: Direct Connection To A Laptop Or Pc
Start-up and installation 2.3.4 Direct connection to a laptop or PC You can also connect the HomeServer directly to your start-up PC via LAN if it has a network connection. For this purpose use a "rotated" network cable (e.g. crossover cable with two RJ45 plugs). -
Page 17: Connecting The Homeserver For Programming
Start-up and installation 2.3.6 Connecting the HomeServer for programming The connection options for the HomeServer described until now were for simple, fast user access to the device. In this way you can test the functionality during initial start-up. However, if the HomeServer is to be used professionally, it must be prepared (programmed) for its application area. -
Page 18: Function Test And Start-Up
Start-up and installation Function test and start-up In order to start up the HomeServer, two subject areas must be differentiated: – Set-up and connection of the HomeServer – Function test and start-up You now learn how a function test is carried out and how the HomeServer is started up. Important: Start-up only to be carried out by an electrical professional! Connection and start-up of the HomeServer may only be carried out by trained electrical professionals. - Page 19 Start-up and installation To access the user interface of the HomeServer, using the address bar of the internet brow- ser call up the page http://HS-ip-address/hs . Then enter one of the above-specified combinations of user name and password to access the user interface.
- Page 20 Start-up and installation How to access the user interface of the HomeServer via an Internet browser: 1. Connect the HomeServer via its network connection either to the local network or directly to the start-up PC (see “Connecting to a network” on page 16). 2.
-
Page 21: Function Test Via The Hsclient Program
Start-up and installation 2.4.2 Function test via the HSClient program The user interface of the HomeServer can also be accessed by the HSClient program. Access via the HSClient program is described in the corresponding operating instructions,. 2.4.3 Start-up After you have completed the function test, you can start up the HomeServer for a new pro- ject. - Page 22 Start-up and installation 06.2012/V 2.0...
-
Page 23: Operation Via Homeserver Portal
The HomeServer portal offers indirect access via the Internet (http) or via WAP to the user interface of the HomeServer. The required basic settings have been saved for all HomeServers dispatched by Gira, enab- ling direct access to the user interface of the sample project saved in the HomeServer. - Page 24 1. Establish a connection to the Internet via your PC. 2. Start your Internet browser. 3. Enter http://homeserver.gira.de into the address bar of the browser. An input mask appears. If you wish to access via WAP, enter the following: http://homeserver.gira.de/hswap.wml.
-
Page 25: Changing The Name Of The Homeserver In The Portal
Operation via HomeServer portal You can now select whether you wish to • Access the HomeServer (Access to the Gira HomeServer) • Change the name of the HomeServer (Change name) • Change the password (Change password) • Have your password sent to you because you have forgotten it (Contact). -
Page 26: Change Password
Operation via HomeServer portal Change password How to change the password for access to the HomeServer via the portal: 1. Log in at the portal so that the start page is displayed and you have access to the main menu. 2. -
Page 27: Homeserver Is Offline" Message When Using A Router
Operation via HomeServer portal 3.4.2 "HomeServer is OFFLINE" message when using a router If you use a router for the Internet connection of the HomeServer and the "HomeServer is OFFLINE" message is displayed, check the following settings: 1. In the Expert software: Was the IP address of the router or DNS server specified incor- rectly? 2. - Page 28 Operation via HomeServer portal 06.2012/V 2.0...
-
Page 29: Expert Software
11. Installing the Expert software The Expert start-up program is available free of charge in the download area of the Gira web- site. This software must be installed on your start-up PC. Important: Check the current software version before installing! Make sure to check the current software version of the firmware and Expert software if you already have this software. - Page 30 Here you systematically specify all data required by the HomeServer for its future tasks. How to start the Expert software following successful installation: 1. Under Windows XP for example, select Start/Program Files/GIRA-SOFTWARE/ HS+FS/. All previously installed Expert versions in the respective language variants can be found in this folder.
-
Page 31: Installation Paths (From Expert Software Version 2.10)
Expert software 4.1.1 Installation paths (from Expert software Version 2.10) The paths for the version currently installed can be found in the ReadMe file, which is in the experte.exe directory after installation. Changing the preset IP address Normally it is not necessary to carry out changes in Expert for the function test or initial start- up. -
Page 32: Programming The Homeserver Via The Rs232 Connection
Expert software Programming the HomeServer via the RS232 connection How to transfer the changed data directly from the start-up PC to the HomeServer: 1. Disconnect the HomeServer from the KNX/EIB (if necessary). 2. Connect the serial (RS232) port of the HomeServer to a COM port of the start-up PC. Use the start-up cable included in delivery for this purpose. -
Page 33: Programming The Homeserver Via Lan
Expert software Programming the HomeServer via LAN How to transfer the changed data from the start-up PC to the HomeServer when both devices are interconnected via a local network: 1. Start the Expert software on your start-up PC. Open the sample project with the chan- ged IP address (if necessary). - Page 34 Expert software 06.2012/V 2.0...
-
Page 35: Important Ip Addresses
Important IP addresses Important IP addresses Your HomeServer can mainly be operated via the Internet, but also via a network connection. Here is an overview of the most important IP addresses. The following applies here: – uuu = user name –... -
Page 36: Opening The User Interface
The following applies: DES = Design (from: Expert/Project/ Design RRR = Refresh settings (from: Expert/Project/ Times) http://homeserver.gira.de Calling up the HomeServer portal. A menu is displayed for the user to log in with login data saved in the Home- Server. -
Page 37: Calling Up Lists
WAP browser mode. A Login mask is displayed for the user to log in with login data saved in the HomeServer. http://homeserver.gira.de/hswap.wml Calling up the HomeServer portal in WAP browser mode. A Login mask is displayed for the user to log in with login data saved in the HomeServer. -
Page 38: Short Explanation Of Important Terms
Important IP addresses Short explanation of important terms Term Meaning HomeServer portal Internet portal enabling access to the user interface of the HomeServer. DynDns.org Free Internet service via which the HomeServer can be assigned a "per- manent" name on the Internet. The HomeServer can then be accessed directly with the name created here. - Page 40 Gira Giersiepen GmbH & Co. KG Electrical installation systems Industriegebiet Mermbach Dahlienstraße 42477 Radevormwald P.O. Box 12 20 42461 Radevormwald Germany Phone +49 (0) 2195 / 602 - 0 +49 (0) 2195 / 602 - 119 www.gira.com info@gira.com...
Need help?
Do you have a question about the HomeServer 0529 00 and is the answer not in the manual?
Questions and answers