
Related Manuals for Bodyworx KR6000PRO


Summary of Contents for Bodyworx KR6000PRO
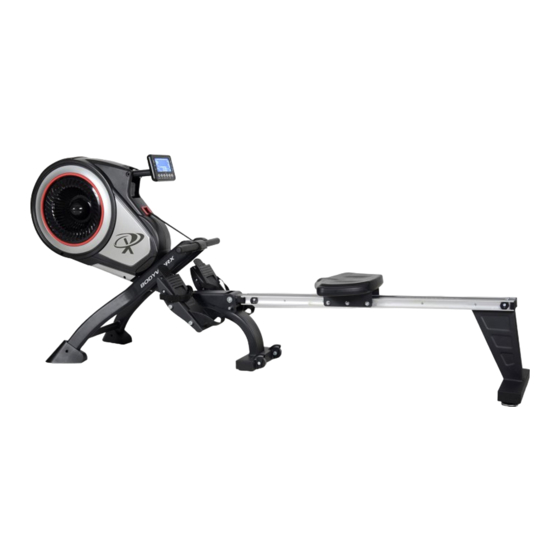
- Page 1 PROGRAMMABLE MAG ROWER Model No: KR6000PRO Retain this owner’s manual for future reference. Read and follow all instructions in this owner’s manual.
- Page 2 GPI Sports & Fitness Warranty Registration Form Congratulations on purchasing your product, we at GPI believe that our product range is of the highest quality and represents great value for money. We back our product range up with our industry leading warranty. Please see below for the step by step instructions on how to register your product warranty online.
-
Page 3: Table Of Contents
CONTENT PAGE IMPORTANT SAFETY INSTRUCTIONS SAFETY GUIDELINES PRE-ASSEMBLY CHECK LIST HARDWARE PARTS LIST ASSEMBLY INSTRUCTION 8-13 EXPLODED DIAGRAM 14-15 PARTS LIST 16-17 CONSOLE INSTRUCTIONS 18-26 EXERCISE INSTRUCTIONS 27-28... -
Page 4: Important Safety Instructions
IMPORTANT SAFETY INSTRUCTIONS Before beginning any fitness program, you should obtain a complete physical examination from your physician. This exercise equipment is designed and built for optimum safety for home use. However, certain precautions always apply whenever you operate any exercise equipment. Be sure to read the entire manual before assembly and operation of this machine. -
Page 5: Safety Guidelines
SAFETY GUIDELINES Successful fitness training programs have one prominent feature in common...safety. Fitness training has some inherent dangers, as do all physical activities. The chance of injury can be greatly reduced or completely removed by using correct techniques, proper breathing, maintaining equipment in good working condition, and by wearing the appropriate clothing. -
Page 6: Pre-Assembly Check List
PRE-ASSEMBLY CHECK LIST PRE-ASSEMBLY CHECK LIST NO:1 NO:9 NO:54 NO:45 NO.14L/R NO:11L/R NO:3 NO:53 NO:35 NO:82 NO:20 NO:24 NO:55 NO:13 NO:8L/R PART NO. DESCRIPTION Q’TY Main frame Roller Wheel 8L/R Front Post Floor Cap ( L/R ) Middle support tube 11L/R Rowing Bar Holder ( L/R ) Socket Head Allen Bolt... -
Page 7: Hardware Parts List
HARDWARE PARTS LIST HARDWARE PARTS LIST STEP: 1 STEP: 2 M8*16mm ¦ µ ¦ µ 1 7mm ¦ µ ¦ µ M8*20mm 2 5mm ¦ µ 8 mm M8*16mm ¦ µ 1 6*86mm STEP: 3 M8*40mm M8*20mm M8*16mm ¦ µ ¦... -
Page 8: Assembly Instruction
ASSEMBLY INSTRUCTION ASSEMBLY INSTRUCTION Step 1 Attach the two Roller Wheels (3) to the Main Frame (1). Secure each Roller Wheel (3) with one Allen Bolt (4) and one Nylon Nut (2) which are pre-assembled on the Main Frame. Attach the computer support tube (20) to the main frame(1) and fasten it with two sets of (43) and ellen bolt (19). - Page 9 Step 3 Insert the seat (53) to the slide rail (45). Insert two cushion rubbers (36) to the slide rail (45), slightly fasten with two ellen bolts (34). Fasten two foot mats (55) on the rear support tube (54). Attach the rear support tube (54) to the slide rail (45), fasten with one ellen bolt (19), three flat washers (43) and two ellen bolts (42).
- Page 10 Step 4 Turn the main frame so that the rear support tube is now on the floor and the underside of the main frame is visible from the front. Take off the four self-tapping screws (10) from the end caps for the front stabiliser tube (8L/R) which are pre-assembled on the end caps, then attach the end caps to the front support tube (9) by four self-tapping screws (10).
- Page 11 Step 5 Turn the main frame back again so that the front support tube is on the floor. Pull out the ball pin (35) from the main frame and unfold the main frame. Then insert the ball pin (35) to the main frame again for fixation. Note: Before insert ball pin (35).
- Page 12 Step 6 Insert the two fixed brackets of the handlebar (11L/R) into the holes on the front support the tube of main frame (1). Attach the left pedal (14L) to the left side of main frame (1), fasten with two ellen bolts (13). Repeat the same steps for the right pedal (14R) to the right side of main frame (1).
- Page 13 Step 8 Pull out the ball pin (35) and lift up the slide rail to fold the machine when done using. CHECK ALL BOLTS AND NUTS ARE TIGHTENED BEFORE USING THE MACHINE...
-
Page 14: Exploded Diagram
EXPLODED DIAGRAM EXPLODED DIAGRAM... -
Page 16: Parts List
PARTS LIST PARTS LIST PART NO. DESCRIPTION Main Frame Nylon Nut M8 Roller Wheel Allen Bolt M8*35 End Cap 80*40 Anti-slip Pad Self Tapping Screw ST4*15 8L/R Front Post Floor Cap L/R Front Post Self Tapping Screw ST5*20 11L/R Rowing Bar Holder L/R Pedal Support Socket Head Allen Bolt M12*140 14L/R... - Page 17 PARTS LIST PART NO. DESCRIPTION Rowing Rail Axle Allen Bolt M8*40 Washer ф8*ф17 End Cap 60*30 Rowing Rail 46L/R Rail Track L/R Self Tapping Screw Seat Roller Wheel Axle Seat Roller Wheel Phillips Screw M5*15 Allen Bolt M6*20 Seat Bracket Seat Rear Support Rear Leverage Knob...
-
Page 18: Console Instructions
CONSOLE INSTRUCTIONS METER INSTRUCTIONS !!! For simple exercise, it is not always necessary to select a training program or manually set the TIME, DISTANCE or other values. You can simply start pedaling. - Page 19 As soon as the computer is connected to the power supply, an acoustic signal sounds and all of the displays are shown on LCD for 2 seconds (Drawing 1). Drawing 1 If no button are pressed and the pedals have not been moved for approx. 4 minutes, the computer LCD will switch OFF.
- Page 20 All settings made with the computer are confirmed with an acoustic signal: 1 shot beep = valid setting confirmed 2 shot beeps =invalid settings reminder 2 shot beeps =PULSE exceed setting value 3 shot beeps =WATT limit is over spec 4 shot beeps =any function count down to 0 or system alarm 6 shot beeps=system force to stop Training Data...
- Page 21 Drawing 3 As soon as one of the set values counts down to 0, the computer will stop along with alarm Bi-bi-bi-bi sound for 8 seconds. Press any button to stop alarm. -You can adjust the level of resistance from 1~16 on the paddles while rowing by pressing UP and DOWN keys.
- Page 22 -Interval programs P2- P3- P7- P12 -Increasing resistance level programs P6- P9- P11 -Increasing and decreasing resistance level programs P1- P4- P5- P8 -P10 The stored training programs are designed especially to enhance aerobic base fitness. . As a beginner you should start with those programs slowly and set a low paddle resistance. .
- Page 23 -With the TARGET program, the preset value 100 will be shown (Drawing 8). Press UP & DOWN buttons to set a value between 30~230 and confirm by ENTER. The program has been saved. Drawing 8 -Set the desired session TIME with UP & DOWN buttons (Drawing 9) and press ENTER button to confirm.
- Page 24 Training with competition mode (RACE) In this program, you can enjoy rowing just like a competition, while your rival is the computer. -Press UP & DOWN to select RACE and press ENTER to confirm (Drawing 10). Drawing 10 -Press UP & DOWN to set SPM confirm by pressing ENTER (default=10±5). -Press UP and DOWN to select desired rowing DISTANCE and confirm by ENTER (default=500 ±100) (Drawing 11).
- Page 25 User-defined profile (USER PROGRAM) Here you can design your own profile with bars just like the preset program profiles. -Press UP & DOWN to select USER PROGRAM and press ENTER to confirm. The first bar will be displayed (Drawing 14). Drawing 14 -Press UP &...
- Page 26 Recovery phase It is recommended to end an intensive rowing session with a recovery phase. During this phase you should be able to relax and paddle without strong resistance until your pulse slows close to its usual rate. -Press RECOVERY button and wear the chest belt again. Then only TIME is showing while counting down from 00:60 to 0:00 (Drawing 16), all other functions are not available.
-
Page 27: Exercise Instructions
EXERCISE INSTRUCTIONS Using your exerciser will provide you with several benefits, it will improve your physical fitness, tone muscle and in conjunction with a calorie controlled diet help you lose weight. 1. THE WARM UP PHASE This stage helps get the blood flowing around the body and the muscles working properly. It will also reduce the risk of cramp and muscle injury. - Page 28 EXERCISE INSTRUCTIONS 3. THE COOL DOWN PHASE This stage is to let your Cardio Vascular System and muscles wind down. This is a repeat of the warm up exercise e.g. reduce your tempo, continue for approximately 5 minutes. The stretching exercises should now be repeated, again remembering not to force or jerk your muscles into the stretch.
- Page 29 PROGRAMMABLE MAG ROWER Model No: KR6000PRO To register your warranty, please go to www.gpisports.com.au DISTRIBUTED EXCLUSIVELY BY 275 Wellington Road Mulgrave, VIC, 3170 Australia...
Need help?
Do you have a question about the KR6000PRO and is the answer not in the manual?
Questions and answers
how do you increase the load on a KR6000PROt
To increase the load on a Bodyworx KR6000PRO, you adjust the resistance level using its programmable magnetic resistance system. This can be done through the console by selecting a higher resistance setting or choosing a program with increased intensity.
This answer is automatically generated
Bodyworx KR6000MAG rowing machine Replacement adjustable footrests
The replacement adjustable footrests for the Bodyworx KR6000PRO rowing machine are the Pedal Adjustment Assembly (quantity 2) and the Pedal (left and right, quantity 1/1 each) as listed in the parts list.
This answer is automatically generated