Table of Contents
Advertisement
Quick Links
edition
DH-CH101 /2 /3
DH-CH003
MAINTENANCE & REPAIR MANUAL
Manufacturer:
DHOLLANDIA N.V.
Zoomstraat 9
9160 LOKEREN (Belgium)
Tel : +32 (0)9 349 06 92
Fax : +32 (0)9 349 09 77
e-mail : info@dhollandia.be
website : www.dhollandia.com
Read the manual in its entirety before operating the wheelchair lift
Keep this manual in the vehicle cab, as reference for the driver and wheelchair lift operator
Doc: SERV_DH-CH101-2-3_CH003_CE_EN_2021 Rev: 0 Date: NOV 01, 2021
Advertisement
Table of Contents
Troubleshooting

Subscribe to Our Youtube Channel
Related Manuals for Dhollandia DH-CH101


Summary of Contents for Dhollandia DH-CH101
- Page 1 DH-CH101 /2 /3 DH-CH003 MAINTENANCE & REPAIR MANUAL Manufacturer: DHOLLANDIA N.V. Zoomstraat 9 9160 LOKEREN (Belgium) Tel : +32 (0)9 349 06 92 Fax : +32 (0)9 349 09 77 e-mail : info@dhollandia.be website : www.dhollandia.com Read the manual in its entirety before operating the wheelchair lift...
-
Page 2: Table Of Contents
Resolving malfunctioning Hand pump ..........................40 DECALS ....................................42 Regular decals ................................. 42 Decals on inside of bus near the lift ..........................43 MEANING OF SAFETY AND WARNING SIGNS ........................45 PRESCRIBED TORQUE VALUES ............................47 END NOTE ....................................48 APPENDIX ....................................49 DHOLLANDIA... - Page 3 13.1 General troubleshooting diagram ............................. 49 13.2 Toubleshooting: Functions test ............................50 13.3 Troubleshooting: Positions test ............................52 13.4 Datasheets grease and oil ............................... 54 DHOLLANDIA...
-
Page 4: Introduction
NOTICE Please confirm you have reviewed the most up-to-date version of this manual prior to operation of the associated DHOLLANDIA wheelchair lift. See below for instructions to download the latest version of the manual. -
Page 5: Understanding Safety And Warning Signs
Prior to operating the wheelchair lift, make sure you understand the safety and warning signs used, and read them in conjunction with the instructions in this manual. If in doubt, DO NOT operate the wheelchair lift. Contact your national DHOLLANDIA distributor. See page 3 for contact info. DHOLLANDIA... -
Page 6: Safety Instructions For Maintenance And Repair
These instructions are supplied as a separate manual with your wheelchair lift. You can also contact your national DHOLLANDIA distributor for the latest edition of this manual. See page 3 for contact info. Or download the latest edition from the website: www.dhollandia.com →... -
Page 7: Identification
IDENTIFICATION Figure 1-1 Every DHOLLANDIA wheelchair lift is identified by and labelled with a unique 8-digit serial number (with or without a space between the first and last 4 digits). Use this number for any inquiry on a particular wheelchair lift or when ordering replacement parts. -
Page 8: Description And Wheelchair Lift Terminology
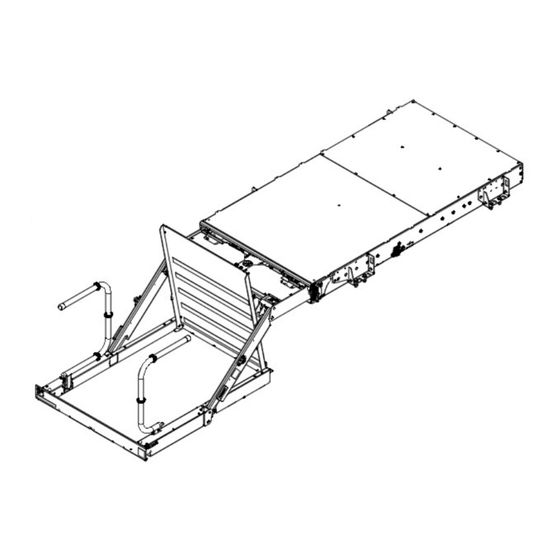
On DH-CH101*, foldable extensions [# 9a] to the handrails are available as an option (option OWP013). Roll stop: roll stop mounted at the outboard platform edge. The roll stop is tilted up automatically when the platform leaves the ground, it is tilted down automatically when the platform touches the ground. - Page 9 The wander lead is equipped with an emergency button that immediately stops all electrical functions when activated. Hydraulic power pack: contains the electric motor driving the hydraulic pump, the oil tank, and the control valves. DH-CH003* ● CASSETTE LIFT WITH EXTENSIBLE PLATFORM ● TERMINOLOGY INBOARD platform edge OUTBOARD platform edge DHOLLANDIA...
- Page 10 DH-CH102* / CH103* ● PLATFORM WITH 1 SINGLE SECTION ● TERMINOLOGY INBOARD platform edge OUTBOARD platform edge DHOLLANDIA...
- Page 11 DH-CH101* ● PLATFORM WITH 1 SINGLE SECTION ● TERMINOLOGY INBOARD platform edge OUTBOARD platform edge DHOLLANDIA...
- Page 12 When turning the EMR button, the lift frame and platform are unlocked inside the cassette, and they can be pulled out by head much more easily. After emergency use, the EMR button MUST be reset in its initial position. Electric connection: plug for the connection of the wander lead with spiral cable. DHOLLANDIA...
- Page 13 Vehicle manufacturers often impose prescribed connections for the battery and earth connections of the lift, which should be observed to avoid damage to the vehicle electrics. Where such prescriptions conflict with the fitting instructions of DHOLLANDIA, contact the vehicle importer or DHOLLANDIA for further advice. DHOLLANDIA...
-
Page 14: Safety Measures
SAFETY MEASURES DHOLLANDIA lifts are equipped with a multiple safety devices to enable its intended use with a maximum degree of safety for the operator, the wheelchair occupant on the platform and any incidental bystanders. The following safety devices are incorporated on the DH-CH... - Page 15 This system prevents trial and error, and mechanical damage of the lift. Automatic cassette lock: in regular conditions, the lift frame and platform are automatically locked inside the cassette by means of a lock mounted at the inboard edge of the cassette. DHOLLANDIA...
- Page 16 12 Main battery fuse: a main fuse 100 – 150A is supplied by the vehicle manufacturer or by DHOLLANDIA. It protects the main battery cable from the batteries to the power pack of the lift against short circuits and amperage peaks.
- Page 17 19 Decals: the lifts are supplied with a number of operation decals, load diagrams and safety decals. Some of these decals are premounted by DHOLLANDIA on the lift. Some of these decals are supplied loose and shall be affixed by the installer near to the lift at a location clearly visible to the operator.
-
Page 18: Importance Of Preventative Maintenance
Some steps in the maintenance checklist require special skills and specific knowledge, that can be acquired through the DHOLLANDIA training programs for maintenance and repair. In case of doubt, DON’T go any further, but ask your local DHOLLANDIA distributor for professional advice. - Page 19 Harness(es) from platform to control or power pack (buzzer, platform lights, etc.) 90 days 1750 cycles Condition, routing, secured with cable ties, undamaged Harnesses for other auxiliary controls 90 days 1750 cycles Condition, routing, secured with cable ties, undamaged DHOLLANDIA...
- Page 20 Rubber cassette sealing (DH-C) 90 days 1750 cycles Condition, undamaged, firmly attached to the cassette Cassette box (when mounted underneath the vehicle) 90 days 1750 cycles Condition, undamaged, no corrosion, no gaps or holes DHOLLANDIA...
- Page 21 + the overload. Refer to procedure I-SERV-G-003 in the Maintenance and Repair Manual. (Note: pressure should never exceed 220 bar / 3190 psi) DH-C cassette lifts: slide-in / out test 180 days 3500 cycles DHOLLANDIA...
- Page 22 the Safety Instructions for Installation, Maintenance and Repair the Maintenance and Repair Manual In order to guarantee the safety of the operators and bystanders in between service and inspection intervals, ALWAYS insist that operators conduct the daily pre-trip inspection in accordance with the Operation manual DHOLLANDIA...
-
Page 23: Troubleshooting And Repair
Therefore, it is very important to identify quickly and precisely if a malfunction has an electric, a hydraulic or a mechanical cause. The tables below can be used to guide you through the troubleshooting. Contact your national DHOLLANDIA distributor if further advice is needed. WARNING Some steps in the troubleshooting instructions require special skills and specific knowledge, that can be acquired through the DHOLLANDIA training programs for maintenance and repair. -
Page 24: Pcb - Positions Test
22-28V 5 SPARE PARTS Only original DHOLLANDIA parts should be used as replacements in case of repair. Part lists for the wheelchair lift can be downloaded from the DHOLLANDIA website. The latest version of all spare parts lists can also be downloaded from the DHOLLANDIA website www.dhollandia.com →... -
Page 25: Diagrams
GENERAL DHOLLANDIA wheelchair lifts are regularly being adapted to new vehicle and chassis developments and specialized customer requirements. Therefore, the electric and hydraulic diagrams applicable to your wheelchair lift might deviate from the generic diagrams contained in this manual. -
Page 26: Hydraulic Overview
HYDRAULIC OVERVIEW The hydraulic overview shown below and the parts needed can be found in the spare parts list in the appendix and on the DHOLLANDIA website. EXAMPLE DHOLLANDIA... -
Page 27: Wheelchair Lift Power Pack Terminology
Images could differ from your installation case but the same components and principles are used. N° Description Electric connection board Battery cables inlet Micro relay Starter solenoid Oil tank cap Oil tank Hydraulic connections: P - T Filter Hydraulic pump Electric DC motor Hand pump DHOLLANDIA... - Page 28 N° Description Pressure relief valve Safety valve LP (Low pressure outlet to tank HP (high pressure) inlet from pump Closing cap Coupling pressure gauge DHOLLANDIA...
-
Page 29: Emergency Operation
Prior to operating the manual emergency controls of the lift, ALWAYS make sure you follow all applicable instructions. In case of doubt, DO NOT CONTINUE, but contact the national DHOLLANDIA distributor for further help and instructions. See contact info on page 3. - Page 30 / disembarking can be done safely. Then locate the electro valve between the lift arms. Remove the plastic nut at the end of the valve. Turn the manual emergency control knob counter clockwise to open that valve. DHOLLANDIA...
- Page 31 Move the lever of the hand pump up and down slowly to lift the platform (= UP). Stop at approx. 15 cm – 6” above cassette height. Fold the handrails back onto the platform surface. Fold the bridge plate back on top of the handrails. DHOLLANDIA...
- Page 32 Where mentioned on the decals or in the manual, this sign refers to a normal operation by means of the electric controls. Where mentioned on the decals or in the manual, this sign refers to a manual emergency operation by means of the back-up devices (Emergency Descent button and hand pump). DHOLLANDIA...
-
Page 33: Important Procedures
(= faster) or less (= slower). V133.12.H / V133.24.H Step Closing the valve manually Turn emergency knob CW (clockwise) to CLOSE the valve manually. Fasten it hand-tight in the closed position. (use no tools!) Mount the plastic cap back on top of the cartridge. DHOLLANDIA... -
Page 34: Procedure I-Serv-G-002: Manual Operation Of The Double Acting Valves (2 Types)
Release the button, or turn the nut CCW (= counter-clockwise) to CLOSE the valve manually. Reinstall the solenoid back in its original position on the cartridge. Reinstall the metal cap back in its original position and fasten it hand-tight. DHOLLANDIA... -
Page 35: Procedure I-Serv-G-003: Hydraulic Pressure Reading And Adjustment
Never raise the hydraulic pressure above 3190 psi / 220 bar, without asking advice from your national DHOLLANDIA distributor. Excessive pressure can cause damage to the wheelchair lift, and serious bodily injury in case of a Counter-hold the centre pressure pressure induced burst in the hydraulic circuit. -
Page 36: Procedure I-Serv-G-004: Flushing Of Pressure Relief Valve
CW to try and raise the pressure pressure. replacing the pressure relief valve again, beyond the original assembly. pressure screw position. Clean or replace the oil filter (remove debris or ice). Replace worn-out pump (if pump body heats up fast). DHOLLANDIA... -
Page 37: Procedure I-Serv-G-005: Check On Valve And Solenoid Function
To end, close the valve manually hand-tight, orient the solenoid in a position that will not damage the valve harness and plug during any of the tail lift functions, replace the nut back on the solenoid and tighten firmly. DHOLLANDIA... -
Page 38: Procedure I-Serv-G-006: Flushing And Cleaning Of Valve Cartridge
To end, close the valve manually hand-tight, orient the solenoid in a position that will not damage the valve harness and plug during any of the wheelchair lift functions, replace the nut back on the solenoid and tighten firmly. DHOLLANDIA... -
Page 39: Procedure I-Serv-G-007: Testing Internal Cylinder Leaks
OK, recondition or replace the cylinder. Contact your national DHOLLANDIA distributor, or consult the website to view the “GUIDELINES FOR THE REVISION OF HYDRAULIC CYLINDERS ” and the applicable safety precautions. Confirm that you have reviewed the most up-to-date version of this manual prior to working on hydraulic cylinders. -
Page 40: Procedure I-Serv-G-008: Oil Replacement, Filling And Bleeding
TYPES OF OIL Option Temperature Type of oil, examples code For various climate conditions, DHOLLANDIA uses 3 types of oil. See table. Standard Mild to hot ISO VG 22 When filling up oil, make sure that you use the same, or a compatible type of oil. -
Page 41: Resolving Malfunctioning Hand Pump
RESOLVING MALFUNCTIONING HAND PUMP If the problem is not resolved after performing the guidelines below, contact your DHOLLANDIA distributor for guidance or spare parts. 1. Perform a second priming of the hand pump to remove air from the hydraulic circuit. - Page 42 Remove the rod of the hand pump by detaching it from the pump handle. Remove the blue seals Use an air pistol to blow out any debris Proceed in the opposite order to place all the removed parts back in their original position. DHOLLANDIA...
-
Page 43: Decals
The following decals are supplied with each new wheelchair lift, and should be affixed to the vehicle body during installation in the manner set forth in the adjacent drawings. The following decals are premounted by DHOLLANDIA on the wheelchair lift. -
Page 44: Decals On Inside Of Bus Near The Lift
DECALS ON INSIDE OF BUS NEAR THE LIFT The following decals are supplied loose with the wheelchair lift and shall by affixed by the installer near to the lift at a location clearly visible to the operator, preferably inside the bus to maximize longevity. EXAMPLE DHOLLANDIA... - Page 45 EXAMPLE DHOLLANDIA...
-
Page 46: Meaning Of Safety And Warning Signs
10 MEANING OF SAFETY AND WARNING SIGNS WARNING signs MANDATORY ACTION signs Overview and keep visual control over the working Contact your national DHOLLANDIA distributor. area of the wheelchair lift at all times. Consult the DHOLLANDIA website. General warning sign used to alert the user to potential hazards. - Page 47 Switch OFF the electrical power to the wheelchair lift via the main battery disconnect switch and / or cabin switch. This is an operation to be executed manually (as opposed to an electrical function controlled by means of one of the control units). DHOLLANDIA...
-
Page 48: Prescribed Torque Values
Therefore, it is essential that the mounting plates are installed following the instructions of this manual. Banjo Bolt Torque Specifications BSPP Metric Pounds Newton Pounds Newton Banjo Banjo Force - Metre Force - Feet Metre Bolt Bolt Feet (lbsf- (Nm) (lbsf-ft) (Nm) Size Size 10.5 24.5 136.5 DHOLLANDIA... -
Page 49: End Note
12 END NOTE DHOLLANDIA would like to thank you for using our products and leave you with this final notice and warning. Additional information about this wheelchair lift and many other DHOLLANDIA products is available at the following link: http://www.dhollandia.com/... -
Page 50: Appendix
13 APPENDIX 13.1 GENERAL TROUBLESHOOTING DIAGRAM DHOLLANDIA... -
Page 51: Toubleshooting: Functions Test
LIFT ON Battery voltage: WORKING 11-14 / 22-28V +12/24V DC SW1 PARKING BRAKE DOOR OPEN INTERLOCK Me power (5A) Light Buzzer Rbat EMG stop SWpower DHOLLANDIA... - Page 52 LIFT ON 11-14 / 22-28V WORKING +12/24V DC SW1 PARKING BRAKE DOOR OPEN INTERLOCK Me power (5A) Light Buzzer WORKING Rbat EMG stop SW power DHOLLANDIA...
-
Page 53: Troubleshooting: Positions Test
Rbat OUT/DEPLOY– SWpower: OFF +BAT 12/24V UNSTOW position Emergency stop: OFF UNSTOW (between STOW and Emergency Motor WORK position) Release (S0): OFF Battery voltage: 11-14 / 22-28V OUT/ DEPLOY – WORK position DHOLLANDIA... - Page 54 LIFT ON Battery voltage: 11-14 / +12/24V DC 22-28V SW1 PARKING BRAKE DOOR OPEN INTERLOCK Me power (5A) LIFT DOWN – WORK EMG stop position SWpower Light Rbat DHOLLANDIA...
-
Page 55: Datasheets Grease And Oil
13.4 DATASHEETS GREASE AND OIL Grease: o Sales code: K0505 o Sales code: UOV005 DHOLLANDIA...
Need help?
Do you have a question about the DH-CH101 and is the answer not in the manual?
Questions and answers