Table of Contents
Advertisement
Quick Links
BEFORE YOU BEGIN
Please read these instructions carefully to familiarize
yourself with the required tools, materials, and installation
sequences. Follow the sections that pertain to your
particular installation. This will help you avoid costly
mistakes. In addition to proper installation, read all
operating and safety instructions.
All information in these instructions is base upon the
latest product information available at the time of
publication. Kohler China reserves the right to make
changes in product characteristics, packaging, or
availability at any time without notice.
These instructions contain important care, cleaning, and
warranty information-please leave instructions for the
consumer.
REQUIRED TOOLS AND MATERIALS
Open end/adjustable wrenches
Tape measure
Basin Wrench
Pipe wrench
Square
Level
Pliers
Socket wrench with sockets
Screw driver
Seal tape
1206437-T01-A
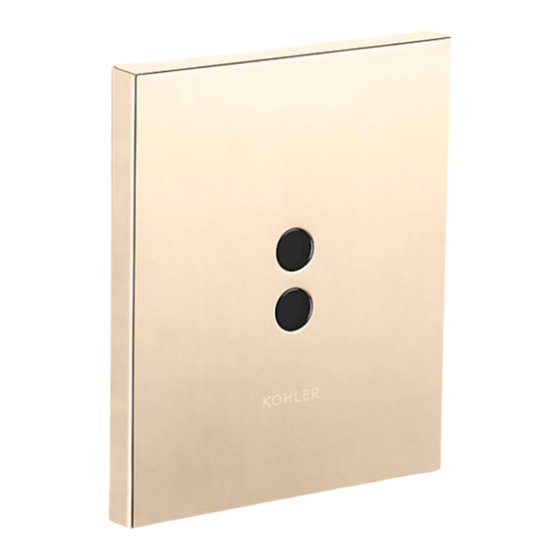
PSD URINAL SENSOR W/PSD TECHNOLOGY
8881T-VC01-BN/AF(0.5L&1L可调式/DC/
8881T-VC03-BN/AF(0.5L&1L可调式/AC/
安装之前
请仔细阅读本说明书,以便了解所需工具、材料及安装
程序。请遵照相关章节进行安装,以避免由于安装不当
而导致不必要的损失。除了有关部门正确的安装方法之
外,还务请阅读所有操作安全说明。
本说明书所含一切材料,均以印刷时所有的最新产品为
准。科勒中国公司保留随时更改产品特性、包装或供应
情况的权利,恕不另行通知。
本说明书也包含了有关护理、清洁及保养等重要资料-
请交予用户保存。
所需工具及材料
开口/活动板钳
卷尺
梅花板钳
管扳手
直角尺
水平尺
老虎钳
管钳子
十字螺丝刀
生料带
18 E
201206
PSD
小便器感应器
INSTALLATION INSTRUCTIONS
8881T-UC01-BN/AF(3L/DC/
8881T-UC03-BN/AF(3L/AC/
)
)
)
)
2012
2012
Advertisement
Table of Contents

Summary of Contents for Kohler 8881T-VC01-BN
- Page 1 All information in these instructions is base upon the 本说明书所含一切材料,均以印刷时所有的最新产品为 latest product information available at the time of 准。科勒中国公司保留随时更改产品特性、包装或供应 publication. Kohler China reserves the right to make 情况的权利,恕不另行通知。 changes in product characteristics, packaging, or availability at any time without notice.
-
Page 2: Sensor Specification
SENSOR SPECIFICATION 感应器规格 8881T-VC01-BN/AF(0.5L/直流型) 8881T-VC01-BN/AF(0.5L/DC) 8881T-VC03-BN/AF(0.5L/交流型) 8881T-VC03-BN/AF(0.5L/AC) 型 号 Model 8881T-VC01-BN/AF(1L/直流型) 8881T-VC01-BN/AF(1L/DC) 8881T-VC03-BN/AF(1L/交流型) 8881T-VC03-BN/AF(1L/AC) 8881T-UC01-BN/AF(3L/直流型) 8881T-UC01-BN/AF(3L/DC) 8881T-UC03-BN/AF(3L/交流型) 8881T-UC03-BN/AF(3L/AC) 2节5号碱性电池(AA x 2) 电 源 2 " AA" size alkaline batteries Power 220V AC 50/60Hz 220V AC 50/60Hz When water pressure is 0.18~0.55MPa., 0.18~0.55MPa. -
Page 3: Product Page
电磁阀 Valve Body Assy Connector 主体组件 连接件 Slurry Mold 灰浆模套 Flushing Control Stick Hex Pan 冲洗控制棒 2.5mm内六角扳手 1100331-SP-BN 1196535-SP-AF 1115769-SP 16306T-NA 1205586-SP 1205587-SP 8881T-VC01-BN 8881T-VC01-AF 8881T-VC01-BN 8881T-VC03-BN 8881T-VC01-BN 8881T-UC01-BN 8881T-VC03-BN 8881T-VC03-AF 8881T-VC01-AF 8881T-VC03-AF 8881T-VC01-AF 8881T-UC01-AF 8881T-UC01-BN 8881T-UC01-AF 8881T-UC01-BN 8881T-UC03-BN 8881T-VC03-BN... - Page 4 ROUGHING-IN 尺寸图 UNIT:mm 单位:毫米 K-4904T-ER K-4904T-ET K-4960T-ER K-4960T-ET K-5016T-YER K-5016T-YET K-4986T-ER K-18645T-Y-0 1206437-T01-A...
- Page 5 K-4978T-ER K-4978T-ET K-4904T-ER、K-4904T-ET、K-4986T-ER、K-5016T-YER、 8881T-VC01 8881T-VC03 K-5016T-YET、K-18645T-Y-0 K-4960T-ER、K-4960T-ET、K-18645T-Y-0、K-5016T-YER、K-5016T-YET 8881T-UC01 8881T-UC03 K-4978T-ER、K-4978T-ET Note: 注意: a. The dimensions above are just for reference. a. 以上尺寸仅供参考。 b. The connection take between the outlet connection b. 出水配件需另行选配。 and urinal is not supplied in this package. Please use K-2464T-NA as top inlet, use stainless 上进水配管选配K-2464T-NA,后进水配管请选用不...
-
Page 6: Installation
安装步骤 INSTALLATION 1 . Determine the installation location per rough-in dimensions. Chisel out a slot and install the supply tubing . Turn off the water supply. The depth of the slot is no less than 90mm, see the figure right for rough-in dimension requirement. Install bushing 适合安装... - Page 7 Please directly reference to Step 3 when installinig DC. Please match 16306T-NA AC power unit when installing AC. The way of installation is as below. CAUTION: Outlet downwards a. Outlet of AC power unit upward prohibited. Outlet upwards 出线朝下安装 出线朝上安装 b.
- Page 8 C. When installing the power unit on the ceiling, please AC Power Unit Ceiling 交流电源盒 layout bushing according to Fig.#4 and thread wire through 天花板 the bushing. Fig.#4: Connection sketch while installing power uint on the ceiling. Bushing 电工套管 CAUTION: One AC power unit can supply two sensors at most.
- Page 9 4. Tighten the slurry mold and valve box with short screws and Tiles then apply slurry into the service around the valve box. Lay Valve Box the tiles. 4. 用短螺钉将灰浆模套与阀盒旋紧后,用灰浆填埋冲洗阀盒体 四周槽道,张贴瓷砖。 Slurry Mold 5. While using DC power, take out the battery box from the back Screws side of cover.
- Page 10 0.5L&1L可调式 /直流型)、 注:仅适用于8881T-VC01-BN/AF( with flushing control stick, there will be once quick rinse after 0.5L&1L可调式 8881T-VC03-BN/AF( /交流型) you complete the 0.5L flush mode setting. NOTE: just for 8881T-VC01-BN/AF(PSD ECO 0.5&1L /DC)、 8881T-VC03-BN/AF(PSD ECO 0.5&1L /AC) 1206437-T01-A...
-
Page 11: Maintenance
MAINTENANCE 维护保养 Urinal Repair 修理小便器 修理小便器时,不必拆下感应器,只需要用电工胶布粘住 When repairing, you don t have to dismount the sensor. 感应窗口,您便可放心修理设备。 Cover the sensing window with tape and work with ease. NOTE Don t use very adhesive tape in case the scar 注意:不要用强力胶布,因为粘痕会难以清除。 will be hard to remove. Clean the Filter Screen If the flushing volume reclines sharply after installation or used for a long time with no cause from water pressure, the... -
Page 12: T T Roubleshooting
T T ROUBLESHOOTING Please make following checks before repair: Symptoms Probable causes Corrective actions 1. No power or mistake connected. 1. Check the power connect. No flushing 2. There is an object within the sensing distance. 2. Remove the object. (Indicator not flashing). - Page 13 I I MPORTANT CONSUMER INFORMATION 用户责任 Consurmer Responsibilities 1. 请勿敲击感应窗口。 1. Do not attack the sensor. 2. 感应器为电子器具,请勿直接用水冲洗。 2. Do not directly flush the sensor with water. The sensor is an electronic instrument. 3. 避免阳光或其它光源直接或发射进入感应窗口。 3. Do not let sunlight or other light source enter or be reflected into Sensor Window.


