Table of Contents
Advertisement
Quick Links
Advertisement
Table of Contents

Related Manuals for CAE Aria


Summary of Contents for CAE Aria
- Page 1 User Guide Your worldwide training partner of choice...
- Page 2 This document, including the information contained herein, is confidential and/or proprietary to CAE Inc., and shall not be reproduced or disclosed in whole or in part, or used for any purpose whatsoever without the prior written authorization of CAE Inc.
-
Page 3: Table Of Contents
CAE Maestro Software ........ - Page 4 Step 2: Connect the Manikin Power Cord to Aria....... .
- Page 5 Using the StethoSym ............81 ©2021 CAE 905K690052 v1.0...
- Page 6 Long-Term Storage ............94 Appendix A - Recommended Clinical Supplies ............95 ©2021 CAE 905K690052 v1.0...
-
Page 7: Cautions And Warnings
• Do not attempt to disassemble the simulator or service any of the electrical components without receiving instructions from Customer Service. • Do not operate the manikin in rain. Apply water to the manikin only in accordance with the supported clinical procedures explained in this guide. ©2021 CAE 905K690052 v1.0... -
Page 8: Product Use Warnings
• Do not use the manikin or equipment in locations where children are likely to be present. Latex The IV cannulation tubing in the left IV arm contains latex. The user may come into contact when changing out the IV tubing during routine maintenance. Users with latex sensitivity should use caution. ©2021 CAE 905K690052 v1.0... -
Page 9: Fluids System
Cautions and Warnings Fluids System For manikins such as Aria that are equipped with fluid systems: • Do not use theatrical blood in the bleeding system. • Only use small amounts of food coloring for urine or blood and flush the system when training is complete. - Page 10 • Do not short-circuit the positive (+) and negative (-) terminals. • Do not place the battery in a device with the positive (+) and negative (-) terminals in the wrong positions. • Do not solder a battery directly. ©2021 CAE 905K690052 v1.0...
-
Page 11: Potential Health Effects
(basic) materials and present a flammability hazard. Safety Measures Review the precautions for handling before replacing a battery utilizing guidance from CAE. Should exposure to hazardous battery components occur, or in the event of a fire, follow all local first aid measures and safety protocols. - Page 12 Batteries Shipped Independent of Batteries contained in or packed the Manikin with the Manikin UN No. U3480N No. 33480480 3481 UN Shipping Lithium-ion Batteries Name: Transport Hazard Class: Required Dangerous Goods Declarations must be completed. Documentation: Labeling: ©2021 CAE 905K690052 v1.0...
-
Page 13: Specifications
Specifications PECIFICATIONS All hardware and software needed for operating the simulator are provided with the shipment. ©2021 CAE 905K690052 v1.0... -
Page 14: Size And Weight
(10°C to 35°C) (-24°C to 45°C) non-condensing Battery Item Description Commercial product name RRC2054-2 Use of the substance/ Lithium-ion (Li-ion) battery preparation Additional information Battery-System: Lithium-ion Nominal Voltage: 14.4 V Nominal Capacity per battery: 6.90 Ah ©2021 CAE 905K690052 v1.0... -
Page 15: Power
Description Simulator Network, • Wireless: IEEE 802.11 g Instructor Tablet, • Security: WPA2 Patient Monitor • Bands Available: 2.4 GHz and 5.0 GHz WiFi Modules - • Wireless: IEEE 802.15.4 WPAN, Personal Area Network StethoSym, SymDefib ©2021 CAE 905K690052 v1.0... -
Page 16: Electrotherapy
CAEAria Specifications Electrotherapy Item Description Defibrillation • 20 to 200 Joules (Monophasic, Biphasic) Pacing • 20 mA to 180 mA ©2021 CAE 905K690052 v1.0... -
Page 17: Meet Aria
™ CAE Aria’s features allow for realistic training in emergency pediatric care. A wireless and tetherless patient simulator, CAE Aria helps future and current healthcare professionals practice the skills needed to build safety proficiency and expertise. - Page 18 • Chest compressions with detection and advanced CPR metrics • Bilateral carotid, brachial, radial and femoral pulses • Variable pulse strength • Library of cardiac rhythms • 4-lead ECG • Commercial ECG device compatibillity • Software-based 12-lead ECG ©2021 CAE 905K690052 v1.0...
- Page 19 • SymDefib for commercial defibrillator compatibility Live or Advanced) • External bleeding module for chest tube drainage and bleeding moulage • Simulated Patient Monitor • CAE Maestro Physiology • Additional standalone CAE Maestro licenses • CAE LearningSpace ©2021 CAE 905K690052 v1.0...
- Page 20 CAEAria Meet Aria THIS PAGE INTENTIONALLY LEFT BLANK ©2021 CAE 905K690052 v1.0...
-
Page 21: Equipment Overview
CAE Aria comes with standard equipment for each configuration. Full Body Wireless Manikin CAE Aria supports the standard healthcare requirements for pediatric patients, from assessment to performing basic clinical skills. Depending on the configuration you purchased, the manikin may include advanced features and capabilities. -
Page 22: Gown
The non-invasive blood pressure and pulse arm allows users to perform blood pressure readings using a modified blood pressure cuff, palpate radial and brachial pulses, and auscultate Korotkoff sounds using the CAE StethoSym. Pediatric BP Cuff T-Adapter A blood pressure cuff T-adapter is included with the Live and Advanced configurations, which can be attached to a clinical blood pressure cuff. -
Page 23: Live And Advanced Configurations
Instructor Tablet with CAE Maestro software CAE Maestro Software CAE Maestro software allows facilitators to control and monitor CAE patient simulators and is offered with Live and Advanced Ariaconfigurations only. Maestro allows you to run simulations “on ©2021 CAE 905K690052 v1.0... -
Page 24: Surface Go 2 Tablet
CAEAria Equipment Overview the fly” in Manual or Modeled mode, or you can run preconfigured Simulated Clinical Experiences (SCEs) in Manual mode. See the Maestro for Aria user guide for more information. CAE Maestro™ Software Surface Go 2 Tablet The Surface Go 2 provides the capabilities of a laptop in an ultra-portable tablet and comes with the Live and Advanced configurations. -
Page 25: Cae Stethosym
CAE SymDefib The CAE SymDefib™ box connects with a real defibrillator monitor. This allows for use of real electrical therapy for defibrillation, cardioversion, and pacing. One SymDefib is included with the Advanced manikin configuration. -
Page 26: Spo2 Finger Probe
To enhance the simulation experience, the Live and Advanced configurations offer optional and additional equipment is available for purchase. Optional Equipment CAE SymDefib (Live configuration only; included with Advanced configuration) External Bleeding Module Simulated Patient Monitor (CAE Maestro software controlled) -
Page 27: Setup
• Verify the content of each item in the container against the shipping paperwork to ensure you received the correct product and parts. • Keep original shipping materials, including boxes and foam. Warranty and repair items must be returned and shipped in their original packaging. ©2021 CAE 905K690052 v1.0... -
Page 28: Setup Preparation
• Plug in the tablet, manikin, and rechargeable accessories to a power source using only the power cords provided. Use the diagram provided in the Unpacking Your CAE Manikin to identify the designated cords associated with this equipment. -
Page 29: Step 1: Place The Aria Manikin In The Work Area
AC power outlet is located close to the workspace to recharge powered components. The Aria manikin comes preasssembled. It is recommended that two persons lift and move the manikin to the work area to avoid damage to the manikin. -
Page 30: Step 2: Connect The Manikin Power Cord To Aria
CAEAria Setup Step 2: Connect the Manikin Power Cord to Aria Remove the manikin power cord from the shipping container. Align the pins of the manikin power cord to the black power connection located at the manikin’s buttocks. Manikin Power Cord Pin Alignment Plug in the manikin power cord to the black power connection. -
Page 31: Step 4: Charge The Instructor Tablet
Allow the tablet to fully charge. Step 5: Charge the Accessories A CAE StethoSym will be provided with the Live and Advanced configurations, and the SymDefib will be provided with the Advanced configuration and is available as an option with the Live Configuraton. -
Page 32: Step 6: Power On The Aria Manikin
Green. When the battery capacity shown in Maestro is below 11%, the power light will be Red. Note: You can also view the manikin power status via the manikin power icon on the CAE Maestro run screen. - Page 33 Setup Aria Power Button LED Color Chart Power Button LED Color System State Flashing blue every second In boatloader mode with update Flashing blue every second three times In boatloader mode when there is no update Solid green immediately after bootloader mode...
-
Page 34: Step 7: Power On The Instructor Tablet
Setup Step 7: Power on the Instructor Tablet Ensure the tablet has been fully charged. Power on the tablet by pressing the power button on the top of the tablet. Tablet Power Button Tablet Power Button ©2021 CAE 905K690052 v1.0... -
Page 35: Step 9: Modify The Blood Pressure Cuff
4. Secure the tubing connectors with cable ties. 5. Use scissors to trim the cable ties. 6. Connect the extension from the long end of the T-shaped blood pressure adapter to the NIBP port on Aria’s right side. Modified Blood Pressure Cuff ©2021 CAE 905K690052 v1.0... -
Page 36: Step 10: Prime The Fluids Systems
1. Attach the IV tubing and empty IV bag to drain port on the manikin. 2. Remove cap on the IV port sit and inject 10 mL of fluid. Replace cap. 3. During simulation, attach the IV tubing and fluids to be infused. 4. Begin fluid infusion. ©2021 CAE 905K690052 v1.0... - Page 37 4. Slowly inject a minimum of 4 mL of distilled water until fluid drains into the overflow reservoir on the urinary module filling tool. 5. Disconnect the urinary module filling tool from the Urinary port. 6. Store the urinary module filling tool in a secure location. Priming the Genitourinary System ©2021 CAE 905K690052 v1.0...
- Page 38 CAEAria Setup THIS PAGE INTENTIONALLY LEFT BLANK ©2021 CAE 905K690052 v1.0...
-
Page 39: Aria Features
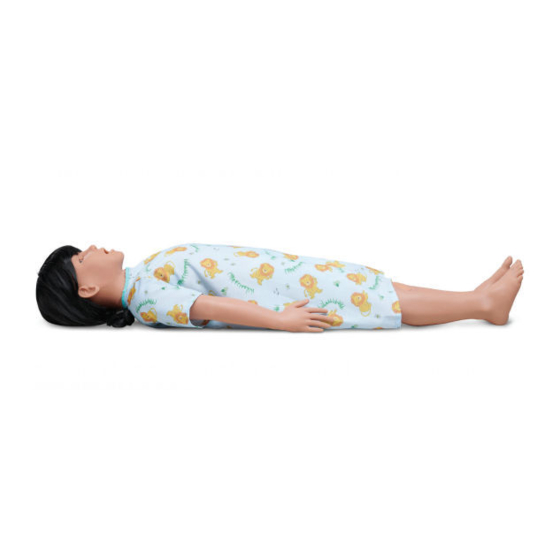
Features EATURES CAE Aria is a wireless and tetherless patient simulator that displays the physical characteristics of a seven-year old child. Aria enhances pediatric simulation-based education of healthcare workers by helping them to develop critical decision-making and patient care skills in a risk-free environment. -
Page 40: Respiratory System
In addition to these respiratory system features, the Advanced configuration includes the following features to enhance the fidelity of the simulator. Advanced Respiratory System Laryngospasms Pharyngeal Swelling Substernal Retractions Tongue Swelling Variable Bronchial Resistance Variable Chest Compliance ©2021 CAE 905K690052 v1.0... -
Page 41: Cardiovascular System
Fingerstick Blood Glucose Library of Cardiac Rhythms Variable Pulse Strength 4-Lead ECG waveforms can be viewed on a standard monitor and/or the Patient Status Display in the Patient Monitor of the software. Software-based 12-Lead dynamic ECG ©2021 CAE 905K690052 v1.0... -
Page 42: Gastrointestinal System
Bowel Sound Auscultation Genitourinary System The Aria manikin is provided with both male and female genitalia. The genitourinary system is designed for excretion of urine upon catheterization. For more information on changing the genitalia, see the Using Aria section of this user guide. -
Page 43: Simulated Clinical Experiences
Each SCE is comprised of a patient and the scenario. Aria includes ten preconfigured SCEs (Manual mode), or clinical simulations, that cover a range of events and crises. -
Page 44: Scenarios
Instructors may also modify events within a given scenario in real-time to increase or decrease event severity and shorten or prolong the duration of an event at any time during a simulation exercise. For instructions on modifying scenarios and creating new scenarios, refer to the Maestro for Aria User Guide. -
Page 45: Using Aria
Using Aria SING Once the simulator is assembled, the Aria manikin is ready for learners to practice and master new competencies, interventions, and skills during clinical scenarios. To create a fully immersive simulation experience with advanced intervention capabilities and realtime data feedback, the Aria simulator utilize instructor-led software with scenario programming capabilities. -
Page 46: Neurologic System Controls
ON by default. Can toggle to OFF if no pain response preferred. Note: With Convulsions enabled, the manikin’s eyes will remain open but on the Maestro run screen the image of the eyes will be blinking. ©2021 CAE 905K690052 v1.0... -
Page 47: Eyes
Using Aria Eyes SymEyes The simulator comes equipped with CAE SymEyes The blink mode, light reactivity, pupil diameter and blink speed of the simulator’s eyes can be controlled from the software. From the Run Screen, tap on the eyes or Eyes button to open the Eyes state screen. - Page 48 CAEAria Using Aria For more information on how to control the SymEyes, see the Maestro for Aria User Guide. CAE SymEyes ©2021 CAE 905K690052 v1.0...
-
Page 49: Respiratory System
• Maintain tracheostomy site Respiratory System Controls Aria uses both physical and mathematical models to achieve an extremely accurate simulation of respiration. Aria’s chest rises and falls, mimicking inspiration and expiration. Aria’s lungs also react realistically to intubation as well as to pathophysiologic states. - Page 50 Left to ON. Set Left Intraplerual Volume amount. Laryngospasm Closes the patient’s vocal cords and From the Run None required. prevents both ventilation and Screen, tap intubation. Respiratory and adjust Laryngospasm toggle. VIEW: Respiratory CONTROL: ON/OFF ©2021 CAE 905K690052 v1.0...
- Page 51 Screen, tap Respiratory and intubation, but allows mask adjust Swollen ventilation of the patient’s lungs, thereby creating a “cannot intubate, Tongue toggle. can ventilate” scenario. VIEW: Respiratory CONTROL: ON/OFF ©2021 CAE 905K690052 v1.0...
-
Page 52: Airway Management
• Laryngopharynx Intubation The upper airway of the Aria manikin is designed to allow for intubation and laryngoscopy. Direct laryngoscopy as well as oral and nasal tracheal intubation can be performed using devices such as endotracheal tubes, nasopharyngeal airways, and oropharyngeal airways. - Page 53 To protect the airway, lubricate the adjunct prior to insertion using the silicone oil spray provided. Use ONLY the provided silicone oil spray to lubricate the adjunct. NEVER use a water-based lubricant, which can cause residue damage. ©2021 CAE 905K690052 v1.0...
-
Page 54: Right Mainstem Intubation
SCE Event log. Right mainstem is not logged until the first ventilation is performed. Right Mainstem Intubation Indicator CAE Maestro Airway Avatar - Right Mainstem Intubation Indicator ©2021 CAE 905K690052 v1.0... -
Page 55: Laryngospasm
Using Aria Laryngospasm The Aria Advanced configuration comes with a software-controlled laryngospasm feature to increase the difficulty of intubationand can be toggled on or off. To activate the laryngospasm feature: 1. Enable Laryngospasms in the Maestro software. Tap the Respiratory icon on the SCE run screen. -
Page 56: Tracheostomy Tube Placement And Suctioning
2. Prime the airway reservoir using silicone oil spray. 3. Place the tracheostomy tube into the tracheostomy site and secure it in place. Tracheostomy Tube Placement and Suctioning 4. After the simulation, remove the tracheostomy tube and replace the crico neck skin plate. ©2021 CAE 905K690052 v1.0... -
Page 57: Chest Excursion
During ventilation (BVM, endotracheal intubation, etc.), the chest will rise with sufficient ventilation volume. Aria presents with spontaneous chest excursion that simulates a patient breathing without the required external ventilation. The following chest excursion parameters can be modified in Maestro: •... -
Page 58: Ventilation
Laryngeal Mask Airway (LMA) Ventilation Ventilator Support Aria supports basic functionality of a ventilator. Low levels or PEEP (5-10) with normal volume (7-10 ml/kg depending on PEEP) can be supported. Reasonable lung compliances and resistances are supported for the scenarios of PARDS and Pneumonia as well as variable airway resistance for obstructed airway. -
Page 59: Cricothyrotomy
Using Aria Aria supports a maximum ventilation of approximately 220 ml with a PEEP of 0. This volume will decrease when PEEP is used. Note: The Advanced configuration only supports asynchronous volume and pressure controlled modes of mechanical ventilation. Cricothyrotomy Before performing a needle cricothyrotomy: 1. - Page 60 Maestro software, or the chest rise is not observed. When finished using the Cricothyrotomy feature, remove the red tape and use alcohol º to clean the glue residue from the surface. Allow to dry. ©2021 CAE 905K690052 v1.0...
-
Page 61: Pneumothorax (Needle Decompression)
By inserting a needle into the second intercostal space, mid-clavicular line, the sound of air being released can be heard and the intrapleural volume is reduced. Chest excursion and breath sounds automatically resume on the affected side. Aria Needle Decompression Chest Tube To perform a chest tube insertion: 1. -
Page 62: Cardiovascular System
For supported chest tube size, see Appendix A - Recommended Clinical Supply Sizes. Cardiovascular System Aria includes cardiovascular features that allow learners to practice basic assessment and emergency life support skill sets. Learners can: • Palpate pulses •... -
Page 63: Cardiovascular System Controls
Using Aria Cardiovascular System Controls With Aria’s Cardiovascular system, users can replicate the clinical signs associated with cardiac activity, including palpable pulses, heart sounds, and electrical activity. Cardiovascular System Controls Anatomy, Clinical Interventions, Patient Software Control Manual Control Physiology and Monitoring and Scenarios. -
Page 64: Pulses
CAEAria Using Aria Pulses Aria includes bilateral pulses at the following locations: • Carotid • Brachial and Radial • Femoral • Popliteal and Dorsalis Pedis (Advanced configuration) Each pulse location represents a zone. Settings of a pulse will affect the zone if both zones are touched at the same time. -
Page 65: Iv Administration
IV Administration There are two IV sites on Aria’s left arm, located on the dorsum of the hand and the antecubital fossa. Each IV site has a fill/drain port. The sites are filled and drained through tubing running from the IV site up to the left shoulder. - Page 66 For instructions on how to prime and fill the IV sites, see the Setup section of this user guide. For instructions on how to flush and drain the IV sites, see the Care and Maintenance section of this user guide. ©2021 CAE 905K690052 v1.0...
-
Page 67: Iv Cannulation
IV Cannulation WARNING If flashback does not occur, do NOT inject any fluid and remove the needle immediately. Repeat the priming directions and ensure you have injected the needle properly and into the simulated vein. ©2021 CAE 905K690052 v1.0... -
Page 68: Intramuscular (Im) Subcutaneous (Sq) Injection
Using Aria Intramuscular (IM) Subcutaneous (SQ) Injection Aria supports IM/SQ injection of the left humeral site located on Aria’s left arm and the left vastus lateralis site located on Aria’s left thigh. Note: The IM/SQ pads can sustain multiple injections and can be removed and replaced after each injection to empty fluids. -
Page 69: Intraosseous (Io) Cannulation And Administration
Using Aria Intraosseous (IO) Cannulation and Administration Aria also allows for humeral and tibial intraosseous (IO) cannulation. The designated IO sites are located on Aria’s left shoulder and left leg . To remove the IO puck: 1. Pull the IO puck out to remove it. -
Page 70: Chest Compressions
SCE History. For more information on how to use the CPR Monitor, see the Maestro for Aria User Guide. On Aria, a 4-lead ECG is emitted from the appropriate positions for display on a standard monitor. - Page 71 Using Aria Connecting ECG Contacts To produce ECG signals on a monitor, connect the lead unit to the ECG contacts located on the manikin. ECG Connection ©2021 CAE 905K690052 v1.0...
-
Page 72: Defibrillation, Cardioversion, And Pacing
The SymDefib is included with the Advanced configuration and can be added to the Live configuration. Simulated Defibrillation For instructions on administering defibrillation through the software, refer to the Maestro for Aria User Guide. Commercial Defibrillation The manikin is designed to safely absorb the energy discharged from commercial defibrillators through the SymDefib. - Page 73 Coarse ventricular fibrillation and high-rate ventricular tachycardia cardiac rhythms are automatically recognized as “shockable” rhythms on AEDs. • With each defibrillation, Aria automatically records the amount of energy discharged and the time defibrillation was performed. The simulated patient response to defibrillation is determined by the scenario script or instructor intervention.
- Page 74 CAEAria Using Aria Note: If using the SymDefib battery to power the SymDefib device, make sure to charge the SymDefib prior to use. Charging the SymDefib ©2021 CAE 905K690052 v1.0...
- Page 75 When connected, the SymDefib begins to display an ECG signal on the monitor and the status light turns a solid green. Note: The SymDefib was paired to the simulator in the factory and should automatically connect wirelessly. ©2021 CAE 905K690052 v1.0...
- Page 76 When demonstrating proper pad placement, learners should attach the SymDefib pads in the appropriate locations on the manikin: one pad on the right side of the chest below the collarbone and the other pad on the left side of the chest. Attach the SymDefib Electrode Pads ©2021 CAE 905K690052 v1.0...
-
Page 77: Blood Pressure
10). For more information, see the Maestro for Aria User Guide. Blood Pressure Aria supports non-invasive blood pressure measurements, and systolic and diastolic readings can be obtained and manipulated through the software. Systolic and Diastolic Blood Pressure To manually adjust the systolic and/or diastolic blood pressure: 1. - Page 78 To get a blood pressure reading: 1. Connect the extension from the T-fitting on the blood pressure cuff adapter to the NIBP port on Aria’s right side. Pediatric BP T-Fitting Adapter Connection 2. Take the non-invasive blood pressure reading using the return-to-flow technique.
-
Page 79: Blood Glucose Fingers
Using Aria Blood Glucose Fingers Aria includes the ability to perform fingerstick blood glucose testing. The second and third fingers on the left hand can be removed and filled with fluid. To fill the glucose fingers with the simulated test blood: 1. - Page 80 4. Prepare glucometer by inserting test strip into device (not included). 5. Place lancet against the window area on the glucose finger and trigger the needle. (Recommended to use the lowest setting on the lancet device). Place Lancet on Glucose Finger ©2021 CAE 905K690052 v1.0...
- Page 81 2. Insert a 1 ml syringe and needle into the bottom opening of the finger. Stop when you hit the plastic stop wall and pull back slightly. 3. Withdraw as much air or fluid as possible with the syringe and remove syringe. ©2021 CAE 905K690052 v1.0...
-
Page 82: Spo2 Finger Probe
Patient Monitor will display the pethysmogram. To connect and attach the SpO finger probe to Aria: 1. Locate the SpO port on Aria’s left arm pit. 2. Connect the SpO probe to the SpO port. 3. Place the SpO probe on Aria. -
Page 83: Gastrointestinal System
Note: Feeding tube is not included. Genitourinary System Aria is configured for male and female genitalia, either of which allows for the insertion of a urinary catheter. The genitourinary system also provides for the excretion of urine. The simulator allows for the insertion of a 10 Fr 3 ml balloon urinary catheter. -
Page 84: Urinary Catheterization
4.5 inches (11.43 cm) for the male genitalia to achieve urine flow. Urinary Catherization Changing the Simulator’s Genitalia Aria comes with male and female genitalia. Note: Prop the manikin’s buttocks up with a pillow or folded sheet/towel to allow for easier access to the manikin’s genitalia. - Page 85 2. Gently pull the genital insert downward, about halfway until the bottom plug is visible. Pulling the Genital Insert Downward 3. With the bottom plug visible, grip the bottom of the genital insert and pull outward to remove it. Removing the Genital Insert ©2021 CAE 905K690052 v1.0...
-
Page 86: Sounds
A variety of simulated sounds are available to enhance realism. Sounds are controlled through the instructor software. To auscultate sounds on the Aria manikin, be sure to locate a stethoscope and set up the StethoSym prior to beginning a simulation. -
Page 87: Using The Stethosym
1. Press the power button on the side of the StethoSym module. The unit powers on and the indicator light should be Green until it synchronizes with the manikin and then turns Blue. The indicator light flashes Red if the battery is low. ©2021 CAE 905K690052 v1.0... - Page 88 Sounds controls on Maestro. 3. To turn the StethoSym off, press the power button. Note: The following diagram of the internal chest identifies the RFID tag locations for using the StethoSym. Aria RFID Tag Locations Tag # Location Sound Heart: Pulmonary Valve...
- Page 89 Orange light turns off when the unit is fully charged. Green Unit is on and fully charged. Flashing Red Battery level is low and needs to be charged. Blue Unit is on and receiving signal from manikin. ©2021 CAE 905K690052 v1.0...
- Page 90 CAEAria Using Aria THIS PAGE INTENTIONALLY LEFT BLANK ©2021 CAE 905K690052 v1.0...
-
Page 91: Care And Maintenance
Following the use of the simulator, make sure all components are properly handled and correctly removed or placed into storage. Note: Do not attempt to open or repair any simulator components with out authorization from CAE Customer Service or their representative. Doing so may void the warranty. Many hardware components within the simulator and Instructor Workstation are not user-serviceable. -
Page 92: Breakdown
CAEAria Care and Maintenance Breakdown To ensure your simulator remains in good working condition, follow the CAE breakdown procedures below prior to storing. Break down the Aria Simulator Clean the Manikin. Flush and Drain the Left Arm IV sites. Maintain IM Injection Site. -
Page 93: Step 3: Maintain Im Injection Site
Step 3: Maintain IM Injection Site If the simulation included use of IM injection equipment, perform the following steps prior to storing the manikin: 1. Remove the pad from the injection site. Removing the IM Pad ©2021 CAE 905K690052 v1.0... - Page 94 Removing Sponge from the IM Pad 3. Squeeze all the fluid from the sponge and let air dry. Squeezing Fluids from the Sponge 4. When dry, replace the sponge back inside pad. 5. Replace the pad into the injection site. ©2021 CAE 905K690052 v1.0...
-
Page 95: Step 4: Flush And Drain The Jugular, Tibial Io And Gastrostomy Sites
Remove syringe. e. Replace cap on the jugular site, remove IO access needle from the IO site, remove MicKey connection tube from the gastrostomy site. ©2021 CAE 905K690052 v1.0... -
Page 96: Step 5: Flush And Drain The Urinary System
Maestro software. Step 7: Flush and Drain the Bleeding System Note: These instructions pertain only to an Aria manikin equipped with the bleeding system option. To flush the bleeding system: 1. If red food coloring was used, rinse out the external bleeding tank. -
Page 97: Step 8: Power Off The Instructor Tablet
Note: The power button will flash blue every 30 seconds to indicate the low power mode is enabled. If the button no longer flashes, the battery has been turned off and external power will need to be plugged in to charge and operate the system. ©2021 CAE 905K690052 v1.0... -
Page 98: Maintenance
Care and Maintenance Maintenance Simple care and maintenance help to ensure that Aria stays in good working condition. Many problems are caused by inadequate or improper maintenance. Perform a thorough check of the various components each time the simulator is used. Failure to follow these guidelines can lead to damage not covered by warranty. -
Page 99: Short-Term Storage
• Keep the manikin and battery in a cool location to extend the life and capacity of the battery. • For battery longevity, adhere to this storage guidance: Keep the simulator and battery in a cool location to extend the life and capacity of the º battery both in storage and during use. ©2021 CAE 905K690052 v1.0... -
Page 100: Long-Term Storage
• Store the manikin in the container the simulator arrived in and refer to the Unpack and Repack Manual (this document also was included when the simulator was shipped). Aria supports storage up to twelve months. After that period of time, the user will need to charge the simulator again. -
Page 101: Appendix A - Recommended Clinical Supplies
A - R PPENDIX ECOMMENDED LINICAL UPPLIES The following clinical supply sizes are recommended for use with Aria. Other sizes may cause damage to Aria and should not be used. Recommended Clinical Supply Sizes Urinary Catheter 10 Fr, 3ml balloon... - Page 102 For more information about CAE products, contact your regional sales manager or the CAE distributor in your country, or visit caehealthcare.com. Tel +1 941-377-5562 or 866-233-6384 For customer service, please contact CAE. Customer Service Headquarters - United States Monday - Friday from 7:00 a.m. to 6:00 p.m. ET Phone 1-866-462-7920 Email: srqcustomerservice@cae.com...
Need help?
Do you have a question about the Aria and is the answer not in the manual?
Questions and answers
how to switch out aria genitalia
To switch out genitalia on CAE Aria:
1. Remove the current genital insert by pulling it outward.
2. Flex the bottom of the desired genital insert.
3. Direct it into the frame.
4. Push the insert into place until it fits snugly into the fittings.
This answer is automatically generated