Table of Contents
Advertisement
Quick Links
Advertisement
Table of Contents

Subscribe to Our Youtube Channel
Related Manuals for CAE SimEquip


Summary of Contents for CAE SimEquip
- Page 1 CAE SimEquip Getting Started Guide...
- Page 2 This document, including the information contained herein, is confidential and/or proprietary to CAE Inc., and shall not be reproduced or disclosed in whole or in part, or used for any purpose whatsoever without the prior written authorization of CAE Inc.
-
Page 3: Table Of Contents
Step 6. Launch SimEquip Software ........ - Page 4 Upgrading SimEquip ........
-
Page 5: Introduction
These tools can be used for complex Simulated Clinical Experiences, improving training in both mobile and bedside applications. SimEquip is based on CAE’s Maestro software platform allowing users to practice subject-specific techniques and methods in ventilation, anesthesia, and cardiac resuscitation with patient simulators or standalone devices. -
Page 6: Virtual Equipment
• Athena • Juno • Embody (CAE’s virtual patient) Note: Patient simulators are sold separately from the SimEquip system. Embody is included with the Maestro standalone package. Virtual Equipment CAE SimEquip offers virtual equipment that may be used during simulation, providing user interfaces that mirror authentic medical equipment. -
Page 7: Simequip Software
• Setup • Appendix A - Troubleshooting • Appendix B - Software Upgrades For further information on using the SimEquip software and Virtual Equipment applications, see the SimEquip User Guide which may be found on the CAE website at https://caehealthcare.com/support/ user-guides/ ©2021 CAE 905K720652 v1.0... - Page 8 CAEProduct Introduction THIS PAGE INTENTIONALLY LEFT BLANK ©2021 CAE 905K720652 v1.0...
-
Page 9: Cautions And Warnings
AUTIONS AND ARNINGS Please read and understand these cautions and warnings before you begin using SimEquip. General • When unpacking equipment for the first time, use box cutters carefully to protect both the packaging and the product. • Be careful when unpacking the Medical Cart. There may be sharp metal corners and edges. -
Page 10: Ergonomics
• Viewing a monitor screen for extended periods of time may result in eye strain. • Lock the caster wheels on the medical cart to ensure proper orientation of monitors, display, and buttons. Equipment misuse and ergonomic injuries may result from improper setup. ©2021 CAE 905K720652 v1.0... -
Page 11: Setup
Setup ETUP Before Setting Up SimEquip Proper operation requires correct configuration. Before setting up the system, keep in mind these basic guidelines: • Read and understand the Cautions and Warnings in the beginning of this guide. • Do not power on any components until instructed in the text. -
Page 12: Portable Simulation Setup Steps
Connect to WiFi: • Using a Patient Simulator or • Standalone - Setup the Router Launch Maestro software. Launch SimEquip software. Step 1. Remove Equipment from Boxes Tools required: • Box Knife - suggested for opening cardboard boxes WARNING: Be careful if using knives to open boxes, to prevent personal injury or damage to equipment. -
Page 13: Step 2. Connect Breathing Circuit Or Medical Cables
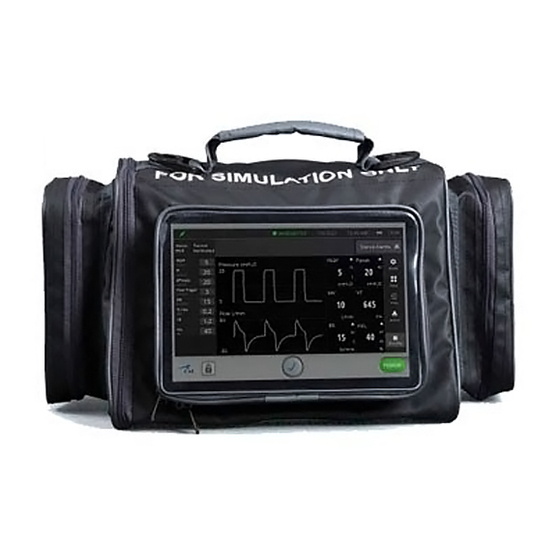
• EtCO Nasal Sample Line (Optional) To assemble the Defibrillator: 1. Unzip the front pocket on the Transport Bag and slide the SimEquip Surface Go 2 tablet out of the pocket. Slide Out SimEquip Tablet 2. Plug the power cord into the tablet. Slide the tablet back into the pocket and zip the pocket closed, leaving the power cord exposed. - Page 14 7. Secure the 3-lead ECG cable by passing the connector end of the cable through the elastic loop and inside the middle compartment of the Transport Bag. 8. Repeat the steps 3 and 4 for the SpO Probe. Defibrillator Assembled ©2021 CAE 905K720652 v1.0...
- Page 15 Setup CAE SimEquip AED To assemble the AED, follow the same steps for assembling the Defibrillator, eliminating the 3-Lead ECG cable. AED Assembled ©2021 CAE 905K720652 v1.0...
- Page 16 CAESimEquip Setup CAE SimEquip Transport Ventilator The Transport Ventilator includes: • Transport Bag • Breathing Circuit with Non-invasive Mask or Endotracheal Tube • Filter • O Hose • SpO Probe • EtCO Sample Line Transport Ventilator Unassembled The Transport Ventilator uses a breathing circuit. To assemble the breathing circuit: 1.
- Page 17 Line Breathing Circuit Assembled with Non-Invasive Mask To assemble the Transport Ventilator: 1. Unzip the front pocket on the Transport Bag and slide the SimEquip Surface Go 2 tablet out of the pocket. Slide Out SimEquip Tablet 2. Plug the power cord into the tablet. Slide the tablet back into the pocket and zip the pocket closed, leaving the power cord exposed.
- Page 18 12. Attach the exposed end of the O hose (outside of the bag) to a simulated oxygen source. WARNING: Never attach the hose to a real O source. The medical gas hoses included with SimEquip are intended for simulation purposes only. ©2021 CAE 905K720652 v1.0...
-
Page 19: Step 3. Power On Equipment
Reference the patient simulator User Guide if there is difficulty locating the power switch. 2. If this is the first time running SimEquip, it may be necessary to update Maestro on the patient simulator. See Appendix B - Software Upgrades for more information on upgrading. - Page 20 For example, the Ares network name is ARE00XXXX (where XXXX is the last 4 digits of Ares’ serial number and is found on a label attached to Ares’ side). ©2021 CAE 905K720652 v1.0...
- Page 21 Setup The simulator network The Network Window d. Tap the simulator network. The connection options appear in the Network window. ©2021 CAE 905K720652 v1.0...
- Page 22 CAESimEquip Setup Tap the simulator network The Network Window e. Tap the Connect automatically box. f. Tap Connect. The Simulator Network The Enter a network security key window appears. ©2021 CAE 905K720652 v1.0...
- Page 23 1. Prior to beginning a simulation, check the power level on the battery, it may need to be recharged. 2. Power on the router by plugging the Micro USB cable from the battery (or to the computer if using the Medical Cart) into the power port of the router. ©2021 CAE 905K720652 v1.0...
- Page 24 3. From the home screen on the tablet, tap the Network icon located in the lower-right corner of the screen in the taskbar. The Network window appears. The WiFi button The Network Window 4. Tap WiFi button to turn on WiFi (button turns blue). ©2021 CAE 905K720652 v1.0...
-
Page 25: Step 5. Launch Maestro
• Patient Simulator - If using a patient simulator, Maestro is installed on the tablet that is used with the simulator. • Standalone - When using the standalone with SimEquip, Maestro is installed on the Instructor tablet included with the standalone package. - Page 26 Note: The Transport Ventilator, Ventilator, and Anesthesia Machine require Modeled mode. Run on the fly (Modeled) The Patient Setup prompt appears. Select Gender 3. Select Male or Female. 4. Tap the Start button. The Run Screen appears. Maestro Run Screen ©2021 CAE 905K720652 v1.0...
-
Page 27: Step 6. Launch Simequip Software
Step 6. Launch SimEquip Software To launch SimEquip: Using the tablet that is in the Transport Bag, tap the CAE SimEquip icon on the desktop screen. The SimEquip Icon The SimEquip app opens and the SimEquip Home screen appears. Virtual equipment for which licenses are activated, will be displayed on the Home screen. -
Page 28: Bedside Medical Cart Simulation Setup Steps
Power on equipment. Connect to WiFi: • Connect to the Patient Simulator WiFi or • Standalone - Setup the Router Launch CAE Maestro. Launch CAE SimEquip software. Launch CAE Patient Monitor (applicable for Anesthesia Machine only). ©2021 CAE 905K720652 v1.0... -
Page 29: Step 1. Remove Equipment From Boxes
2. Additional equipment is shipped in cardboard boxes. Open the boxes. Do not remove the monitors from the boxes until after attaching the VESA monitor mounts to the monitors (see Step 2 Attach Monitors to Cart). ©2021 CAE 905K720652 v1.0... - Page 30 3. All other items (with the exception of the monitors) from the smaller boxes may be placed on a table in the assembly area. Dual Monitor Mounting Bar Vertical Support Column Cart Front Panel Articulating Arm Platform Caster Wheel Lock Medical Cart Unassembled Anesthesia Machine - Front ©2021 CAE 905K720652 v1.0...
- Page 31 IMPORTANT: Lock the caster wheels on the cart so that the cart remains stable for the duration of the setup process. Note: Do NOT plug the power cord into the outlet until the setup steps are complete. ©2021 CAE 905K720652 v1.0...
-
Page 32: Step 2. Attach Monitors To Cart
1. Ventilator Configuration - One Monitor: Open the box labeled “Monitor”, leaving the monitor in the box. Anesthesia Machine - Two Monitors: Open the box labeled “Monitor B”? 2. Remove the plastic bag with the VESA mount and hardware from the foam packing. VESA Mount and Screws ©2021 CAE 905K720652 v1.0... - Page 33 6. Insert the screws through the back of the VESA mount hardware. Using the Phillip’s Head screwdriver, connect the VESA mount to the monitor by tightening the screws. 7. If there are two monitors, repeat steps 1-6 for “Monitor A”. 8. Remove the monitor(s) from the box. ©2021 CAE 905K720652 v1.0...
- Page 34 Note: It is important to place the monitors on the appropriate side of the medical cart, to allow access to the computer ports on Monitor “A”. 10. Place the additional washer and screw under the VESA mount bracket and attach to the support column (or bar). ©2021 CAE 905K720652 v1.0...
- Page 35 2. Plug the monitor display cord from the Medical Cart into the Monitor display port. 3. Plug the Router USB cord (white) from the Medical Cart into the USB port on the computer. Router USB to Computer Connection ©2021 CAE 905K720652 v1.0...
- Page 36 Monitor Power Display Monitor Ports 2. Plug the USB cable from the Medical Cart into the USB port. 3. Plug in the power cord from the Medical Cart to the power port. Connections - Monitor B ©2021 CAE 905K720652 v1.0...
- Page 37 Note: Router cables are included with the Medical Cart, regardless if running standalone and using a router, or if using a patient simulator where there is no external router. 6. Plug the power cords from the Medical Cart into the appropriate port on the monitor. ©2021 CAE 905K720652 v1.0...
- Page 38 CAESimEquip Setup Connections - Monitor A ©2021 CAE 905K720652 v1.0...
-
Page 39: Step 3. Attach Articulating Arm
3. From the underside of the platform, insert the eyebolt into the hole in the platform and further into the hole in the articulating arm. 4. Secure the arm by threading and tightening the nut on the end of the eyebolt. Eyebolt Under Platform on Installed Articulating Arm ©2021 CAE 905K720652 v1.0... -
Page 40: Step 4. Connect Medical Attachments And Hoses
The connection of limbs and / or cables will be determined by the type of simulation that is running and the intended use of virtual equipment. This section will describe how to connect the breathing circuits, medical attachments, and hoses for medical gases. CAE SimEquip Ventilator Ventilator Medical Attachments Type... - Page 41 Medical Cart by gently twisting the fitting to secure. d. Place the breathing circuit limbs inside the articulating arm support. e. Place the EtCO sample line in the articulating arm support. ©2021 CAE 905K720652 v1.0...
- Page 42 Oxygen source. WARNING: Never attach the hose to a real O source. The medical hoses included with SimEquip are intended for simulation purposes only. Back of Medical Cart - Ventilator Configuration Connected - USA Green Shown 6.
- Page 43 Medical hoses for the Anesthesia Machine may connect in the front or back of the Medical Cart, depending upon the type of hose. Connect the hoses as desired for the intended simulation. WARNING: Never attach the hoses to a real gas source. The medical hoses included with SimEquip are intended for simulation purposes only.
- Page 44 Place the EtCO sample line in the articulating arm support. 4. Attach the SpO probe by aligning the notch and pushing in on the fitting. Wrap the excess cord around the cord hook on the Medical Cart. ©2021 CAE 905K720652 v1.0...
- Page 45 10. Attach the Nitrous Oxide hose to the N O port in the back of the Medical Cart by twisting the fitting. Attach the opposite end of the Nitrous Oxide hose to a simulated Nitrous Oxide source. ©2021 CAE 905K720652 v1.0...
-
Page 46: Step 5. Power On Equipment
Reference the patient simulator User Guide if there is difficulty locating the power switch. 2. If this is the first time running SimEquip, it may be necessary to update Maestro on the patient simulator. See Appendix B - Software Upgrades for more information on upgrading. - Page 47 Router USB to Computer Connection 2. At the back of the Medical Cart casing, gently pull the opposite end of the USB cable through the access hole and plug into the USB port on the router. ©2021 CAE 905K720652 v1.0...
- Page 48 3. Leaving all Velcro strips attached to the back of the router, remove the transparent film from the top Velcro strip. Affix the Velcro to the back of the cart, by gently applying pressure to the router in the desired position. USB to Router Connection ©2021 CAE 905K720652 v1.0...
-
Page 49: Step 7. Launch Maestro
• Patient Simulator - If using a patient simulator, Maestro is installed on the tablet that is used with the simulator. • Standalone - When using the standalone with SimEquip, Maestro is installed on the Instructor tablet included with the standalone package. - Page 50 Note: The Transport Ventilator, Ventilator, and Anesthesia Machine require Modeled mode. Run on the fly (Modeled) A prompt to select gender appears. Patient Setup Window 3. Select Male or Female. 4. Tap the Start button. The Run Screen appears. Maestro Run Screen ©2021 CAE 905K720652 v1.0...
-
Page 51: Step 8. Launch Simequip Software
SimEquip Home Screen Equipment applications for each software license purchased will appear on the center of the Home screen. On the left panel, the Connectivity status will appear green, indicating that SimEquip is connected to a WiFi. Connectivity - Connected Status... -
Page 52: Step 9. Launch Patient Monitor
Double-tap the Patient Monitor icon and the Patient Monitor screen appears. CAE Patient Monitor In the event the Patient Monitor launches and the window is overlapping the SimEquip application window, drag the Patient Monitor window to the opposite monitor display. - Page 53 Setup To setup Patient Monitor on the Instructor Device: After attempting to launch the Patient Monitor, the Connection screen will appear. Connection Screen - Attempting to Connect The Connection Failed message will appear. Connection Failed Message ©2021 CAE 905K720652 v1.0...
- Page 54 2. Enter in the IP address for the Instructor tablet. Enter the IP address for Instructor Tablet To identify the IP address: a. Tap the Network icon located in the lower-right corner of the screen in the taskbar. ©2021 CAE 905K720652 v1.0...
- Page 55 Setup b. Tap Properties. The IP Address will be represented by the IPv4 address. Properties 3. After entering the IP address, click on the Connect button. 4. Reattempt to launch the Patient Monitor. ©2021 CAE 905K720652 v1.0...
- Page 56 CAESimEquip Setup THIS PAGE INTENTIONALLY LEFT BLANK ©2021 CAE 905K720652 v1.0...
-
Page 57: Appendix A - Troubleshooting
A - T PPENDIX ROUBLESHOOTING This Troubleshooting section addresses some common concerns and inquiries. For any questions not addressed here, please contact CAE Healthcare Customer Service. Contact information is provided on the last page of this guide. Connection Issues Connection Failed If the Connection Failed message is displayed: •... -
Page 58: Simulator Manual Connection
• Make certain that the Maestro software launched and a simulation is running. Simulator Manual Connection Warning Messages Maestro Warning If the Maestro Warning message is displayed: • Make certain that the Maestro software launched and a simulation is running. Warning Message - Maestro Simulation ©2021 CAE 905K720652 v1.0... -
Page 59: Simulation Not Compatible
• Patient parameters in Maestro may be changed to use the selected equipment. See the Setup the Patient section of this User Guide which applies to the equipment selected for the simulation. • Select a different preconfigured SCE, with different patient parameters. Warning Message - Simulation Not Compatible ©2021 CAE 905K720652 v1.0... - Page 60 CAESimEquip Appendix A - Troubleshooting THIS PAGE INTENTIONALLY LEFT BLANK ©2021 CAE 905K720652 v1.0...
- Page 61 Upgrading SimEquip When updates are provided for the SimEquip application and the SimEquip computer is connected to the Internet, the software will automatically detect an update. If the SimEquip computer has been disconnected from the Internet for a period of time, it is suggested to check for updates. The status of the software will be reflected on the SimEquip About window.
- Page 62 For more information about CAE products, contact your regional sales manager or the CAE distributor in your country, or visit caehealthcare.com. Tel +1 941-377-5562 or 866-233-6384 For customer service, please contact CAE. Customer Service Headquarters - United States Monday - Friday from 7:00 a.m. to 6:00 p.m. ET Phone 1-866-462-7920 Email: srqcustomerservice@cae.com...
Need help?
Do you have a question about the SimEquip and is the answer not in the manual?
Questions and answers