Table of Contents
Advertisement
Advertisement
Table of Contents

Related Manuals for CAE Ares


Summary of Contents for CAE Ares
- Page 1 User Guide Your worldwide training partner of choice...
- Page 2 This document, including the information contained herein, is confidential and/or proprietary to CAE Inc., and shall not be reproduced or disclosed in whole or in part, or used for any purpose whatsoever without the prior written authorization of CAE Inc.
-
Page 3: Table Of Contents
Surface Go Tablet ............18 ©2020 CAE 905K640152 v1.1... - Page 4 Contents CAE Maestro Command and Control Software ....... . .18 Advanced and Complete Configuration .
- Page 5 System Tools ............. . 53 Using Ares ........................55 Neurologic System .
- Page 6 Long-Term Storage ............93 Appendix A - Recommended Clinical Supplies ............95 ©2020 CAE 905K640152 v1.1...
-
Page 7: Cautions And Warnings
• Do not attempt to disassemble the simulator or service any of the electrical components without receiving instructions from Customer Service. • Do not operate the manikin in rain. Apply water to the manikin only in accordance with the supported clinical procedures explained in this guide. ©2020 CAE 905K640152 v1.1... -
Page 8: Product Use Warnings
If necessary, have another person help you lift and move the manikin. Fluids System If your manikin is equipped with fluid systems: • Do not modify the reservoirs or any assembly component. • Always protect your eyes, skin, and clothing against accidental exposure. ©2020 CAE 905K640152 v1.1... -
Page 9: Battery
For information about battery specifications, see the Specifications section of this guide. CAUTION: The information in this section IS NOT THE SAFETY DATA SHEET. Though CAE is not responsible for updates to each battery manufacturer’s safety data sheet, these may be available through the CAE Customer Service. -
Page 10: Precautions For Handling
• Do not short-circuit the positive (+) and negative (-) terminals. • Do not place the battery in a device with the positive (+) and negative (-) terminals in the wrong positions. • Do not solder a battery directly. ©2020 CAE 905K640152 v1.1... -
Page 11: Potential Health Effects
CAUTION: Corrosive gas may be emitted during the fire. When the battery burns with other combustibles simultaneously, take a fire-extinguishing method which correspond to the combustibles. ©2020 CAE 905K640152 v1.1... -
Page 12: Transport Information
CAEAres Cautions and Warnings Transport Information CAE complies with the most current International Air Transport Association (IATA) Dangerous Goods Regulations when transporting and shipping Li-ion batteries. The following terms are defined as follows: Consignment - One or more packages of hazardous materials accepted by an operator from one shipper at one time and at one address, receipted for in one lot and moving to one consignee at one destination address. - Page 13 Cautions and Warnings Batteries contained in or packed with the MSI TouchPro UN No. 3091 UN Shipping Name: Lithium Metal Batteries Transport Hazard Class: Labeling: ©2020 CAE 905K640152 v1.1...
- Page 14 CAEAres Cautions and Warnings THIS PAGE INTENTIONALLY LEFT BLANK ©2020 CAE 905K640152 v1.1...
-
Page 15: Specifications
Specifications PECIFICATIONS All hardware and software needed for operating the simulator are provided. In the event there is a need to extend the instructor tablet to other manikins or computers, contact CAE Healthcare for further instructions. Size and Weight Size... -
Page 16: Battery
4 hours when ON and receiving signal (Sleep Mode) • Recharge time: 50 minutes SymDefib • Run Time: 17 hours (with Pads not on Manikin) • 2-3 hours (with Pads on Manikin) Communications Simulator Network • Wired: 10/100 Ethernet • Wireless: IEEE 802.11 g ©2020 CAE 905K640152 v1.1... -
Page 17: System Requirements
Maestro for Ares 905K640552 v1.2 CAE Maestro v1.8 Ares User Guide 905K640152 v1.1 CAE Maestro v1.4 - 1.8 Note: Periodic system updates for Maestro are available at: https://caehealthcare.com/support/ software-updates. You can download software updates from any device with an Internet connection. ®... -
Page 18: Approved Devices
• Wireless 802.11b/g/n Ethernet card 100BASE-T Ethernet Adapter Note: Maestro can store up to 32GB of patient record files. In the event this storage capacity is expected to be maximized, plan for additional hard drive space. ©2020 CAE 905K640152 v1.1... -
Page 19: Equipment Overview
Optional equipment is available to enhance learning scenarios. For more information, see Optional Equipment in this user guide. Standard Equipment Ares comes with standard equipment for each of the three configurations. Base Configuration Equipment Basic Airway Head with Tristate eyes... -
Page 20: Iv/Io Arm
NIBP and Pulse Arm The non-invasive blood pressure and pulse arm allows users to perform blood pressure readings using a modified blood pressure cuff, palpate radial and brachial pulses, and auscultate Korotkoff sounds. NIBP and Pulse Arm with Electronics ©2020 CAE 905K640152 v1.1... -
Page 21: Male And Female Genitalia, And Chest Skins
Equipment Overview Male and Female Genitalia, and Chest Skins All Ares configurations come with interchangeable male and female genitalia, and chest skins. This also includes gender specific torso skins, breasts, and wigs. Female and Male Genitalia and Chest Skins Male and Female Wigs... -
Page 22: Stethosym
The StethoSym assembly attaches to a stethoscope and pairs with the manikin via Bluetooth technology. This device allows users to auscultate heart, lung, and bowel sounds emitted. One StethoSym assembly is included with the manikin. StethoSym ©2020 CAE 905K640152 v1.1... -
Page 23: Tools And Supplies
Equipment Overview Tools and Supplies Additional supplies are included with the simulator. IO Pad, Gown, and Arm Sleeves Screwdriver, Tape, Laryngospasm Assembly, and Lubricant ©2020 CAE 905K640152 v1.1... -
Page 24: Surface Go Tablet
The Surface Go tablet carrying case is a way to store and protect the Surface Go tablet. With an ergonomic design, users can operate their tablet with ease and comfort. CAE Maestro Command and Control Software CAE Maestro Command and Control Software... -
Page 25: Advanced And Complete Configuration
The SymDefib box connects with a real defibrillator monitor. This allows for use of real electrical therapy for defibrillation, cardioversion, and pacing. One SymDefib is included with the Complete manikin configuration. The SymDefib can be added onto the Base or Advanced configurations. SymDefib ©2020 CAE 905K640152 v1.1... -
Page 26: Optional/Additional Equipment
The articulated arm comes with a removable deltoid injection pad for IM injections and can be interchanged with an IO deltoid pad. Articulated Arm SymDefib One SymDefib is included with the Complete manikin configuration. The SymDefib can be added onto the Base or Advanced configurations. ©2020 CAE 905K640152 v1.1... -
Page 27: Breast Examination Module
• Small (10 mm) hard with longer peg (2) • Medium (15 mm) hard (2) • Medium (15 mm) soft (2) • Large (20 mm) hard (2) • Large (20 mm) soft (2) Breast Exam Module ©2020 CAE 905K640152 v1.1... -
Page 28: Wound Care Kits
CAEAres Equipment Overview Wound Care Kits Complete Wound Kit This optional kit for Ares contains the following eight (8) wounds: • Thigh incision • Thigh suture • Thigh bite wound • Thigh debridement • Lower leg with varicose veins and stasis ulcer •... - Page 29 Equipment Overview Upper Leg Debridement Upper Leg Bite Wound Lower Leg Wound The lower leg wound can replace the lower leg that comes on Ares. Varicose Veins with Stasis Ulcer ©2020 CAE 905K640152 v1.1...
- Page 30 CAEAres Equipment Overview Upper Leg Amputation Wound The upper leg amputation wound can replace the right leg that came on Ares. Below the Knee Amputation Stump Foot Wounds The two (2) foot wounds can replace the foot that comes on Ares.
-
Page 31: Post-Mastectomy Module
This optional module allows for the practice of post-mastectomy care. The kit includes: • Post-operative left total mastectomy incision with staples • Opening for drain tube to be placed under the skin • Normal right breast Post-Mastectomy Wound Kit ©2020 CAE 905K640152 v1.1... - Page 32 CAEAres Equipment Overview THIS PAGE INTENTIONALLY LEFT BLANK ©2020 CAE 905K640152 v1.1...
-
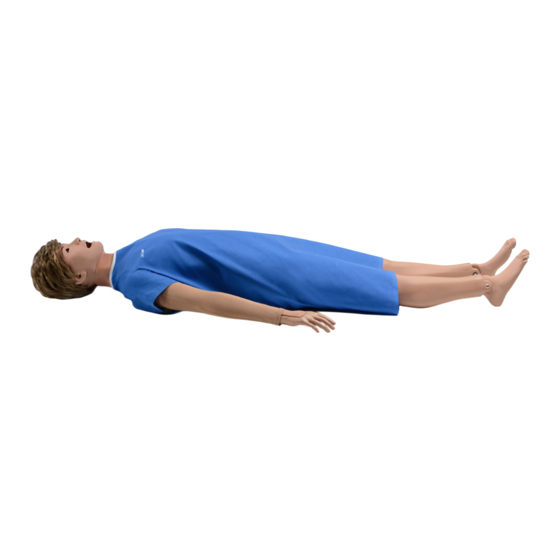
Page 33: Meet Ares
This simulator is mobile, lightweight, easy to use, and anatomically accurate for better skills proficiency and clinical assessment. Ares configurations come with interchangeable male and female chest skins, wigs and genitalia, giving you two patient simulators in one. For information on how to change the simulator’s genitalia, see Changing the Simulator’s Genitalia in this user guide. -
Page 34: Simulator Configurations
• Unilateral radial and brachial pulses, with variable intensity control Sounds • Auscultation of normal and abnormal heart, lung, and bowel sounds • Audible Korotkoff sounds generated with NIBP • Two-way communication between manikin and facilitator • Prerecorded speech and vocal sounds ©2020 CAE 905K640152 v1.1... - Page 35 Configuration Components Ares Base Urinary (Continued) • Interchangeable genitalia • Urinary catheterization without fluids Software and Tablet • CAE Maestro software • Surface Go Tablet Ares Advanced • Base features • Sym eyes Ares Complete • Advanced features • SymDefib Optional •...
- Page 36 CAEAres Meet Ares THIS PAGE INTENTIONALLY LEFT BLANK ©2020 CAE 905K640152 v1.1...
-
Page 37: Setup
Note: Keep original shipping materials, including boxes and foam. Warranty and repair items must be returned and shipped in their original packaging. For more information, see the Unpack and Repack Manual in the storage container. ©2020 CAE 905K640152 v1.1... -
Page 38: Set Up The Simulator
To prepare Ares for attaching the legs: a. Reach under Ares’ buttocks and pull the torso skin away from the skin attachment pegs. There are two skin attachment tabs on each peg. Only remove the top tab from each peg and leave the lower tab in place. -
Page 39: Step 3: Attach Ares' Legs
Setup Step 3: Attach Ares’ Legs The following hardware is included: • Two (2) knurled nuts • Two (2) springs • Four (4) metal washers Leg Hardware To attach the legs: a. Insert the leg screw attached to the top of the leg into the hip joint hole. - Page 40 Ensure the metal washer is against the simulator’s body. The metal washer prevents the spring from damaging the plastic. Metal washer Attaching Ares’ Legs f. Ensure that the leg moves freely. g. Repeat steps a through f for the second leg. h. Reattach the genitalia and skin.
-
Page 41: Step 4: Prepare Ares For Arms
Setup Step 4: Prepare Ares for Arms The following tools and hardware are included: • One (1) Phillips screwdriver • Two (2) arm screws • Two (2) joint spheres To prepare for the arms: a. Remove the IM/IO pads from both arms and set them aside. -
Page 42: Step 5: Attach Ares' Iv Arm
CAEAres Setup Step 5: Attach Ares’ IV Arm The following tools and hardware are included: • One (1) Phillips screwdriver • The IV arm To attach the IV arm: a. Attach the mounting screw to the hole in the shoulder mount. -
Page 43: Step 6: Attach The Nibp Arm
Use the screwdriver to tighten the mounting screw until it is snug and the arm moves freely. c. Reinsert the IM pad into the NIBP arm. d. Connect the electronics tether from the NIBP arm to the arm connection on Ares’ right side. Electronics... -
Page 44: Step 7: Modify A Blood Pressure Cuff
CAEAres Setup Step 7: Modify a Blood Pressure Cuff Ares’ blood pressure can be taken using non-invasive monitoring techniques; however, modifications to a standard blood pressure cuff are required. The following tools and equipment are required: • One (1) Standard Adult Blood Pressure Cuff •... -
Page 45: Step 8: Place Ares' Wig
To place the wig on Ares’ head: a. Remove the wig from the packaging, and remove all packing materials. b. Place the wig on Ares’ head. If the wig needs to be adjusted, see the following steps in the Adjust the Fit of the Wig section. -
Page 46: Step 9: Power On Ares
Plug the power supply into a grounded outlet. c. Press the ON/OFF button on Ares’ right side and hold it for three (3) seconds to initiate the boot-up process. When Ares is ready for operation, the simulator will say, “Hello”... - Page 47 Setup NOTE: Ares' serial number is located on the left side of the torso by the power button. Ares serial number Ares Serial Number Location d. Tap the Ares network. The Connect to a Network dialog box appears. Enter caeadmin Connect to a Network Screen e.
- Page 48 To connect to the simulator’s network on the Windows Surface Go tablet: a. From the home screen, tap the Network icon located in the lower-right corner of the screen in the taskbar. The Network window appears. The WiFi button The Network Window ©2020 CAE 905K640152 v1.1...
- Page 49 Tap WiFi button to turn on WiFi (button turns blue). c. In the Network window, locate the simulator network from the list of available networks. For Ares, the network name is ARE00XXXX (where XXXX is the last 4 digits of Ares’ serial number).
- Page 50 CAEAres Setup d. Tap the simulator network. The connection options appear. Tap the simulator network The Network Window e. Check the Connect automatically box. f. Tap Connect. The Simulator Network ©2020 CAE 905K640152 v1.1...
-
Page 51: Step 12: Launch Maestro
To launch Maestro, tap the CAE Maestro icon on the tablet desktop screen. The Maestro App Icon The Maestro app opens and the Maestro start screen appears. For additional information on Using Maestro, see the Maestro for Ares User Guide. ©2020 CAE 905K640152 v1.1... - Page 52 CAEAres Setup THIS PAGE INTENTIONALLY LEFT BLANK. ©2020 CAE 905K640152 v1.1...
-
Page 53: Ares Features
With the right blend of clinical training features, Ares is durable and reliable through repeated lifesaving team scenarios. Ares was created to fulfill requirements for advanced life support training (ACLS) and emergency care management. -
Page 54: Physiological And Pharmacological Features
Ares also has cervical motion for the practice of patient stabilization. Ares’ left arm allows for IV placement in two sites: antecubital fossa and dorsum of the hand. In addition to the standard configuration features, optional articulated arms may be added to enhance the fidelity of the simulator. -
Page 55: Cardiovascular System
Unilateral blood pressure measurement can be done on the simulated patient’s right arm using a modified adult blood pressure cuff. Measurement can be done by both auscultation and palpation. ©2020 CAE 905K640152 v1.1... -
Page 56: Gastrointestinal System
Ares features auscultation of normal and abnormal bowel sounds using the StethoSym. Genitourinary System The manikin is provided with both male and female genitalia. Urinary catheterization (without fluids) may be performed on the manikin. For more information on changing genitalia, see the Using Ares section of this user guide. Reproductive System The Ares manikin features optional accessories for practicing clinical care skills. -
Page 57: Simulated Clinical Experiences
• Sepsis with Hypotension • Stroke In addition to the SCEs that are included with the Base Ares, five CAE EMS Learning Modules are available with 10 SCEs per module. Each SCE includes the information below and can be printed from the Maestro software: •... -
Page 58: Scenarios
Any Base Patient can be combined with any scenario, creating a wide variety of clinical care simulations. For instructions on modifying scenarios and creating new scenarios, refer to the Maestro for Ares User Guide. ©2020 CAE 905K640152 v1.1... -
Page 59: System Controls
Ares Features System Controls Ares is designed to allow the instructor to focus attention on learner actions and reactions by providing a flexible set of tools that adjust to the instructor’s needs. Application Software CAE Maestro software is the application that provides the instructor a means to control all features of the simulator. - Page 60 CAEAres Ares Features THIS PAGE INTENTIONALLY LEFT BLANK ©2020 CAE 905K640152 v1.1...
-
Page 61: Using Ares
Using Ares SING Once the simulator is assembled, the Ares manikin is ready learners to practice and master new competencies, interventions, and skills during clinical scenarios. To create a fully immersive simulation experience with advanced intervention capabilities and realtime data feedback, all configurations of the Ares simulator utilize instructor-led software with programming capabilities. -
Page 62: Neurologic System Controls
Eyes Each pupil of the Ares manikin can be set manually to a fixed diameter of 3.5 or 8 mm (normal or blown) by carefully rotating the eye from left to right or right to left until the proper size appears. - Page 63 Using Ares SymEyes The Advanced and Complete Ares configurations come with SymEyes. NOTE: Only SymEyes react to light. SymEyes ©2020 CAE 905K640152 v1.1...
-
Page 64: Respiratory System
CAEAres Using Ares Respiratory System The Ares manikin includes respiratory features that allow learners to practice basic assessment and life support skill sets. With the manikin, learners can: • Manage difficult airways • Perform intubation and procedural suctioning • Recognize and resolve right mainstem intubation •... -
Page 65: Nasal Packing
Intrapleural Vol: Left, Intrapleural Vol: Right Nasal Packing Ares supports nasal packing. Nasal packing can be performed on both nares, utilizing ribbon, gauze, nasal packs, or tampons. To apply nasal packing: 1. Cut a length of ribbon gauze or use commercially available nasal pack or nasal tampon. -
Page 66: Airway Management
• Laryngopharynx Intubation The upper airway of the Ares manikin is designed to allow for intubation and laryngoscopy. Direct laryngoscopy as well as oral and nasal tracheal intubation can be performed using devices such as endotracheal tubes, nasopharyngeal airways, and oropharyngeal airways. -
Page 67: Gastric Distention
Using Ares To replicate laryngospasm: 1. Attach the yellow tubing to the port on Ares' left side labeled LARYNGO. 2. Pull back syringe plunger and fill syringe with 50 ml of air. 3. Attach syringe to stopcock and inject air into manikin. -
Page 68: Chest Excursion
• Intrapleural Volume: Disables chest excursion on the affected side but still allows for excursion on the unaffected side. Ventilation Ares supports manual bag-valve-mask (BVM) ventilation via face mask, endotracheal tube, and tracheostomy tube. Proper ventilation will demonstrate chest rise and fall. Manual Bag-Valve-Mask (BVM) Ventilation... -
Page 69: Pneumothorax (Needle Decompression)
Ares’ Torso Cardiovascular System The Ares manikin includes cardiovascular features that allow learners to practice basic assessment and advanced life support skill sets. With the Ares manikin, learners can: • Palpate pulses • Place IV lines and catheters •... -
Page 70: Cardiovascular System Controls
CAEAres Using Ares Cardiovascular System Controls With Ares’ Cardiovascular system, users can replicate the clinical signs associated with cardiac activity, including palpable pulses, heart sounds and electrical activity. Cardiovascular System Controls Anatomy, Clinical Interventions, Patient Software Control Manual Physiology and Monitoring and Scenarios. -
Page 71: Pulses
Using Ares Pulses Ares comes with: • Bilateral carotid and femoral pulses • A right NIBP and pulse arm which has radial and brachial pulse locations The pulses are activated when pressure is applied to the correct location. The pulse intensities can be changed using the Maestro software. -
Page 72: Iv Administration
IV Administration There are two IV sites on Ares’ left arm, dorsum of the hand, and antecubital fossa. Each IV site has an insert with a loop of tubing.The sites are filled and drained through tubing running from the IV site up to the left shoulder. - Page 73 1. Connect the end of the drain port tubing to the IV tubing and an empty IV bag. 2. Open the clamp on the IV tubing. 3. Fill an IV bag with water, or with water mixed with food coloring to simulate blood. ©2020 CAE 905K640152 v1.1...
-
Page 74: Intramuscular (Im) Injection
10. Connect IV fluids/medications to the IV site to be infused. 11. Open the clamp on the IV fluids to be infused. 12. Open the IV drain tubing clamp. Intramuscular (IM) Injection Ares supports IM injection at four sites: • Bilateral deltoid • Bilateral vastus lateralis ©2020 CAE 905K640152 v1.1... -
Page 75: Intraosseous (Io) Cannulation
The IM Injection Site Intraosseous (IO) Cannulation Ares also allows for humeral intraosseous (IO) cannulation. The designated IO sites are located on either deltoid side. Note: Replace either of the IM pads with an IO access puck prior to performing IO Cannulation. - Page 76 CAEAres Using Ares However, it is not advised to remove the manikin’s skin. Please call CAE Customer Service if there are issues that require this level of maintenance. Hand placement sensor Internal Chest Features The simulator supports normal hand placement and standard compression techniques so that chest compressions can be performed.
-
Page 77: Ecg
Using Ares On Ares, a 4-lead ECG is emitted from the appropriate positions for display on a standard monitor. To produce ECG signals on a monitor, connect the lead unit to the ECG contacts (or snaps) located on the manikin. - Page 78 The SymDefib box connects with a real defibrillator monitor. This allows for use of real electrical therapy for defibrillation, cardioversion, and pacing.One SymDefib is included with the Complete manikin configuration. The SymDefib can be added onto the Ares Base or Advanced configurations. SymDefib...
- Page 79 The SymDefib box measures and reports the energy delivered via the Maestro software. When demonstrating proper pad placement, learners should attach the SymDefib pads in the appropriate locations on the manikin: one pad on dorsal connection and one on ventral connection. ©2020 CAE 905K640152 v1.1...
- Page 80 Coarse ventricular fibrillation and high-rate ventricular tachycardia cardiac rhythms are automatically recognized as “shockable” rhythms. • With each defibrillation, Ares automatically records the amount of energy discharged and the time defibrillation was performed. The simulated patient response to defibrillation is determined by the scenario script or instructor intervention.
-
Page 81: Blood Pressure
10). Refer to the Maestro for Ares User Guide for further information. Blood Pressure Ares supports non-invasive blood pressure measurements, and systolic and diastolic readings can be obtained and manipulated through the software. Systolic and Diastolic Blood Pressure To manually adjust the systolic and/or diastolic blood pressure: 1. - Page 82 To get a blood pressure reading: 1. Connect the extension from the T-fitting on the blood pressure cuff adapter to the NIBP port on Ares’ right side . 2. Ensure the electronics tether from the NIBP arm is connected to the arm connector on Ares’...
-
Page 83: Gastrointestinal System
StethoSym utilizing the RFID tags. For further information, see Using the StethoSym in this guide. Genitourinary System Ares may be configured with either male or female genitalia, either of which allows for the insertion of a urinary catheter. Changing the Simulator’s Genitalia Ares comes with male and female genitalia. - Page 84 CAEAres Using Ares Ares is shipped with the male chest skin in place and no genitalia . To change the genitalia: 1. Roll the manikin onto its side. 2. Detach the skin from the lower torso skin attachment pegs by gently pulling the skin tabs up and over the attachment pegs.
- Page 85 9. Position the upper hooks on the genitalia over the metal tabs. Note: The genitalia hooks are not designed to sit in the middle channel. ©2020 CAE 905K640152 v1.1...
- Page 86 Use the breast foam alignment guides on the manikin to assist with proper placement. Breast Foam Alignment Guide Breast Foam Alignment Guide 3. Attach the lower skin tabs to the lower skin anchors. 4. (Optional) Replace the wig. ©2020 CAE 905K640152 v1.1...
-
Page 87: Urinary Catheterization
Catheterize Ares using a 16-French urinary catheter lubricated with silicone spray. Both female and male genitalia can be catheterized. Note: Ares does not have a urinary fluid reservoir, so there will not be any fluid output. Reproductive System The Ares manikin allows for the learner to practice: •... -
Page 88: Wound Care
• Upper leg bit wound • Upper leg debridement These wounds are interchangeable with the upper leg IM injection pads. Burnt Skin To practice removing eschar from a burn wound, use the debridement wound accessory for the upper leg. ©2020 CAE 905K640152 v1.1... -
Page 89: Leg And Foot Wounds
The upper leg amputation wound provides an example of a below the knee leg amputation. To replace the standard right leg on Ares, use the tools that are provided in the wound kit: 1. Remove the right leg from the manikin. -
Page 90: Post-Mastectomy Care
• Normal right breast Post-Mastectomy Wound Kit To use the Post-Mastectomy wound kit: 1. Remove the female skin from Ares. 2. Replace with the post-mastectomy skin. 3. Place the end of a drainage system through the hole and underneath the skin. -
Page 91: Medication Administration
Medication Administration Simulated Medication Certain medication administration can be simulated using the instructor software. For more information on administering medication in the software only, see the Maestro for Ares User Guide. Intravenous, Intramuscular, and Intraosseous Medication Learners can administer medications via intramuscular injection, IV cannulation or intraosseous injection. - Page 92 CAEAres Using Ares THIS PAGE INTENTIONALLY LEFT BLANK ©2020 CAE 905K640152 v1.1...
-
Page 93: Care And Maintenance
Following the use of the simulator, make sure all components are properly handled and correctly removed or placed into storage. Note: Do not attempt to open or repair any simulator components with out authorization from CAE Customer Service or their representative. Doing so may void the warranty. Many hardware components within the simulator and instructor tablet are not user-serviceable. -
Page 94: Step 1: Clean The Manikin
Gently rub the soiled area with a soft cloth to remove most marks and stains. DO NOT use solvents or abrasive pads. Inspect the manikin for damage or puncture marks. If damage exists, contact CAE Healthcare Customer Service immediately for a repair. Prompt repair prevents expansion of the damaged area. -
Page 95: Step 3: Maintaining Im Injection Sites
If the simulation included use of IM injection equipment, perform the following steps prior to storing the manikin: a. Remove the pad from the injection site. b. Remove the sponge from inside the pad. Remove the Sponge from the IM Pad ©2020 CAE 905K640152 v1.1... -
Page 96: Step 4: Power Off The Instructor Tablet
Tap the red X in the upper-right corner of the screen to exit Maestro. The tablet desktop screen appears. d. Tap the Start menu icon in the lower-left corner. Start Menu A menu appears. e. From the menu, tap the Power button. ©2020 CAE 905K640152 v1.1... -
Page 97: Step 5: Power Off The Manikin
Step 5: Power off the Manikin To power off the manikin: a. Press the button located on Ares’ right side and hold it for three seconds. b. Disconnect Ares’ power supply to the DC IN connection on Ares’ right side. -
Page 98: Short-Term Storage
A topping charge is only applied when the battery voltage drops to a certain level. Keep the simulator and battery in a cool location to extend the life and capacity of the º battery both in storage and during use. ©2020 CAE 905K640152 v1.1... -
Page 99: Long-Term Storage
Repack Manual (this document also was included when the simulator was shipped). The shipping container is approximately 2 feet (61cm) by 6 feet (183 cm). Note : Prior to using the manikin, ensure it reaches ambient temperature. ©2020 CAE 905K640152 v1.1... - Page 100 CAEAres Care and Maintenance THIS PAGE INTENTIONALLY LEFT BLANK. ©2020 CAE 905K640152 v1.1...
-
Page 101: Appendix A - Recommended Clinical Supplies
Combitube 41 Fr i-gel Supraglottic Airway Needle Decompression 14 g 6 cm Face Mask Adult Medium Other Supplies Manual Bag Valve Mask (BVM) Lighted Stylets Double Lumen Endobronchial Tube Mild Dish Soap Talcum Powder Petroleum Jelly ©2020 CAE 905K640152 v1.1... - Page 102 CAEAres Appendix A - Recommended Clinical Supplies THIS PAGE INTENTIONALLY LEFT BLANK. ©2020 CAE 905K640152 v1.1...
- Page 103 For more information about CAE products, contact your regional sales manager or the CAE distributor in your country, or visit caehealthcare.com. Tel +1 941-377-5562 or 866-233-6384 For customer service, please contact CAE. Customer Service Headquarters - United States Monday - Friday from 7:00 a.m. to 6:00 p.m. ET Phone 1-866-462-7920 Email: srqcustomerservice@cae.com...
Need help?
Do you have a question about the Ares and is the answer not in the manual?
Questions and answers