Table of Contents
Advertisement
Quick Links
Advertisement
Table of Contents

Related Manuals for Baumalight iMP772


Summary of Contents for Baumalight iMP772
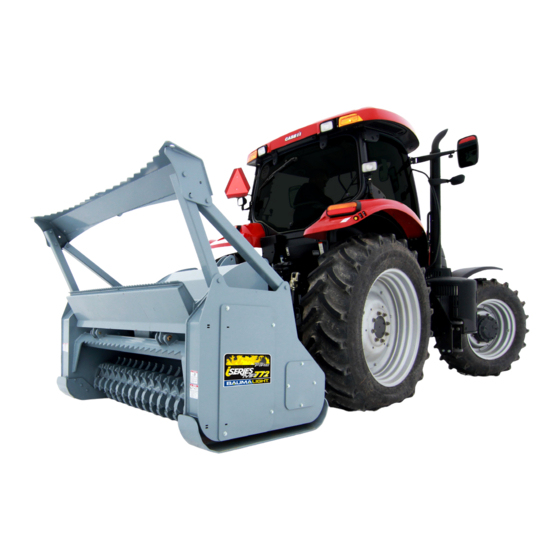
- Page 1 Brush Mulcher iMP772 OPERATOR’S MANUAL Issue Date: Feb 2020...
-
Page 2: Table Of Contents
TABLE OF CONTENTS 1 INTRODUCTION ��������������������������������������������������������������������������������������������������������������������������������� 1 1�1 Overview �������������������������������������������������������������������������������������������������������������������������������������� 1 1�2 Intended Use And Foreseeable Misuse ������������������������������������������������������������������������������������ 2 2 SAFETY ������������������������������������������������������������������������������������������������������������������������������������������������ 3 2�1 Safety Alert Symbol And Safety Words ������������������������������������������������������������������������������������ 3 2�2 Operational Hazards ������������������������������������������������������������������������������������������������������������������� 4 Prepare For Emergencies ���������������������������������������������������������������������������������������������������������� 5 Replace Safety Signs �����������������������������������������������������������������������������������������������������������������... -
Page 3: Introduction
Operator’s Manual. This manual covers the Baumalight Brush Mulcher, models iMP772. Use the Table of Contents as a guide to locate required information. Keep this manual handy for frequent reference and to pass on to new operators or owners. Call... -
Page 4: 1�2 Intended Use And Foreseeable Misuse
1.2 Intended Use And Foreseeable Misuse The brush mulcher is designed to be used by experienced operators, trained in the safe operation of a tractor and trained in the hazards related to using the brush mulcher and the safe use of the mulcher for the intended purpose. -
Page 5: Safety
2 SAFETY 2.1 Safety Alert Symbol And Safety Words ^ CAUTION You must read, understand and follow the instructions given operating unit CAUTION - Indicates a hazardous manufacturers, as well as the instructions in this situation, which, if not avoided, could manual. -
Page 6: 2�2 Operational Hazards
Additional information applications� may be found at: www.asae.org or www.osha.gov. If you do not understand any part of this manual, Any other use may result in personal contact Baumalight at 866-820-7603. injury, damage to equipment and may void the warranty�... -
Page 7: Prepare For Emergencies
Safety signs are identified in Section 3 of this • Do not exceed load capacity of equipment. manual. • Replacement safety signs are available from your Baumalight dealer. Avoid Powerlines & Underground Utilities Do Not Allow Riders ^^ DANGER •... -
Page 8: Detach Brush Mulcher Safely
Detach Brush Mulcher Hazards From Modifying Safely Equipment Do not make any alterations to your brush Detach brush mulcher on a firm and level surface. mulcher. Altering the equipment may cause unsafe Brush mulcher may fall over if detached on sloping conditions and may void the manufacturer’s or soft surface. -
Page 9: 2�3 Maintenance Hazards
^ WARNING for the job. Burn hazard� Do not make unauthorized modifications. Contact Baumalight at 866-820-7603 before you weld, cut/ Hot and high pressure hydraulic oil� drill holes, or make any other modifications. Allow oil to cool before servicing� Always use Baumalight replacement parts. -
Page 10: Safety Signs
3 SAFETY SIGNS Dashed line indicates item hidden from view unless cover is removed. A. MTB-178 Safety Sign B. MTB-176 Safety Sign C. MTB-177 Safety Sign... - Page 11 D. MTB-175 Safety Sign F. MTB Safety Sign E. MTB-185 Safety Sign G. MTB-180 Safety Sign H. MTB-182 Safety Sign...
-
Page 12: Operation
4 OPERATION 4.1 Preparation For Use Driveline Dimension A PTO driveline is supplied with the machine. To ^ WARNING accompany the variety of 3 point hitch geometry available today, the driveline can be too long for Wear an approved respirator (N95 Type most machines or too short for others. - Page 13 d. Use a file to remove burrs from edges that were cut. e. Assemble the 2 ends of the shaft. Make sure shaft can telescope freely. If it does not, separate the 2 parts and inspect for burrs or cuttings on shaft ends. Be sure it telescopes freely before installing.
-
Page 14: 4�3 Pre-Operation Check List
4.3 Pre-Operation Check List Check-mark Check these items: Frequency Check the three linch pins on the hitch to verify they are Each operation. securely fastened. Verify the pins on each end of the drive shaft are secured. Each operation. Verify the safety chains on the drive shaft are securely Each operation. -
Page 15: 4�5 Attach Brush Mulcher
4.5 Attach Brush 4.6 Detach Brush Mulcher Mulcher ^ WARNING ^ WARNING Prevent serious injury or death caused To prevent injury or machine damage put transmission in “Park” and check by unexpected movement: the full range of hitch for interference, Park tractor on a level surface�... -
Page 16: 4�7 Transporting
4.7 Transporting 1. Verify all reflectors and Slow Moving Vehicle (SMV) sign are visible. 2. Raise brush mulcher to fully raised position. 3. Verify tractor PTO is disengaged. 4. Travel at a reaonable and safe speed. ^ WARNING To prevent bodily injury from rotating cutting wheel, be sure to disengage PTO before transporting mulcher�... -
Page 17: 4�9 First Time User Tips
4.9 First Time User Tips • First, operate all functions in a clear area with ^ WARNING the tractor at idle speed to get a good feel for the controls before you actually move into any Always turn off the tractor and disengage brush. -
Page 18: 4�10 Field Operation
4.10 Field Operation ^ WARNING ^ WARNING Entanglement in a rotating drive line Never operate brush mulcher when can cause serious injury or death� other people are in the vicinity� Debris can be thrown several feet from cutting Keep tractor shields and drive line area�... -
Page 19: Service And Maintenance
5 SERVICE And MAINTENANCE 5.1 Maintenance Maintenance Chart General Inspection Inspect the unit for any buildup of Daily contamination (dirt, stones, etc.). Cutting Teeth Check and replace one at a time as Every 4 hours. necessary. With daily use expect to replace 4 to 6 teeth per day. -
Page 20: 5�3 Check Belt Tension
5.3 Check Belt Tension 1. Lower mulcher to ground. 2. Set parking brake, stop engine and remove key. ^ WARNING Moving parts can crush and cut� Keep clear of moving components� Follow lockout procedure before servicing� 3. Open inspection cover (A). 4. -
Page 21: 5�4 Replace Belt
5.4 Replace Belt 1. Lower mulcher to ground. 12. Place a straight edge (I) on drive pulley and rotor pulley. Pulleys must be aligned or belt 2. Set parking brake, stop engine and remove will wear quickly. Adjust pulley alignment as key. -
Page 22: 5�5 Adjust Slip Clutch
Dimension B - 1.1 in. (28 mm) • 4-Disk 80 Hp 540 rpm OEM Part Number • B8N111USA60307 • B8#140EA60307 • Note: Parts breakdown found Dimension A - 0.275 in. (7 mm) • Baumalight’s website. www�baumalight�com Dimension B - 1.15 in. (29 mm) •... -
Page 23: 5�7 Lubricate Rotor Bearings
If excess grease in the bearing caused overheating, it will be necessary to remove grease fitting to permit excess grease to escape. Note: Parts breakdown can be found on Baumalight’s website. www�baumalight�com... -
Page 24: Troubleshooting
2. Slippage on the clutch occurs if there is more power than the unit is rated for: Model iMP772 is rated for 100- 150 hp input. A bigger tractor can be used if it is idled down. This will decrease the output power of the engine. -
Page 25: Storage
7 STORAGE 7.2 Removing Mulcher 7.1 Storing Mulcher From Storage 1. Store mulcher in a dry place. 1. Review Operator’s manual check 2. Clean mulcher thoroughly. Dirt and wood chips adjustments. will draw moisture and cause rust. 2. Check gear box oil level. Add oil as necessary. 3. -
Page 26: Warranty
8 WARRANTY This product is warranted to be free of defects in materials and workmanship under normal use and service, for a period of one year from the date of purchase, when operated and maintained in accordance with the Operating and Maintenance Instructions supplied with this unit. This warranty does not cover misuse or negligence. - Page 28 For parts, specifications and the latest machine information please visit our website. www�baumalight�com MTB MFG INC. CORPORATE HEADQUARTERS 4575 Powell Rd., Wallenstein, Ontario Canada N0B 2S0 Phone - 519.698.9864 Toll Free - 866.820.7603 Fax - 519.698.1087 www�baumalight�com...
Need help?
Do you have a question about the iMP772 and is the answer not in the manual?
Questions and answers