Konica Minolta bizhub PRO 1100 Shortcut Manual
Hide thumbs
Also See for bizhub PRO 1100:
- Additional information (132 pages) ,
- Quick manual (119 pages) ,
- Maintenance manual (71 pages)

Related Manuals for Konica Minolta bizhub PRO 1100


Summary of Contents for Konica Minolta bizhub PRO 1100
- Page 1 Education Newsletter bizhub PRO 1100 Shortcut Manual 簡易說明書 For details operations, please refer to full set manual 詳細的操作說明,請參照完整的操作說明書 http://manuals.konicaminolta.eu/bizhub-PRO-1100/EN/index.html...
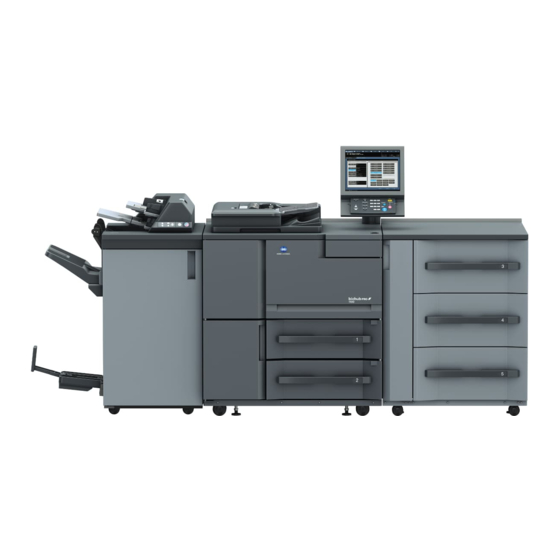
- Page 2 bizhub PRO1100...
-
Page 3: Control Panel
Control Panel 1. 數字按鍵 1. Keypad 2. 重設 2. Reset 3. 電源指示燈 3. Power Led 4. 數據指示燈 4. Data LED 5. 插隊 5. Interrupt 6. 停止 6. Stop 7. 校對複印 7. Proof Copy 8. 開始 8. Start 9. 開始指示燈 9. Start LED 10.C(清除)... -
Page 4: Screen Overview
Screen Overview 面板概要 Overview of Machine Screen 機器面板概要 1. Machine configure display - Displays 1. 機器配備顯示 ﹣ 顯示主機身的配備和附 the configuration of main body and 加配件 options 2.作業顯示區域 2. Job display ﹣ 顯示現在的 area - 工作情況 Displays the current 3.耗材與紙屑盒 status of the 的指示... - Page 5 Screen Overview 面板概要 Overview of Job List Screen 作業清 1. [Hold Job] 1.[保留作業] ﹣ - It allows 管理保存的工作 you to mange the 2.[安全作業] ﹣ hold jobs 存儲有密碼保護 的打印工作 2. [Secure Job] - The print job with password-protected is stored 3. [時間表] - 更改預約作業的次序 3.
- Page 6 Screen Overview 面板概要 Overview of HDD Recall Screen 硬碟呼叫面板概要 1. HDD 1. 硬碟根目錄 ﹣ Store 顯示硬碟根目 Root - 錄中的檔案 Display the root 2. [新的] ﹣ 新 folder 增資料夾 2. [New]- 3. [選擇多項] ﹣ Create a 可同時選擇多 folder in 個檔案 the HDD root 4.
- Page 7 Screen Overview 面板概要 Overview of Copy Screen 影印面板概要 1. [Quality Adj.] - Adjust copy quality 1. [品質調整] ﹣ 設定影印品質 2. [Original Setting] - Set original type 2. [原稿設定] ﹣ 設定原稿的種類和方向 and direction 3. [倍率] ﹣ 設定影印縮放比例 3. [Zoom] - Specify the zoom ratio 4.
-
Page 8: Copy Function
Copy Function 影印功能 Density 濃淡度 Adjust the copy density 調整影印的濃淡度 1. Touch 1.按[品質調整] [Quality Adj.] 2.於複印濃淡度設定 2. Adjust the 濃淡度的深淺 density is lightened or darkened... - Page 9 Copy Function 影印功能 Zoom 倍率 Adjust the zoom ratio 調教縮放比例 1. Touch [Zoom] 1.按[縮放] (A)固定倍率 (A)Fixed Zoom 選擇預設的縮放倍 Select fixed zoom 率 size (B)手動縮放 (B)Manual Zoom 輸入縮放比列 Input zoom value. (C)自動 (C)Auto Zoom 按[自動]把原稿縮 Touch [Auto] to 放到指定的紙張大 zoom original 小...
- Page 10 Copy Function 影印功能 Simplex/Duplex 雙面/組合 Choose [1 > 1] 選擇 [1 > 2] [1 > 1] [2 > 1]or [1 > 2] iii. [2 > 2] [2 > 1]或 iii. [2 > 2] 1 > 2 1 > 2 印 單面原稿...
- Page 11 Copy Function 影印功能 Bind Direction 訂裝方向 1. Touch [Output 1.按[輸出設定] Setting] 2.選[左﹠右]或 2. Select [頂端] [Right&Left] or [Top]...
- Page 12 Copy Function 影印功能 Staple 裝訂 1. Touch 1.按[複印] [Copy] 2.按[輸出設定] 2. Touch [Output 3.按[裝訂] Setting] 3. Select * 此功能需要加裝 [Staple] 配件 * Optional accessories are required for this function...
- Page 13 Copy Function 影印功能 Half-Fold Booklet 摺疊﹠裝訂 1. Touch [Copy] 1.按[複印] 2. Touch 2.按[輸出設定] [Output Setting] 3.選[摺疊﹠裝訂]或 3. Select [多張對摺] [Fold&Staple] or [Multi-Half] * 此功能需要加裝配件 * Optional accessories are required for this function...
- Page 14 Copy Function 影印功能 Tri-Fold 三摺 1.按[複印] 1. Touch [Copy] 2.按[輸出設定] 2. Touch [Output 3.選[多張三摺] Setting] 4.選[外側列印]或 3. Touch [內側例印] [Multi 3-Fold] * 此功能需要加裝配 4. Touch 件 [Outside Print] or [Inside Print] * Optional accessories are required for this function...
- Page 15 Copy Function 影印功能 Punch Hole 打孔 1.按[複印] 1. Touch [Copy] 2.按[輸出設定] 2. Touch [Output Setting] 3.按[打孔] 3. Touch [Punch] * 此功能需要加裝配件 * Optional accessories are required for this function...
- Page 16 Copy Function 影印功能 Sort / Group 分頁/群組 Select whether to sort or group when 選取列印多份時以分頁或分組輸出 printing multiples sets of copies 1.按[輸出設定] Touch [Output 2.選擇 Setting] i.[位移分頁] ii.[分頁] Select iii.[位移分類] i.[Offset Sort] iv.[群組] ii. [Sort] ii. [Offset Group] iv.[Group] Sort Group Offset...
-
Page 17: Scan Function
Scan Function 掃描功能 Overview of Scan operation Screen 掃描面板概要 1. Scan type - Email,HDD, SMB, FTP etc. 1. 掃描類型 ﹣ 電郵,硬碟, SMB, FTP 2. [A to Z] - Display an address in which 2. [A to Z] - 顯 the reference 示以英文字母... - Page 18 Scan Function 掃描功能 Overview of Scan Setting 掃描設定概要 1. [Original Setting] - Change original 1. [原稿設定] ﹣ 更改原稿方向和類型 orientation and type 2. [分批掃描] ﹣ 分批掃描文件並整合成一 2. [Separate Scan] - The scan operation 個檔案 is divided into serval 3. [掃描尺寸] ﹣ sessions 設定掃描範圍...
-
Page 19: Tray Setting
Tray Setting 紙盤設定 Change Tray Setting(Part1) 紙盤設定(第一部份) 1. Touch 1.按[機器] [Machine] 2.按[紙張設定] 2. Touch [Paper Setting] 3.選擇紙盤 3. Select tray 4.按[變更設定] 4. Touch [Change Set]... - Page 20 Tray Setting 紙盤設定 Change Tray Setting(Part2) 紙盤設定(第二部份) 5. Paper Type - Select desired paper type 5. 紙張型態 - 選擇需要的紙張種類 6. [Paper Size] - 6. [紙張尺寸] ﹣ set [Standard] [標準] 或 [自訂] or [Custom] 7.[重量] ﹣設定紙張 7. [Weight] - set 重量 paper weight 8.[紙張顏色] - 設定...
- Page 21 Tray Setting 紙盤設定 Custom Size Setting 自訂尺寸設定 1. Touch 1.按[機器] [Machine] 2.按[紙張設定] 2. Touch [Paper Setting] 3.選擇紙盤 3. Select tray 4.按[變更設定] 4. Touch 5.按[紙張尺寸] [Change Set] 6.按[自訂] 5. Touch [Paper Size] 7.按[1]輸入寬度,按 [2]輸入長度 6. Touch [Custom] 8.按 [OK] 7. Touch [1] to input width and [2] to input length...
- Page 22 Tray Setting 紙盤設定 Both Side Adjustment 兩面調整 Gap Adjustment(Part1) 間隙調整(第一部份) Adjusts the magnification and image 跟據前面影像的大少和 position of the 位置,來調整背面影 back side based 像. on the image position of the 1.按[機器] 和 front side. [兩面調整] 1. Touch 2.按[間隙] [Machine] and [Both Sides] 3.選擇紙盤...
- Page 23 Tray Setting 紙盤設定 Both Side Adjustment 兩面調整 Gap Adjustment(Part2) 間隙調整(第二部份) 7. Measure the gap between the front 7. 量度測試表背面[a]到[d]各點和前面影像 and back side at each point of [a] to 的偏差值. [d] on the [back] side of printed chart to acquire the ✓...
- Page 24 Tray Setting 紙盤設定 Both Side Adjustment 兩面調整 Gap Adjustment(Part3) 間隙調整(第三部份) 8. Press each point key of [a] to [d] to 8. 在[a]到[d]用屏幕的數字鍵輸入要調整的 enter the adjustment data by numeric 數值 keys 9. 按[啟動調整]執行調整 9. Press [Adjustment Start] to adjust 10.按[Start]打印測試表和量度調整後的偏 10.Press [Start] to print test chart and 差,重覆步驟7-10直至前面和背面影像...
- Page 25 Tray Setting 紙盤設定 Both Side Adjustment 兩面調整 Scan Meas. Adjustment(Part1) 掃描測量(第一部份) The magnification 自動跟據前面影像的 ratio and printing 大少和位置,來調整 position of the 背面影像. back side are automatically 1.按[機器] 和 adjusted by using [兩面調整] the scanner function of this 2.按[掃描測量] machine to measure the gap 3.選擇一個放有A3 amount in printing...
- Page 26 Tray Setting 紙盤設定 Both Side Adjustment 兩面調整 Scan Meas. Adjustment(Part2) 掃描檢測(第二部份) 7. 按 [輸出調整測試圖] 7. [Output Adjustment Chart] 8.選擇需要調整的紙 8. Select the 盤 desired tray for both side 9.輸入需要的調整表 adjustment 份數, 最多為20份 9. Enter the 10.按[Start]打印調 necessary 整表 number of adjustment 11.按...
- Page 27 Tray Setting 紙盤設定 Both Side Adjustment 兩面調整 Scan Meas. Adjustment(Part3) 掃描檢測(第三部份) 12.Touch [Scan Adjustment Chart] 12.按 [掃描調整測試圖] 13.Following the instructions on the 13. 按照屏幕的指示掃描調整表 screen to scan the adjustment sheets...
-
Page 28: Print Counter List
Check Meter 檢查計數器 If Digital Doctor not installed, please send 如果沒有安裝數碼醫生,請每月把咪錶報告 the meter report monthly through: 電郵至 bhkg_csmeter@bhk.konicaminolta.hk email bhkg_csmeter@bhk.konicaminolta.hk 2565-2128 或 傳真至 2565-2128 OR fax Print Counter list 列印計數值 1.按[Utility/Counter] 1. Press[Utility/Counter] 2.按〔計數值細節〕 2. Touch [Details Counter] 3.按〔列印模式〕 4.按 [Start]列印報告 3. - Page 29 更換碳粉 Change Toner Cartridge If a toner is near empty,the screen 當某碳粉接近不足時,版面會顯示請更 will show please add toner 換碳粉 If not join Digital Doctor Service, to 如果沒有使用數碼醫生服務, 請電郵或致 order new toner, please: 電我們安排送新的碳粉 email bhkg_csorder@bhk.konicaminolta.hk 2565-2190 電郵至 bhkg_csorder@bhk.konicaminolta.hk OR call 2565-2190 或 致電...
- Page 30 更換廢棄碳粉閘 Replacing Waste Toner Box If the waste toner box is full [Please 當廢棄碳粉閘碳粉接近滿時,版面會顯 replace waste toner box] message 示[請更換廢棄碳粉閘]信息. will display. 1. Open the waste 1. 打開廢棄碳粉閘門,然 toner box door, then 後取出廢棄碳粉閘. draw out the waste toner box. 2. 把標籤轉貼到廢棄碳 2.
- Page 31 更換裝訂卡匣 Replacing Staple Cartridge If the staple cartridge is empty, 當裝訂卡匣的訂用完時, 版面會顯示請 replacing staple cartridge message 更裝訂卡匣的信息。請按照屏幕的指示 will display, please follow on-screen 更換. instructions to replace. On-Screen Instructions 屏幕指示 1.按[ 1. Touch [ 2. 按 [耗材/紙屑] 2. Touch 3.
-
Page 32: Removing Paper
清理塞紙 Removing Paper 當塞紙發生時,屏幕會顯示塞紙信息和 When a paper misfeed occurs in 指示塞紙的位置. a copy job, the machine displays the message [Mishandled paper] 請按[圖解說明]並跟隨屏幕的指示清理 and misfeed area(s) on the 塞紙. screen. Please touch [Illustration] and follow on-screen instructions to remove paper... - Page 36 客⼾戶服務熱線 2565 8181 部⾨門熱線 聯絡⽅方法 Particulars Contact us 維修保養服務 傳真Fax : 2856 1024 Service & 電郵Email : Maintenance bhkg_servicectr@bhk.konicaminolta.hk 報讀咪錶 傳真Fax : 2565 2128/ 2856 2008 Meter Reporting 電郵Email : bhkg_csmeter@bhk.konicaminolta.hk 訂購碳粉及紙張 傳真Fax : 2565 2128/ 2856 2008 Toner & Paper 電郵Email : Ordering bhkg_csorder@bhk.konicaminolta.hk...
Need help?
Do you have a question about the bizhub PRO 1100 and is the answer not in the manual?
Questions and answers