Wacom DTF-720 User Manual
Interactive pen display
Hide thumbs
Also See for DTF-720:
- Installation manual & user manual (180 pages) ,
- Installation manual and user's manual (60 pages) ,
- User manual (28 pages)
Table of Contents
Advertisement
Quick Links
Introduction and Overview
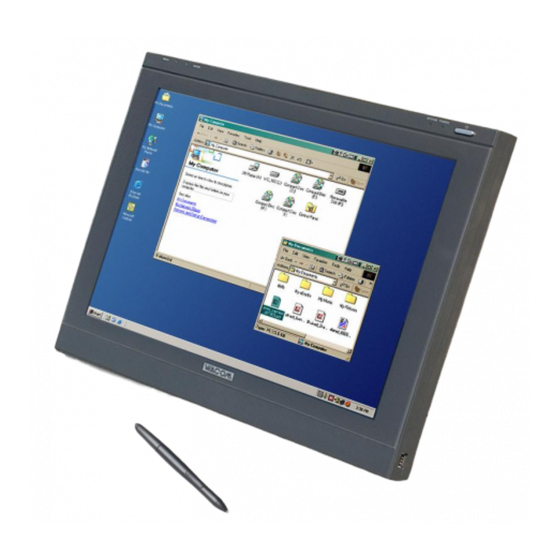
The Wacom® DTF-720™ Interactive Pen Display combines an LCD monitor with a
Wacom tablet.
This gives you a direct point-and-draw-on-screen interface that can be used with a
Personal Computer (PC) or Macintosh computer. DTF-720's basic components include a
Wacom tablet internally mounted behind a 17.0" diagonal TFT color LCD monitor, and
Wacom's pen.
Your DTF-720 Interactive Pen Display offers a number of significant advantages over a
standard monitor:
Reduced power consumption
■
Reduced heat generation
■
Requires less work space
■
Flicker free and easier on the eyes
■
Integrated input and display
■
Pressure-sensitive drawing directly on the display screen.
■
This manual describes how to install DTF-720 hardware and software. It also describes
how to use DTF-720 and the pen. Note that the computer treats the two parts of
DTF-720 (the LCD monitor and the Wacom tablet) as separate pieces of hardware.
Therefore, the installation process is completed in two stages. First, you will install the
LCD monitor portion of DTF-720. In the second stage you will install DTF-720's tablet
functionality.
You can find information on using the Wacom Tablet Control Panel for customizing your
tablet and pen settings in the online Help, located under the Help menu in the Wacom
Tablet Control Panel.
The following are not included with this product:
Information about your specific computer hardware
■
Information about your operating system
■
Information about application software.
■
Please refer also to your computer hardware, operating system, or software application
manuals.
To use the pressure-sensitivity of the pen with your favorite drawing application, refer to
instructions in that application's manuals.
1
Advertisement
Table of Contents
Troubleshooting

Subscribe to Our Youtube Channel
Related Manuals for Wacom DTF-720


Summary of Contents for Wacom DTF-720
-
Page 1: Introduction And Overview
This manual describes how to install DTF-720 hardware and software. It also describes how to use DTF-720 and the pen. Note that the computer treats the two parts of DTF-720 (the LCD monitor and the Wacom tablet) as separate pieces of hardware. -
Page 2: Precautions On Use And Handling
■ Only use the AC adaptor that came with DTF-720 . If a different type of AC adaptor is used, DTF-720 will not work properly or it may be damaged. Using a different type of AC adaptor also has the potential to result in fire. - Page 3 ■ Do not scratch the cover glass of DTF-720 . Avoid placing sharp objects on the glass surface. ■ Do not use detergent to clean the cover glass of DTF-720 ; this may alter the surface friction and deteriorate the handwriting feel.
-
Page 4: Table Of Contents
Checking Packed Components ...........5 Connect DTF-720 to a computer ..........6 Tablet Driver Installation ..............8 Uninstalling The DTF-720 ...............9 Customizing The DTF-720 – The Basics ..........10 Opening the Wacom Tablet Control Panel Control Panel Basics Control Panel Details Calibrating the DTF-720 DTF-720 Component Functions ..........16... -
Page 5: Checking Packed Components
Contains the driver soft- ware. (Windows/Macintosh) VGA Cable* Some package configurations includ an additional CD containing bundled software applications. Please retain the package box for use when storing or shipping DTF-720. * For DTF-720 only. Do not use with other devices. -
Page 6: Connect Dtf-720 To A Computer
Connect DTF-720 to a computer as adisplay. CAUTION ■ Do not use any cable that did not come with DTF-720; use of an improper cable may damage DTF-720. ■ Make sure your graphics card has a VGA connector. The use of an improper video card may damage DTF-720. -
Page 8: Tablet Driver Installation
Be sure to adjust the tablet calibration to precisely align the screen cursor position with the location of the pen tip. Refer to Calibrating the DTF-720 on page 14. To learn more about Using the DTF-720, proceed to Customizing The DTF-720 - The Basics and to Using... -
Page 9: Uninstalling The Dtf-720
When the pen tablet driver has been removed, shut down your system, power off your computer, and turn off the DTF-720. When your computer and the DTF-720 are off, disconnect the DTF-720 from your computer. Windows 98SE, Me, or 2000: Click the Windows START button. -
Page 10: Customizing The Dtf-720 - The Basics
Display and the pen. Opening the Wacom Tablet Control Panel To open the control panel, use the DTF-720 pen on the pen display tablet: Windows: Click on the Windows START button and choose ALL PROGRAMS. (For versions other than Windows XP, choose the PROGRAMS group.)Then select WACOM TABLET and choose the... -
Page 11: Control Panel Basics
Control Panel Basics Open the Tablet control panel to begin customizing your product. Experiment with different settings to find what works best for you. Any changes you make will take effect immediately, but you can always click DEFAULT to return to the factory settings. Additionally, your keyboard tab and arrow keys can be used to navigate the control panel. -
Page 12: Control Panel Details
Customizing DTF-720 – The Basics Control Panel Details Pen Tip Feel & Eraser Feel Move the Tip or Eraser Feel slider to adjust the sensitivity of the pen tip or eraser. To create broad brush strokes or to click with a light touch, use a soft tip setting. - Page 13 • Pressure Hold sets the button so that, when pressed, the pressure is locked at the current pressure level until the button is released. For example, you can paint with pressuresensitivity until you reach the bush size that you like. •...
-
Page 14: Calibrating The Dtf-720
You will need to calibrate the pen display tablet in order to align the screen cursor position with the position of the pen on the display screen. This is required to adjust for parallax caused by the display screen cover glass. Set the DTF-720 in its working position, then follow the procedure below. - Page 15 Hold the pen as you normally do, and use the pen tip to click on the cross- hairs in the upper-left corner. Then click on the cross-hairs that are displayed in the lower-right corner. (For Windows systems, you will need to click APPLY or OK for the changes to take effect.) Test the alignment and click OK to accept the calibration.
-
Page 16: Dtf-720 Component Functions
- When a still image is displayed for a long period of time, an afterimage may remain for a short period of time. As the tablet portion of DTF-720 emits electromagnetic waves at a certain frequency, if another tablet is closely placed to DTF-720, the screen cursor may jitters or jumps around. To solve this problem, place... -
Page 17: Rear View
Important Be sure to adjust the tilt angle of the stand to the low tilt position before packaging DTF-720. If you do not close the stand, the notched mechanism may be damaged during transportation and storage. Do not lift the unit by the stand; this may damage the stand mechanism. -
Page 18: Using An Alternate Mount Or Stand
DTF-720 Component Functions Using an Alternate Mount or Stand If you will be using DTF-720 in an installation that requires the use of an alternate mounting platform, you can remove the adjustable stand from DTF-720 and mount the pen display onto a VESA conforming mount arm or stand. -
Page 19: Using The Pen
Using the Pen Hold the pen as you would a pencil. Make sure the side switch is in a convenient location where you can press it with your thumb or forefinger, but won't accidentally press it while drawing. Eraser Eeasar Second Side Switch Side Switch Tip Switch... -
Page 20: Using A Pen
Note to calibrate DTF-720. Clicking Tap DTF-720 screen once with the pen tip, or touch the pen to the display screen with enough pressure to generate a mouse click. Double-Clicking Press the upper side switch (Windows systems) or quickly tap DTF-720 screen twice in the same place with the pen tip. - Page 21 Important Do not remove the switch by prying it from either end as this may damage your Pen. Remove the pen tip cone by turning it counterclockwise. Pull the grip forward over the pen tip. NEVER adjust the trimmer capacitor that became visible as it is fine tuned.
-
Page 22: Adjusting The Lcd Monitor
On Screen Display (OSD) controls. User Settings: When you manually set the display using the On Screen Display (OSD) function, the settings are stored within DTF-720 for use the next time the unit receives a similar signal. This is applicable to all display modes. - Page 23 Horizontal Center Menu Position Select to move the Select to move the OSD menu around screen image left the display. or right. To automatically adjust, use the Reset option. Vertical Center Reset Provides two options: Select to move the screen image up or Use Auto Adjust down.
-
Page 24: Adjusting Pitch And Phase (Vga Only)
Adjusting Pitch and Phase Some computers and video cards may not allow the multi-sync function to fully work when DTF-720 is first connected. If some portion of the text appears blurred, adjust the pitch and phase by following the procedure below. For crisp images, set the DTF-720 resolution of your video card to 1280 x 1024. -
Page 25: Power Saving
And if the phase is not calibrated, the darkened area riffles. Power Saving DTF-720 conforms to VESA and Energy Star power saving guidelines. When using DTF-720 with a VESA DPMS Display Power Management Signaling (DPMS) compliant computer or graphics card, the display will automatically comply with the below power saving parameters. -
Page 26: Caring For Dtf-720
Caring for DTF-720 Cleaning T o clean the DTF-720 casing, use a soft cloth with mild detergent (such as dish washing liquid) diluted with water. Do not use paint thinner, benzine, alcohol, or other organic solvents to clean DTF-720 casing or pen. -
Page 27: Troubleshooting
Troubleshooting If you encounter problems with DTF-720 display, refer to the following tables. Your problem may be described here, and you can try the solution offered. For additional information about color issues, refer to the documentation that came with your operating system or applications. - Page 28 ■ Check that the AC power adaptor is plugged into both the pen display tablet and an active power outlet, and that the DTF-720 power switch is turned on. ● No display. The power LED is lit ■ Check the contrast, brightness, and backlight cntrols.Adjust blue.
-
Page 29: Pen Tablet Troubleshooting
■ Be sure you are using the pen (modelFP-320) that originally came with your pen display tablet. Other pens may not function properly on the DTF-720 pen display tablet. ■ Make sure the status LED lights blue when the tip is pressed. - Page 30 ■ Be sure you are using the pen (model FP-310) that originally came with your pen display tablet. Other pens may not function properly on the DTF-720 pen display tablet. ■ Be sure you press the side switch when the pen tip is in proximity –...
- Page 31 If another tablet is too closely screen when another tablet is placed to the DTF-720 it may interfere with screen cursor connected to your computer. positioning. If this occurs, move the tablet further away from...
- Page 32 Troubleshooting Windows-Specific Problems Problem Hint ● Windows 98SE or Me: ■ On a multiple monitor system, the pen display tablet is When working with multiple mapped to the virtual desktop (a rectangular area covering all monitors, the screen cursor monitors). If your video display areas do not form a rectangle positioning is incorrect after because they are different sizes or they are not evenly aligned, moving into the unmapped area of...
- Page 33 OS v10.2.7 or 10.2.8, but computer. (Be sure to unplug only the USB cable.) Then fails to work after restart. uninstall the tablet driver. See Uninstalling the DTF-720 on page 41 for details. 2. Within your computerʼs OS X SYSTEM folder, select (highlight) the LIBRARY folder.
-
Page 34: Specifications
Specifications General Specifications Physical dimensions (WxDxH): 400x362x55.5mm (excluding the stand) Weight: 6.1kg (including the stand) Main Unit input Voltage: DC12V Power consumption: 37W or less (DC12V) Operating temp. & humidity: 5 to 35 deg. C, 20 to 80%RH (non condensing) Storage temp. - Page 35 Tablet Reading technology: Electromagnetic reasonance method Active area: 337.920 x 270.336mm Resolution: 20lpmm (0.05mm) max. Accuracy: +/-0.5mm, four corners ( 20 mm wide, 80 mm long from each corner of four "L" shaped areas) to be +/-2.0mm Maximum reading height: Maximum report rate: 100 points/sec., max Pressure levels:...
- Page 36 FCC Compliance and Advisory Statement This device complies with Part 15 of the FCC rules. Operation is subject to the following two conditions: 1) this device may not cause harmful interference, and 2) this device must accept any interference received, including interference that may cause undesired operation.
-
Page 37: Obtaining Technical Support
Obtaining Technical Support If you have a problem with DTF-720, first check the appropriate setup chapter in this guide to make sure the unit is installed correctly. Then review the Troubleshooting section within this manual and the online Help; your problem may be described there and you can try the solution offered. - Page 39 Copyright © Wacom Company, Limited, 2005 All rights reserved. No part of this manual may be reproduced except for your express personal use. Wacom reserves the right to revise this publication without obligation to provide notification of such changes. Wacom does its best to provide current and accurate information in this manual.
Need help?
Do you have a question about the DTF-720 and is the answer not in the manual?
Questions and answers