Table of Contents
Advertisement
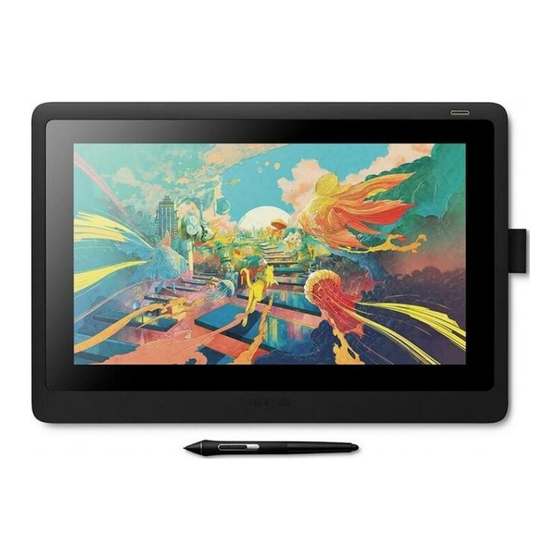
USER'S MANUAL
DTK-1660
About the Wacom Cintiq 16
Set up your device
Get started with your creative pen display
Work with your pen
Customize your device in Wacom Tablet Properties
Use On-Screen Controls as shortcuts
Access application-specific settings
Wacom Desktop Center
Customize Wacom Display Settings
Care for your device
Technical Support
Glossary
Advertisement
Table of Contents

Related Manuals for Wacom Cintiq 16


Summary of Contents for Wacom Cintiq 16
- Page 1 About the Wacom Cintiq 16 Set up your device Get started with your creative pen display Work with your pen Customize your device in Wacom Tablet Properties Use On-Screen Controls as shortcuts Access application-specific settings Wacom Desktop Center Customize Wacom Display Settings...
-
Page 2: Table Of Contents
Advanced pen and eraser Customize your device in Wacom Tablet Properties What can I customize in Wacom Tablet Properties? Where can I access settings and other options in Wacom Tablet Properties? Open Wacom Tablet Properties Assign settings in Wacom Tablet Properties... - Page 3 Backing up your settings Updating your tablet Getting apps and products Getting Support for Wacom products Logging in with your Wacom ID Customize Wacom Display Settings Customize advanced Wacom Display Settings Wacom Display Settings - Set Color Care for your device...
-
Page 4: About The Wacom Cintiq 16
About the Wacom Cintiq 16 Your Wacom Cintiq 16 creative pen display helps you express yourself by allowing you to create directly on your screen. Use the pen included with the Cintiq 16 or another Wacom pen or tool that works with the Cintiq 16. -
Page 5: Features Of Your Wacom Cintiq 16
The pen holder can be installed on either side of your pen display. Use it to store the pen when it is not in use. Additional nibs are also found in the pen holder. Pen button access to Express Menu: Use the upper button of the pen included with your Cintiq 16 to access the Express Menu. - Page 6 User's Manual Number Item 3-in-1 cable cover Connection for 3-in-1 cable Folding legs VESA stand mounting holes...
-
Page 7: Access The Express Menu
Access the Express Menu Express Menu By default, pressing the upper pen button of the Wacom Pro Pen 2 included with your Cintiq 16 will open the . The Express Menu improves your work flow by giving you quick and easy access to your favorite features and functions. -
Page 8: Set Up Your Device
User's Manual Set up your device 1. First, follow the directions in this section of user help. The Quick Start Guide included in the box contains images that can help. Attach any stands that are included with your device. Set up your work area. Get started 2. -
Page 9: Set Up Your Work Area
User's Manual Set up your work area Position your tablet, pen, and keyboard for easy access. Adjust your monitor so you can view it comfortably without eyestrain, placing it about one arm's length away from you. Position the tablet so the screen cursor follows the same direction as your hand movements on the tablet. If you are using the tablet as a creative tool, consider placing the tablet below the keyboard and centered below your monitor. -
Page 10: Install The Driver
From the Wacom Desktop Center, select Updates , and then click the update to install it. If the Wacom Desktop Center is not available for your device, go to the Wacom drivers page to find the latest updates. Note : Your device will not work if you uninstall the driver. -
Page 11: Stand Setup And Usage
User's Manual Stand Setup and Usage There are two built-in stand legs. Fully extend the legs into the lock position before using your pen display: In addition to the folding legs, you can use your pen display with an optional VESA stand. The VESA stand offers a larger range of incline for your pen display. -
Page 12: Get Started With Your Creative Pen Display
Help You can also open user help from the Wacom Desktop Center menu. You also can access user help from the Product Manuals page of the Wacom Support website. -
Page 13: Connect To Your Computer
5. Connect the of the 3-in-1 cable to your computer. power button 6. Press the to turn on the pen display. Wacom recommends that you visit the Wacom Desktop Center to check for updates for the Wacom driver and firmware. -
Page 14: Work With Your Pen
3. Replace the cone. Specialty pens Pens designed for more advanced work, such as the Wacom Pro Pen 3D, Art Pen, or Airbrush, can be used with many pen tablets and pen displays. To discover other pens and tools that can be used with your pen tablet or pen display, go to the Wacom Store. -
Page 15: Use Your Pen
: Select the item with the pen tip, then slide the pen tip across the screen to move it. Pen buttons Use pen buttons as shortcuts to settings. You can view and change the assigned settings on the tab in Wacom Tablet Properties. Note: Some pens do not have buttons. - Page 16 User's Manual...
-
Page 17: Store Your Pen
User's Manual Store your pen Store your pen properly keep it in good condition and help the pen tip last longer. Important: Store your pen so there is no pressure on the pen tip or eraser. If your device has a pen stand, store the pen with the tip down in the stand. If your device included a pen case, store the pen in the pen case. -
Page 18: Customize Your Pen Functions
Some pens do not have buttons or an eraser. Assign settings to the pen button and pen tip Open Wacom Tablet Properties. Note: The options available in Wacom Tablet Properties will vary depending on your device. 2. If there is a Tool row, select your pen. -
Page 19: Customize Other Pen Properties
: To see how hard you need to press with the pen, check your Current Pressure by pressing down with the pen tip or eraser in an empty area of the Wacom Tablet Properties window. If you want to change the amount of pressure you need to use the pen tip or eraser, move the... - Page 20 User's Manual Distance or set a pen button to double-click instead of the pen tip. Default You can return the pen to default settings by going to the tab in Wacom Tablet Properties and clicking...
-
Page 21: Eraser
User's Manual Eraser Select the Eraser tab to adjust eraser sensitivity. The above screenshot is for descriptive purposes; it may not match your screen. Eraser Feel Use the slider to customize the amount of pressure needed to erase. Erase From the dropdown menu, select the function to perform when using the eraser. -
Page 22: Replace The Pen Nib
Then, gently guide the bottom of the stand to the right until you feel it click into place. If you device includes a pen holder attachment, check there. If you need more nibs, you can purchase them from the Wacom Store. Where to find the nib replacement tool For some devices, the nib replacement tool is a metal ring included with your device. - Page 23 User's Manual Pen stands vary depending on the pen tablet or pen display that you purchased.
-
Page 24: Use Your Pen With Windows Ink
(Microsoft Office 2007 or later): Use the enhanced digital mark-up and inking tools found on the Review tab in applicable applications. Windows Input Panel : Use handwriting or an on-screen keyboard to directly enter text with your Wacom pen. Note: The Pen Flicks and press-and-hold-to-right-click features are disabled in some graphics applications. -
Page 25: Advanced Pen And Eraser
User's Manual Advanced pen and eraser Customize To further customize tip or eraser pressure settings, select the Pen or Eraser tab and then click the button. Options within the Pen Feel Details dialog let you independently change the tip or eraser pressure sensitivity and click threshold settings. Note: The available features on your pen may vary depending on your device. -
Page 26: Customize Your Device In Wacom Tablet Properties
User's Manual Customize your device in Wacom Tablet Properties You can customize your device, pen, and other tools in Wacom Tablet Properties so that they work the way you want. Open Wacom Tablet Properties to view the settings you can customize. -
Page 27: Open Wacom Tablet Properties
Wacom Tablet Properties, you can view customizable settings for your device and tools. Note: The tabs and options that you see in Wacom Tablet Properties will vary depending on your device. To open Wacom Tablet Properties: Windows and Mac: Wacom Desktop... -
Page 28: Assign Settings In Wacom Tablet Properties
Some examples of customizable components are ExpressKeys™, pen buttons, the pen tip, Touch Rings, Rocker Rings, On-Screen Controls, touch gestures, and Touch Strips. Note: The customizable components and the options available in Wacom Tablet Properties may vary depending on your device. Open Wacom Tablet Properties. -
Page 29: Example Of Assigning A Setting In Wacom Tablet Properties
6. Engage the component that you customized, and the setting that you assigned is performed. : You can assign settings that apply only in a specific application. Example of assigning a setting in Wacom Tablet Properties Zoom In Here is how you can customize a pen button to Open Wacom Tablet Properties. -
Page 30: What Settings Can I Assign
The available features and customizable components in this list may vary depending on your device. Refer to the drop- down menus on the settings tabs in Wacom Tablet Properties to see which options are available for the components specific to your device. Warning:... - Page 31 User's Manual Forward Directs you to a step ahead of where you are in your history, similar to how Forward works in browsers. Toggles Ink on and off. Ink Toggle When Handwriting recognition is turned on, Ink recognizes and converts your handwriting into text and (Mac) inserts it into a document.
- Page 32 Displays the current settings of your customizable components, including ExpressKeys™, the Touch Ring, pen, and touch. Settings Click on any item that displays to open Wacom Tablet Properties so you can adjust setting assignments, if desired. Show Minimizes all open windows so you can view your desktop.
- Page 33 User's Manual Skip Touch Ring. Switch Toggles between the applications that you have open. Application Tablet PC Displays the Tablet PC Settings menu. Settings Toggles touch on and off. Touch On/Off This setting is not available on devices that have a built-in touch on/off switch or button. Tumbles, orbits, or rotates items in 3D applications.
-
Page 34: Assign Keystrokes
4. Enter a for your keystroke and click The name appears on On-Screen Controls, in Wacom Tablet Properties, and in Settings view, so enter a name that indicates the keystroke you assigned. If you are assigning numbers to a Keypad, it is best practice to name the Keystroke the number that you assigned. -
Page 35: Calibration
1. Set up your pen display in its working position. 2. Open Wacom Tablet Properties. If more than one pen display is installed on your system, select the one you are working Device with from the list. -
Page 36: Settings View
User's Manual Settings View You can view the current settings for the ExpressKeys™, Rocker Ring, Touch Ring, Center or Home button, Touch Strips, Touch on/off, and the pen for your Pen Display at any time. Your display will vary, depending on model. To use Settings View: In the Tablet Properties... -
Page 37: Display Toggle
Display Toggle is available when working on multiple monitor systems. This feature allows you to work with your pen display on all other connected displays, or on one display at a time. Wacom Tablet Properties, the Display Toggle tab is automatically available when your pen tablet is installed on a multi-monitor system. - Page 38 User's Manual less. When deselected, as much of the active area as possible will be used for tablet-to-display mapping. Important: When using application-specific settings with Display Toggle, be sure that each customized application in the Application All Other list (including ) has a tool button or ExpressKey assigned to Display Toggle.
-
Page 39: Customize User Options
User's Manual Customize user options Options Click on Wacom Tablet Properties to customize pen button mode and other preferences for your device. Note: The available options may vary depending on your device. Hover Click is the default and allows you to click by pressing the pen button while holding the pen tip slightly above the device surface. -
Page 40: Use On-Screen Controls As Shortcuts
User's Manual Use On-Screen Controls as shortcuts On-Screen Controls are menus that display on your pen display screen or monitor. You can use On-Screen Controls as shortcuts to the settings that you use the most. How to create and use an On-Screen Control 1. - Page 41 Radial menu : A Radial menu is a circle split into slices, and each slice has its own setting. : You can select the wrench icon to open Wacom Tablet Properties.
-
Page 42: Create On-Screen Controls
You must first create a new On-Screen Control, or copy an existing one, and then you can assign settings to Important : On-Screen Controls are not specific to a device. You can assign them to a customizable component of any device that appears in Wacom Tablet Properties. 1. Open Wacom Tablet Properties. - Page 43 User's Manual Size You can move the slider to change the size of the On-Screen Control when it appears on your screen. You can select Display at Cursor if you want the On-Screen Control to appear next to your cursor when you open it. If you do not select this, the On-Screen Control appears in the same location every time you open it.
-
Page 44: Assign Settings To Radial Menus And Screen Keys
You can change the settings at any time if you decide that you want different settings. 1. In Wacom Tablet Properties on the On-Screen Controls tab, select the name of the On-Screen Control in the Panels list. -
Page 45: Assign Settings To Keypads
Keypad, you can change the settings assigned to the buttons so that the Keypad includes the settings you want. 1. In Wacom Tablet Properties on the On-Screen Controls tab, select the name of the Keypad in the Panels list. -
Page 46: Assign On-Screen Controls
You can assign On-Screen Controls to ExpressKeys™, touch gestures, and pen buttons, depending on the features available on your device. In this example, you can see how to assign an On-Screen Control to an ExpressKey™. Device Open Wacom Tablet Properties and select your Functions Select ExpressKeys™... -
Page 47: Access Application-Specific Settings
User's Manual Access application-specific settings Settings assigned to customizable components can be further customized for a specific application. This makes performing functions in the application faster and easier. There are multiple ways to access those application-specific settings. Settings assigned by you : You can assign your own settings that change depending on the application you are working Settings assigned by applications : Some applications assign settings to customizable components so that when you... -
Page 48: Application-Specific Settings Assigned By You
Pen settings, the changes will apply to the Pen only while you are using that application. Application-specific settings can be used with all Wacom pen tablets and pen displays, and with the ExpressKey Remote device. - Page 49 User's Manual To remove an application-specific setting: Tool 1. In the list, select the tool from which you want to remove the application-specific setting. 2. In the Application list, select the application you want to remove. 3. Click on the Application list button.
-
Page 50: Settings Assigned By Applications
When you open that application, you are automatically using the settings assigned by it. How do I know what setting is assigned? After you open an application that assigns settings, you can view the assigned settings in Wacom Tablet Properties. Application Defined If you see... -
Page 51: Imported Settings Assigned By Applications
3. Follow the prompts in the window that appears. Open Wacom Tablet Properties to view the imported settings. : You do not have to use the settings assigned by the settings file. You can change the settings in Wacom Tablet Properties. -
Page 52: Wacom Desktop Center
User's Manual Wacom Desktop Center The Wacom Desktop Center helps you keep your driver and products up-to-date, customize your devices, and learn more about how to use pen tablets and pen displays. The above screenshot is for descriptive purposes; it may not match your screen. -
Page 53: Updating Your Tablet
Wacom ID so you can access the Wacom Cloud. Click your name to view and update your profile. Click More to change privacy settings, to configure how the Wacom Desktop Center starts up, to access help, and to find Wacom on social media. -
Page 54: Customize Wacom Display Settings
User's Manual Customize Wacom Display Settings Display The Display Settings utility allows you to customize Pen display settings. To open the Display Settings dialog, select the Settings option in the Wacom Desktop Center. Select the Display to be customized from the dropdown menu. - Page 55 User's Manual Notes: Not all setting options may be available on your Pen display.
-
Page 56: Customize Advanced Wacom Display Settings
User's Manual Customize advanced Wacom Display Settings Advanced Click Wacom Display Settings to customize advanced display settings such as aspect ratio, sharpness, auto power down, and more. Important: The available options may vary depending on your device. Change the Aspect Ratio so that the screen displays the ratio of width to height that you want. - Page 57 User's Manual The above screenshot is for descriptive purposes; it may not match your screen.
-
Page 58: Wacom Display Settings - Set Color
User's Manual Wacom Display Settings - Set Color The Set Color dialog of the Wacom Display Settings utility allows you to further customize Pen display settings. To open the dialog, choose Custom Color from the Color Setting menu in the main Display settings dialog. -
Page 59: Care For Your Device
Replace your pen nibs frequently to avoid scratching the surface with worn pen nibs. Avoid extremes in temperature. Important Product Information Make sure to review the for additional safety precautions. You can find it in the Wacom Desktop Center, if supported for your device, or from Wacom Support. -
Page 60: Wacom Support
User's Manual Wacom Support If you encounter an issue with your pen tablet or pen display, perform the recommended action in any error message that appears on your screen. If that does not resolve the issue, try the following: Review the Quick Start Guide and make sure that the tablet is set up correctly, including that all plugs and connectors are firmly in place. -
Page 61: Test The Creative Pen Display
6. Check any other tool(s) you may be using. 7. If any of these tests fail, you may have defective hardware. See Wacom Support. 8. After testing, use Wacom Tablet Properties to reconfigure your pen display and tools for any custom settings you may have been using. -
Page 62: Test The Pen
4. If updating your driver does not fix the issue, in the Wacom Desktop Center. 5. If resetting does not fix the issue, diagnose issues using Wacom Tablet Properties. Diagnose issues using Wacom Tablet Properties Open Wacom Tablet Properties. Device If you have more than one device connected to your system, select the device you are using the pen with from the list. - Page 63 User's Manual The above screenshot is for descriptive purposes; it may not match your screen. Pointing Device Info Hold your pen within 10 mm (0.4 inch) of the surface of the device while watching the Proximity Device Name Device Type Device S/N You should see a value appear after , and...
-
Page 64: Glossary
The smallest unit of measure on your display screen. Pressure sensitive. A quality of the Wacom pen tip and eraser that senses the amount of pressure being applied. This is used to create natural-looking pen, brush, and eraser strokes in applications that are pressure-sensitive. - Page 65 The navigation area of your pen tablet where touch is detected. The touch sensor resides within the active area, and does not accept pen input. Track. A motion used when navigating with touch. Touch and move a single finger across the tablet surface. Wacom Link adaptor Adapter for creative pen displays on machines without a USB-C port.
-
Page 66: Order Parts And Accessories
Order parts and accessories To purchase parts and accessories for your device, go to the Wacom Store. You may also contact your local dealer, distributor, or Wacom Support for your region. Note: Some parts and accessories may not be available in all regions. -
Page 67: Privacy
User's Manual Privacy At Wacom, we value your Privacy. We use analytics to collect basic information about browsing to improve our User Help. Please see our Privacy Policy for more information. -
Page 68: About This Document
User's Manual About This Document This document is referred to as User Help. User Help is intended to assist with the setup, features, and advanced use of Wacom devices, including tablets, pens, and accessories. User Help is an additional resource to the Quick Start Guide, which is included in the box with your Wacom device. The Quick Start Guide will give you the fastest overview of the initial setup or installation process so you can begin using your Wacom device immediately. -
Page 69: Trademarks
© Copyright 2019 Wacom Co., Ltd. All rights reserved. Wacom, Intuos, Cintiq, and their respective logos are trademarks and/or registered trademarks of Wacom Co., Ltd. No part of this information may be reproduced except for your express personal use. Wacom makes reasonable efforts to provide current and accurate information. However, Wacom reserves the right to change any specifications and product configurations at its discretion, without prior notice and without obligation to include such changes.
Need help?
Do you have a question about the Cintiq 16 and is the answer not in the manual?
Questions and answers