Table of Contents
Advertisement
Quick Links
Advertisement
Table of Contents

Subscribe to Our Youtube Channel
Related Manuals for EdgeStar CMF151L-1


Summary of Contents for EdgeStar CMF151L-1
- Page 1 Compact Freezer CMF151L-1 Owner’s Manual www.edgestar.com V3.1-09212021...
-
Page 2: Important Safety Information
Important Safety Information Improper handling can cause serious damage to the EdgeStar freezer and / or injury to the user. This freezer is designed for domestic indoor use only. Do not use the unit for industrial or commercial use. Any other use may invalidate the warranty. Please review the ratings label located on the rear panel of the unit for electrical and other technical data related to this unit. - Page 3 Important Safety Information General Safety • To prevent injuries, use at least two people to move and install the freezer. • This appliance is not intended for use by persons, including children, with reduced physical, sensory or mental capabilities, unless they have been given supervision or instruction concerning the use of the appliance by the person(s) responsible for their safety.
-
Page 4: Table Of Contents
Storing Frozen Food....................10 Freezing Fresh Food ....................10 Normal Sounds......................11 Defrosting ........................ 11 Energy Saving Guide ....................11 Preparing the Freezer for Storage................12 Cleaning and Maintenance ..................... 12 Troubleshooting ......................13 Specifications ......................... 15 EdgeStar Limited Warranty .................... 16... -
Page 5: First-Time Operating Instructions
The instruction manual should be read before use. Introduction Thank you for purchasing this EdgeStar freezer. We hope that this purchase will be the beginning of a lasting and rewarding relationship between you and EdgeStar. We will provide the customer support and exemplary products necessary to nurture that relationship. -
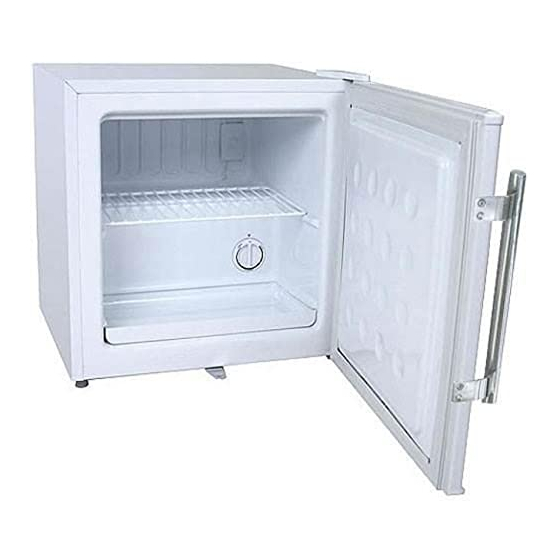
Page 6: Parts Identification
Parts Identification Note: Gather the model and serial number from the product label and write them down before installing the freezer. Front View: Door Hinge Door Handle Lock Leveling Foot Rear View: Product Label Cabinet Power Cord... -
Page 7: Installation
Installation The freezer should be installed in accordance with local electrical code requirements. The freezer should also be placed in a location that is strong enough to support its total weight, keeping in mind that it will weigh substantially more when fully loaded than when empty. Before you plug the freezer into a power supply, be sure to let it stand upright for at least 24 hours to allow the compressor’s oils to settle. -
Page 8: Clearance Requirements
Clearance Requirements Notes: • Choose a location that has ambient temperatures above 50° F and below 90° F. Operation outside these temperatures may result in lowered efficiency or cause other adverse effects. • This unit MUST be installed in an area protected from the elements, e.g. wind, rain, water spray or drips. -
Page 9: Reversing The Door Swing
Reversing the Door Swing Warning: Before you begin, unplug the compact freezer. To Remove the Door: 1. Using a Philips screwdriver, remove the screws from the handle and set the handle and screws aside. 2. Using a flathead screw driver, carefully pry the top hinge cover off. 3. -
Page 10: Operation
Operation Installation Checklist before Operation 1. Have all packing materials and tape been removed from the interior and exterior of the freezer? 2. Have the installation instructions been followed, including connecting the machine to electricity? 3. Has the machine been leveled? 4. -
Page 11: Normal Sounds
Caution: If you turned the unit off, please wait at least 5 minutes before turning it back on. Normal Sounds Your freezer may make noise during operation. Most of these sounds are normal. Hard surfaces like the floor and walls can make sounds seem louder than they actually are. The following describes several sounds you may hear and what may be making them: •... -
Page 12: Preparing The Freezer For Storage
Preparing the Freezer for Storage If the freezer will not be used for a long time or is to be moved to another place, it will be necessary to defrost the unit and dry the interior. 1. Disconnect the freezer from the power supply by removing the power plug from the wall socket. 2. -
Page 13: Troubleshooting
Troubleshooting Before Calling for Help: If the unit appears to be malfunctioning, read through the “Operation” section of this manual first. If the problem persists, check the Troubleshooting Guide below and on the following page. The problem may be something that can easily be solved or explained. Problem Possible Cause Solution... - Page 14 Problem Possible Cause Solution The unit is making Certain sounds are Read the “Normal Sounds” section. strange noises normal. The unit is not level Check to make sure that the freezer is level, and or is touching another that it is not in contact with another appliance or appliance.
-
Page 15: Specifications
Note: Technical data and performance information are provided for reference only. Specifications are subject to change. Check the rating label on the freezer for the most accurate information. Product Type Compact Freezer CMF151L-1 Model Voltage / Frequency AC 115V~60Hz Amperage 1.1A... -
Page 16: Edgestar Limited Warranty
WHAT IS COVERED: LABOR: For a period of NINETY (90) DAYS from the date of original purchase, labor will be performed free of charge at an authorized EdgeStar repair facility. At its option, EdgeStar will repair the product with new or remanufactured parts, or exchange the defective product with a new, refurbished, or remanufactured product. - Page 17 ©2021 EdgeStar...
Need help?
Do you have a question about the CMF151L-1 and is the answer not in the manual?
Questions and answers