
Related Manuals for EdgeStar CBR1501SG


Summary of Contents for EdgeStar CBR1501SG
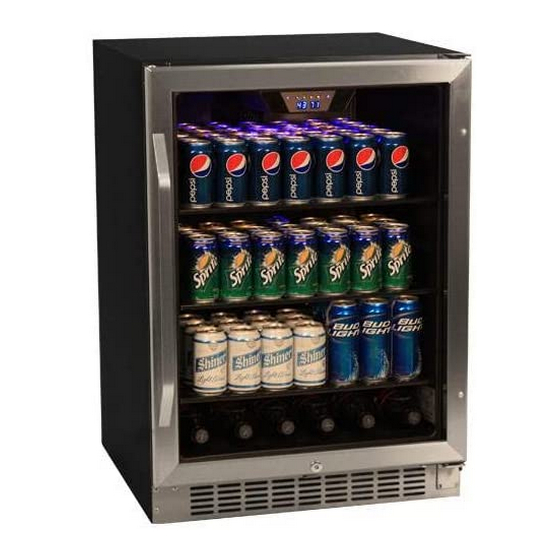
- Page 1 Built-in Beverage Cooler CBR1501SG Owner’s Manual For more information on other great EdgeStar products on the web, go to http://www.edgestar.com...
-
Page 2: Important Safety Information
Important Safety Information Improper handling can cause serious damage to the EdgeStar beverage cooler and/or injury to the user. This beverage cooler is designed for domestic indoor use only. Do not use the unit for industrial or commercial use. Any other use may invalidate the warranty. -
Page 3: Table Of Contents
................. 11 ROUBLESHOOTING CONTINUED SPECIFICATIONS ....................12 EDGESTAR LIMITED WARRANTY ..ERROR! BOOKMARK NOT DEFINED. First Time Operating Instructions Before use, make sure all packaging labels and materials are all removed from the unit. Be sure to keep track of all included parts and pieces before discarding packaging materials. -
Page 4: Introduction
Introduction Thank you for purchasing this EdgeStar beverage cooler. We are glad you chose us. We believe that your purchase of this product opens a relationship between you and EdgeStar. We will provide the customer support needed to nurture that relationship. -
Page 5: Parts Identification
Leveling foot every 3 months is ideal. Back View Product Label Tip: Gather the model and serial number from the product label and write them down before installing the beverage cooler. Power Plug Cabinet EdgeStar Built-in Beverage Cooler... -
Page 6: Installing The Beverage Cooler
Installing the Beverage Cooler The beverage cooler should be installed in accordance with local electrical code requirements. The beverage cooler should also be placed in a location that is strong enough to support its total weight, keeping in mind that it will weigh substantially more when fully loaded than when empty. -
Page 7: Installation Clearance Requirements
See the “Leveling the Beverage cooler” section. • A standard electrical supply (115 VAC only, 60 Hz), properly grounded in accordance with National Electrical Code and local codes and ordinances is required. EdgeStar Built-in Beverage Cooler... -
Page 8: Electrical Requirements
Electrical Requirements ELECTRIC SHOCK HAZARD! Plug into a grounded 3-prong outlet. Never remove the grounding prong from the plug. Never use an adapter to bypass the grounding prong. DO NOT use an extension cord. Failure to follow these instructions can result in fire, electrical shock, or death. -
Page 9: Installing The Door Handle
2. If necessary, make sure you remove all the contents sitting on the shelf. 3. Remove both of the plastic notches with a screwdriver. 4. Continue to pull the shelf forward until it is completely removed from the inner compartment. EdgeStar Built-in Beverage Cooler... -
Page 10: Reversing The Door Swing
Reversing the Door Swing Follow the instructions below to reverse the door swing. IMPORTANT: Before you begin, unplug the refrigerator. To reverse the door from right swing to left swing: 1. Open the door and using a Phillips screwdriver, remove the bottom screws from the lower hinge. -
Page 11: Operation
The Celsius or Fahrenheit light will be lit depending on what scale temperature is being displayed. To switch between C and F, press and hold the buttons at the same time for approximately 5 seconds until the temperature scale changes. EdgeStar Built-in Beverage Cooler... -
Page 12: Normal Sounds
Normal Sounds Your new beverage cooler may make sounds that are not familiar to you. Most of the new sounds are normal. Hard surfaces like the floor, walls can make the sounds seem louder than they actually are. The following describes the kinds of sounds that might be new to you and what may be making them. -
Page 13: Cleaning And Maintenance
The door gasket is not Make sure the door gasket is properly sealing. sealing properly. The cooler does not have the Read and follow the “Installation Clearance suggested ventilation. Requirements” section. EdgeStar Built-in Beverage Cooler... -
Page 14: Troubleshooting Continued
Troubleshooting continued Issue Possible cause Solution Ensure the cooler is plugged in and the power outlet has There is a power failure. power. Plug the unit in to a power outlet that has sufficient The cooler is not plugged in. The beverage cooler amperage. -
Page 15: Specifications
Note: Technical data and performance information is provided for reference only. Specifications are subject to change. Check the rating label on the beverage cooler for the most accurate information. *Note on beverage storage capacity: The beverage cooler can store 160 standard 12 oz. cans. EdgeStar Built-in Beverage Cooler... - Page 16 Once an EdgeStar authorized representative has confirmed that your product is defective and eligible for warranty service, the product must be returned to an EdgeStar authorized repair facility. EdgeStar is not responsible for damage resulting from shipper mishandling or improper packaging. Do not return a defective product to the place of purchase.
- Page 17 Web: http://www.edgestar.com E-mail: service@edgestar.com Register your product, download owner’s manuals, access additional troubleshooting resources, and obtain more information on other great EdgeStar products on the web at: http://www.edgestar.com Product contents and specifications may change without notice. Copyright © 2013 Living Direct, Inc. All rights reserved.
Need help?
Do you have a question about the CBR1501SG and is the answer not in the manual?
Questions and answers