Table of Contents
Advertisement
Quick Links
INSTALLATION MANUAL
Level of Difficulty
Moderate
Installation difficulty levels are based on time
and effort involved and may vary depending on
the installer level of expertise, condition of the
vehicle and proper tools and equipment.
This is the first of two manuals
required to complete this installation.
The second manual is included with
your side steps / running boards.
Parts List
Item Qty Description
1
2
Mounting bracket, driver side
2
2
Mounting bracket, passenger
side front
3
3
Mounting bracket, passenger
side rear
4
2
Mounting bracket, spacer
5
7
Retainer plate
6
17
Flat washer, 5/16"
7
17
Hex bolt, 5/16"-18 x 1", grade 5
8
16
Flange nut, 5/16"-18
9
4
Flat washer, 5/16",
black zinc plate
10
4
Hex bolt, 5/16"-18 x 1",
grade 5, black zinc plate
11
5
Clip on nut, 5/16"-18
12
4
Thread forming bolt, 5/16" x 1"
Tools Required
Drill
Ratchet
Drill bit, 7/16"
Wrench, 1/2"
Drill bit, 7/32"
Straight edge
or Level
Drill bit, 11/32"
Paint marker
Socket, 1/2"
Tape measure
Panel trim
--
removal tool
Torque Specifications
5/16"
7 ft-lbs.
Use above torque setting unless otherwise noted
LUVERNETRUCK.COM
•
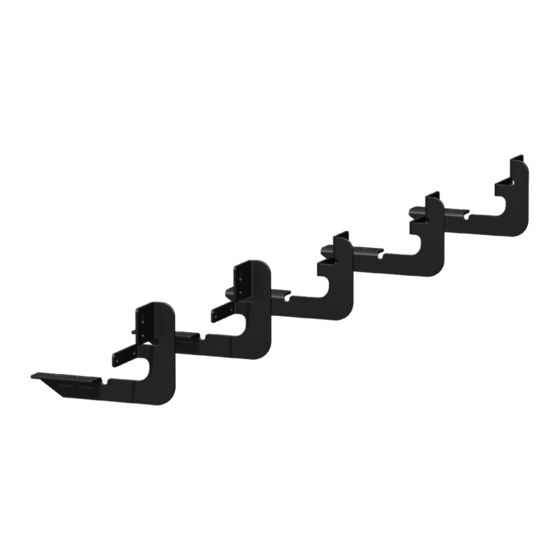
Product Photo
NOTICE
Visit www.luvernetruck.com for a full-color copy of this
instruction manual, as well as helpful videos, guides and much more!
Before you begin installation, read all instructions thoroughly.
Proper tools will improve the quality of installation and reduce the time required.
Periodic inspection of your product should be performed
to ensure all hardware and / or components remain secure.
To help prevent damage to the product or vehicle, refer to the specified
torque specifications when securing hardware during the installation process.
Maintenance
Mild automotive detergent may be used to clean the product. Do not use dish detergent, abrasive
cleaners, abrasive pads, wire brushes or other similar products that may damage the finish.
Product Registration and Warranty
LUVERNE stands behind our products with industry-leading warranties. To get copies of the product
warranties, register your purchase or provide feedback, visit: warranty.curtgroup.com/surveys
PRODUCT SUPPORT: 877.287.8634
Front
•
570747-INS-RA
•
01/29/2021
Rear
•
ECN7969
•
PAGE 1
570747
Advertisement
Table of Contents

Summary of Contents for Luverne 570747
- Page 1 Tools Required Product Registration and Warranty LUVERNE stands behind our products with industry-leading warranties. To get copies of the product Drill Ratchet warranties, register your purchase or provide feedback, visit: warranty.curtgroup.com/surveys Drill bit, 7/16”...
- Page 2 Adjust the lower bracket if needed to ensure the two holes are fully on the pinch seam. LUVERNETRUCK.COM • PRODUCT SUPPORT: 877.287.8634 • 570747-INS-RA • 01/29/2021 • ECN7969 •...
- Page 3 5/16”-18 bolts and 5/16” washers through the drilled holes. On the back side of the pinch weld place the retainer plate over the bolts and fasten them with the 5/16”-18 flange nuts. Tighten down all fasteners. LUVERNETRUCK.COM • PRODUCT SUPPORT: 877.287.8634 • 570747-INS-RA • 01/29/2021 • ECN7969 • PAGE 3...
- Page 4 On the back side of the pinch weld, place the retainer plate over the bolts and fasten them with the 5/16”-18 flange nuts. Tighten down all fasteners. LUVERNETRUCK.COM • PRODUCT SUPPORT: 877.287.8634 • 570747-INS-RA • 01/29/2021 • ECN7969 • PAGE 4...
- Page 5 Place the rear passenger-side bracket in place, using the top slot in the bracket. Fasten with the supplied 5/16”-18 bolt and 5/16” washer. Snug the hardware, but do not fully tighten. LUVERNETRUCK.COM • PRODUCT SUPPORT: 877.287.8634 • 570747-INS-RA • 01/29/2021 • ECN7969 • PAGE 5...
- Page 6 Use a straight edge or level to adjust brackets and tighten all fasteners. Note: To complete the installation, refer to the manual included with your running boards / side steps. LUVERNETRUCK.COM • PRODUCT SUPPORT: 877.287.8634 • 570747-INS-RA • 01/29/2021 • ECN7969 • PAGE 6...


Need help?
Do you have a question about the 570747 and is the answer not in the manual?
Questions and answers