Advertisement
Quick Links
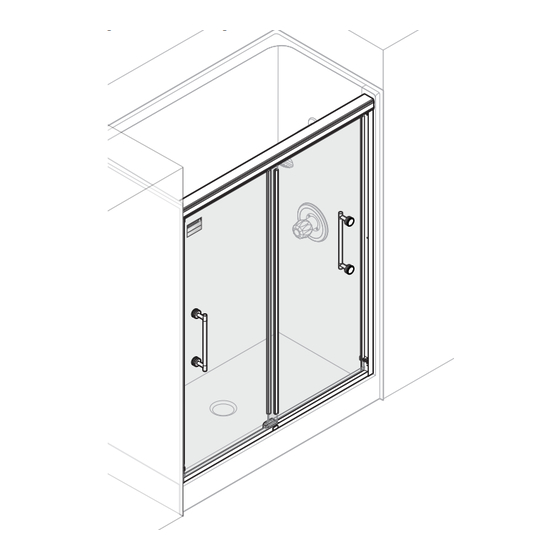
Frameless
Sliding
Ashmore Shower and
Bathtub Doors
For Delta 5/16 inch (8 mm)
Puertas para ducha y bañera
corredizas sin marco Ashmore
Para vidrio Delta 5/16 pulg. (8 mm)
INSTALLATION GUIDE / GUÍA DE INSTALACIÓN
CAUTION identifies a potentially hazardous situation which,
if not avoided, may result in minor or moderate injury and/or
property/product damage.
IMPORTANT identifies information critical to installation,
operation, or maintenance.
NOTE indicates helpful advice to make installation, operation or
maintenance proceed well.
CAUTION: To reduce the risk of breakage, keep corner protectors on glass while installing. Avoid contact between shower
door and metal parts and/or hard surfaces. Always ensure glass panels are placed on padded surfaces.
PRECAUCIÓN: Durante la instalación, coloque vidrio o protectores de esquinas para reducir el riesgo de romperse. Evite el contacto
entre la puerta de la ducha y las piezas metálicas y/o superficies duras. Asegúrese siempre de que los paneles de vidrio estén
colocados sobre superficies acolchadas.
Consult your local plumbing codes prior to installation.
Consulte los códigos de fontanería locales antes de la instalación.
NOTE: Installation widths: 60" Tub/shower: 54-5/8"minimum – 60" maximum,
48" Shower: 44" minimum – 48" maximum.
NOTA: Installation widths: para ducha/bañera de 60" (152,40 cm): mínimo 54-5/8" (138,75 cm) – máximo 60"
(152,4 cm), ducha de 48" (121,92 cm): mínimo 44 (111,76 cm) – máximo 48" (121,92 cm).
Minimum Required Clearance Heights for Installation:
For Shower: 77 Inches (195.6cm)
For Tub: 63 Inches (160 cm)
Minimum Required Installation Wall Heights
for Installation:
For Shower: 74-3/8 Inches (188.9 cm)
For Tub: 60-3/8 Inches (153.4 cm)
1
• BEFORE BEGINNING, READ ALL INSTRUCTIONS WITH PARTICULAR
ATTENTION TO SAFETY INFORMATION AND TO ENSURE YOU HAVE ALL
PARTS, TOOLS AND PROTECTIVE EQUIPMENT NEEDED TO SAFELY INSTALL
YOUR UNIT.
• PLEASE DO NOT CONTACT STORE FOR REPLACEMENT PARTS
• PLEASE CONTACT 1-800-964-4850 FOR ASSISTANCE
• ANTES DE COMENZAR, LEA TODAS LAS INSTRUCCIONES PRESTANDO
ATENCIÓN ESPECIAL A LA INFORMACIÓN DE SEGURIDAD Y ASEGÚRESE DE
TENER TODAS LAS PIEZAS, HERRAMIENTAS Y EQUIPOS DE PROTECCIÓN
NECESARIOS PARA INSTALAR SU UNIDAD DE FORMA SEGURA.
• POR FAVOR, NO CONTACTE A LA TIENDA PARA SOLICITAR PIEZAS DE
REPUESTO
• POR FAVOR LLAME AL 1-800-964-4850 PARA RECIBIR ASISTENCIA
ADVERTENCIA identifica situaciones potencialmente peligrosas
que, de no evitarse, podrían provocar lesiones leves o
moderadas y/o daños a la propiedad/producto.
IMPORTANTE identifica información esencial para la instalación,
funcionamiento, o mantenimiento.
NOTA indica consejos útiles para una correcta instalación,
funcionamiento o mantenimiento.
Alturas mínimas de separación necesarias para la instalación:
Para la ducha: 77 pulgadas (195,6 cm)
Para la bañera: 63 pulgadas (160 cm)
Alturas mínimas de la pared necesarias para la instalación:
Para la ducha: 74,375 pulgadas (188,9 cm)
Para la bañera: 60,375 pulgadas (153,4 cm)
DESIGNED AND DISTRIBUTED BY LIBERTY HARDWARE MANUFACTURING CORPORATION
STOP
PARE
DECEMBER 2020
Advertisement

Related Manuals for Delta Frameless Sliding


Summary of Contents for Delta Frameless Sliding
- Page 1 • POR FAVOR, NO CONTACTE A LA TIENDA PARA SOLICITAR PIEZAS DE corredizas sin marco Ashmore REPUESTO • POR FAVOR LLAME AL 1-800-964-4850 PARA RECIBIR ASISTENCIA Para vidrio Delta 5/16 pulg. (8 mm) INSTALLATION GUIDE / GUÍA DE INSTALACIÓN CAUTION identifies a potentially hazardous situation which, ADVERTENCIA identifica situaciones potencialmente peligrosas if not avoided, may result in minor or moderate injury and/or que, de no evitarse, podrían provocar lesiones leves o...
- Page 2 CAUTION: PRECAUCIÓN: To install your Delta shower door unit, you must: Para instalar su unidad de puertas para ducha Delta, debe: • Leer por completo todas las instrucciones, advertencias, • Completely read all instructions, warnings, cautions, and einformación de mantenimiento. El no hacerlo podría provocar maintenance information.
-
Page 3: Before You Start
• Lye (common in drain cleaner) • Acetone For optimal maintenance it is recommended that the glass panels be squeegeed on a regular basis after the shower is used. For further inquiries, contact Delta Shower Doors Customer Care Team at customersolutions@deltashowerdoors.com or call 1-800-964-4850. -
Page 4: Antes De Comenzar
Para el mantenimiento óptimo se recomienda que se limpien los paneles de vidrio con regularidad después de utilizar la ducha. Si tiene otras preguntas, póngase en contacto con Delta Shower Doors Customer Care Team en customersolutions@deltashowerdoors.com o llame Atención al cliente de... - Page 5 PARTS IDENTIFICATION / IDENTIFICACIÓN DE LAS PARTES Part Description Qty. Pieza Descripción Cant. Top track Riel superior Bottom Track Carril inferior Wall jamb Jamba de pared 8mm Glass panel Panel de cristal de 8mm #6 x 0.375” L PH screw Tornillo n.°...
- Page 6 DOOR ASSEMBLY / MONTAJE DE LA PUERTA CAUTION: To reduce the risk of breakage, which may result in personal injury, property damage or product failure, DO NOT set glass panels on a hard surface or on their edge. PRECAUCIÓN: Para reducir el riesgo de rotura, que puede provocar lesiones, daños a la propiedad o fallas del producto, NO coloque los paneles sobre una superficie dura ni sobre su borde.
- Page 7 HARDWARE / HERRAJE Tile Wall Anchor #8-18 x 1.5" Anclaje de pared Pan Head Screw de azulejo Tornillo de cabeza alomada #6 x 0.375" Pan Head Tapping Screw Tornillo autorroscante de cabeza alomada...
- Page 8 DOOR HANDLE HARDWARE / COMPONENTES DEL ASA DE LA PUERTA...
- Page 9 Option / Opción Installing Wall Jamb IMPORTANT: The wall jamb (C1) must sit flat against the Tiled wall / Pared alicatada shower wall and bottom threshold ledge. Make sure tile meets the fixture at a 90° corner. Tile or installation imperfections may require minor shaping of the wall jamb (C1) with a metal file to improve fit.
- Page 10 asegúrese de perforar en los montantes. CAUTION Wear safety glasses and cut resistant gloves with non-slip grip when drilling or cutting to avoid risk of injury. PRECAUCIÓN Use gafas protectoras y guantes anticorte y antideslizantes al taladrar o cortar para evitar el riesgo de lesiones. If using Option 1b, trim, grind or use a hacksaw and miter box to round the corner of the wall jamb (C1).
- Page 11 Make sure wall jamb (C1) is level vertically. Temporarily tape wall jamb (C1) in position. Repeat step 3 and 4 for remaining wall jamb (C1). For acrylic enclosures proceed to steps 5a-7a. For tile enclosures proceed to steps 5b-7b. Asegúrese de que la jamba de pared (C1) esté vertical (aplomada).
- Page 12 asegúrese de perforar en los montantes. CAUTION Wear safety glasses and cut resistant gloves with non-slip grip when drilling or cutting to avoid risk of injury. PRECAUCIÓN Use gafas protectoras y guantes anticorte y antideslizantes al taladrar o cortar para evitar el riesgo de lesiones. Remove wall jamb (C1).
- Page 13 Using a pencil or other marking device, mark holes in wall jamb (C1). Repeat for remaining wall jamb (C1). Con un lápiz u otro dispositivo para marcar, marque los orificios en la jamba de la pared (C1). Repita con la otra jamba de pared (C1). CAUTION To avoid risk of injury or product damage, make sure that you drill into studs.
- Page 14 asegúrese de perforar en los montantes. CAUTION Wear safety glasses and cut resistant gloves with non-slip grip when drilling or cutting to avoid risk of injury. PRECAUCIÓN Use gafas protectoras y guantes anticorte y antideslizantes al taladrar o cortar para evitar el riesgo de lesiones. Insert tile anchors (N1) in each hole location.
- Page 15 IMPORTANTE: La puerta no podrá instalarse bien si esta distancia no se mide correctamente. Compruebe de nuevo la medición. Si tiene alguna pregunta sobre este paso, póngase en contacto con el equipo de atención al cliente de Delta Shower Doors al 1-800-964-4850. _________ medición “A”...
- Page 16 Top track / Riel superior Using a pencil or other marking tool (such as painters tape), mark distance "A" along top track (A1). IMPORTANT: Incorrect measurement may prevent proper door installation. Double-check measurement. " " " A " A Con la ayuda de un lápiz u otra herramienta para marcar (como la cinta de pintor) marque la distancia "A"...
- Page 17 Insert T-straps (M1) into top track (A1). Inserte las bandas en T (M1) en la guía superior (A1). End / Extremo End / Extremo Position the top track (A1) over the tops of the wall jambs (C1). NOTE: Either side of the reversible top track (A1) may face out.
- Page 18 Push T-strap (M1) towards the wall jamb (C1). Mark hole using a pencil or other marking tool. Repeat for remaining T-strap (M1). Tire las bandas en T (M1) hacia la jamba de pared (C1). Marque el orificio con un lápiz u otra herramienta para marcar.
- Page 19 Any questions about this step please contact the Delta Shower Doors Customer Care Team at 1-800-964-4850. Si tiene alguna pregunta sobre este paso, póngase en contacto con el equipo de atención al cliente de Delta Shower Doors al 1-800-964-4850. _________...
- Page 20 Bottom track / Riel inferior Installing Bottom Track Using a pencil or other marking tool (such as painters tape), mark distance "B" on bottom track (B1). Double-check measurement before cutting. IMPORTANT: DO NOT cut the top and bottom tracks the same length.
- Page 21 Place bottom track (B1) on the ledge with leg facing out. If bottom track (B1) is too long or the middle does not sit flush against the ledge, use a metal file to remove additional metal and smooth rough edges. Coloque el riel inferior (B1) sobre el listón con la patilla orientada hacia fuera.
- Page 22 Double check clearance of bottom track (B1) in enclosure. On underside of bottom track (B1), apply a thick bead of sealant between neighboring pair of supports as shown in picture 22. Vuelva a verificar que haya espacio en la rielera inferior (B1) en el recinto.
- Page 23 Install a grab bumper (Q1) at the bottom location of wall jamb (C1) using screw (O1). Use a screwdriver to hand tighten until secure. Repeat for remaining wall jamb (C1). Instale un asidero (Q1) en la ubicación inferior de la jamba de la pared (C1) con el tornillo (O1).
- Page 24 Si observa algún desgaste o daño en el panel de vidrio, llame al equipo de atención al cliente de Delta Shower Doors al 1-800-964-4850 para obtener más ayuda. Inner Door Glass Panel Assembly/Installation/Ensamblaje/instalación del panel de vidrio de la puerta interior...
- Page 25 CAUTION Risk of injury or product damage. During installation, tempered glass should not come in contact with metal parts or hard surfaces (tile/concrete flooring) or it may shatter. Gaskets or bushings must always be used between glass and metal. PRECAUCIÓN CAUTION Risk of injury or product damage.
- Page 26 Installing Inner Glass Panel Hangers To protect the glass from chips or scratches that could result from contact with screw, install bushings (B2) and roller gasket (C2) into each hole at the top of the glass panel (D1). Place the hanger brackets (Y1) over the glass panel (D1). NOTE: Make sure hanger bracket (Y1) rollers are facing down as shown in Figure 28.
- Page 27 CAUTION CAUTION Risk of injury or product damage. During installation, Risk of injury or product damage. During installation, tempered glass should not come in contact with metal parts or tempered glass should not come in contact with metal parts or hard surfaces (tile/concrete flooring) or it may shatter.
- Page 28 Risk of injury or product damage. During installation, tempered glass should not come in contact with metal parts or hard surfaces (tile/concrete flooring) or it may shatter. Gaskets or bushings must always be used between glass and metal. CAUTION PRECAUCIÓN Risk of injury or product damage.
- Page 29 Installing Outer Glass Panel Hangers To protect the glass from chips or scratches that could result from contact with screw, install bushings (B2) and roller gasket (C2) into each hole at the top of the glass panel (D1). Place the hanger brackets (Y1) over the glass panel (D1). NOTE: Make sure hanger bracket (Y1) rollers are facing down as shown in Figure 33.
- Page 30 CAUTION CAUTION Risk of injury or product damage. During installation, Risk of injury or product damage. During installation, tempered glass should not come in contact with metal parts or tempered glass should not come in contact with metal parts or hard surfaces (tile/concrete flooring) or it may shatter.
- Page 31 CAUTION CAUTION Lower the glass / Baje el panel de vidrio To reduce risk of personal injury and glass breakage, screws To reduce risk of personal injury and glass breakage, screws and fasteners must be hand tightened to fully secure. and fasteners must be hand tightened to fully secure.
- Page 32 Installing Anti Jump Extrusion Slide the anti jump extrusions (L1) on the top left and right edge of both glass panels (D1) as shown in Step 39. NOTE: Top Track (A1) not shown for clarity for extrusion (L1) installation. Instalación del perfil antisalto Deslizar el perfil antisalto (L1) sobre el borde superior izquierdo y derecho de ambos paneles de vidrio (D1) como se muestra en el paso 39.
- Page 33 CAUTION To reduce the risk of personal injury or glass breakage, all bushings and gaskets must be installed as instructed. PRECAUCIÓN Para reducir el riesgo de sufrir lesiones personales o de que se rompa el vidrio, todos los bujes y juntas deben instalarse como se indica.
- Page 34 Slide doors toward center. Remove tape from bottom track. Inside the shower, use silicone sealant to seal along the For optimal water retention, use silicone sealant to seal entire length of the wall jambs (C1) and where the wall jambs along the entire length of the wall jambs (C1) and bottom (C1) meet the bottom track (B1).
- Page 35 CAUTION: Do Not force the door panel to move, as doing so may result in breakage and risk of injury. If the following steps do not resolve the associated symptoms or for any questions, call Delta Shower Doors Customer Care Team at 1-800-964-4850.
-
Page 36: Solución De Problemas
PRECAUCIÓN: No fuerce el panel de puerta al mover, de hacerlo puede romperse y provocar lesiones. Si los siguientes pasos no resuelven los síntomas asociados, o en caso de preguntas, llame a atención al Delta Shower Doors Customer Care Team al 1-800-964-4850.
Need help?
Do you have a question about the Frameless Sliding and is the answer not in the manual?
Questions and answers