Page 1
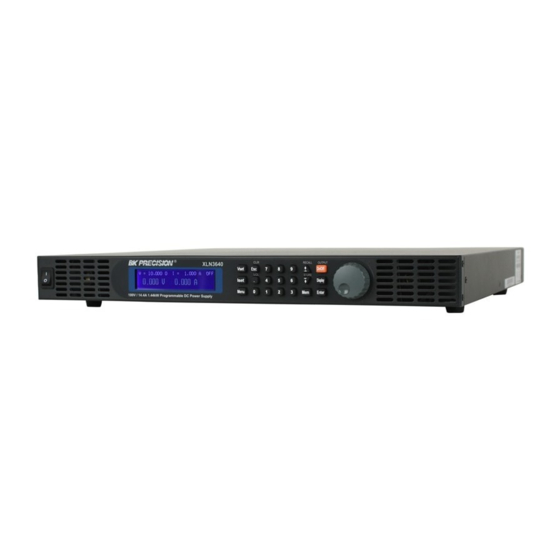
Model: XLN3640, XLN6024, XLN8018, XLN10014 Click for models XLN15010, XLN30052 & XLN60026 High Power Programmable DC Power Supply USER MANUAL...
Page 2
Safety Summary The following safety precautions apply to both operating and maintenance personnel and must be observed during all phases of operation, service, and repair of this instrument. Before applying power, follow the installation instructions and become familiar with the operating instructions for this instrument. Failure to comply with these precautions or with specific warnings elsewhere in this manual violates safety standards of design, manufacture, and intended use of the instrument.
Page 3
DO NOT SUBSTITUTE PARTS OR MODIFY THE INSTRUMENT Do not install substitute parts or perform any unauthorized modifications to this instrument. Return the instrument to B&K Precision for service and repair to ensure that safety features are maintained. WARNINGS AND CAUTIONS WARNING and CAUTION statements, such as the following examples, denote a hazard and appear throughout this manual.
Page 4
Store/Move/Maintain Storage When this device is not in use, properly package it and store it in an environment suitable for storage (if present in a good preserving environment, the packaging process can be waived). Freight While moving this product, move it by using the original packaging to pack this product in advance.
Table of Contents Preface ...................... 1 Products Outline ................1 Features ..................... 2 Specifications ..................4 Cautions Before Using ................9 Check and Confirm Accessories before Using ........9 Operation Instructions ............... 9 Ambient Environment ............... 9 Storage ..................... 10 Power-line voltage ................
Page 6
Control Voltage Output with Rotary knob ........35 Timer Function ................35 Series (cascade) / Parallel Mode Setting ......... 36 4.8.1 Parallel Connection Setting ............36 4.8.2 Series Mode Setting ..............38 4.8.3 Error Message of Series/Parallel Connection ......41 External Tuning Setting ..............
Page 7
State Bit Definition ................74 LAN Communication (-GL versions) ..........75 Using Web Server................... 75 Main Page (Home) .................. 75 Using Telnet .................... 78 Using Sockets ..................78 Assemble Accessories ................79 Assemble Rack Mount Brackets ............. 79 Assembly of Output Protective Cover (XLN6024/XLN8018/XLN10014) ..........
Preface Products Outline B&K Precision models XLN3640/XLN6024/XLN8018/XLN10014 are programmable DC power supplies with single outputs that offer the maximum power output up to 1440 watts (0 -- 36 V/40 A or 0 -- 60 V/24 A or 0 -- 80 V/18 A or 0 -- 100 V/14.4 A). With a 16-bit D/A, A/D converter embedded, the power supplies come with the resolution of 1mV in voltage setting and 1mA in current setting.
Features 1) Output Voltage & Current Voltage output range: 0 -- 36V (XLN3640) / 0 -- 60V (XLN6024) 0 -- 80V (XLN8018) / 0 -- 100V (XLN10014) Current output range: 0 -- 40A (XLN3640) / 0 -- 24A (XLN6024) 0 -- 18A (XLN8018) / 0 -- 14.4A (XLN10014) Power output range: 0 -- 1440W...
Page 10
UUT by accidentally entering the wrong settings. 6) Series & parallel connection mode The series-parallel connection mode of two or more units (maximum to 4 units) significantly increases the combined output power to a maximum of 5760 W. In parallel connection mode of four XLN3640 the maximum output is 36 V/160 A;...
Specifications XLN3640/XLN6024 Specifications Output Rating XLN3640 XLN6024 Output Voltage 0--36 V 0--60 V Output Current 0--40 A 0--24 A Output Power 1440 W 1440 W Output Protection OVP Adjustment Range 2--38 V 3--64 V OVP Accuracy 200 mV 300 mV Line Regulation ≤...
Page 12
General Average Command Response <50 ms <50 ms Time 0.99 0.99 Power Factor Correction (Full load) (Full load) Remote Sense Compensation ≤ 15 ms ≤ 20 ms Rising Time at Full Load ≤ 15 ms ≤ 20 ms Rising Time at No Load ≤...
Page 13
XLN8018/XLN10014 Specifications Output Rate XLN8018 XLN10014 0~80 V 0~100 V Output Voltage 0~18 A 0~14.4 A Output Current Output Power 1440 W 1440 W Output Protection 4~85 V 5~105 V OVP Adjustment Range OVP Accuracy 400 mV 500 mV Line Regulation ≤...
Page 14
Average Command <50 ms <50 ms Response Time ≥ 0.99 ≥ 0.99 Power Factor Correction (Full load) (Full load) Remote Sense Compensation ≤ 25 ms ≤ 30 ms Rising Time at Full Load ≤ 25 ms ≤ 30 ms Rising Time at No Load ≤...
Page 15
Features of models XLN3640/XLN6024/XLN8018/XLN10014: Graphical, easy to read LCD display Compact, high efficiency and power density 40 A output connector for quick connectivity Convenient numerical & function keys Store and recall 10 instrument settings Timer (1 sec -- 100 hours) ...
Cautions Before Using Check and Confirm Accessories before Using After receiving this product, please verify the items received in accordance with the ones listed below: The appearance of the products is without scratch or other damages. Standard parts as shown in parts list of section 8. Operation Instructions In order to avoid damaging the instrument due to improper operation, be sure to read this user manual.
Storage The storage temperature range of this product is within -10ºC - 70ºC and R.H. should be within 80% without moisture condensing. If not operating this product for a long time interval, pack it with original packaging or similar one and put it in a dry place without exposure to direct sunlight. Power-line voltage Rated AC power source connected to this product is within 100 V-240 V (refer to the Product Specification for details).
Warm-up Time The XLN series is fully operable upon switching the power on. However, to reach the specified equipment accuracy, please allow the supply to warm up for at least 30 minutes. Power-off procedure When the supply is not in use, be sure to turn the power switch on the panel to the OFF position to turn off the power.
Front Panel Operation XLN3640/XLN6024/XLN8018/XLN10014 Panel 3.1.1 Front Panel Power switch: Please consult the “Cautions before use” section before turning on power switch. Display: 192x32 Graphic LCD Module Current setting Press to set up the current limit. Voltage setting Press to set up the output voltage. Dot/Local This button is applied as a decimal point.
Page 20
ESC/CLR Press this button to clean up numerical setting or jump to the previous screen. Numerical keys They are used to directly input the voltage or current value or choose the setting option in Menu screen. Down/Right/Store This key is a multi-function key for the following three functions: Down: In “Menu Setting”...
Page 21
(11) Output Control the On/Off of the output power. (12) The rotary knob: Use this knob to adjust voltage or current (press first to let cursor display first). This is adjustable when output is ON. (13) Enter This key is the confirmation key of current or voltage setting value; or press under output status to dynamically adjust voltage (at CV mode) or current (at CC mode).
Page 22
1 . SYSTEM SETTING 2 . OUTPUT SETTING 3 . PROTECTION LL L 7 . TIMER CONTROL 8 . CALIBRATION 9 . CHAIN SETTING SYSTEM SETTING: Pressing key in the first page of Menu Setting will enter the following “SYSTEM SETTING” menu. = L FF REMOTE CONTROL: Choose the remote interface (USB/GPIB/ETHERNET)
Page 23
Data bit Parity check : none Stop bit *When entering the Remote mode, screen will present RMT indicator as shown in the following picture. GPIB ADDRESS: Set up GPIB ADDRESS (1-30) EXTERN CONTROL: Set up the external control to voltage control (VOLT 0-10 V or 0-5 V), resistance control (RES 0-5K) or off (OFF).
Page 24
BEEP: Turns the Buzzer ON/OFF LCD BACKLIT: Set the backlight of the LCD to Always ON or OFF after 1/5/10/30 minutes RECALL DEFAULT: Restores manufacturer default settings Ext 5V OUTPUT: Turns the extra 5V power output (on the rear panel) ON/OFF. POWER ON STATE: Users can set the output state of the supply when powered on.
Page 25
setting values stored inside internal memory. *If entering the HOT KEY mode, screen will indicate HOT symbol as shown in the following illustration. OUTPUT SETTING: Press in the first page of Menu Setting to enter OUTPUT SETTING menu. VOLT LIMIT MAX = 60.500 V CURR LIMIT MAX = 24.500 A...
Page 26
CURR SLEW RATE: Current ascending/descending slope (XLN 3640:0.01 - 2.5A/ms) (XLN 6024:0.01 - 1.2A/ms) (XLN 8018:0.01 - 0.72A/ms (XLN 10014:0.01 - 0.48A/ms) CONNECTOR DROP: Turns on/off the connector drop calibration function EXT FULL VOLT: External voltage control full-scale setting. Select between 10 V or 5 V for full-scale control.
Page 27
from CV to CC mode CC TO CV: Enable/disable the protection of the change from CC to CV mode SERIES/PARALLEL SETTING Press in the second screen of Menu Setting to enter SERIES/PARALLEL menu. SELECT MODE: Choose series or parallel operation mode.
Page 28
6.1 CURRENT COUNTER TEST: Press to enter the CURRENT COUNTER TEST screen. = 1 . = 1 . Refer to “Current Counting” section for the detailed setting procedure. 6.2 PROGRAM MODE: Press to enter the PROGRAM MODE menu. Before running the program, user needs to input the programmed values through the USB or GPIB interface into the power supplies.
Page 29
Press in the third page of Menu Setting to enter TIMER CONTROL screen. TIMER: Turn on/off TIMER function. TIME: Set up OUTPUT ON time (Max:999Hr 59Min 59Sec) 8. CALIBRATION Press in the third page of “Menu Setting” to enter CALIBRATION menu. Users must enter the password to access calibration mode.
Page 30
password “13579” to enter the following calibration menu screen: Figure 1 B. Press “1” to access Voltage Calibration Procedure.
Page 31
D. According to voltage value displayed on DVM, fill in the values for their corresponding functions and press ENTER. If any DVM read-back value at each voltage function does not fit with the following table below, please inspect the hardware. XLN3640 Function Setting...
Page 32
MIDH 48 - 58 V 69 - 83 V XLN10014 Function Setting Range of Read-Back Value Value 4.5 - 5.5 V MIDL 29.7 - 36.3 V MIDH 59 - 72 V 85 - 104 V E. When pressing ENTER at Hi function, and the calibration data values will be stored in FLASH and unit will return to calibration main screen.
Page 33
Lo = C. Jump to Hi function when completed. Lo = D. Press ENTER to access OVP calibration procedure at High function. Lo = l i b a i n . . . F. After completing the above steps, calibration value will be stored in FLASH and unit will return to the calibration main screen.
Page 34
measurement fixture. According to voltage value shown on DVM, fill in that value that corresponds to the function and press ENTER key. Figure 2 = L 1...
Page 35
CALIB CURR MIDH = 258.246 mV CALIB CURR Hi = 377.559 mV C. Please inspect the hardware if the current value is inconsistent with the value in the tolerance error table below after the calibration values of each function is changed to actual current value. XLN3640 Function Setting...
Page 36
XLN10014 Function Setting Range of Transformation Value 0.03625A 0 - 0.1 A MIDL 4.7A 4.2 - 5.2 A MIDH 9.5A 8.55 - 10.45 A 13.7A 12.33 - 15.07 A D. The calibration value will be stored in FLASH after pressing ENTER at Hi function.
3.1.2 Rear Panel Cooling fans: The supply automatically adjusts fan’s rpm according to the load condition. (16) Cooling fan: The rear cooling fan speed is temperature control. (17) Power output terminal: Please pay attention to the correct polarities when making connection. (18) RMT/LCL Sense: When Remote sense is selected, the wire connection can be setup as follows (shown in the figure below): positive sense (+S) and positive...
Page 38
When Local sense is selected, the wire connection can be setup as follows (shown in the figure above):positive sense (+S) is connected to the positive lead (+) and negative sense (-S) is connected to the negative lead (-), whereas the positive lead (+) of the DC output is connected to the positive end (+) of the device and the negative lead (-) of the DC output is connected to the negative end (-) of the device under test.
Page 39
(23) 5V/1A Output: XLN series offers an extra output with a constant output voltage of 5 V and the maximum output current of 1 A. This extra power supply can be switched on or off under the “System Setting” menu. (24) USB : USB interface connector.
Page 40
WARNING: This PRODUCT is designed meeting safety code and has passed the related qualification test. In case no output cable is connected, close the protection cover and fasten the screws in so as to protect user from electric shock or other hazards.
Operation Instructions Voltage Setting Press and set the output voltage by pressing the numerical keys directly, and then press to confirm the setting. = 15 Current Setting Press and set the output current by pressing the numerical keys directly and then press to confirm the setting.
to confirm it. Now the cursor will move to the value setting for the OCP on the right hand side. Enter the OCP value by pressing the numerical keys. 4 1 4 Voltage Output After the voltage, current and protection settings are entered, press output voltage.
countdown of the timer. Once it reaches down to zero, the supply will turn off the output automatically. Series (cascade) / Parallel Mode Setting The XLN3640/XLN6024/XLN8018/XLN10014 uses the series/parallel mode (4 supplies maximum) to increase the output power capability. By connecting 4 instruments in parallel, the combined unit can offer 36 V/160 A power output.
Page 44
that are connected to the Master. Therefore, in order to correctly configure the correctly, user must set up the Slaves before the Master is set. To set a XLN3640/XLN6024/XLN8018/XLN10014 to slave mode, press , and in the main screen to enter the series/parallel setting option.
After receiving the control command from the Master, all Slaves will be locked on to the SLAVE screen. At this point all keys except are locked so that slaves cannot be operated by front keys except controlled by the Master as shown below: Once the Master and Slave settings are done, users can then operate the Master only to set up the combined output voltage and current of the complete system.
Page 46
After wiring is complete, configure one supply as the Master and the other three as the Slave A, B, and C. After the power supply is configured as Master, it will start searching for all Slaves that are connected to the Master. Therefore, in order to setup correctly, user must set up the Slaves before the Master is set.
Page 47
start searching for all Slaves, as shown below. If wiring is correct, this screen will appear: After receiving the control command from the Master, all Slaves will be locked on the SLAVE screen and all keys except are disabled so that slaves cannot be operated by pressing front keys.
4.8.3 Error Message of Series/Parallel Connection If the RS485 wiring is wrong or the signal is not correct, the Master will display the following message in the screen for searching Slaves: If more than one Master is being set in the series/parallel operation mode, the following message will be displayed.
error message “SYNC OFF” is shown when the slave is not receiving the synchronous output OFF signal. LL L External Tuning Setting Models XLN3640/XLN6024/XLN8018/XLN10014 provides the capability to control the output voltages by an external voltage/resistance. The range of the external voltage is in 0 - 10 VDC or 0 - 5 VDC and the range of the external variable resistance is between 0 - 5 kΩ...
XLN3640 (or 0 - 24 A for XLN6024 or 0 - 18 A for XLN8018 or 0 - 14.4 A for XLN10014) output current, the resolution of voltage and current will be different in response. The screen will show similar to the following (accuracy is 10mV): V = 36.00 V I = 40.00 A...
pressing , error occurs herein and the screen will display an error message after two seconds. One of the following three scenarios may happen: Connector not ready If a fuse is not properly connected to the output connector or a breaker under test has not been switched to ON position, the screen will show an error message as shown below.
Page 52
10 programs that can have 150 steps in total for setting purpose. This can only be programmed remotely via USB, GPIB, or LAN with SCPI commands or with the included software. Each program does not restrict the step quantity, however, the sum of 10 programs are restricted to 150 steps. For each program users can set up how many times to repeat the program.
Page 54
Example 2: To output the wave form shown above, the following example program can be used. PROG 2 Choose program number PROG:CLE Clear program 2 data PROG:REP 0 No repeat after running this program PROG:TOTA 8 Set program 2 to have 8 steps in total PROG:STEP 1 Settings for step 1 PROG:STEP:CURR 2...
Page 55
PROG:STEP:CURR 2 PROG:STEP:VOLT 5 PROG:STEP:ONT 0.5 PROG:STEP 7 Choose step 7 PROG:STEP:CURR 2 PROG:STEP:VOLT 20 PROG:STEP:ONT 0.5 PROG:STEP 8 Choose step 8 PROG:STEP:CURR 2 PROG:STEP:VOLT 0 PROG:STEP:ONT 0.5 PROG:NEXT 0 Select next program to run after program 2 is complete, 0 means stop PROG:SAV After edit, use Save command to store program 2 in the hardware...
Page 56
Example 3: If it needs to execute Program 2 right after Program 1 is executed then program 1 shall be modified to have NEXT 2 command. The following steps can be taken for the modification and execute the programs. PROG 1 Select program 1 PROG:NEXT 2 Change the NEXT command from...
4.12 Multi-unit Connection mode (RS485) XLN3640 / XLN6024 / XLN8018 / XLN10014 can use RS485 to provide multi-units series connection function for up to 30 units (If more than 10 units, please add a 120Ω resistor terminator in the last unit as shown in the below figure.
Page 58
SYSTEM CONTROL COMMAND: Command Description ================================================== CADR followed by address, which can be 1 to 30 and is used to access the power supply CCLS Clear status CRST Reset command. Brings the power supply to a known state CIDN? Returns the power supply model identification CREV? Returns the firmware version CSN?
Page 59
COC? Returns the OCP setting level COCP Sets the OCP on/off COCP? Returns the OCP on/off Sets the OPP level COP? Returns the OPP setting level COPP Sets the OPP on/off COPP? Returns the OPP on/off CMODE? Returns the power supply operation mode ================================================== SYNCHRONOUS CONTROL COMMAND: Command...
Page 60
OK CADR 7 OK CPV 20 Q3. How to set up Output for Address 7 on the system? OK CADR 3 OK COUT 1 Q4. How to read back Voltage value for Address 1 on the system? ...
Protection and Error Messages Over-voltage Protection (OVP) When the OVP is activated and voltage measured exceeds the setting point of protected voltage, the system will enter the “Over Voltage Protect” mode that will shut off the output and show OVP on the display. Press to reset the protection mode and deactivate the buzzer.
Constant Voltage Protection (CV TO CC) When this function is activated, the power supply will stay in CV mode. If load changes force the system to transition from CV to CC (constant current) mode, the system will enter the “CV TO CC Protect” state that will shut off the output and display the CVC message on the screen.
Low Voltage Protection (ACD) When the machine has detected abnormally low AC power input, system will enter the “AC Detect Low Protect” mode that will shut off output and display the error message shown in the following figure. Press to reset the protection and deactivate buzzer.
Remote Interface communication protocol The communication protocol includes standard SCPI commands and a few proprietary commands which follow the SCPI convention. Prefaces SCPI interface enables users operate model XLN3640/XLN6024/XLN8018/XLN10014 supply through a computer or a terminal equipped with IEEE-488.2 GPIB or USB interface. Additionally, it allows remote control and monitoring.
characters at the end of each command when programming. The Error/Event List SCPI interface can offer an error/event list that contains up to 10 errors/events. Users can read the errors/events through the “error?” command in a first-in first-out manner. Once an error/event is read, the read process will clear it from the memory.
Remote Communication Protocol Command Description ADDRess set the address of the machine ADDRess? return the address of the machine BEEP set beep on(1) or off(0) clear protect status CURRent set current CURRent? return current setting ERRor? return error message IOUT? current readback ISET set current...
Page 67
Examples: Q 1:How to set GPIB address? ADDR 10 ==>address is 10 Q 2:How to read back GPIB address? ADDR? ==>return GPIB address ADDRESS? ==>return GPIB address Q 3:How to set up buzzer? BEEP 1 ==>trigger beep to on BEEP off ==>trigger beep to off Q 4:How to clear the protecting state? ==>clear protect status...
Page 68
Q 11:How to read the current outputting value? IOUT? ==>return current output Q 12:How to lock buttons and the rotary knob? LOCK 1 ==>lock the keypad and knob LOCK ON ==>lock the keypad and knob Q 13:How to read the product model number? MODEL? ==>return machine model name Q 14:How to set up OVP function?
SCPI Conformity Information The XLN series is entirely compatible with all IEEE-488.2 and SCPI commands (1995). Commands are included in SCPI commands (in Vol. 2, 1995). 6.5.1 Common SCPI commands Command Explanation *CLS Clear status (include error code) *IDN? Response:<Manufacturer>, <model>, <serial number>, <firmware type, &...
*CLS 6.5.2 SCPI Command subsystem ABORt Abort the Output Action FETCh Fetch Subsystem :CURRent? Return the fetched output current :VOLTage? Return the fetched output voltage MEASure Measure subsystem :CURRent? Return the measured output current :VOLTage? Return the measured output voltage MEMory Memory Subsystem <NR1 | ? >...
Page 71
from 1 - 10 :CLEar clear program n parameters :ALL clear all program parameters :NEXT <NR1 | ? > ser or return next program number (1 - 10 , 0 for end) :REPeat <NR1 | ? > set or return repeat times (max. 50000) :RUN<Boolean | ? >...
Page 72
:MODE <OFF/0,PARALLEL/1,SERIES/2|? > set or return parallel/series mode :TYPE <MASTER/0,SLAVEA/1,SLAVEB/2,SLAVEC/3|?> set or return master/slave setting [SOURce] Source Subsystem :CURRent <NRf | ? > set or return current level:0-40/0-24A :PROTection <Boolean | ? > set or return over-current state :LEVel <NRf | ? > set or return over-current level :VOLTage <NRf | ? >...
Page 73
:LOCK <Boolean | ? set or return key lock state :LCD :BL <Boolean | ? > set or return LCD backlight state :POWer :CURRent <NRf | ? > set or return user define current level :STATe <Boolean | ? > set or return user define output state :TYPE <OFF/0,LAST/1,USER/2 | ? >...
Page 74
Examples: Q 28:How to cancel all actions? ABOR ABORT Q 29:How to fetch current value? FETC:CURR? FETCH:CURRENT? Q 30:How to fetch voltage value? FETC:VOLT? FETCH:VOLTAGE? Q 31:How to measure current? MEAS:CURR? MEASURE:CURRENT? Q 32:How to measure voltage? MEAS:VOLT? MEASURE:VOLTAGE? Q 33:How to set up and read back the specific memory set? MEM 1 MEMORY 3 MEM?
Page 75
MEM:ISET? MEMORY:ISET 25 MEMORY:ISET? Q 36:How to save data to memory set? MEM:SAVE MEMORY:SAVE Q 37:How to set up and cancel output? OUT ON OUTPUT 0 Q 38:How to set up and read back the voltage limit? OUT:LIM:VOLT 30 OUT:LIM:VOLT? OUTPUT:LIMIT:VOLTAGE 35 OUTPUT:LIMIT:VOLTAGE? Q 39:How to set up and read back the current limit?
Page 76
Q 43:How to read back the protection state? PROT? PROTECTION? Q 44:How to set up and read back the CC to CV protection state? PROT:CCCV ON PROT:CCCV? PROTECTION:CCCV 0 PROTECTION:CCCV? Q 45:How to set up and read back the CV to CC protection state? PROT:CVCC ON PROT:CVCC? PROTECTION:CVCC 0...
Page 77
SOURCE:CURRENT:PROTECTION:LEVEL? Q 49:How to set up and read back the overpower protection state? PROT:OPP ON PROT:OPP? PROTECTION:OPP 0 PROTECTION:OPP? Q 50:How to set up and read back the overpower protection point? PROT:OPP:LEV 30 PROT:OPP:LEV? PROTECTION:OPP:LEVEL 40 PROTECTION:OPP:LEVEL? Q 51:How to set up and read back the overvoltage protection state? PROT:OVP ON PROT:OVP? PROTECTION:OVP 0...
Page 78
SYSTEM:E5V 0 Q 55:How to read back error code? SYS:ERR? SYSTEM:ERROR? Q 56:How to set up and read back the external adjustment state? SYS:EXT VOLT SYS:EXT? SYSTEM:EXTERNAL RESISTANCE SYSTEM:EXTERNAL? Q 57:How to set up and read back the GPIB address? SYS:GPIB:ADDR 5 SYS:GPIB:ADDR? SYSTEM:GPIB:ADDRESS 6...
Page 79
SYS:POW:TYPE? SYS:POWER:TYPE USER SYS:POWER:TYPE? SYSTEM:GPIB:ADDRESS? Q 63:How to set up and read back the voltage under user-defined booting mode? SYS:POW:VOLT 10 SYS:POW:VOLT? SYSTEM:POWER:VOLTAGE 20 SYSTEM:POWER:VOLTAGE? Q 64:How to set up and read back the current under user-defined booting mode? SYS:POW:CURR 10 SYS:POW:CURR? SYSTEM:POWER:CURRENT 20 SYSTEM:POWER:CURRENT?
Page 80
Q 69:How to set up and read back the output voltage? SOUR:VOLT 30 SOUR:VOLT? SOURCE:VOLTAGE 35 SOURCE:VOLTAGE? Q 70:How to set up and read back the output current? SOUR:CURR 40 SOUR:CURR? SOURCE:CURRENT 35 SOURCE:CURRENT? Q 71:How to set up and read back parallel/series mode? PS:MODE PARALLEL PS:MODE? PS:MODE 2...
State Bit Definition When “STATE?” command is used, the system will return three (3) bytes in the order as shown below. Byte 2 Byte 1 Byte 0 bit 7 - bit 0 bit 7 - bit 0 bit 7 - bit 0 The definition of each bit is described in the following: byte 0: bit 7...
LAN Communication (-GL versions) XLN series power supplies provide three LAN control modes, including Web server, Telnet and Sockets. First, enter the first Item “System Setting” on the menu to set the interface selection (Remote Control) to Ethernet. Then, select IP setting procedure as Static.
Page 83
The main page shows all the basic message and network information. Setting Page (Configuration) This page allows you to setup protection settings and reset/setup password for the system.
Page 84
Status Page (Status) Display the status of the system. If any error codes are shown, please refer to “Error/Event list” section for details. Web Control This page allows user to set up voltage/current and output. Additionally, the display will allow monitoring of the output voltage/current value (JAVA support is required for display).
Using Telnet The power supply can be controlled via Telnet over the Ethernet interface. Simply go into command prompt under MS-DOS and enter: Telnet <DeviceIP> 5024 (<Device IP> is IP address of the unit; 5024 is the Telnet port). A welcome message will be shown as below: Input SCPI command to communicate with the system, such as below: Using Sockets All XLN series use port 5025 to provide the standard function for SCPI...
Assemble Accessories Assemble Rack Mount Brackets The XLN3640/XLN6024/XLN8018/XLN10014 is designed to fit in a space of one rack unit (1U) and can be mounted in a standard 19-inch rack panel or cabinet. Rack mount brackets must be assembled before mounting the unit in a rack.
Assembly of Output Protective Cover (XLN6024/XLN8018/XLN10014) Safety regulation requests protective cover when the output voltage is higher than 45 VDC. Therefore, there are protective covers for the output connectors for the XLN6024/XLN8018/XLN10014. Refer to the following figure for the assembly/disassembly of the output protective cover. Step 1 Step 2 Step 3...
Assembly of Remote Sense Protective Cover (XLN6024/XLN8018/XLN10014) Safety regulation requests protective cover when the voltage is higher than 45 VDC. Therefore, there are protective covers for the remote sense connectors for the XLN6024/XLN8018/XLN10014. Refer to the following figure for the assembly/disassembly of the remote sense protective cover.
Accessories Product Name: XLN3640/XLN6024/XLN8018/XLN10014 Parts List: Item Name & Specification Remarks Terminal Block for Rapid Plug Connector XLNRC Output Rapid Connector Includes two solder plugs Rack mount Bracket kit Handle bar kit Operation Manual XLNPC Power Cord Test Report and Certificate of Calibration...
Service Information Warranty Service: Please go the support and service section on our website www.bkprecision.com to obtain a RMA #. Return the product in the original packaging with proof of purchase to the address below. Clearly state on the RMA the performance problem and return any leads, probes, connectors and accessories that you are using with the device.
Limited Three-year Warranty B&K Precision Corp. warrants to the original purchaser that its products and the component parts thereof, will be free from defects in workmanship and materials for a period of three years from date of purchase. B&K Precision Corp. will, without charge, repair or replace, at its option, defective product or component parts.
Page 94
Model: XLN15010, XLN30052, XLN60026 High Power Programmable DC Power Supply USER MANUAL...
Page 95
Safety Summary The following safety precautions apply to both operating and maintenance personnel and must be observed during all phases of operation, service, and repair of this instrument. Before applying power, follow the installation instructions and become familiar with the operating instructions for this instrument. Failure to comply with these precautions or with specific warnings elsewhere in this manual violates safety standards of design, manufacture, and intended use of the instrument.
Page 96
DO NOT SUBSTITUTE PARTS OR MODIFY THE INSTRUMENT Do not install substitute parts or perform any unauthorized modifications to this instrument. Return the instrument to B&K Precision for service and repair to ensure that safety features are maintained. WARNINGS AND CAUTIONS WARNING and CAUTION statements, such as the following examples, denote a hazard and appear throughout this manual.
Page 97
Store/ Maintain Storage When this device is not in use, properly package it and store it in an environment suitable for storage (if present in a good preserving environment, the packaging process can be waived). Freight While moving this product, move it by using the original packaging to pack this product in advance.
Optionally, users can also add LAN and GPIB interface capability (-GL versions). Features 1) Output Voltage & Current Voltage output range: 5 – 150 V (XLN15010) 5 – 300 V (XLN30052) 5 – 600 V (XLN60026) Current output range: 0.04 – 10.4 A (XLN15010) 0.02 –...
Page 102
The parallel connection mode of two or more units (maximum 4 units) significantly increases the combined output power to a maximum of 6240 W. For example, in parallel connection mode withfour XLN15010, the maximum output is 150 V/41.6 A. 8) Multi-unit connection mode The RS 485 interface can be used to connect multiple power supplies in series, up to maximum of 31 units.
Note: All specifications apply to the unit after a temperature stabilization time of 15 minutes over an ambient temperature range of 23 °C ± 5 °C. Specifications are subject to change without notice. Specifications Models XLN15010 XLN30052 XLN60026 Output Rating Output Voltage 5 – 150 V 5 –...
Page 104
Programming and Readback Accuracy ±(% output+offset) Voltage 0.05 %+75 mV 0.05 %+150 mV 0.05%+300 mV Current 0.1 %+30 mA 0.1 %+15.6 mA 0.1%+7.8 mA General ≤ 2 ms ≤ 2 ms ≤ 2 ms Transient Response Time ≥ 80 % ≥...
Report any damage to the shipping agent immediately. Save the original packing carton for possible future reshipment. Every power supply is shipped with the following contents: • XLN15010/XLN30052/XLN60026 Power supply • User Manual • AC power cord •...
Environmental Conditions Do not locate or operate this product in an environment with dust, vibration, or corrosive gas and do not expose this product directly to the sunlight. Operate it in an environment with temperature 0--40 & relative humidity 20%--80%. Pause the operation when ambient temperature is over 40 C;...
Installing Rackmount Brackets The power supply is designed to fit in a space of one rack unit (1U) and can be mounted in a standard 19-inch rack panel or cabinet. Rack mount brackets must be assembled before mounting the unit in a rack. Refer to the following figure to assemble the rack mount brackets.
Removing Protective Covers Output Protection Covers Safety regulation requests protective cover when the output voltage is higher than 45 VDC. Therefore, there are protective covers for the output connector of the power supply. Refer to the following figure for the assembly/disassembly of the output protective cover.
Step 1 Step 2 Step 3 Step 4 Step 5 Connecting AC Input The power supply’s AC input is rated for 100 V – 240 V, with frequency of 47 Hz – 63 Hz. Before connecting to an external AC power source, be sure that the power switch is in the OFF state and use the supplied power cord assembly.
Page 110
to the screw holes on the power supply. 3. Use only the included screws to fasten and secure the cable housing assembly Warning: The power cord supplied with this product is certified for safety. In case the supplied cable assembly needs to be replaced, or an extension cable must be added, be...
Page 111
Warning: The power cord supplied with this product is certified for safety. In case the supplied cable assembly needs to be replaced, or an extension cable must be added, be sure that it can meet the required power ratings of this product.
1.10 Fuses This product is a switching mode power supply. The fuse installed inside should not break under normal operation. In case the fuse is blown, it may indicate a malfunction in the unit. In this event, contact B&K Precision. Warning: Any disassembling of the casing or changing the fuse not performed by an authorized service technician will void...
Front Panel Operation Front Panel Overview 3 4 5 XLN60026 600V / 2.6A 1.56kW Programmable DC Power Supply 14 13 Power switch: Turns on the main power to the power supply. Display: 192x32 Graphic LCD Module Current setting Press to set up the current limit. Voltage setting Press to set up the output voltage.
Page 115
back to previous menu options or exit the menu. Numerical keys They are used to directly input the voltage or current value or choose a setting option in the menu. Down/Right/Store This key is a multi-function key for the following three functions: Down: When in the menu settings, use this “Down”...
Page 116
(12) Rotary knob: Use this knob to adjust voltage or current when the output is ON (press first to let cursor display first). (13) Enter This key is used to confirm any changes to the settings within the menu or the voltage and current setting value. (14) Mem Press this key to access the instrument settings memory location.
Menu Settings and Configuration 1 . SYSTEM SETTING 2 . OUTPUT SETTING 3 . PROTECTION LL L 7 . TIMER CONTROL 8 . CALIBRATION 9 . CHAIN SETTING SYSTEM SETTING: Pressing key in the first page of Menu Setting will enter the following “SYSTEM SETTING”...
Page 118
*USB control requires installing USB drivers first. Download USB driver from www.bkprecision.com *USB interface is a virtual COM port. T he settings are: Baudrate : 57600 bps Data bit Parity check : none Stop bit *When entering the Remote mode, the screen will present RMT indicator as shown in the following picture.
Page 119
RECALL DEFAULT: Restores manufacturer default settings KEY LOCK: While exiting the setting screen after enabling KEY LOCK, all keys except the key are locked. Only this key can disable KEY LOCK. *Simultaneously pressing both keys in the main screen can also lock keys. *While entering KEY LOCK state, the display will show an LCK indicator in the bottom right corner.
Page 120
CURR SLEW RATE = 0.0520 A/mS VOLT LIMIT MAX: Upper limit of the output voltage setting XLN15010 – 150.5 V max. XLN30052 – 300.5 V max. XLN60026 – 600.5 V max. CURR LIMIT MAX: Upper limit of the output current setting XLN15010 –...
Page 122
from CC to CV mode PARALLEL SETTING Press in the second screen of the menu to enter PARALLEL menu. ON/OFF: Enables or disables the parallel mode. MASTER/SLAVE: Refer to “Parallel Setting” section for the detailed setting procedure to use MASTER/SLAVE mode. Note: Up to four power supplies of the same models may be connected in parallel.
Page 123
FUNCTION menu. PROGRAM MODE: Press to enter the PROGRAM MODE screen. This mode allows the user to run list mode (sequences) that are stored within the internal program mode memory. Prior to using this function, the user needs to edit the list steps through the USB or GPIB interface and load it into a program memory location.
Page 124
Users can enable/disable external control in this menu option. An external voltage source (VOLT) or resistor (RES) can be used to control the output voltage and current. The external voltage/resistance can be either 0 - 10V/0 - 10K (10V/10K) or 0 - 5V/0 - 5K (5V/5K).
Page 125
page. CHAIN ON/OFF: On/Off Series Connection Mode CHAIN ADDRESS: Setting Address (1 – 30) For detailed setting information, please refer to “ Multi-unit Connection Mode (RS485) ” section.
Rear Panel Overview (16) LAN (Ethernet) Interface: RJ-45 LAN connector for remote communication. (17) GPIB Interface: GPIB connector for remote communication. (18) Main Output (+ + - -): The main output of the power supply. (19) Earth connection: Used for earth ground connection. (20) USB Interface: USB interface for remote communication.
Page 127
(-S) and negative lead (-) of the DC output are connected to the negative end (-) of the device under test. This connection will compensate the voltage dropped due to current flow through long power wires (the maximum compensation voltage is 2 V or 5 V depending on the model). (24) AC power input: The power receptacle is rated for a power input within 100 VAC - 240 VAC.
Operation Instructions Voltage Setting Press and set the output voltage by pressing the numerical keys directly, and then press to confirm the setting. Current Setting Press and set the output current (current limit) by pressing the numerical keys directly and then press to confirm the setting.
Overcurrent Protection OCP Press to enter the “Configuration” menu and press to enter the PROTECTION setting screen. Then, use the knob to set OCP to ON and press to confirm it. Now the cursor will move to the value setting for the OCP on the right hand side.
by turning the rotary knob. Press and the cursor appears in response; press to move the cursor to the digit you want to change and turn the knob to increase or decrease the output voltage value at the cursor. The changes of the voltage setting and the output voltage will immediately apply.
Page 131
Power Line RS-485 Power Line RS-485 LOAD RS-485 After wiring is complete, configure one of the supplies as the Master and the other three as Slave A, B, and C. After one of the supplies is configured to be the Master, it will start searching for all Slaves that are connected to the Master. To operate correctly, the user must set up the Slaves before the Master.
If the wiring is correct, the following screen will appear: After receiving the control command from the Master, all Slaves will be locked on to the SLAVE screen. At this point all keys except are locked so that slaves cannot be operated from the front panel keys except controlled by the Master as shown below: Once the Master and Slave settings are completed, users will only have to operate the Master supply to set up the combined output voltage and current.
Page 133
If more than one Master is being set to parallel mode, the following message will be displayed. After the master is configured, if it cannot communicate with one of the slave supplies, the following error message will be displayed (example showing Slave A) After finishing the set up, if a Slave receives only the output command sent by the Master but does not receive the synchronization signal, it will present the...
2.13 External Analog Interface A DB25 analog interface connector is available in the rear panel for analog control. The output voltage or output current can be controlled by an external voltage source or resistor connected to the appropriate pins on this connector. The range of the external voltage could be either 0 ~ 10 VDC or 0 ~ 5 VDC and the range of the external variable resistance could be either 0 ~ 10 kΩ...
2.13.2 Functions Enabling/Disabling External Control To enable external control, you must first access MENU 6-SPECIAL TEST FUNC 2. EXTERNAL CONTROL, and change the setting on [EXTERN ENABLE = ] to [ACTIVE] , as shown in the figure below. This must be done prior to executing all the functions (i.e. Enable +/-, Shut-Off, Local/Analog, Voltage/Current Program, Voltage/Current Monitor, etc.) EXTERN MONITOR= 10V...
Page 136
A MODE: This allows the output On/Off button to be enabled or disabled. When pin 1 and 14 are opened, the output On/Off button is disabled and the power supply’s output will remain OFF. Pressing the On/Off button will not turn ON the output, and the LCD screen will also display ENA . V = 300.00 I = 1.000 0.00 V...
Page 137
Output EXTERN Enable On/Off Display Output ENABLE +/Enable - button ---- NOT ACTIVE Not Active (by Default) Disabled ENA ACTIVE Opened Enabled ---- (A Mode) Shorted On/Off Disabled ---- ACTIVE Opened Disabled ---- (B Mode) Shorted Note: When changing from A MODE to B MODE, change EXTERN ENABLE to NOT ACTIVE first to disable analog control, then change to B MODE.
Page 138
Rising-edge trigger EXTERN MONITOR= 10V EXTERN SHUT-OFF= ON / LOW EXTERN ENABLE= ACTIVE When Shut Off occurs, the output will be turned off immediately and SO will appear on the LCD display (as shown in the figure below). To enable the output again, first set the pin’s input voltage back to the original voltage setting (for falling-edge trigger, set back to high level (5V), and low level (0V) for rising-edge trigger).
Page 139
EXTERN EXTERN Shut-Off ENABLE Display SHUT-OFF Output (menu config.) (pin 15) (menu config.) OFF / LOW Display ACTIVE NOT ACTIVE (by Default) ON / LOW Display ACTIVE OFF / LOW High-to-Low ACTIVE ON / LOW Low-to-High CV/CC Pin 13 can be used to monitor the power supply output mode. The pin will output a High level (5V) under CV mode, and Low level (0V) under CC mode.
Page 140
Local Control V = 300.00 I = 1.000 0.00 V 0.000 A Analog Control V = 300.0 I = 1.00 0.0 V 0.00 A Local/Analog pin Display EXTERN Output state ENABLE control NOT ACTIVE (by NOT ACTIVE Local Default) DISPLAY ACTIVE High (5V) Local...
Page 141
Display Local/Analog pin Output Control State High (5V) Local NO DISPLAY Low (0V) Analog Power OK Pin 16 can be used to indicate whether a fault condition is present in the power supply. Normally this pin will output a High level (5V). When a fault occurs, this pin will output a Low level (0V).
Page 142
Under voltage mode, you may set the power supply’s voltage output value through Pin 9. DC SOURCE You can access MENU 6-SPECIAL TEST FUNC 2. EXTERNAL CONTROL to choose the input voltage range [EXTERN PROGRAM] to [10 V / 10K] for 0 – 10V or [ 5V / 5 K] for 0 – 5V. EXTERN VOLT CONTROL= VOLT EXTERN CURR CONTROL= VOLT EXTERN PROGRAM= 10 V / 10 K...
Page 143
Pin 9 and GND Pin 22 can be connected with a resistor to set the power supply’s output voltage value. You may access MENU 6-SPECIAL TEST FUNC 2. EXTERNAL CONTROL to choose the input resistance range at [EXTERN PROGRAM] to [10 V / 10 K] for 0 –...
Page 144
Under voltage control, you may input s DC voltage through Pin 10 to control the power supply’s output current value. DC SOURCE You may access MENU 6-SPECIAL TEST FUNC 2. EXTERNAL CONTROL to choose the input voltage range at [EXTERN PROGRAM] to [10 V / 10 K] for 0 –...
Page 145
supply’s output current value. You may access MENU 6-SPECIAL TEST FUNC 2. EXTERNAL CONTROL to choose the input resistance range at [EXTERN PROGRAM =] to [10 V / 10 K] for 0 – 10kΩ and [ 5 V / 5 K] for 0 – 5 kΩ. EXTERN VOLT CONTROL= VOLT EXTERN CURR CONTROL= VOLT EXTERN PROGRAM= 10 V / 10 K...
Page 146
DC SOURCE You may access MENU 6-SPECIAL TEST FUNC 2. EXTERNAL CONTROL to choose the voltage monitor output range of Pin 11 at [EXTERN MONITOR= ] to [10V] for 0 – 10 V (as shown in figure below) and [5V] for 0 – 5V. EXTERN MONITOR= 10V EXTERN SHUT-OFF= OFF / LOW EXTERN ENABLE=...
You may access MENU 6-SPECIAL TEST FUNC 2. EXTERNAL CONTROL to choose the current monitor output range of Pin 24 at [EXTERN MONITOR] to [10 V] for 0 – 10 V (as shown in figure below) and [5V] for 0 – 5V. EXTERN MONITOR= 10V EXTERN SHUT-OFF= OFF / LOW EXTERN ENABLE=...
Page 148
Example 1: To output the waveform shown above, users may edit the program through the following commands: PROG 1 Choose program number PROG:CLE Clear program 1 data PROG:REP 0 No repeat (repeat one time for “1”) PROG:TOTA 8 Set program 1 to have 8 steps in total PROG:STEP 1 Following 3 settings are for step 1 PROG:STEP:CURR 2...
Page 149
PROG:STEP:ONT 0.5 PROG:STEP 6 Choose step 6 PROG:STEP:CURR 2 PROG:STEP:VOLT 100 PROG:STEP:ONT 0.5 PROG:STEP 7 Choose step 7 PROG:STEP:CURR 2 PROG:STEP:VOLT 50 PROG:STEP:ONT 0.5 PROG:STEP 8 Choose step 8 PROG:STEP:CURR 2 PROG:STEP:VOLT 0 PROG:STEP:ONT 0.5 PROG:NEXT 0 Select next program to run after program 1 is complete, 0 means stop PROG:SAV After edit, use Save command to store...
Page 150
Example 2: To output the waveform shown above, the following example program can be used. PROG 2 Choose program number PROG:CLE Clear program 2 data PROG:REP 0 No repeat after running this program PROG:TOTA 8 Set program 2 to have 8 steps in total PROG:STEP 1 Settings for step 1 PROG:STEP:CURR 2...
Page 151
PROG:STEP 6 Choose step 6 PROG:STEP:CURR 2 PROG:STEP:VOLT 50 PROG:STEP:ONT 0.5 PROG:STEP 7 Choose step 7 PROG:STEP:CURR 2 PROG:STEP:VOLT 200 PROG:STEP:ONT 0.5 PROG:STEP 8 Choose step 8 PROG:STEP:CURR 2 PROG:STEP:VOLT 0 PROG:STEP:ONT 0.5 PROG:NEXT 0 Select next program to run after program 2 is complete, 0 means stop PROG:SAV After edit, use Save command to store...
Page 152
Example 3: If the power supply needs to execute Program 2 right after Program 1 is executed, then program 1 can be modified with a NEXT 2 command. The following steps can be taken to modify and execute the programs. PROG 1 Select program 1 PROG:NEXT 2...
2.15 Multi-unit Connection Mode (RS485) The power supply, via the RS485 interface, provides multi-unit control function for up to 30 units (If connecting more than 10 units, please add a 120Ω resistor terminator to the last unit as shown in the figure below). Turn on the ...
Protection and Error Messages Overvoltage Protection (OVP) When OVP is activated and the voltage measured exceeds the set point, the system will enter the “Overvoltage Protection” mode that will shut off the output and show OVP on the display. Press ESC to reset the protection mode and deactivate the the buzzer.
Constant Voltage Protection (CV TO CC) When this function is activated, the power supply will stay in CV mode. If load changes force the system to transition from CV to CC (constant current) mode, the system will enter the “CV TO CC Protect” state that will shut off the output and display the CVC message on the screen.
Low Voltage Protection (ACD) When the machine has detected abnormally low AC power input, system will enter the “AC Detect Low Protect” mode that will shut off the output and display the error message shown in the following figure. Press ESC to reset the protection and deactivate buzzer.
Remote Communication Interface Connection USB (Virtual COM) All models have a standard USB interface (virtual COM) that can be used for remote communication. The serial settings are listed below: BAUDRATE: 57600 PARITY: NONE DATA BITS: 8 STOP BIT: 1 FLOW CONTROL: NONE GPIB GPIB option is available when the supply is installed with the optional LAN/GPIB interface card.
Page 158
provides a simple way of setting voltage and current, as well as monitoring the output, using a web browser from a computer connected to the same local area network as the power supply. To access this, do the following: 1. On the computer, open up a Java-enabled web browser. 2.
Page 159
Table 1 - Web Browser Menu Description Home Provides general information of the power supply: Model Number, Manufacturer, Short Description, MAC Address, IP Address, Firmware Version. Configuration Allows users to configure: OVP Setting, OCP Setting, OPP Setting, LCD Backlight, *Change Password.
Page 160
Telnet Connection The power supply can be connected via Ethernet (LAN) interface using Telnet client with the following port: Telnet Port: 5024 Windows XP Users 1. Open a command prompt window, which can be found by going to Start > All Programs > Accessories > Command Prompt. Alternatively, you can click on Start, select Run…, and type in cmd in the Open: input box .
Page 161
Windows Vista/7 Users By default, Telnet client is not installed on the system. There are two ways to install it manually: 1. Open command prompt: a. Select Windows Start > All Programs > Accessories > Command Prompt b. Select Windows Start and type in cmd in the Search programs and files box and click on cmd.exe in the search list.
populated. Then, Click the box next to Telnet Client. When finished, follow steps 1a or 1b to open Command Prompt and follow the same steps 2 and 3 from “Windows XP users” instructions above. Socket Connection Socket connection is available for communication via Ethernet (LAN) interface.
negative floating-point numeric values are some examples of valid data. <string > Characters enclosed by single or double quotes <LF > Line Feed, Hex code is 0x0Ah <CR> Carriage Return, Hex code is 0x0Dh <END > End or identify Note: All commands are terminated with <CR> and <LF> characters. A space is always included in between the command and the parameter.
Page 164
-005 Parallel function, Error mode -006 Parallel function, Multi-Master -007 Parallel function, No Slave found -008 Parallel function, Communication with Slave A error -009 Parallel function, Communication with Slave B error -010 Parallel function, Communication with Slave C error -011 Parallel function, Sync.
Remote Communication Protocol Command Description ADDRess set the address of the machine ADDRess? return the address of the machine BEEP set beep on(1) or off(0) clear protect status CURRent set current CURRent? return current setting ERRor? return error message IOUT? current readback ISET set current...
Page 166
Examples: Q 1:How to set GPIB address? ADDR 10 ==>address is 10 Q 2:How to read back GPIB address? ADDR? ==>return GPIB address ADDRESS? ==>return GPIB address Q 3:How to set up buzzer? BEEP 1 ==>trigger beep to on BEEP off ==>trigger beep to off Q 4:How to clear the protecting state? ==>clear protect status...
Page 167
Q 11:How to read the current output value? IOUT? ==>return current output Q 12:How to lock buttons and the rotary knob? LOCK 1 ==>lock the keypad and knob LOCK ON ==>lock the keypad and knob Q 13:How to read the product model number? MODEL? ==>return machine model name Q 14:How to set up OVP function?
SCPI Conformity Information The power supply is compatible with all IEEE-488.2 and SCPI commands (1995). Commands are included in SCPI commands (in Vol. 2, 1995). 4.5.1 Common SCPI commands Command Explanation *CLS Clear status (include error code) *IDN? Response:<Manufacturer>, <model>, <serial number>, <firmware type, &...
*CLS 4.5.2 SCPI Command subsystem ABORt Abort the Output Action FETCh Fetch Subsystem :CURRent? Return the fetched output current :VOLTage? Return the fetched output voltage MEASure Measure subsystem :CURRent? Return the measured output current :VOLTage? Return the measured output voltage MEMory Memory Subsystem <NR1 | ? >...
Page 170
:PROTection :CLEar Reset latched protection PROGram Program Subsystem <NR1 | ? > select or return program number, range from 1 - 10 :CLEar clear program n parameters :ALL clear all program parameters :NEXT <NR1 | ? > set or return next program number (1 - 10 , 0 for end) :REPeat <NR1 | ? >...
Page 171
:LEVel <NRf | ? > set or return overpower protect value :OVP <Boolean | ? > set or return overvoltage protect state :LEVel <NRF | ? > set or return overvoltage protect value Parallel Subsystem :MODE <OFF/0,PARALLEL/1? > set or return parallel mode :TYPE <MASTER/0,SLAVEA/1,SLAVEB/2,SLAVEC/3|?>...
Page 172
set or return IP address :KEY :LOCK <Boolean | ? set or return key lock state :LCD :BL <Boolean | ? > set or return LCD backlight state :POWer :CURRent <NRf | ? > set or return user define current level :STATe <Boolean | ? >...
Page 173
Examples: Q 28:How to cancel all actions? ABOR ABORT Q 29:How to fetch current value? FETC:CURR? FETCH:CURRENT? Q 30:How to fetch voltage value? FETC:VOLT? FETCH:VOLTAGE? Q 31:How to measure current? MEAS:CURR? MEASURE:CURRENT? Q 32:How to measure voltage? MEAS:VOLT? MEASURE:VOLTAGE? Q 33:How to set up and read back the specific memory set? MEM 1 MEMORY 3 MEM?
Page 174
Q 35:How to set up and read back the current stored in specific memory set? MEM:ISET 15 MEM:ISET? MEMORY:ISET 25 MEMORY:ISET? Q 36:How to save data to memory set? MEM:SAVE MEMORY:SAVE Q 37:How to set up and cancel output? OUT ON OUTPUT 0 Q 38:How to set up and read back the voltage limit? OUT:LIM:VOLT 30...
Page 175
OUT:SR:CURR? OUTPUT:SR:CURRENT 0.01 OUTPUT:SR:CURRENT? Q 42:How to read back the output state? OUT:STAT? OUTPUT:STATE? Q 43:How to read back the protection state? PROT? PROTECTION? Q 44:How to set up and read back the CC to CV protection state? PROT:CCCV ON PROT:CCCV? PROTECTION:CCCV 0 PROTECTION:CCCV?
Page 176
SOUR:CURR:PROT ON SOUR:CURR:PROT? SOURCE:CURRENT:PROTECTION 0 SOURCE:CURRENT:PROTECTION? Q 48:How to set up and read back the overcurrent protection point? PROT:OCP:LEV 2 PROT:OCP:LEV? PROTECTION:OCP:LEVEL 2 PROTECTION:OCP:LEVEL? SOUR:CURR:PROT:LEV 2 SOUR:CURR:PROT:LEV? SOURCE:CURRENT:PROTECTION:LEVEL 2 SOURCE:CURRENT:PROTECTION:LEVEL? Q 49:How to set up and read back the overpower protection state? PROT:OPP ON PROT:OPP? PROTECTION:OPP 0...
Page 177
SOURCE:VOLTAGE:PROTECTION ? Q 52:How to set up and read back the overvoltage protection point? PROT:OVP:LEV 30 PROT:OVP:LEV? PROTECTION:OVP:LEVEL 40 PROTECTION:OVP:LEVEL? SOUR:VOLT:PROT:LEV 25 SOUR:VOLT:PROT:LEV? SOURCE:VOLTAGE:PROTECTION:LEVEL 35 SOURCE:VOLTAGE:PROTECTION:LEVEL? Q 53:How to set up the buzzer? SYS:BEEP ON SYSTEM:BEEP 0 Q 54: How to read back error code? SYS:ERR? SYSTEM:ERROR? Q 55: How to set up and read back the GPIB address?
Page 178
SYSTEM:KEY:LOCK? Q 58: How to set up and read back the LCD backlight function? SYS:LCD:BL ON SYSTEM:LCD:BL? Q 59: How to set up and read back the boot mode? SYS:POW:TYPE LAST SYS:POW:TYPE? SYS:POWER:TYPE USER SYS:POWER:TYPE? SYSTEM:GPIB:ADDRESS? Q 60: How to set up and read back the voltage setting under user-defined boot mode? SYS:POW:VOLT 10 SYS:POW:VOLT?
Page 179
SYS:REC:DEF SYSTEM:RECALL:DEFAULT Q 64: How to set up and read back the communication interface? SYS:REM GPIB SYS:REM? SYSTEM:REMOTE ETHERNET SYSTEM:REMOTE? Q 65: How to read back the serial number? SYS:SER? SYSTEM:SERIES? Q 66: How to set up and read back the output voltage? SOUR:VOLT 30 SOUR:VOLT? SOURCE:VOLTAGE 35...
State Bit Definition When “STATE?” command is used, the system will return three bytes in the order as shown below. Byte 2 Byte 1 Byte 0 bit 7 - bit 0 bit 7 - bit 0 bit 7 - bit 0 The definition of each bit is described in the following: byte 0: bit 7...
Multi-Unit Programming Commands The multi-unit programming commands used by the power supply include a carriage return (CR) character for termination of all ASCII strings. For all configuration commands (except for commands listed under Synchronous Control Commands section), the instrument will return a string “OK”...
Page 182
CIDN? Description: Queries the IDN information of the selected power supply. This command functions the same as *IDN?, however this is used in a multi unit programming setup for the selected power supply. Query: CIDN? Return B&K PRECISION,XLN15010,SN#,fw_version,0 String: CREV?
Page 183
Description: Queries the firmware version of the selected power supply. Query: CREV? Return 1.10 String: CSN? Description: Queries the serial number of the selected power supply. Query: CSN? Return 123D19238 String: Serial number is 123D19238. CST? Description: Queries the status of the selected power supply. This command functions the same as STATUS? command, however this is used in a multi unit programming setup for the selected power supply.
4.7.2 Output Control Commands This set of commands controls the outputs of the selected instrument (based on their address). Use CADR command (described in previous section) first to select the address of the unit you want to control before using any of these commands to control that unit’s output. Command Description ==================================================...
Page 185
Description: Configures/Queries the VSET voltage setting of the selected power supply. Example: CPV 150.68 Sets the selected power supply’s VSET voltage setting to 150.68 V. CPV? Queries the selected power supply’s VSET voltage setting. CMV? Description: Queries the measured/readback voltage output value of the selected power supply.
Page 186
CMC? Description: Queries the measured/readback current output value of the selected power supply Query: CMC? Return 1.234 A String: The selected power supply has a measured output current of 1.234 A. CDVC? Description: Queries the display voltage and current of the selected power supply.
Page 187
value of the selected power supply. Example: COV 170.000 Sets the selected power supply’s OVP value to 170.000V. COV? Queries the selected power supply’s OVP value. COVP Description: Configures/Queries the overvoltage protection state of the selected power supply. Example: COVP ON Sets the selected power supply’s OVP state to ON.
Page 188
of the selected power supply. Example: COCP ON Sets the selected power supply’s OCP state to ON. COCP? Queries the selected power supply’s OCP state. Description: Configures/Queries the overpower protection value of the selected power supply. Example: COP 300.00 Sets the selected power supply’s OPP value to 300.00 W.
Return String: Format: CV or CC 4.7.3 Synchronous Control Commands This set of commands can be used to control all the power supplies connected in the RS-485 chain at once. Note that these commands will not return an “OK” string upon making a configuration. Command Description ==================================================...
Page 190
GRST Description: Resets all the power supplies connected in the chain to a known state. Syntax: GRST GCLS Description: Clears the status of all the power supplies connected in the chain. Syntax: GCLS GCLR Description: Clears the protection flag/trip of all the power supplies connected in the chain.
Page 191
3.123 A. GOUT Description: Configures/Queries the output state of all the power supplies in the chain. Example: GOUT ON Sets all the power supplies’ output to ON. Description: Configures/Queries the overvoltage protection value of all the power supplies connected in the chain.
Example: GOC 3.000 Sets all the power supplies’ OCP value to 3.000 A. GOCP Description: Configures/Queries the overcurrent protection state of all the power supplies connected in the chain. Example: GOCP ON Sets all the power supplies’ OCP state to ON. Description: Configures/Queries the overpower protection value of all the power supplies connected in the chain.
Commands), the return string will be “OK”. If otherwise, an error message will occur. See the table below for the list of errors and their descriptions. Return String Description Wait response time has timed Time out Range error Input value is out of range More than one master is in the Multi master chain.
Voltage Calibration Follow the step by step instructions below for voltage calibration. Power off the supply and connect its output terminal to a Digital Volt Meter (DVM), as shown in the figure below. Then set the meter for DC voltage measurement. Voltage Calibration DS30052 DC Voltage measurment...
Page 195
4. Key in “13579” as the password to enter the calibration menu. 5. Press to access the Voltage Calibration menu, and the following parameters will be displayed. 6. With the CALIB VOLT Lo selected, look at the voltage value displayed on the DVM, and change the value to match the measured results.
Page 196
Function Setting Range of read back value 5 ~ 16.5 89.1 ~ 108.9 MIDL 178.2 ~ 217.8 MIDH 256.5 ~ 313.5 XLN15010 Function Setting Range of read back value 5 ~ 8.25 49.5 44.55 ~ 54.45 MIDL 89.1 ~ 108.9 MIDH 142.5...
OVP Calibration Follow the step by step instructions below for OVP calibration. 1. Press in the calibration menu to enter the OVP calibration menu. 2. Press to access OVP calibration procedure for “Lo”. Lo = 3. When complete, go to the OVP “Hi” parameter and press 4.
Current Calibration Follow the step by step instructions below for current calibration. 1. Connect two terminals on the output of the power supply to two ends of the current shunt, then connect the DVM to the sensor of the current shunt to measure DC voltage, as shown below. Current Calibration DS30052 Current Shunt...
Page 199
calibration menu. 3. First, input the resistance of the current shunt in mΩ for current measurement fixture and press 4. Then, observe the voltage value shown on the DVM, and input it accordingly for CALIB CURR Lo, then CALIB CURR MID1, MID2, MID3, and Hi accordingly.
Page 201
Lo = 3. Wait until it is finished. It will indicate “OK”. Now, do the same for OCP “Hi”. Lo = 4. Once completed, the calibration values will be stored into the internal flash memory and return to the calibration page. If it is not completed within 10 seconds from the start of the calibration, there may be issues with the OCP protection circuit and will need to be inspected by a trained technician.
Page 202
Index AC input, 14 Multi-unit Connection, 56 Analog Interface, 39 OCP, 34 Calibration, 97 OVP, 33 Caution, 18 Parallel Mode, 35 CHAIN, 30 POWER ON STATE, 24 Down/Right/Store, 20 Rackmount, 12 Enable +/-, 40 Resistor Mode, 46 RMT/LCL Sense, 31 Environmental, 11 SLEW, 26 Error, 37...
Page 203
Service Information Warranty Service: Please go the support and service section on our website www.bkprecision.com to obtain a RMA #. Return the product in the original packaging with proof of purchase to the address below. Clearly state on the RMA the performance problem and return any leads, probes, connectors and accessories that you are using with the device.
Page 205
Limited Three-year Warranty B&K Precision Corp. warrants to the original purchaser that its products and the component parts thereof, will be free from defects in workmanship and materials for a period of three years from date of purchase. B&K Precision Corp. will, without charge, repair or replace, at its option, defective product or component parts.
Need help?
Do you have a question about the XLN15010 and is the answer not in the manual?
Questions and answers