Table of Contents
Advertisement
Quick Links
A L L
P U R P O S E
V I N Y L
G A R D E N
8 Ft x 8 Ft DuraMate - V2
(EN) Model # 00381-1
(ES) Modelo # 00381-1
(FR) Modèle # 00381-1
(EN) OWNER'S MANUAL /
Assembly Instructions '8 Ft DuraMate-V2'
Size 8 Ft x 8 Ft / 2.4 m x 2.4 m
(Approx.)
Ver: 0.0
Please thoroughly read the owner's manual
before beginning the shed assembly.
Call us or visit duramaxbp.com for damaged
parts.
Do not return to the store.
You can watch the assembly videos on
www.duramaxbp.com
YouTube
Need Help? Comments or Suggestion
Call Customer Service Hotline.
(800) 483-4674
www.duramaxbp.com
WARRANTY ACTIVATION
Thank you for your purchase of DURAMAX
shed. To activate your shed warranty, log
on to our website and fill in the form under
warranty activation.
www.duramaxbp.com/warranty.php
TM
A Product of
S H E D S
(ES) MANUAL DEL PROPIETARIO /
Instrucciones de montaje '8 Pies DuraMate-V2'
Tamaño 8 Pies x 8 Pies / 2.4 Metros x 2.4 Metros
Ver: 0.0
Por favor a fondo lea el manual del dueño antes
de comenzar la asamblea de cobertizo.
Llámenos o visite duramaxbp.com por daños
partes.
No vuelva a la tienda
Usted puede ver los videos de montaje en
www.duramaxbp.com
YouTube
necesita ayuda? Comentarios, Sugerencias?
La Línea Directa del Servicio del cliente.
(800) 483-4674
www.duramaxbp.com
ACTIVACIÓN DE GARANTÍA
Gracias por su compra de DURAMAX
cobertizo usted. Para activar la garantía
cobertizo, ingrese a nuestra página web y
rellenar el formulario en la activación de la
garantía.
www.duramaxbp.com/warranty.php
(EN) VINYL GARDEN SHED
(ES) JARDÍN DE VINILO CUBIERTO
(FR) ABRI DE JARDIN DE VINYLE
(FR) GUIDE D'INSTRUCTIONS /
Instructions de montage '8 Pieds DuraMate-V2'
Mesures 8 Pieds x 8 Pieds / 2.4 Mètre x 2.4 Mètre
(Aproximado.)
Ver: 0.0
.
a besoin d'aide? Commentaires, suggestions?
Veuillez lire attentivement le mode d 'emploi
avant de commencer l' assemblage de remise.
Appelez-nous ou visitez duramaxbp.com
pour les dommages les pièces.
Ne pas retourner au magasin
Vous pouvez regarder les vidéos de
montage sur
www.duramaxbp.com
YouTube
Hotline service client.
(800) 483-4674
www.duramaxbp.com
ACTIVATION DE LA GARANTIE
Merci pour votre achat de DURAMAX
hangar. Pour activer la garantie de votre
hangar, connectez-vous sur notre site et
remplir le formulaire sous activation
de la garantie.
www.duramaxbp.com/warranty.php
(Approximativ)
.
Advertisement
Table of Contents

Related Manuals for USP Duramax 8 Ft x 8 Ft DuraMate V2


Summary of Contents for USP Duramax 8 Ft x 8 Ft DuraMate V2
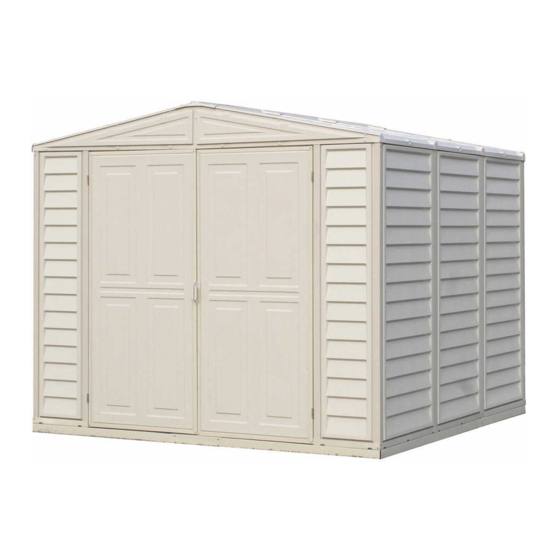
- Page 1 A Product of A L L P U R P O S E V I N Y L G A R D E N S H E D S (EN) VINYL GARDEN SHED 8 Ft x 8 Ft DuraMate - V2 (ES) JARDÍN DE VINILO CUBIERTO (FR) ABRI DE JARDIN DE VINYLE (EN) Model # 00381-1...
- Page 2 (EN) Your Total Solution To Maintenance Free Storage Sheds. • All Weather Durable PVC • Won’t Dent, Rust, Rot or Mildew • Tall Walk In Shed • Never Needs Painting • 61 Inch Wide Double Doors • Easy Assembly • High Wind Tested •...
- Page 3 (EN) Duramax Vinyl Garden Shed Limited Fifteen Year Warranty U.S. Polymer Inc. will send a replacement part free of charge, in the event of material defects and or workmanship for a period of fifteen years from the date of purchase. In the event of a defect covered by the warranty, US Polymers shall replace the defective part, but shall not be responsible for shipping, labor, or other charges.
- Page 4 (EN) SAFETY & PRECAUTIONS For your own safety, please read and follow these instructions during the shed assembly. Before You Begin... 1. Check your local building codes regarding footings, location, etc. CAUTION 2. Select a site that allows enough working space around the shed. 3.
- Page 5 (ES) SEGURIDAD Y PRECAUCIONES Para su propia seguridad, lea y siga las instrucciones durante el ensamblaje del cobertizo. Antes de comenzar ... PRECAUCION 1. Consulte los códigos de construcción locales relativos a cimentación, localización etc. 2. Seleccione un sitio que permite suficiente espacio para trabajar alrededor de la nave. 3.
- Page 6 (FR) SÉCURITÉ ET PRÉCAUTIONS Pour votre propre sûreté, svp lisez et suivez ces instructions avant et pendant le montage. Avant de commencer... 1. Vérifiez vos codes de la construction et de l'habitation concernant la pose, l'emplacement, etc. ATTENTION 2. Choisissez un site qui laisse assez d'espace de travail autour de l'abri. 3.
- Page 7 (EN) Note : Before starting installation, please refer to Safety & Precautions. (ES) Pozor : Antes de comenzar la instalación, consulte Seguridad y Precauciones. (FR) Note : Avant de commencer l'installation, référez-vous svp au chapitre Sécurité et Précautions. (EN) Tools You Will Need Cordless Drill - Philips Head Screwdriver - Philips Head Hammer or Rubber mallet...
- Page 8 (EN) Parts List (ES) La Lista de partes (FR) Liste des pièces (EN) Check all parts prior to installation. (ES) Revise todas las partes antes de la instalación (FR) Vérifier toutes les pièces avant d'installer. (EN) ACCESSORIES (EN)CODE (EN)QTY (EN)CODE (EN)QTY (EN) PROFILES (EN) PROFILES...
- Page 9 (EN) Exploded View (ES) El Panorama estallado RRS2 (FR) Vue Explosée RRS2 RRS2 RPB1 RPB1 RPB1 RPB1 RPB1 RPB1 FPRB FPLB RS2B VRA07 RS1XB RS13B RS14B RS10B RS8B RS4XB RS13B RS14B RS12B VRA06 RS9B RS11B RS5S RS2B...
- Page 10 # 9 -14 # 15-21 # 22-34 # 35-43 # 44-50 # 51-52 (EN) IMPORTANT: USE HAND GLOVES TO PREVENT INJURY. (ES) IMPORTANTE: GUANTES DE MANO DE USO PARA PREVENIR LA HERIDA. (FR) IMPORTANT: UTILISER LES GANTS POUR PREVENIR LES ACCIDENTS.
- Page 11 (EN) Foundation & Base Frame (ES) Fundacion y Base Frame (FR) Fondation & Chassis de base (EN) DuraMax must be installed on a Duramax foundation or level wooden platform or a level concrete foundation. (ES) Duramax debe estar instalado en una base Duramax o una plataforma de madera de nivel o una base de hormigón nivelada.
- Page 12 (EN)If the shed is assembled with wooden foundation on soil, use the soil anchor kit. (ES)Si el cobertizo se ensambla con bases de madera en el suelo, utilice el kit de anclaje del suelo. (FR)Si le hangar est assemblé avec des fondations en bois sur le sol, utiliser le kit d'ancrage du sol. (EN) Wooden Platform for Basic Shed(Not Included) The following is the list of lumber and sizes you will need.
- Page 13 (EN)Foundation Structure (ES)Estructura Fundación (FR)Structure Fondation (EN)Plywood Floor (ES)piso de madera contrachapada (FR)plancher de contreplaqué VBB01 (x1) VBA02 (x3) S1 (x28) VBB04 (x1) VBA03 (x3) VBA02 (EN) Left VBA03 (ES)Izquierda (FR) Gauche (EN) Back (ES)Trasera (FR) Arrière VBA03 VBA02 VBB01 VBA02 VBB04 VBA03...
- Page 14 (EN) OPTION : 2 - ASSEMBLY ON CONCRETE FOUNDATION (ES) OPCIÓN : 2 - ASAMBLEA SOBRE BASE DE HORMIGÓN (FR) OPTION : 2 - ASSEMBLÉE SUR LA FONDATION EN BÉTON (EN) Parts needed (ES) Las partes necesitaron (FR) Pièces nécessaires (EN)CODE (EN)QTY (ES)CODE...
- Page 15 (EN)Concrete foundation (ES)Cimentación de hormigón (FR)Fondation concrète (EN)Concrete foundation (ES)Cimentación de hormigón (FR)Fondation concrète (EN)Concrete foundation (ES)Cimentación de hormigón (FR)Fondation concrète (EN) IMPORTANT: USE HAND GLOVES TO PREVENT INJURY. (ES) IMPORTANTE: GUANTES DE MANO DE USO PARA PREVENIR LA HERIDA. (FR) IMPORTANT: UTILISER LES GANTS POUR PREVENIR LES ACCIDE NTS.
- Page 16 VBB01 (x1) VBA02 (x3) S2 (x28) F1 (x28) VBB04 (x1) VBA03 (x3) (EN) Left VBA03 (ES)Izquierda VBA02 (FR) Gauche (EN) Back (ES)Trasera (FR) Arrière VBA03 VBA02 VBB04 VBA03 VBA02 (EN) Right VBB01 (ES)Correcta (EN) Front (FR) Partie droite (ES) Frente (FR) Avant VBB01 VBA02...
-
Page 17: Table Of Contents
(EN) Roof Structure Pre Assembly (ES) Montaje previo de la estructura del techo (FR) Pré-assemblage de la structure du toit (EN) : All parts are clearly marked and care should be taken to use the correct one. (ES) : Todo pone piezas son marcados claramente y cuidan debe ser tomado para usar el corrige uno. - Page 18 R S 8 B (x2) S1 (x4) R S 9 B (x2) (EN) Make sure these holes are up. (ES) Asegúrese de que los orificios estén hacia arriba. RS9B (FR) Assurez-vous que ces trous soient positionnés vers le haut. RS1XB RS8B RS8B RS9B...
- Page 19 S1 (x8) RS2B (x2) RS2B RS2B RS9B RS8B RS2B RS8B RS1XB (EN) Make sure to mark as shown after each pre-assembly for further assembly reference. (ES) Asegúrese de marcar como se muestra después de RS9B cada premontaje para más referencias de ensamblaje. (FR) Assurez-vous de marquer comme indiqué...
- Page 20 R S 8 B (x2) S1 (x8) R S 9 B (x2) (EN) Make sure these holes are up. RS9B (ES) Asegúrese de que los orificios estén hacia arriba. (FR) Assurez-vous que ces trous soient positionnés vers le haut. RS1XB RS8B RS8B RS9B...
-
Page 21: Vra06
(EN) Side Roof Structure Assembly Right (ES) Montaje de estructura de techo lateral derecho (FR) Ensemble de structure de toit latéral droit VRA06 (x1) S1 (x2) VRA07 (x1) VJA01 (x1) (EN) Make sure this hole facing outward. (ES) Asegúrese de que este agujero hacia el exterior. (FR) Assurez-vous que ce trou vers l'extérieur. - Page 22 (EN) Side Roof Structure Assembly Left (ES) Conjunto de estructura de techo lateral izquierdo (FR) Ensemble de structure de toit latéral gauche VRA06 (x1) S1 (x2) VRA07 (x1) VJA01 (x1) (EN) Make sure this hole facing outward. (ES) Asegúrese de que este agujero hacia el exterior. (FR) Assurez-vous que ce trou vers l'extérieur.
-
Page 23: Rs5S
(EN) Roof Structure Assembly Left & Right (ES) Ensamblaje de estructura de techo izquierda y derecha (FR) Ensemble de structure de toit gauche et droite RS5S (x4) S1 (x24) RS6S (x4) RS5S (EN) Note: Align bigger & smaller holes. (ES) Nota: Alinee los agujeros más grandes & más pequeños. (FR) Remarque : Aligner plus gros &... -
Page 24: (En) Parts Needed (Es) Las Partes Necesitaron (Fr) Pièces Nécessaires
(EN) Walls & Columns (ES) Las paredes & las Columnas (FR) Murs et montants (EN) Parts needed (ES) Las partes necesitaron (FR) Pièces nécessaires (EN)CODE (EN)QTY (EN)CODE (EN)QTY (EN)CODE (EN)QTY (ES)CODE (ES)QTY (ES)CODE (ES)QTY (ES)CODE (ES)QTY (FR)CODE (FR)QTÉ (FR)CODE (FR)QTÉ (FR)CODE (FR)QTÉ... - Page 25 S1 (x2) CCS1 (x1) (EN) Front (EN) Make sure that, the arrow mark points up. (ES) Frente (ES) Asegúrese de, marca de la flecha apunte hacia arriba. (FR) Avant (FR) Assurez-vous que la flèche pointe vers le haut. CCS1 CCS1 CCS1 CCS1 CCS1...
- Page 26 CDRB1 (x1) S1 (x2) (EN) Needed to hold the panel at this step. (EN) Front 1&2 (ES) Frente (ES) Necesario para sostener el panel en este paso. (FR) Avant (FR) Nécessaire pour maintenir le panneau à cette étape. CDRB1 FSPB1 FSPB1 FSPB1 CDRB1...
- Page 27 VCB01 (x1) S1 (x2) (EN) Right (ES) Correcta (EN) Needed to hold the panel at this step. (FR) Partie droite (ES) Necesario para sostener el panel en este paso. (FR) Nécessaire pour maintenir le panneau à cette étape. (EN) Front (ES) Frente (FR) Avant CCS1...
- Page 28 VCB03 (x1) S1 (x2) (EN) Right (ES) Correcta (EN) Front (FR) Partie droite (ES) Frente VCB03 (FR) Avant CCS1 1&2 VCB03 VCB03 CCS1 CMB1 VCB03 S1 (x3) S2 (x1) CMB1 (x1) CMF (x1) SPB1 (x1) (EN) Right (ES) Correcta (FR) Partie droite CMB1 SPB1 3&4...
- Page 29 S1 (x2) CCS1 (x1) SPB1 (x1) (EN) Right (ES) Correcta (FR) Partie droite CCS1 SPB1 VBA03 SPB1 VBA02 CMB1 SPB1 VBA03 CCS1 CCS1 SPB1 CCS1 VBA02 2&4 VBA02 S1 (x2) S2 (x1) CCF (x1) VCB04 (x1) (EN) Back (ES) Detrás (EN) Right (FR) Arrière (ES) Correcta...
- Page 30 S1 (x2) CMB1 (x1) SPB1 (x1) (EN) Back (ES) Detrás (FR) Arrière SPB1 SPB1 SPB1 CCS1 CMB1 CMB1 VBA02 S1 (x2) S2 (x1) CMF (x1) VCB04 (x1) (EN) Back (ES) Detrás (FR) Arrière VCB04 VCB04 CCS1 CCS1 1&2 VCB04 VCB04 VCB04 3&4 CMB1...
- Page 31 S1 (x3) CMB1 (x1) SPB1 (x1) (EN) Back (ES) Detrás (FR) Arrière SPB1 SPB1 CMB1 SPB1 CMB1 CMB1 VBA03 VBA03 S1 (x2) VCB03 (x1) (EN) Back (ES) Detrás (FR) Arrière VCB04 VCB04 CMB1 VCB03 1&2 VCB03 CMB1 CMB1 VCB03 VCB03 (EN) IMPORTANT: USE HAND GLOVES TO PREVENT INJURY.
- Page 32 S1 (x2) CCS1 (x1) SPB1 (x1) (EN) Back (ES) Detrás (FR) Arrière CCS1 VBA03 SPB1 SPB1 VBA02 CMB1 VBA03 SPB1 CCS1 SPB1 CCS1 CCS1 VBA02 2&4 S1 (x1) S2 (x1) CCF (x1) VCB03 (EN) Left (ES) Izquierda (EN) Back (ES) Detrás (FR) Gauche (FR) Arrière CCS1...
- Page 33 S1 (x2) CMB1 (x1) SPB1 (x1) (EN) Left (ES) Izquierda (FR) Gauche (EN) Back (ES) Detrás (FR) Arrière SPB1 SPB1 CCS1 SPB1 CMB1 CMB1 VBA02 S1 (x2) CMF (x1) S2 (x1) VCB04 (x1) (EN) Left (ES) Izquierda (FR) Gauche (EN) Back (ES) Detrás (FR) Arrière VCB04...
- Page 34 S1 (x2) CMB1 (x1) SPB1 (x1) (EN) Left (ES) Izquierda (FR) Gauche SPB1 SPB1 CMB1 SPB1 CMB1 CMB1 VBA03 VBA03 S1 (x2) VCB03 (x1) (EN) Left (ES) Izquierda (FR) Gauche VCB03 CMB1 VCB04 1&2 VCB03 VCB03 CMB1 VCB03 CMB1 (EN) IMPORTANT: USE HAND GLOVES TO PREVENT INJURY. (ES) IMPORTANTE: GUANTES DE MANO DE USO PARA PREVENIR LA HERIDA.
- Page 35 S1 (x2) CCS1 (x1) SPB1 (x1) (EN) Left (ES) Izquierda (FR) Gauche CCS1 SPB1 VBA03 SPB1 VBB04 CMB1 SPB1 VBA03 CCS1 CCS1 SPB1 2&4 CCS1 VBB04 VBB04 S1 (x1) S2 (x1) CCF (x1) VCB03 (EN) Front (ES) Frente (FR) Avant 1,2&3 CCS1 VCB03...
- Page 36 S1 (x2) CDLB1 (x1) FSPB1 (x1) FSPB1 FSPB1 CCS1 CDLB1 FSPB1 CDLB1 CDLB1 VBB04 VBB04 (EN) Front (ES) Frente (FR) Avant VCB01 (x1) S1 (x2) (EN) Front (ES) Frente VCB01 (FR) Avant VCB01 CCS1 CCS1 1&2 VCB01 VCB01 CDLB1 (EN) IMPORTANT: USE HAND GLOVES TO PREVENT INJURY. (ES) IMPORTANTE: GUANTES DE MANO DE USO PARA PREVENIR LA HERIDA.
- Page 37 (EN) Roof Structures (ES) Estructuras de techo (FR) Charpente (EN) Parts needed (ES) Las partes necesitaron (FR) Pièces nécessaires (EN)CODE (EN)QTY (EN)CODE (EN)QTY (ES)CODE (ES)QTY (ES)CODE (ES)QTY (FR)CODE (FR)QTÉ (FR)CODE (FR)QTÉ RS4XB RS10B RS11B RS12B FDCL FDCR FMC (x6) S1 (x6) 1&2 CMB1 CMB1...
- Page 38 S1 (x4) FCC (x4) CCS1 CCS1 1&2 CCS1 CCS1 CCS1 CCS1 FDCR (x1) S1 (x2) FDCL (x1) FDCL FDCR FDCR CDRB1 CDLB1 FDCL CDRB1 CDLB1 (EN) IMPORTANT: USE HAND GLOVES TO PREVENT INJURY. (ES) IMPORTANTE: GUANTES DE MANO DE USO PARA PREVENIR LA HERIDA. (FR) IMPORTANT: UTILISER LES GANTS POUR PREVENIR LES ACCIDENTS.
- Page 39 (EN) Roof Strcture Assembly (ES) Estructura de Asamblea de techo (FR) Assemblage de la charpente RS2B RS1XB RS9B RS13B VRA07 RS2B RS13B RS8B VJA01 RS4XB RS1XB RS5S RS5S VRA07 VRA06 RS6S RS4XB RS6S RS4XB RS13B RS13B RS2B RS4XB RS1XB RS9B RS2B VRA06 RS8B...
- Page 40 S1 (x2) A (x1) RS1XB CDRB1 RS9B 1,2&3 RS1XB FDCR S1 (x2) B (x1) RS1XB CMB1 (EN) IMPORTANT: USE HAND GLOVES TO PREVENT INJURY. (ES) IMPORTANTE: GUANTES DE MANO DE USO PARA PREVENIR LA HERIDA. (FR) IMPORTANT: UTILISER LES GANTS POUR PREVENIR LES ACCIDENTS.
- Page 41 S1 (x4) S2 (x4) C (x1) D (x1) VRA07 RS1XB VRA06 1&2 VRA07 VRA06 RS2B 3&4 VRA06 S1 (x4) VRA07 VRA06 VRA07 VRA06 VRA07 VRA06 (EN) IMPORTANT: USE HAND GLOVES TO PREVENT INJURY. (ES) IMPORTANTE: GUANTES DE MANO DE USO PARA PREVENIR LA HERIDA. (FR) IMPORTANT: UTILISER LES GANTS POUR PREVENIR LES ACCIDENTS.
- Page 42 S1 (x16) E (x4) RS13B RS13B RS13B RS13B RS13B RS13B RS13B RS13B RS5S RS8B RS8B RS8B RS13B RS8B RS13B RS5S RS6S RS9B RS9B (EN) IMPORTANT: USE HAND GLOVES TO PREVENT INJURY. (ES) IMPORTANTE: GUANTES DE MANO DE USO PARA PREVENIR LA HERIDA. (FR) IMPORTANT: UTILISER LES GANTS POUR PREVENIR LES ACCIDENTS.
- Page 43 S1 (x8) S7 (x16) RS4XB (x4) RS4XB RS4XB RS4XB RS4XB RS4XB RS4XB RS4XB RS4XB RS5S RS5S VRA06 RS5S (EN) IMPORTANT: USE HAND GLOVES TO PREVENT INJURY. (ES) IMPORTANTE: GUANTES DE MANO DE USO PARA PREVENIR LA HERIDA. (FR) IMPORTANT: UTILISER LES GANTS POUR PREVENIR LES ACCIDENTS.
- Page 44 6 10 S1 (x12) RS10B (x2) RS11B (x2) RS10B RS11B RS11B RS10B RS5S RS11B RS10B RS5S RS10B RS13B RS6S (EN) Make sure the hole in (RS10B) facing outward on both sides. (ES) Asegúrese el agujero en (RS10B) que volviéndose externo a ambos lados. (FR) Assurez-vous que le trou dans (RS10B) soit face à...
- Page 45 6 11 RS12B (x2) S1 (x8) RS12B RS12B RS5S RS12B (EN) IMPORTANT: USE HAND GLOVES TO PREVENT INJURY. (ES) IMPORTANTE: GUANTES DE MANO DE USO PARA PREVENIR LA HERIDA. (FR) IMPORTANT: UTILISER LES GANTS POUR PREVENIR LES ACCIDENTS.
-
Page 46: (Fr)Code (Fr)Qté
(EN) Roof Panels (ES) Paneles de techo (FR) Panneaux de toiture (EN) Apply silicone into the holes before inserting the pins (Silicone not included). (ES) Aplicar silicona en los agujeros antes de insertar los pasadores. (Silicona no incluido). (FR) Appliquez du silicone dans les trous avant d'insérer les chevilles plastiques (silicone non inclus). - Page 47 PPG (x6) PPG (x7) PIN (x6) PIN (x7) FPRB (x1) FPLB (x1) FPLB FPRB (EN) Back (EN) Back (ES) Detrás (ES) Detrás (FR) Arrière (FR) Arrière PPG (x5) RPB1 (x1) PIN (x5) RPB1 (EN) IMPORTANT: USE HAND GLOVES TO PREVENT INJURY. (ES) IMPORTANTE: GUANTES DE MANO DE USO PARA PREVENIR LA HERIDA.
- Page 48 PPG (x5) PIN (x5) RPB1 (x1) RPB1 (EN) IMPORTANT: USE HAND GLOVES TO PREVENT INJURY. (ES) IMPORTANTE: GUANTES DE MANO DE USO PARA PREVENIR LA HERIDA. (FR) IMPORTANT: UTILISER LES GANTS POUR PREVENIR LES ACCIDENTS.
- Page 49 PPG (x7) RPB1 (x1) PIN (x7) RPB1 PPG (x5) RPB1 (x1) PIN (x5) RPB1 (EN) IMPORTANT: USE HAND GLOVES TO PREVENT INJURY. (ES) IMPORTANTE: GUANTES DE MANO DE USO PARA PREVENIR LA HERIDA. (FR) IMPORTANT: UTILISER LES GANTS POUR PREVENIR LES ACCIDENTS.
- Page 50 PPG (x6) RRS2 (x1) PIN (x6) RRS2 PPG (x5) RPB1 (x1) PIN (x5) RPB1 (EN) IMPORTANT: USE HAND GLOVES TO PREVENT INJURY. (ES) IMPORTANTE: GUANTES DE MANO DE USO PARA PREVENIR LA HERIDA. (FR) IMPORTANT: UTILISER LES GANTS POUR PREVENIR LES ACCIDENTS.
- Page 51 PPG (x4) PIN (x4) PPGL (x2) PINL (x2) RRS2 (x1) PPGL PINL RRS2 PPG (x7) RPB1 (x1) PIN (x7) RPB1 (EN) IMPORTANT: USE HAND GLOVES TO PREVENT INJURY. (ES) IMPORTANTE: GUANTES DE MANO DE USO PARA PREVENIR LA HERIDA. (FR) IMPORTANT: UTILISER LES GANTS POUR PREVENIR LES ACCIDENTS.
- Page 52 PPG (x6) PIN (x6) PPGL (x2) PINL (x2) RRS2 (x1) PPGL PINL RRS2 RS14B (x12) RS14B RS14B RRS (x1) (EN) Outside (ES) Exterior (FR) Exterieur RS14B (EN) Inside (EN) Front (ES) Frente (ES) Interior (FR) Avant (FR) Interieur (EN) IMPORTANT: USE HAND GLOVES TO PREVENT INJURY. (ES) IMPORTANTE: GUANTES DE MANO DE USO PARA PREVENIR LA HERIDA.
- Page 53 (EN) Door (ES) La puerta (FR) Porte (EN) Parts needed (ES) Las partes necesitaron (FR) Pièces nécessaires (EN)CODE (EN)QTY (EN)CODE (EN)QTY (ES)CODE (ES)QTY (ES)CODE (ES)QTY (FR)CODE (FR)QTÉ (FR)CODE (FR)QTÉ DL (x1) DR (x1) 1&2 CDLB1 CDLB1 (EN) IMPORTANT: USE HAND GLOVES TO PREVENT INJURY. (ES) IMPORTANTE: GUANTES DE MANO DE USO PARA PREVENIR LA HERIDA.
- Page 54 S1 (x4) R (x1) L (x1) PW (x4) 1&2 (EN) IMPORTANT: USE HAND GLOVES TO PREVENT INJURY. (ES) IMPORTANTE: GUANTES DE MANO DE USO PARA PREVENIR LA HERIDA. (FR) IMPORTANT: UTILISER LES GANTS POUR PREVENIR LES ACCIDENTS.
- Page 55 (EN)Apply silicone around the perimeter of the base ‘U’ channel. Seal the corners, joints and base of door column. This is optional and should be done for heavy rain areas if needed. (ES) Pozor : Aplicar silicona alrededor del perímetro del canal "U" de la base. Selle las esquinas, juntas y la base de la columna de la puerta.
- Page 56 (EN)Ventilation kit (ES)Kit De Ventilación (FR) Kit de ventilation (EN)Parts Needed (ES) Las partes necesitaron (EN)TOOLS YOU WILL NEED (ES) HERRAMIENTAS NECESARIAS (FR)Pièces Nécessaires Perceuse électrique Power Drill Foret de 3/16” (5 mm) de diamètre Dia 3/16” (5mm) drill bit Foret de 1/2”...
- Page 57 (EN) High wind area installation instructions (ES) Instrucciones de instalación de la zona con fuertes vientos (FR) Instructions pour une installation dans des zones de vent violent (EN) To ensure that your shed withstands high winds, you will need the following reinforcement.
- Page 58 1&2 VRA07 RS1XB SPB1 SPB1 VRA07 RS1XB SPB1 SPB1 (EN) Attach each Side Panel (SPB1 , FSPB1 ) on top to the Roof Structure (RS1XB,VRA06,VRA07). Using a dia. 3mm (1/8”) drill with a power drill, make two equal distance holes on the Side Panel through the Roof Structure. Drive a self tapping screw (S4) through the Side Panel to the Roof Structure.
- Page 59 (EN) Important Warranty Information (ES) Información importante sobre la garantía (FR) Informations Importantes Concernant La Garantie (EN)The 'DURAMAX' shed has been tested and passed h�gh w�nd loads �n a controlled laboratory env�ronment when �nstalled w�th the h�gh w�nd �nstallat�on gu�del�nes. Natural h�gh w�nd areas create w�nd at unpred�ctable speeds that are very d�ff�cult to capture accurately by locat�on.
- Page 60 (EN) ADDITIONAL ACCESSORIES AVAILABLE (Not included). (ES) ACCESORIOS ADICIONALES DISPONIBLES (No incluidos). (FR) ACCESSOIRES ADDITIONNELS DISPONIBLES (Non fournies avec l’abri). (EN) These accessories are required in case of heavy snow or high wind areas. Please choose relevant accessories according to your needs. (ES) Estos accesorios son requeridas en caso de fuertes nevadas o zonas de alto viento.
- Page 61 (EN) Congratulations! (EN) We hope you enjoy your DuraMax Storage Shed! (ES) Felicidades! (ES) Esperamos que disfrute su cobertizo de almacenaje para DuraMax! (FR) Félicitations ! (FR) Nous espérons que vous apprécierez votre cabanon de DuraMax !
- Page 62 U.S. Polymers, Inc. 1057 S. Vail Ave Montebello, CA 90640, w w w . d u r a m a x b p . c o m United States of America SKU#00381-1 RD-0.0 24-08-2020...
Need help?
Do you have a question about the Duramax 8 Ft x 8 Ft DuraMate V2 and is the answer not in the manual?
Questions and answers