Advertisement
Quick Links
A L L
P U R P O S E
V I N Y L
G A R D E N
EN
OWNER'S MANUAL /
Instructions for Assembly '10.5 Ft WoodBridge Plus'
Size 10.5Ft x 10.5Ft / 3.2 m x 3.2 m
Ver: 0.0
FR
MANUEL D'INSTRUCTION/
Instructions pour l'Assemblage '10.5 Pieds WoodBridge Plus'
Dimension 10.5Pieds x 10.5Pieds / 3.2 Mètre x 3.2 Mètre
Ver: 0.0
DE
Benutzerhandbuch /
Montageanleitung'10.5 Ft WoodBridge Plus'
Größe: 10.5Ft x 10.5Ft / 3.2 m x 3.2 m
Ver: 0.0
ES
MANUAL DEL PROPIETARIO /
Instrucciones de montaje '10.5 Pies WoodBridge Plus'
Tamaño 10.5Pies x 10.5Pies / 3.2 Metros x 3.2 Metros
Ver: 0.0
PT
MANUAL DO PROPRIETARIO/
Intruções de montagem.'10.5 pés WoodBridge Plus'
Tamanho 10.5pés x 10.5pés / 3.2 Metro x 3.2 Metro
Ver: 0.0
NL
Gebruiksaanwijzing voor eigenaar/
Instructies voor bouw '10.5Voet WoodBridge Plus'
Maat 10.5 voet x 10.5 voet / 3.2 Meter x 3.2 Meter
Versie: 0.0
CS
'10.5 Stopy WoodBridge Plus'
Velikost 10.5 Stopy x 10.5 Stopy / 3.2 Metr x 3.2 Metr
Verze : 0.0
SK
'10.5 Stopa WoodBridge Plus'
Pozri: 0.0
SL
Razl: 0.0
Model # 40224-1
TM
A Product of
S H E D S
(Approx.)
(Approx.)
(Ca.)
(Aprox.)
(Aprox.)
(Ongeveer)
VINYL GARDEN SHED
HR
Instrukcije za skupštine '10.5 Stopalo WoodBridge Plus'
Ver: 0.0
HU
Útmutató az összeszereléshez '10.5 Láb WoodBridge Plus'
10.5Láb x 10.5Láb / 3.2 Méter x 3.2 Méter
Verzió: 0.0
SV
ÄGARENS MANUAL/
Monteringsinstruktioner för '10.5 Fot WoodBridge Plus'
Storlek 10.5 fot x 10.5 fot / 3.2 m x 3.2 m
Version: 0.0
IT
MANUALE DEL PROPRIETARIO /
Istruzioni per l'assemblaggio '10.5 Piedi WoodBridge Plus'
Dimensione 10.5 Piedi x 10.5 Piedi / 3.2Metri x 3.2Metri
Versione 0.0
PL
'10.5 Stopy WoodBridge Plus'
Wymiary 10.5Stopy x 10.5Stopy / 3.2 Metr x 3.2 Metr
Wersja: 0.0
RO
'10.5 Picioare WoodBridge Plus'
Ver: 0.0
BG
TR
'10.5 Fit WoodBridge Plus'
10.5Fit x 10.5Fit / 3.2 m x 3.2m
Sürüm: 0.0
(Ungefär)
(Circa)
(Aprox.)
Advertisement

Related Manuals for USP DURAMAX 10.5 Ft WoodBridge Plus


Summary of Contents for USP DURAMAX 10.5 Ft WoodBridge Plus
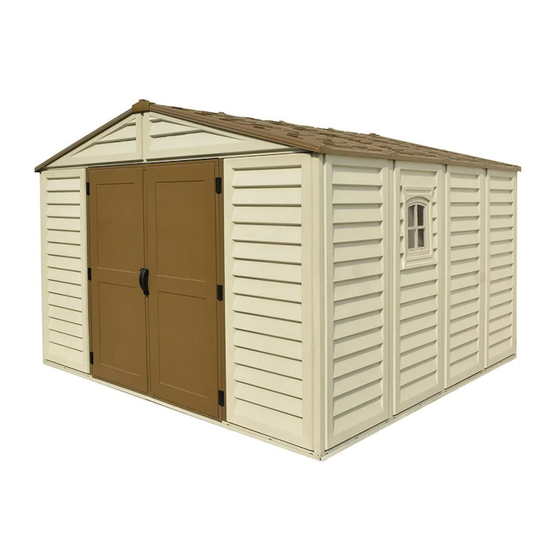
- Page 1 VINYL GARDEN SHED A Product of A L L P U R P O S E V I N Y L G A R D E N S H E D S OWNER’S MANUAL / Instructions for Assembly ‘10.5 Ft WoodBridge Plus’ Instrukcije za skupštine ‘10.5 Stopalo WoodBridge Plus’...
- Page 2 Building Dimensions : Storage Exterior Dimension Interior Dimension Approximate Door Opening Size Base Dimension Roof Edge to Edge Area Volume Wall to Wall inch inch inch inch 105.6 Sq. Ft 643 Cu.Ft 10.5 Ft x 10.5 Ft Width 125 1/2 318.7 127 7/8 324.8...
- Page 3 Gebouw afmeting: Opslag Binnenkant afmeting Buitenkant afmeting Benadering Deur opening Maat Gebied Muur tot muur Volume Basis afmeting Dakrand tot rand inch inch inch inch 10.5 Voet x 105.6 643 Kubieke 10.5 Voet Vierkante voet voet Wijdte 125 1/2 318.7 127 7/8 324.8 123 3/8...
- Page 4 Zgrada dimenzija Interijer dimenzija Vrata Open mjera Temeljiti dimenzija 105.6 10.5 Stopalo x Stopalo Stopalo 10.5 Stopalo 18.2 mérete Terület 10.5 105.6 643 Köb Láb 10.5 Láb x Hüvelyk Hüvelyk Hüvelyk Hüvelyk Láb Láb Lager Dörröppning Area 10.5 fot x 10.5 Bredd Höjd...
- Page 5 Wymiary budowlane: Magazynowa wymiary Kubatura Powierzchnia 643 Stopy inch inch inch 10.5 Stopy x 105.6 Stopy 10.5 Stopy kwadratowy 318.7 324.8 313.3 18.2 Metr 318.7 313.3 3.2 Metr x 9.8 Metr 3.2 Metr kwadratowy 233.2 185.5 181.5 10.5 Picioare x 105.6 Picio- 643 Picioare 318.7...
-
Page 6: Benötigte Werkzeuge
1. Cordless Drill - Philips Head 6. Tape Measure 6. Traka Divizor 2. Screwdriver - Philips Head 7. Hand Gloves 3. Carpenters Square 8. Eye Protector 8. Oko Zaštitnik 4. 8’ Step Ladder 9. Waterproof Clear Silicon 4. 8’ Korak Ljestve 9. -
Page 7: Parça Listesi
Parts List Lista delle varie parti Liste des pièces Teileliste Seznam delov Lista elementelor componente La Lista de Partes Dijelovi Lists Lista de Peças Alkatrészlista Parça Listesi Onderdelenlijst Komponentlista 1.Check all parts prior to installation. 2.Before starting installation, please refer to Safety & Precautions. 2.Avant de commencer l'installation, référez-vous svp à... - Page 8 VBA01 VRA13 FDCL VBA04 VRA24 FDCR VBA05 VRA14 VBA06 VRA15 VCA01 VRA16 VCA03 VRA17 VRA01 VRA18 VRA02 CLA1 VRA06 CLA2 VRA03 CLA3 VRA04 CLA4 VJA01 WPA1 VRA05 WPA2 VRA08 RPA1 VRA19 VRA09 RPA2 VRA10 RPA3 PPGL VRA11 RPA4 VRA21 RPA5 PINL VRA22 RPA6...
- Page 9 RPA3 RPA2 RPA4 RPA2 RPA5 RPA1 RPA5 RPA6 FPA3 VRA22 VRA11 VRA18 VRA23 VRA06 VRA15 VRA18 VJA01 VRA14 FPA4 VRA17 VRA16 VRA21 VRA06 VRA10 VRA16 VRA18 VRA16 VRA12 VRA10 VRA17 VRA16 VRA14 VRA17 VRA18 WPA1 VRA01 VRA16 VRA09 VRA06 VRA04 WPA1 VRA16 VRA08...
- Page 10 #10-17 # 18 # 19-35 #36-53 # 54-60 # 61-63...
- Page 11 Foundation Základy Fondamenta Fondation Základ Podstawa Fundament Temelj La cimentación Temelj Fundação Alap Temel Fundering Grunden 1.Set the Torque limit of your Screw drill to #3 or #4 to ensure the Screws do not strip the Metal reinforcements. 2.It is important that these instructions are followed step by step. 3.Don’t install under windy conditions.
- Page 12 2.Pomembno je, da sledite opisanim navodilom korak za korakom. 3.Nemojte instalirati pod vjetrovitim uvjetima. 1.Állítsa a csavarhúzó nyomatékhatárait #3 vagy #4-re, hogy a csavarok ne csavarják le a fém vasalatokat 5.Ha egy fészket építesz a falhoz, építsd meg 2,5 métert. távolítsa el, majd csúsztassa be. (Csak a Duramax Alapítvány és a Fa Alapítvány) 1.
- Page 13 (EN) DuraMax must be installed on a DuraMax Foundation, level wooden platform or a level concrete foundation,that has an outside dimension of 129 3/8” x 129 3/8”(3287mm x 3287mm). (FR) DuraMax doit être installé sur une plate-forme en bois de niveau ou une fondation en béton de niveau, qui a une dimension extérieure de 129 3/8”...
- Page 14 Parts needed Parti occorrenti Pièces nécessaires Benötigte Teile Dele, ki jih boste potrebovali Elementele componente necesare Piezas necesitadas Dijelovi potreban Peças Necessárias Szükséges részek Gerekli parçalar Onderdelen nodig Delar som behövs VFA01 VFA12 VFA02 VFA13 VFA06 VFA14 VFA10 VFA15 VFA11 VFA01 (x2) S1 (x4)
- Page 15 VFA11 (x2) (x4) VFA12 (x2) VFA11 VFA12 VFA13 (x4) (x8) VFA14 (x4) VFA14 VFA13...
- Page 16 VFA15 (x2) (x6) 1&2 VFA02 VFA11 VFA01 VFA12 VFA12 VFA15 VFA02 VFA11 VFA02 VFA11 VFA11 VFA15 VFA15 (x2) (x6) VFA15 VFA12 VFA01 VFA12 1&2 VFA01 VFA12 VFA15 VFA02 VFA11 VFA01...
- Page 17 (x8) VFA01 VFA02 VFA14 VFA14 VFA01 VFA14 VFA13 VFA01 VFA13 VFA13 VFA02 VFA01 VFA06 (x4) (x8) VFA14 VFA06 VFA13 VFA14 VFA06 VFA13...
- Page 18 VFA10 (x8) S1 (x16) VFA10 VFA10 VFA10 VFA10 VFA10 VFA10 VFA10 VFA13 VFA10 VFA10 VFA10 VFA11 VFA14 VFA12 VFA10...
- Page 19 Base Frame Cornice di Base Bodenrahmen Base de armação Basis frame Basram Parts needed Parti occorrenti Pièces nécessaires Benötigte Teile Piezas necesitadas Peças Necessárias Szükséges részek Onderdelen nodig VBA01 VBA06 VBA04 VBA05 VBA01 (x1) VBA04 (x3) S1 (x36) VBA05 (x3) VBA06 (x1) VBA04 VBA05...
- Page 20 Pareti & Colonne Panelen en stijlen Parts needed Parti occorrenti Pièces nécessaires Benötigte Teile Piezas necesitadas Szükséges részek Peças Necessárias Onderdelen nodig CLA1 VCA03 CLA2 VJA01 CLA3 WPA1 CLA4 WPA2 VCA01 One shatter proof window panel (WPA2 ) included. This can be used in any of the wall positions. Une panneau de fenêtre incassable (WPA2 ) inclus.Ceci peut être utilisé...
- Page 21 Column & Panel Assembly method Colonne et méthode de montage panneau Az oszlop és a panel összeszerelési módszere Montageverfahren für Säulen und Paneele Kolonn- och panelmonteringsmetod Columna y el método de montaje de Panel Metodo di assemblaggio di colonne e pannelli Método de montagem de colunas e painéis Metoda montażu kolumn i paneli Kolom en paneelmontage methode...
- Page 22 Lock the panel into the column from top to bottom. Verrouiller le panneau dans la colonne de haut en bas. Verriegeln Sie das Panel von oben nach unten in die Säule. Trabe el panel en la columna de arriba a abajo. Método de montagem de colunas e painéis Kolom en paneelmontage methode.
- Page 23 WPA1 (x1) 1&2 WPA1 WPA1 WPA1 WPA1 CLA2 CLA2 CLA2 CLICK! WPA1 WPA1 CLA2 3&4 CLA2 VBA01 VBA01 VBA01 S1 (x2) CLA1 (x1) 1&2 WPA1 WPA1 CLA1 CLA1 CLA1 CLA1 WPA1 CLICK! CLA1 WPA1 VBA01...
- Page 24 S2 (x1) FCB(x1) CLA2 Do not tighten the screw. Leave it loose. Ne pas serrer la vis. Laissez-le lâche. Ziehen Sie die Schraube nicht fest. Lass es locker. No apriete el tornillo. Déjalo suelto. Não aperte o parafuso. Deixe solto. Draai de schroef niet vast.
- Page 25 S1 (x12) VCA03 (x6) VJA01 (x3) VCA03 VJA01 VCA03 VCA03 VCA03 VJA01 WPA1 (x1) S1 (x2) CLA3 (x1) CLICK! CLICK! 1&2 WPA1 CLICK! WPA1 3&4 CLA2 CLA2 CLICK! WPA1 WPA1 WPA1 CLA3 CLA3 CLA3 CLA3 VBA04 VBA04...
- Page 26 S1 (x2) CLA3 (x1) WPA2 (x1) WPA1 WPA2 CLA3 CLA3 CLA3 WPA2 VBA04 CBC (x1) S1 (x4) VCA01 VCA03 VCA01 VCA03 1&2 VCA03 CLA3 CLA3 VCA03 VCA03 4&5 VCA03 VCA03 VCA03 CLA3 VCA03...
- Page 27 WPA1 (x1) S1 (x3) CLA3 (x1) WPA2 WPA1 CLA3 CLA3 2&3 CLA3 WPA1 CLA3 CLA3 VBA05 CLA3 WPA1 VCA03 WPA1 (x1) S1 (x2) CLA2 (x1) CLA2 WPA1 WPA1 CLA3 VBA04 WPA1 CLA2 CLA2 WPA1 CLA2 VBA04 2&4 VBA05...
- Page 28 S1 (x1) S2 (x1) FCB(x1) Do not tighten the(S2) screw. Leave it loose. Ne serrez pas la vis (S2). Laissez-le en vrac. Ziehen Sie die Schraube (S2) nicht an. Lass es locker. No apriete el tornillo (S2). Déjalo suelto. Não aperte o parafuso (S2). Deixe solto. Draai de (S2) schroef niet vast.
- Page 29 S1 (x2) CLA3 (x1) WPA1 (x1) WPA1 WPA1 CLA3 WPA1 CLA3 WPA1 CLA3 VBA04 S1 (x4) CBC (x1) VCA03 VCA03 VCA03 VCA03 1&2 VCA03 CLA3 CLA3 VCA03 VCA03 4&5 VCA03 VCA03 VCA03 CLA3 VCA03...
- Page 30 S1 (x3) CLA3 (x1) WPA1 (x1) CLA3 WPA1 WPA1 WPA1 VBA05 CLA3 WPA1 CLA3 CLA3 VCA03 S1 (x2) CLA2 (x1) WPA1 (x1) CLA2 WPA1 WPA1 VBA04 CLA3 WPA1 CLA2 WPA1 CLA2 VBA04 CLA2 2&4...
- Page 31 S1 (x1) S2 (x1) FCB(x1) Do not tighten the(S2) screw. Leave it loose. Ne serrez pas la vis (S2). Laissez-le en vrac. Ziehen Sie die Schraube (S2) nicht an. Lass es locker. No apriete el tornillo (S2). Déjalo suelto. Não aperte o parafuso (S2). Deixe solto. Draai de (S2) schroef niet vast.
- Page 32 S1 (x2) CLA3 (x1) WPA1 (x1) WPA1 WPA1 WPA1 CLA3 WPA1 CLA3 CLA3 WPA1 VBA04 S1 (x4) CBC (x1) VCA03 VCA03 VCA03 VCA03 1&2 CLA3 CLA3 VCA03 VCA03 VCA03 VCA03 4&5 VCA03 CLA3 VCA03 VCA03...
- Page 33 S1 (x3) WPA1 (x1) CLA3 (x1) CLA3 WPA1 WPA1 WPA1 VBA05 CLA3 WPA1 CLA3 CLA3 S1 (x2) WPA1 (x1) CLA2 (x1) CLA2 WPA1 WPA1 VBA06 CLA3 WPA1 WPA1 CLA2 CLA2 WPA1 VBA06 CLA2 2&4...
- Page 34 FCB(x1) S1 (x1) S2 (x1) Do not tighten the(S2) screw. Leave it loose. Ne serrez pas la vis (S2). Laissez-le en vrac. Ziehen Sie die Schraube (S2) nicht an. Lass es locker. No apriete el tornillo (S2). Déjalo suelto. Não aperte o parafuso (S2). Deixe solto. Draai de (S2) schroef niet vast.
- Page 35 S1 (x3) VCA01 (x1) VCA03 VCA01 CLA4 VCA01 VCA01 VCA01 VCA03 EPS (x1) VCA01 CLA4 VCA01...
- Page 36 After completing the center band assembly, fully tighten the four center band fittings (FCB) to the corner column (CLA2). Après avoir terminé l'assemblage de la bande centrale, bien serrer les quatre raccords de la bande centrale (FCB) à la colonne d'angle (CLA2). Ziehen Sie nach Abschluss der Montage des Mittelbandes die vier Mittelbandverschraubungen (FCB) vollständig an der Eckstütze (CLA2) fest.
- Page 37 Parts needed Parti occorrenti Pièces nécessaires Benötigte Teile Piezas necesitadas Szükséges részek Peças Necessárias Onderdelen nodig VRA01 VRA18 FDCR VRA10 VRA02 VRA11 VRA19 VRA03 VRA12 VRA21 VRA04 VRA13 VRA22 VRA05 VRA14 VRA23 VRA06 VRA15 VRA24 VRA08 VRA16 VJA01 VRA09 VRA17 FDCL S1 (x9) FMC (x9)
- Page 38 FCC (x4) S1 (x4) CLA2 1&2 CLA2 S1 (x2) FDCR (x1) FDCL (x1) FDCR FDCL FDCR CLA1 FDCL CLA4...
- Page 39 VRA14 VJA01 VRA19 VRA02 VRA06 VRA04 VRA23 VRA15 VRA04 VRA01 VRA10 VRA18 VRA03 VRA16 VRA22 VRA17 VRA24 VRA18 VRA16 VRA11 VRA21 VRA18 VRA06 VRA12 VJA01 VRA16 VJA01 VRA17 VRA16 VRA18 VRA06 VRA18 VRA08 VRA13 VRA16 VRA09 VRA17 VJA01 VRA12 VRA16 VRA18 VRA11 VRA18...
- Page 40 VRA01 (x1) S1 (x4) VRA02 (x1) VJA01 (x1) VJA01 VRA01 VRA01 VRA02 VRA02...
- Page 41 VRA03 (x2) S1 (x6) VRA04 (x2) VRA04 VRA01 VRA03 VRA03 VRA04 VRA02 S1 (x6) VRA05 (x1) VRA01 VRA05 VRA02...
- Page 42 RJ (x2) S1 (x2) VRA01 VRA02 VRA02 1&2 VRA02 VRA01 (x1) S1 (x4) VRA02 (x1) VJA01 (x1) VJA01 VRA01 VRA01 VRA02 VRA02...
- Page 43 VRA03 (x2) S1 (x8) VRA04 (x2) VRA04 VRA01 VRA03 VRA03 VRA04 VRA02 RJ (x2) S1 (x2) VRA01 VRA02 VRA02 1&2 VRA02...
- Page 44 S1 (x4) VRA06 (x4) VJA01 (x2) VRA06 VRA06 VRA06 VRA06 VJA01 VRA08 (x1) VRA09 (x1) VRA08 VRA09...
- Page 45 VRA21 (x1) S1 (x6) VRA21 VRA08 VRA09 VRA10 (x1) S1 (x16) VRA11 (x1) VRA10 VRA21 VRA11 VRA08 VRA09...
- Page 46 VRA08 (x1) VRA09 (x1) VRA08 VRA09 VRA22 (x1) S1 (x6) VRA08 VRA09 VRA22...
- Page 47 VRA10 (x1) S1 (x16) VRA11 (x1) VRA10 VRA08 VRA11 VRA22 S7 (x24) VRA12 (x2) VRA13 (x1) VRA12 VRA12 VRA13 VRA12 VRA12 VRA13 VRA13 VRA12 VRA12...
- Page 48 S7 (x16) VRA23 (x1) VRA24 (x1) VRA12 VRA23 VRA23 VRA24 VRA12 VRA24 VRA23 VRA12 VRA12 VRA24 VRA23 VRA12 VRA12...
- Page 49 S2 (x2) S1 (x2) VRA02 VRA02 VRA01 VRA02 VRA02 VRA01 FDCL CLA4 1,2&5 FDCR CLA1 S1 (x3) S2 (x2) VRA01 VRA02 VRA02 VRA02 1,2&4 CLA3 VRA03 CLA3 CLA3...
- Page 50 S1 (x4) VRA06 VRA06 VRA06 VRA06 1&2 VRA06 VRA06 S1 (x6) VRA06 VRA06 VRA06 VRA06 VRA06...
- Page 51 S1 (x8) VRA12 VRA23 VRA12 VRA03 VRA12 VRA12 1&2 VRA03 VRA03 VRA23 VRA14 (x2) S1 (x20) VRA15 (x2) VRA15 VRA14 VRA14 VRA15 VRA14 VRA03 VRA15 VRA15 VRA15 VRA04 VRA06...
- Page 52 S1 (x8) VRA11 VRA08 VRA22 VRA04 VRA10 VRA09 VRA10 VRA21 VRA09 VRA08 VRA08 VRA11 VRA22 VRA04 S1 (x12) S7 (x24) VRA16 (x6) VRA16 VRA16 VRA16 VRA16 VRA16 VRA16 VRA16 VRA12 VRA16 VRA16 VRA16 VRA16 VRA06 VRA06 VRA06...
- Page 53 S1 (x12) VRA17 (x3) VRA17 VRA17 VRA17 VRA17 VRA18 (x8) S7 (x24) VRA18 VRA18 VRA18 VRA18 VRA18 VRA18 VRA18 VRA18 VRA18 VRA06...
- Page 54 VRA19 (x2) S1 (x4) VRA19 VRA19 VRA19 VRA03 VRA03...
- Page 55 Roof Panels Pannelli del tetto Panele dachowe Paneles de techo Painéis do Telhado Parts needed Parti occorrenti Pièces nécessaires Benötigte Teile Piezas necesitadas Peças Necessárias Szükséges részek Onderdelen nodig FPA1 RPA3 PPGL FPA2 RPA4 PINL FPA3 RPA5 FPA4 RPA6 RPA1 RPA2 Apply silicone into the holes before inserting the pins (Silicone not included).
- Page 56 Insert roof plugs into Fascia Panel only as indicated. Use a screwdriver to align the holes. Insérez les bouchons de toit dans le panneau Fascia uniquement comme indiqué. Utilisez un tournevis pour aligner les trous Insira os plugues do teto no Painel de Fáscia somente conforme indicado. Use uma chave de fenda para alinhar os orifícios.
- Page 57 PPG (x5) PPG (x4) PIN (x5) PIN (x4) FPA2 (x1) FPA1 (x1) BP (x2) BP (x2) FPA2 FPA1 FPA3 (x1) PPG (x7) PPG (x6) FPA4 (x1) PIN (x6) PIN (x7) FPA4 FPA3...
- Page 58 Start from front left side roof panel going back. Apply silicone into the holes before inserting the pins (Silicone not included). Apply silicone around the roof plugs. Commencez par le panneau de toit avant gauche en remontant. Appliquez de la silicone dans les trous avant d'insérer les broches (silikon nicht enthalten). Appliquez du silicone autour des bouchons de toit.
- Page 59 PPG (x6) PIN (x6) RPA1 (x1) RPA1 RPA1 PPG (x6) PPG (x6) PIN (x6) PIN (x6) RPA2 (x1) RPA2 (x1) RPA1 RPA2 RPA1 RPA2...
- Page 60 PPG (x8) PPG (x10) PIN (x8) RPA3 (x1) RPA4 (x1) PIN (x10) RPA3 RPA4 PPG (x9) PPG (x9) PPGL (x1) PPGL (x1) PIN (x9) PIN (x9) RPA5 (x1) PINL (x1) RPA5 (x1) PINL (x1) PINL PINL PPGL PPGL RPA5 RPA5...
- Page 61 PPG (x13) PIN (x13) RPA6 (x1) PPGL (x1) PINL (x1) PINL PPGL RPA6 EC (x2) PIN (x2) PPG (x2)
- Page 62 Door Porta Porte Dvere Drzwi Die Tür Vrata La puerta Vrata Porta Ajtó De deur Dörr Parts needed Parti occorrenti Pièces nécessaires Benötigte Teile Elementele componente necesare Piezas necesitadas Dijelovi potreban Szükséges részek Onderdelen nodig Delar som behövs SBC1 SBC1 (x4) (x2) PW (x4) DR (x1)
- Page 63 SBC1 (x4) LH (x2) PW (x4) DL (x1) 1&2 Left Door Porte gauche Linke Tür Puerta izquierda Porta esquerda Linker deur Leva vrata SBC1 Lijeva vrata Bal ajtó Porta Sinistra Lewe drzwi Usa stanga SBC1 (x8) PW (x8) DL (x1) DR (x1) SBC1 CLA1...
- Page 64 SBC1 (x8) (x1) LH (x1) PW (x8) SBC1 CLA1 CLA1 CLA4 1&2 CLA1 SBC1 (x4) R (x1) L (x1) PW (x4) SBC1 SBC1...
- Page 65 Parts needed Parti occorrenti Pièces nécessaires Benötigte Teile Piezas necesitadas Peças Necessárias Szükséges részek Onderdelen nodig...
- Page 67 (x24) (x24) Yer Seçenekleri Place the Exterior Grade (CDX) - 3/4” (19mm)Weather proof Marine grade plywood on top of the foundation. Placer le grade extérieur (CDX) -3/4 "(19mm) résistante aux intempéries de contreplaqué de qualité marine au-dessus de la fondation. Legen Sie das wetterbeständige Marine Grade Sperrholz (CDX) -3/4”(19 mm) auf die Oberseite des Fundaments.
- Page 68 ň Postavite Zunanjost razred (CDX) - 3/4 "(19mm) Vreme dokaz Marine stopnje vezan na vrhu temelja. Helyezzük el a külső minőségű (CDX) - 3/4 "(19 mm) idő őségű tengeri rétegelt lemezt az alapzat tetején. Placera yttre graden (CDX) - 3/4 "(19mm) Vädret bevis Marine grade plywood ovanpå fundamentet. Collocare il compensato di grado marino per esterni (CDX) - 3/4 "(19mm) sopra la fondazione.
- Page 70 Dit is optioneel en moet gedaan worden voor zware regenval gebieden indien nodig. ř ří sloupce. řeba v případě potřeby udě ětrem. ňu dverného stĺpika. ľné a malo by sa v prípade potreby urobiť ďové oblasti. ő ącza i podstawę kolumny drzwi. Aplica i silicon în jurul perimetrului canalului de bază...
- Page 71 fi fixer un coupe-froid au bas de la porte. Cette étape est facultative et la partie n'est pas incluse. ist nicht enthalten. fi incluida. fi inbegrepen. ěm mů ě ř ď ť ľ ť Nagy eső ő opzionale e la parte non è inclusa. ącza i podstawę...
- Page 72 Aby bylo zajiště ě ř ť nasledovné zosilnenie. ő megerősítésre lesz szüksége. ępującego wzmocnienia. ę ż ę Pentru a vă asigura că vaporul dvs. rezistă i avea nevoie de armarea următoare. Parti occorrenti Peças Necessárias Szükséges részek Onderdelen nodig...
- Page 73 concrete at the holes in the Foundation Profiles and drill concrete with suitable concrete bit to accept Dia 6mm wall plug. (Follow the assembly step in page 64-66). marquer le béton au niveau des trous dans les profils de fondation et forage de béton avec foret à béton adapté à accepter diamètre prise murale de 6 mm.(Suivez l'étape d'assemblage en pages 64-66).
- Page 74 make two equal distance holes on the Base U-channel through the Side Panel. Drive a self tapping screw(S4) through the Base U-channel to the Side Panel. Repeat this for every Side Panel. See blowup. filés U . En utilisant un foret de 3mm de dia. avec une fi...
- Page 75 WPA1 WPA1 WPA1 WPA1 VBA05 VBA04 VBA04 VBA05...
- Page 76 Attach each Side Panel (WPA1 ,WPA2 ) on top to the Roof Structure (VRA01,VRA02,VRA06 ). Using a dia. 3mm (1/8”) drill with a power drill, make two equal distance holes on the Side Panel through the Roof Structure. Drive a self tapping screw (S4) through the Side Panel to the Roof Structure.
- Page 77 VRA06 VRA01 VRA06 VRA02 WPA1 WPA1 VRA06 VRA01 WPA1 WPA1 VRA06 VRA01 WPA1 WPA1...
- Page 78 Important Warranty Information Informations Importantes Concernant La Garantie Wichtige Informationen zur Gewährleistung Viktig garantiinformation Información importante sobre la garantía Informazioni importanti sulla garanzia ImportantesInformações de Garantia Belangrijke Informatie over de garantie Önemli Garanti Bilgileri Pomembne Garancijske Informacije The 'DURAMAX' shed has been tested and passed high wind loads in a controlled laboratory environment when installed with the high wind installation guidelines.
- Page 79 że obciążenia wiatrem w kontrolowanym środowisku laboratoryjnym, gdy zainstalowano ją zgodnie z wytycznymi dotyczącymi instalacji wiatrowej. Naturalne obszary o dużym natężeniu wiatru wytwarzają wiatr o nieprzewidywalnych prędkościach, które są ązku z tym nie moż Dulapul "DURAMAX" a fost testat și a fost încărcat cu încărcături puternice de vânt într-un mediu de laborator controlat atunci când este instalat cu instruc iunile de instalare a vântului.
- Page 80 ADDITIONAL ACCESSORIES AVAILABLE (Not included) ACCESSOIRES ADDITIONNELS DISPONIBLES (non inclus) WEITERES ZUBEHöR (Nicht enthalten) (ingår ej) ACCESORIOS ADICIONALES DISPONIBLES ACCESSORI SUPPLEMENTARI DISPONIBILI (no incluida) (non incluso) ACESSóRIOS ADICIONAIS DISPONíVEIS (não incluído) (nie wliczone) EXTRA ACCESOIRES AANWEZIG. ACCESORIILE SUPLIMENTARE DISPONIBILE (niet inbegrepen) (Nu este inclus) EK AKSESUARLAR MEVCUTTUR These accessories are required in case of heavy snow or high wind areas.
- Page 81 ANCHOR KIT (Soil) SIDRO KOMPLET (tla) KIT D'ANCRE (Sol) ANKER-KIT (Boden) KIT DI ANCORAGGIO (Suolo) KIT DE APOIO (Solo) ZESTAW DO MOCOWANIA (Grunt) ANKER GEREEDSCHAP (bodem) SET DE ANCORARE (ÎN SOL) SIDRNA OPREMA (zemlja) Wire rope with twist augers for sheds installed with foundation (Wood / Metal) on soil. For heavy wind area.
- Page 82 ANCHOR KIT (Concrete) SIDRO KOMPLET (beton) Verankerungsset (Beton) FÖRANKRINGS-KIT (Betong) KIT DI ANCORAGGIO (cemento) KIT DE APOIO (Concreto) ZESTAW DO MOCOWANIA (Beton) ANKER GEREEDSCHAP ( Beton) SET DE ACORARE (Beton) SIDRNA OPREMA (beton) Eye bolt with wire rope for sheds installed with foundation (Wood / Metal) on concrete. For heavy wind area.
- Page 83 SHELF KIT REGAL AUSSTATTUNG KIT ESTANTE KIT MENSOLA KIT DE PRATELEIRAS PLANK MONTAGE KIT SHELF KIT DOPLNKOVÝ KIT KOMPLET POLIC Easy mounting system on the middle column. 6 inch wide reinforced PVC shelf with end caps. Facile système de montage sur la colonne du milieu. Étagère de 6 pouces de large en PVC renforcé avec des embouts.
- Page 84 U.S. Polymers, Inc. 1057 S. Vail Ave Montebello, CA 90640, w w w . d u r a m a x b p . c o m United States of America SKU# 40224-1 17 RD-0.0 12-09-2019...
Need help?
Do you have a question about the DURAMAX 10.5 Ft WoodBridge Plus and is the answer not in the manual?
Questions and answers