Table of Contents
Advertisement
Quick Links
Advertisement
Table of Contents

Related Manuals for Skandika Crosstrainer Fint


Summary of Contents for Skandika Crosstrainer Fint
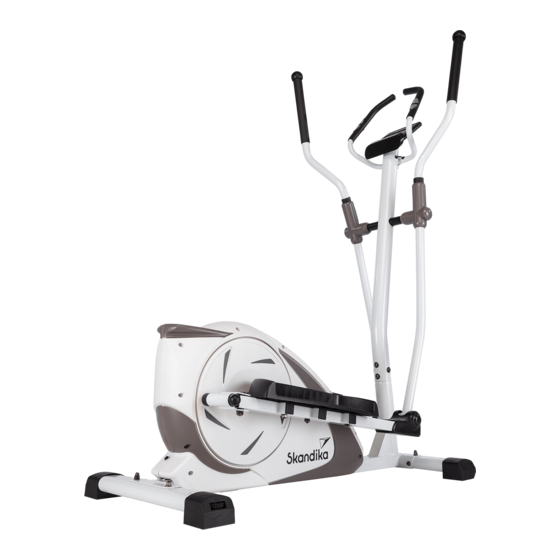
- Page 1 Crosstrainer Fint Art.Nr. SF-2580...
-
Page 2: Table Of Contents
Exploded diagram Parts list / Cleaning & Care Guarantee conditions skandika.com/ service Importeur MAX Trader GmbH Cross- trainer Please visit the Skandika Adresse Wilhelm-Beckmann-Str. 19, D-45307 Essen FINT Service portal on our Artikelnummer SF-2580 website for setup & help Klasse... -
Page 3: Safety Precautions
SAFETY PRECAUTIONS WARNING To reduce risk of injury, read and understand this instruction manual before using the device! This machine is intended for home use only in accordance with the instructions provided in this manual. Read the instruction manual carefully before using this device and keep the instruction manual for future use. SAFETY PRECAUTIONS To ensure the best safety of the device, regularly check it 15. -
Page 4: Checklist
CHECKLIST Before starting to assemble we recommend to look for a place with sufficient space. Use a floor protection. Remove all parts from the carton and spread them on the floor. Check according to the checklist, if all parts are complete. Perhaps some parts are already pre-assembled for your convenience. We recommend to use the provided tools to set-up this device and to set-up the device with 2 persons. -
Page 5: Assembly Instructions
ASSEMBLY INSTRUCTIONS Part No. Description Main frame Front post 03L/04L Pedal Tube(L) / Lower handlebar (L) 03R/04R Pedal Tube(R) / Lower Handlebar (R) 05L/R Upper Handlebars L/R Stationery Handlebars Front Stabilizer Rear Stabilizer Carriage Bolt Allen Screw M6x15L Allen Screw M8x30L Nylon Nut Computer Pedal... - Page 6 ASSEMBLY INSTRUCTIONS STEP 2 Remove the pre-assembled 4 Allen bolts (20), 4 spring washers (12) and 4 curved washers (11) from Main frame (01). Connect the upper sensor wire (13) to the lower sensor wire (14). Insert front post (02) into main frame (01) and fasten with 4 Allen bolts (20), 4 spring washers (11) and 4 curved washers (11).
- Page 7 ASSEMBLY INSTRUCTIONS STEP 3 (45) as shown. Check the pedal tube left (03L) and right (03R), which have two spacers (19) on it. Ensure that these spacers do not fall down! and one nylon nut (17). Then put the PVC caps (43) to cover the hex head bolt (30), the nylon nut (17) and the left U type connec- ting plate (10).
- Page 8 ASSEMBLY INSTRUCTIONS STEP 4 Attach the left upper handlebar tube (05L) to the left lower handlebar tube (04L). Secure with two Allen bolts (21) and two carriage bolts (18). Repeat for the right upper handlebar tube (05R). Attach the left & right pedal (25) to the left pedal tube as shown.
- Page 9 ASSEMBLY INSTRUCTIONS STEP 5 Loosen the screws (31) from the back of computer (24) and the grommet (46) from the side of front post (02). Fix the stationery handlebars (06) on front post (02) with the Allen bolts (22) and guide the hand pulse wire (42) through the hole on the side of front post (02) to the top and out of the front post (02).
- Page 10 ASSEMBLY INSTRUCTIONS STEP 6 Loosen the screws (09) from the decorative covers for pedal tube joint (34/35) & (37/38). Attach decorative cover for pedal tube (03R). Fix decorative cover (27/32) on left lower handlebar (04L) and cover (28/33) on right lower handlebar (04R) as shown.
-
Page 11: Warm-Up And Cool-Down
WARM-UP AND COOL DOWN WARM-UP and COOL-DOWN A successful exercise program consists of a warm-up, aerobic exercise and a cool-down. Exercise for at least two or preferably three times a week, resting for a day between workouts. After several months, you may increase the frequency to four or five times per week. -
Page 12: Computer Instructions
COMPUTER INSTRUCTIONS FUNCTIONAL BUTTONS Select functions. MODE Press to enter recovery function. Only available with active pulse measurement. RECOVERY After measurement (approx. 1 minute) your fitness level will be displayed: means OUSTANDING 1.0<F<2.0 means EXCELLENT 2.0≤F≤2.9 means GOOD 3.0≤F≤3.9 means FAIR 4.0≤F≤5.9 means BELOW AVERAGE means POOR. - Page 13 COMPUTER INSTRUCTIONS Workout selection Press key after power-up to select the desired mode. Press to confirm. DOWN ENTER Setting workout parameters The computer allows to preset different function values for your workout: TIME / SPEED / DISTANCE / CALORIES / AGE / PULSE / RPM / ODO / WATT / TARGET HR. and the keys to preset any value.
- Page 14 COMPUTER INSTRUCTIONS Body fat (P11) Select “BODY FAT” program with keys and press to confirm. This mode will process a DOWN ENTER body-fat measurement. Adjust the following values with the and ENTER: UP/DOWN 1. Gender (Male / Female) 2. Height in cm 3.
-
Page 15: Using The App Kinomap
USING THE APP KINOMAP Apple Store KINOMAP The free KinoMap app turns your device into a powerful and fun fitness product! Choose from the geotagged video on Kinomap and go! Your 人信息,打开手机蓝牙,确保电子表 position is shown in the video and as icon on the map. -
Page 16: Using The App Fitness Data
USING THE APP FITNESS DATA Apple Store 2. FITNESS DATA Requirements iOS: Version 7.1 and newer; Bluetooth® 4.0 and newer, iPhone 4s and newer. Android: Version 4.3 and newer; Bluetooth® 4.0 and newer Google Play Downloading the app Scan the 2D code to download and install Download the software (search for Fitness Data) from Google Play Store resp. -
Page 17: Exploded Diagram
EXPLODED DIAGRAM... -
Page 18: Parts List / Cleaning & Care
PARTS LIST / CLEANING & CARE Part No. Description Part No. Description Main Frame Flange Nut Front Post Hex Head Nut M5 Pedal Tube (L) C-Clip ø17 Pedal Tube (R) Sensor Magnet Lower Handlebar (L) Self-tapping Screw M4×20L Lower Handlebar (R) Nylon Nut M6 Upper Handlebars (L) Bearing 6203... -
Page 19: Guarantee Conditions
Ask at your council about the respective local disposal sites. In accordance with our policy of continual product impro- For service, accessories and spare parts, please contact: info@skandika.com vement, we reserve the right Service centre: MAX Trader GmbH, Wilhelm-Beckmann-Straße 19, 45307 Essen, to make technical and visual Germany changes without notice. - Page 20 Sales & Service by MAX Trader GmbH Wilhelm-Beckmann-Straße 19 45307 Essen Germany SF-2580 GB Ver. 1.0...
Need help?
Do you have a question about the Crosstrainer Fint and is the answer not in the manual?
Questions and answers