Advertisement
Available languages
Available languages
Quick Links
Advertisement
Chapters

Subscribe to Our Youtube Channel
Related Manuals for Skandika Ergometer Atlantis


Summary of Contents for Skandika Ergometer Atlantis
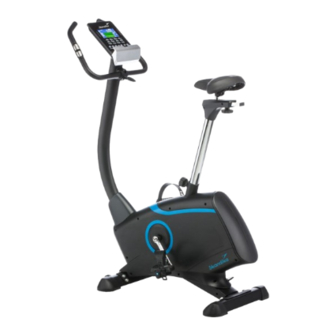
- Page 1 Ergometer Atlantis Art.Nr. SF-1600...
-
Page 2: Table Of Contents
Du auf Nennspannung / -strom 9 V DC / 1500 mA WARNUNG: Lesen Sie vor Gebrauch die Bedienungsanleitung. Dieses Trainingsgerät unserer Skandika Service ist nicht für Zwecke geeignet, für die eine hohe Genauigkeit erforderlich ist. Seite. Für weitere Informa- Produktionsdatum... -
Page 3: Wichtige Sicherheitshinweise
SICHERHEITSHINWEISE WARNUNG Um die Verletzungsgefahr zu reduzieren, muss diese Anleitung vor dem Gebrauch vollständig gelesen und verstanden werden! Dieses Gerät ist ausschließlich für den Heimgebrauch in Übereinstimmung mit den Anweisungen in dieser Anleitung vorgesehen. Lesen Sie die Gebrauchsanleitung sorgfältig durch, bevor Sie das Gerät einsetzen und bewahren Sie die Gebrauchsanleitung für die weitere Nutzung auf. -
Page 4: Aufbauanleitung
SICHERHEITSHINWEISE / AUFBAUANLEITUNG 21. Wenn Sie Schwindelgefühle, Übelkeit, Brustschmerzen oder andere abnormale Symptome verspüren, stoppen Sie sofort das Training und konsultieren Sie Ihren Arzt. 22. Personen wie Kinder, Invaliden und behinderte Menschen sollten das Gerät nur im Beisein einer weiteren Person, die eine Hilfestellung und Anleitung geben kann, benutzen. - Page 5 AUFBAUANLEITUNG SCHRITT 1: ANBRINGEN DER STANDFÜSSE / BASISMONTAGE Zuerst bringen Sie den vorderen und hinteren Standfuß (J-7=vorn und I-5=hinten) am Hauptrahmen (G-1) an. Hierzu werden je 4 Schrauben M8 x 20mm (N-1) und 4 Unterlegscheiben (N-2) benötigt. Ziehen Sie die Verbin- dungen gut fest.
- Page 6 AUFBAUANLEITUNG SCHRITT 3: SATTELMONTAGE Montieren Sie den Sattel (L-10) oben auf der Sattelstütze (K) wie abgebildet. Der Sattel ist in der Horizontalen verstellbar und kann somit auch der Arm- und Beinlänge angepasst werden. Hierzu Schraubenkopf des Feststellers (L-7) bis zum Gewindeende herausdrehen und herausziehen, Sattelverstel- lung in die gewünschte Position schieben und Schraubenkopf wieder fest anziehen.
- Page 7 AUFBAUANLEITUNG SCHRITT 4: LENKERSTÜTZEN- UND KABEL-MONTAGE Entfernen Sie zunächst (sofern diese vormontiert ist) die Lenkerstütze (H-1) durch Lösen der Schraubverbindungen (E-1 / E-2 / E-3). Schieben Sie die Abdeckung für Lenkerstütze (G-23) von unten über die Lenkerstütze (H-1) und verbinden Sie die Sensorkabelenden (H-2 & G-25) zwischen Hauptrahmen und Lenkerstütze. Danach stecken Sie vorsichtig und ohne ein Kabel einzuklemmen die Lenkerstütze (H-1) in den Hauptrahmen und sichern diese Verbin- dung wieder mit den Schrauben (E-2) und Unterlegscheiben (E-1 bzw.
- Page 8 AUFBAUANLEITUNG SCHRITT 5: LENKERGRIFFMONTAGE Befestigen Sie den Lenkergriff (M-2) an der Lenkerstütze (H-1) wie abgebildet an der angeschweißten Halterung mit Hilfe der Abdeckung (N-7) und der T-Schraube (N-6). Ziehen Sie die Schraube noch nicht endgültig fest. Bevor Sie das Zusammengebaute endgültig festschrauben, justieren Sie den zunächst nur lose fixierten Lenkergriff (M-2) in die gewünschte Position.
- Page 9 AUFBAUANLEITUNG SCHRITT 6: COMPUTERMONTAGE Verbinden Sie das obere Sensorkabel (H-2) und das Handpulskabel (M-5) mit dem Computer (A) und befestigen Sie den Computer (A) auf der Halterung oben auf der Lenkerstütze wie abgebildet mit den Schrauben (A-1). Das Gerät ist nun vollständig aufgebaut. PRÜFEN SIE VOR DER BENUTZUNG, OB ALLE SCHRAUBEN UND MUTTERN FESTGEZOGEN SIND!
-
Page 10: Stromanschluss / Computerbedienung
STROMANSCHLUSS / COMPUTERBEDIENUNG STROMANSCHLUSS Der Computer erhält seinen Strom über den mitgelieferten Adapter, welcher an der Buchse an der Abdeckung des Gerätes (Geräterückseite über dem hinteren Standfuß) sowie an eine übliche Steckdose 230V angeschlossen werden muss. Bei einem evtl. Neukauf/Ersatz des Adapters ist darauf zu achten, dass dieser GS-geprüft ist und dem Gerätesicherheitsgesetz und den folgenden Spezifikationen entspricht: Adapter-Spezifikationen:... - Page 11 COMPUTERBEDIENUNG Die Bedeutung der Tasten Durch Druck auf diese Taste bestätigen Sie diverse Eingabewerte, z. B. Zielwertvorgaben, MODE (Eingabe) persönliche Daten etc. oder wählen einen Trainingsmodus. Wir gehen auf diese Eingaben später detailliert ein. Halten Sie diese Taste für 2 Sekunden gedrückt, werden alle Werte auf Null zurückgesetzt. RESET Dies passiert auch, wenn Sie die Stromversorgung abtrennen.
- Page 12 COMPUTERBEDIENUNG WIE TRAINIERE ICH? Nachdem sich der Computer eingeschaltet hat (kurzes Aufleuchten aller Anzeigen und Piepton), müssen Sie mit den Tasten DOWN einen Trainingsmodus wählen. Dieser kann aus folgenden Möglichkeiten gewählt werden: MANUAL (Manuell) BEGINNER (Anfänger) ADVANCE (fortgeschritten) SPORTY (sportlich) CARDIO WATT Bestätigen Sie Ihre Auswahl mit MODE.
- Page 13 COMPUTERBEDIENUNG - TIME (Vorgeben einer Trainingszeit von 0:00 bis max. 99:00 Min.) - DISTANCE (Vorgeben einer Trainingsstrecke von 0 bis max. 99.90 km) - CALORIE (Vorgeben des gewünschten Kalorienverbrauchs von 0 bis max. 9990 kcal.) - PULSE (Vorgeben einer Pulsfrequenz von 30 bis max. 240 Schläge/Min.) Um eine solche Vorgabe einzugeben, haben Sie nach der Auswahl des manuellen Modus („Manual“...
- Page 14 COMPUTERBEDIENUNG 3. „Cardio“ Modus Mit diesem Trainingsmodus können Sie ein automatisch gesteuertes Training abhängig von Ihrer Pulsfrequenz absolvieren. Nach der Auswahl dieses Modus müssen Sie Ihr korrektes Alter (Age) angeben, falls der Computer danach fragt (Standardwert: 25, justierbar mit und DOWN, bitte bestätigen mit MODE). Nun beginnt die Auswahl des Prozentsatzes für den Zielpuls.
- Page 15 COMPUTERBEDIENUNG Die Körperfettmessung Wie erreicht man denn idealen Körpertyp und steigert damit seine Gesundheit? „Fit“ zu sein hat viele Vorteile – von der Gewichtskontrolle bis zu besserem und erholsameren Schlaf in der Nacht. Menschen, die regelmäßig trainieren – und zwar in der richtigen Art und Weise – werden weniger krank und leben erwiesenermaßen länger als Menschen, die einen ungesunden Lebenswandel haben.
- Page 16 COMPUTERBEDIENUNG In diesen Fällen kann die Messung bzw. deren Ergebnis nicht als absolutes Ergebnis angesehen werden, sondern lediglich als relativer Wert zur Ermittlung der Veränderung über einen bestimmten Zeitraum hinweg. Kontaktieren Sie in jedem Fall Ihren Arzt, bevor Sie die Körperfettmessung(en) vornehmen. Er kann Sie individuell beraten, ob diese Analyse für Sie geeignet ist oder nicht.
- Page 17 COMPUTERBEDIENUNG Hinweis zu den angezeigten Ergebnissen: Kaum eine Körperfettmessung wird exakt die gleichen Ergebnisse anzeigen wie eine vorherige. Bitte bedenken Sie, dass (ähnlich wie z. B. bei einer Blutdruckmessung) schon kleinste Änderungen wie z. B. in der Haltung oder bei Bewegungen, aber auch entsprechend der Tageszeit (unser Körper ist nie immer in exakt der gleichen Verfassung) etc.
-
Page 18: Verwendung Der Iconsole+ App
Der Computer ist ausgestattet mit einem eingebauten Empfänger für die drahtlose Pulsfrequenz-Übertragung mittels eines kompatiblen Brustgurtes (unkodiert / 5 kHz, z. B. Skandika Brustgurt). So können Sie je nach Belieben entscheiden, ob Sie Ihre Pulsfrequenz mittels der Handpulssensoren messen lassen möchten, oder aber durch Anlegen des Brustgurtes, was Ihnen ermöglicht, ein Training zu absolvieren, ohne ständig die Handpulssensoren... - Page 19 VERWENDUNG DER ICONSOLE+ APP Auf dem Home-Screen können Sie eine Verbindung zu Ihrem Trai- ningsgerät herstellen, indem Sie „Get Started“ anklicken und den entsprechenden Anweisungen (Quick Start / Schnellstart) folgen. Die Sprache der App ist unter „Settings“ (Einstellungen) änderbar. Hier können Sie zudem weitere Einstellungen wie beispielsweise die Einheit „Metric“...
- Page 20 VERWENDUNG DER ICONSOLE+ APP Programme und Bluetooth -Herzfrequenzmessung ® Die App beinhaltet verschiedene Programme, nach denen Sie mit Ihrem Gerät trainieren können. Je nach Trai- ningsziel und Zeit können Sie hier verschiedene Optionen auswählen. Unter dem Punkt „Ruhe HF Test“ können Sie mit einem über Bluetooth ®...
-
Page 21: Verwendung Der Kinomap App
Tippen Sie nun auf OK und kehren Sie zum Hauptmenü zurück. Sie können nun einen Kurs auswählen (je nach Art Ihres KinoMap-Kontos). Drücken Sie auf Start und beginnen Sie mit dem Training! Atlantis 4. Skandika auswählen 5. Das Gerät auswählen... - Page 22 TRAININGSHINWEISE Trainingshinweise Um den gewünschten Trainingserfolg zu erreichen, ist es unerlässlich, sich über wichtige Punkte für die Ge- staltung eines Fitnesstrainings im Allgemeinen und über die genaue Handhabung Ihres Gerätes mit Hilfe dieser Anleitung zu informieren. Wir bitten Sie deshalb, sich alle aufgeführten Punkte genau durchzulesen, entspre- chend zu beachten und stets im Hinterkopf zu behalten.
-
Page 23: Trainingshinweise
TRAININGSHINWEISE Dehnübungen für die Beinmuskulatur Die auf der folgenden Seite dargestellten Dehnübungen eignen sich grundsätzlich für ein Aufwärmen wie auch für die Abkühlphase nach dem Training. Dabei ist jedoch zu beachten, dass in der Aufwärmphase die Dehnungen nur kurz (ca. 5 bis 10 Sekunden) gehalten werden und danach die Dehnung wieder gelöst wird. Dies soll die Muskelspannung erhöhen und den Muskel auf das kommende Training vorbereiten. - Page 24 TRAININGSHINWEISE Übung 1: Dehnung des Quadriceps (Oberschenkelvorderseite) Mit einer Hand an der Wand abstützen und mit der anderen einen Fuß wie abge- bildet ergreifen und in die Dehnung der Oberschenkelvorderseite führen. Bringen Sie dabei die Ferse des ergriffenen Fußes soweit wie möglich (ohne Schmerzen zu verspüren) in Richtung Po.
-
Page 25: Explosionszeichnung
EXPLOSIONSZEICHNUNG... -
Page 26: Teile-Liste
TEILE-LISTE Teil Teil Bezeichnung Spezifikation Menge Bezeichnung Spezifikation Menge Computer (ABS) SM2581-67 G-17 Hauptabdeckung, links (HIPS) G-18 Hauptabdeckung, rechts (HIPS) Schraube für Computer M5x10mm G-19 Schraube M4x50mm Achsenset Schraube M8x12mm G-20 Schraube M4x30mm Antriebsrad (ABS) ø 240 G-21 Schraube 3/16“x3/4“ Adapter 230V~50Hz, 9VDC Führung G-22... -
Page 27: Reinigung & Pflege / Technische Daten
REINIGUNG & PFLEGE / TECHNISCHE DATEN Reinigung & Pflege Es empfiehlt sich, alle Geräteteile, die sich lösen könnten (Schrauben, Muttern u.ä.) regelmäßig (etwa alle 2 bis 4 Wochen bzw. je nach Benutzungshäufigkeit) zu kontrollieren, um Unfälle durch sich lösende Einzelteile zu vermeiden. -
Page 28: Garantiebedingungen
Beitrag zum Schutze unserer Umwelt. Bitte erfragen Sie bei der Gemeindeverwaltung die zuständige Entsorgungsstelle. Im Zuge ständiger Produktverbesse- Für Ersatzteile kontaktieren Sie bitte folgende E-Mail-Adresse: service@skandika.de rungen behalten Der Service erfolgt durch: MAX Trader GmbH, Wilhelm-Beckmann-Straße 19, 45307 Essen, wir uns technische... - Page 29 Importeur MAX Trader GmbH Ergo- Adresse Wilhelm-Beckmann-Str. 19, D-45307 Essen meter Please visit the Skandika Artikelnummer | Name SF-1600 | CardioBike Atlantis Service portal on our Klasse website for setup & help Standard EN 20957-1 Nennspannung / -strom...
-
Page 30: Safety Precautions
SAFETY PRECAUTIONS WARNING To reduce risk of injury, read and understand this instruction manual before using the device! This machine is intended for home use only in accordance with the instructions provided in this manual. Read the instruction manual carefully before using this device and keep the instruction manual for future use. SAFETY PRECAUTIONS This class HC exercise machine is designed for a maximum 12. -
Page 31: Set-Up Instructions
SAFETY PRECAUTIONS / SET-UP INSTRUCTIONS 21. Stop your work-out immediately in case of dizziness, nausea, chest pain or any other physical symptoms. In case of doubt, consult your physician immediately. 22. Children, disabled and handicapped persons should use the exercise only under supervision and in presence of another person who may give support and useful instructions. - Page 32 SET-UP INSTRUCTIONS STEP 1: ATTACHING THE FEET / BASIC ASSEMBLY Attach the front stabilizer (J-7) & rear stabilizer (I-5) to the main frame (G-1) with each 4 screws M8 x 20 (N-1) and 2 washers (N-2). Properly fix the stabilizers in order to avoid loosing them during exercise. The height adjusters (I-3, on the underside of I-5) are used for compensation of uneven floor if necessary.
- Page 33 SET-UP INSTRUCTIONS STEP 3: SEAT Fix the seat (L-10) onto the seat support tube (K) as per the drawing above. The seat can be adjusted horizontally according to your personal need (arm- and leg-length) by loosing and pulling out the knob (L-7), sliding the seat slider to the desired position and fixing the knob (L-7) again properly.
- Page 34 SET-UP INSTRUCTIONS STEP 4: HANDLEBARS POST AND CABLES Remove (in case these are pre-mounted) handlebars post (H-1) by loosing the screws (E-1 / E-2 / E-3). Slide the cover for handlebars (G-23) onto the bottom side of handlebars post (H-1) and connect both ends of the sensorcable (H-2 &...
- Page 35 SET-UP INSTRUCTIONS STEP 5: HANDLEBARS Assemble the handlebars (M-2) to the handlebars post (H-1) by the handlebars cover (N-7) and the T-knob (N-6). You may adjust the angular to your individual convenience before fixing the handlebars (M-2) tightly. Pay atten- tion not to squeeze the handpulse cables.
- Page 36 SET-UP INSTRUCTIONS STEP 6: COMPUTER Connect the upper sensorcable (H-2) and the handpulse cable (M-5) to the computer (A). Fix the computer (A) onto the holder on top of the handlebars post as shown with the screws (A-1). The exercise bike is completely assembled now! CHECK IF ALL BOLTS AND NUTS ARE TIGHTENED BEFORE USING THE DEVICE!
-
Page 37: Mains Connection / Computer Operation
MAINS CONNECTION / COMPUTER OPERATION MAINS CONNECTION The computer gets its power supply by the included adaptor which will be connected to a normal mains plug (European standard, please check the specifications). If you have to buy a new adaptor it is important to pay attention that it is GS-approved and corresponds to the product safety law and the below mentioned specifications. - Page 38 COMPUTER OPERATION Function buttons By pressing this button, you confirm various input values, e.g. target value specifications, MODE personal data, etc. or select a training mode. We will go into detail about these inputs later If you keep this key pressed for 2 seconds, all values are reset to zero. This also happens RESET when you disconnect the power supply.
- Page 39 COMPUTER OPERATION HOW DO I EXERCISE? After switching on the computer (short display of all possible signs and a beep tone) you need to choose a training mode by using the DOWN -buttons as well as MODE for confirmation. The following modes can be selected: MANUAL BEGINNER...
- Page 40 COMPUTER OPERATION - TIME (Training time between 0:00 and max. 99:00 Min.) - DISTANCE (Distance from 0 to max. 99.90 km) - CALORIE (desired calories burned in one training from 0 to max. 9990 kcal.) - PULSE (Pulse frequency from 30 to max. 240 bpm) To enter such a preset after selecting the manual mode („Manual“...
- Page 41 COMPUTER OPERATION 3. „Cardio“ mode This mode automatically adjusts a training level depending on your pulse frequency. After selecting this mode, DOWN MODE enter your correct age (standard value = 25 – can be adjusted with the buttons & for confir- mation).
- Page 42 COMPUTER OPERATION Bodyfat measurement: The bodyfat analysis How to reach your ideal body type and improve your health Being „fit“ has many benefits - from weight control to better and more restful sleep at night. People who exer- cise regularly - and in the right way - are less likely to get sick and have been shown to live longer than people who have unhealthy lifestyles.
- Page 43 COMPUTER OPERATION How to do the measurement: 1. The correct posture for body fat measurement: a) Sit on the device with your arms in front of you at an angle of approximately 75°. Keep your elbows straight and move them as little as possible. b) Enclose the sensors as completely as possible with your fingers so that there is sufficient contact with the electrodes.
- Page 44 COMPUTER OPERATION Hints for the shown results: Almost not one measurement of body fat will show the same results like before. Please keep in mind that (simi- lar to blood pressure measurement) the smallest movements or surrounding influences or also your daily cons- titution will have a strong influence upon the results.
-
Page 45: Use Of The Iconsole+ App
The computer is equipped with a built-in receiver, which can receive the pulse signals measured by a compatible (uncoded / 5 kHz, e.g. Skandika chest belt) chest belt wirelessly. So you can decide, if you want to measure your pulse frequency by the hand sensors or by the chest belt. A chest belt would enable you to exercise without the need to grasp the hand sensors all the time. - Page 46 USE OF THE ICONSOLE+ APP On the Home screen, you can connect to your training device by clicking „Get Started“ and following the corresponding instructions (Quick Start). The language of the app can be changed under „Set- tings“. Here you can also change other settings such as the unit „Me- tric“...
- Page 47 USE OF THE ICONSOLE+ APP Programmes and Bluetooth heart rate measurement ® The app contains various programmes according to which you can train with your device. Depending on your training goal and time, you can select different options here. Under the item „Resting heart rate test“ you can have your resting heart rate recorded with a heart rate monitor connected via Bluetooth for a more precise training plan.
-
Page 48: Use Of The Kinomap App
Now tap on OK and return to main menu. You can now choose a course for your exercise (depending on your type of KinoMap account maybe only some free courses). Press Start and begin to exercise! Atlantis 4. Select Skandika 5. Tap on the device... - Page 49 EXERCISE HINTS Exercise hints The following pages will inform you about some general basics about fitness training. In order to reach your personal training aims, it is absolutely necessary to read and keep in mind all the points mentioned in this user manual.
-
Page 50: Exercise Hints
EXERCISE HINTS Stretching exercises for the leg-muscles The stretching exercises on the following page are suitable for warm-up AND cool-down phase. The difference is the way of doing the stretches in these both phases. In the warm-up phase the stretches should only be held in the extended position for app. - Page 51 EXERCISE HINTS Exercise 1: Quadriceps Stretch With one hand against a wall for balance, grasp your foot as shown and stretch the front upper muscles of the leg. Raise your heel as close as possible to the buttocks (but only so far, that you do not feel any pain). In the “warm-up” phase please hold the stretched position for 5 up to max.
-
Page 52: Explosion Drawing
EXPLOSION DRAWING... -
Page 53: Parts List
PARTS LIST Part Part Description Specification Q´ty Description Specification Q´ty Computer (ABS) SM2581-67 G-17 Chain cover, left (HIPS) G-18 Chain cover, right (HIPS) Screw for computer M5x10mm G-19 Screw M4x50mm Axle set Screw M8x12mm G-20 Screw M4x30mm Driving wheel (ABS) ø 240 G-21 Screw 3/16“x3/4“... -
Page 54: Cleaning And Care
CLEANING & CARE / TECHNICAL SPECIFICATIONS Cleaning & Care We recommend checking all parts which may get loose (screws, nuts etc.) on a regular base (e.g. all 2 or 4 weeks, this depends also on how often you use the item) for tight seating. This avoids possible injuries because of loose parts. -
Page 55: Guarantee Conditions
Ask at your council about the respective local disposal sites. In accordance with our policy of continual product impro- For spare parts please contact: service@skandika.de vement, we reserve the right Service centre: MAX Trader GmbH, Wilhelm-Beckmann-Straße 19, 45307 Essen, to make technical and visual Germany changes without notice. - Page 56 Nennspannung / -strom 9 V DC / 1500 mA WARNUNG: Lesen Sie vor Gebrauch die Bedienungsanleitung. Dieses Trainingsgerät page de service Skandika. ist nicht für Zwecke geeignet, für die eine hohe Genauigkeit erforderlich ist. Pour plus d‘informations, Produktionsdatum...
-
Page 57: Informations De Sécurité
INFORMATIONS DE SÉCURITÉ AVERTISSEMENT Pour réduire les risques de blessures, veuillez lire attentivement ce mode d’emploi avant d‘utiliser la plate- forme vibrante ! Cet appareil est uniquement destiné à une utilisation domes-tique conformément aux inst- ructions contenues dans ce mode d’emploi. Lisez attentivement le mode d’emploi avant d’utiliser l’appareil et conservez bien ce mode d’emploi. -
Page 58: Instructions De Montage
INFORMATIONS DE SÉCURITÉ / INSTRUCTIONS DE MONTAGE 21. Si vous ressentez vertiges, nausées, douleurs dans la poitrine ou autres symptômes normaux, cessez immédiatement l‘entraînement et consultez un médecin. 22. Les personnes telles qu’enfants, invalides ou handicapés ne peut utiliser l‘appareil qu‘en présence d‘une autre personne capable de venir en aide et de donner des instructions. -
Page 59: Étape 1: Montage Des Pieds
INSTRUCTIONS DE MONTAGE ÉTAPE 1: MONTAGE DES PIEDS Montez d’abord les pieds avant et arrière (J-7 = en avant et I-5 = en arrière) sur le cadre principal G-1). Pour cela sont nécessaires : 4 vis M8 x 20 mm (N-1), 4 rondelles. Serrez bien les raccordements. A l‘aide du régleur de la hauteur (I-3, sur le dessous du I-5) il est possible de compenser les éventuelles inégalités du sol. -
Page 60: Étape 3: Montage De La Selle
INSTRUCTIONS DE MONTAGE ÉTAPE 3: MONTAGE DE LA SELLE Montez la selle (L-10) sur la tige de la fixation de la selle (K) comme sur le schéma. La selle peut être réglée en position horizontale et ainsi peut être adaptée à la longueur des bras et des jambes. Pour cela, dévissez à fond la grosse vis de blocage (L-7) et retirez-la. - Page 61 INSTRUCTIONS DE MONTAGE ÉTAPE 4: MONTAGE DE LA TIGE DE GUIDON ET DES CÂBLES Commencez par retirer la tige de guidon (H-1) pré-assemblée en desserrant les vis (E-1, E-2, E-3). Raccordez le câble du capteur supérieur avec le câble de capteur inférieur (C-6 & D-20) comme sur schéma. Retirez le clip de sécurité, si existant.
- Page 62 INSTRUCTIONS DE MONTAGE ÉTAPE 5: MONTAGE DES POIGNÉES DE GUIDON Comme indiqué sur le schéma, fixez la poignée de guidon (M-2)) sur la tige du guidon (H-1) au support soudé à l’aide du couvercle/cache (N-7) et de la vis de fixation en T (N-6). Ne serrez pas encore la vis à...
- Page 63 INSTRUCTIONS DE MONTAGE ÉTAPE 6: MONTAGE DE LA CONSOLE Raccordez le câble supérieur de l’ordinateur (H-2) et le câble du capteur de pouls (M-5) à la console (A) et fixez l’ordinateur (A) sur le support situé sur la tige de guidon (H-1) avec la vis (A-1). Le vélo est maintenant assemblé.
-
Page 64: Alimentation Électrique / Utilisation De La Console
ALIMENTATION ÉLECTRIQUE / UTILISATION DE LA CONSOLE ALIMENTATION ÉLECTRIQUE La console est alimentée en électricité par l‘adaptateur, qui doit être branché à la prise située dans le capot de l‘appareil (à l‘arrière de l‘appareil au dessus du pied arrière ainsi qu‘à une prise de courant 230 V. - Page 65 UTILISATION DE LA CONSOLE Fonction des touches Par la pression de cette touche vous pouvez confirmer diverses entrées d‘informations MODE (ENTRER) comme par exemple : les valeurs-cibles, les données personnelles etc., vous pouvez aussi sélectionner un mode d‘entraînement. Nous reviendrons en détails sur cette fonction ulté- rieurement .
- Page 66 UTILISATION DE LA CONSOLE QUEL MODE D‘ENTRAÎNEMENT CHOISIR ? Après que la console s‘est allumée (tous les signaux s‘allument brièvement accompagnés d‘un court signal sonore) avec la touche (UP/DOWN) (HAUT/BAS) vous devez choisir un mode d‘entraînement. Ce dernier peut être sélec- tionné...
- Page 67 UTILISATION DE LA CONSOLE - TIME (TEMPS) (saisir une durée cible de 0:00 à max 99:00 min) - DISTANCE (saisir une distance cible de 0:00 à max 99:90 km) - CALORIES (saisir une consommation de calories cible de 0:00 à max 9990 kcal.) - PULSE (POULS) (saisir une fréquence cible de 30 à...
- Page 68 UTILISATION DE LA CONSOLE 3. Mode „Cardio“ Avec ce programme d‘entraînement vous pouvez effectuer un entraînement automatiquement réglé sur votre fréquence cardiaque. Après avoir sélectionné ce mode d‘entraînement vous devez entrer votre âge et si la console le demande (valeur standard : 25, réglable avec et DOWN, confirmez avec MODE).
- Page 69 UTILISATION DE LA CONSOLE Mesure de la masse graisseuse Comment atteindre un type de corps idéal tout en améliorant sa santé ? Etre en forme a beaucoup d’avantage, du contrôle du poids jusqu’à un sommeil efficace la nuit. Les personnes, qui s’entraînent régulièrement –...
- Page 70 UTILISATION DE LA CONSOLE Dans ces cas, les mesures, ou les résultats des mesures ne peuvent être considérés comme des valeurs absolues, mais comme valeurs relatives et indicatives. Contactez votre médecin de toute façon votre médecin avant de faire une mesure de masse graisseuse. Il pourra vous confirmer, si cette analyse est appropriée pour vous. La mauvaise utilisation des pulsions électriques peut entraîner la perte des données ou l’affichage de données erronées.
- Page 71 UTILISATION DE LA CONSOLE Symbole Masse graisseuse Sportif / Evaluation Poids insuf- Normale Surcharge mince fisant pondérale Homme Femme H & F Notes relatives aux valeurs affichées : Deux mesures de la masse graisseuses consécutives ne seront jamais exactement identiques. Il faut tenir comp- te du fait que (comme pour la prise de tension) la moindre variation de position ou un mouvement, ou le mo- ment de la journée, le corps ne se trouve pas toujours dans la même condition, ce qui peut avoir un effet non négligeable sur les résultats affichés.
-
Page 72: Utilisation De La Iconsole + App
L‘ordinateur est équipé d‘un récepteur intégré pour la transmission sans fil du pouls au moyen d‘une ceinture thoracique compatible (non codée / 5 kHz, par exemple la ceinture thoracique Skandika). Cela vous permet de décider si vous voulez faire mesurer votre pouls par les capteurs de pouls manuels ou en mettant la ceinture thoracique, qui vous permet de faire un entraînement sans avoir à... - Page 73 UTILISATION DE LA ICONSOLE + APP Sur l‘écran d‘accueil, vous pouvez vous connecter à votre disposi- tif d‘entraînement en cliquant sur „Get Started“ et en suivant les instructions correspondantes (Quick Start). La langue de l‘application peut être modifiée sous „Paramètres“ (Settings). Ici, vous pouvez également modifier d‘autres paramètres tels que l‘unité...
- Page 74 UTILISATION DE LA ICONSOLE+ APP Programmes et mesure de la fréquence cardiaque Bluetooth ® L‘application contient différents programmes selon lesquels vous pouvez vous entraîner avec votre appareil. En fonction de votre objectif d‘entraînement et de votre temps, vous pouvez sélectionner différentes options ici. Sous la rubrique „Test de la fréquence cardiaque au repos“, vous pouvez enregistrer votre fréquence cardiaque au repos avec un cardiofréquencemètre connecté...
-
Page 75: Utilisation De La Kinomap App
Puis appuyez sur OK et retournez au menu principal. Vous pouvez main- tenant sélectionner une distance pour votre entraînement (en fonction du type de compte, le cas échéant, uniquement certains itinéraires gratuits). Appuyez sur « START » (Démarrer) ! Atlantis 4. Sélectionnez 5. Sélectionnez l‘appareil Skandika... -
Page 76: Consignes Pour L'entraînement
CONSIGNES POUR L’ENTRAÎNEMENT Consignes pour l’entraînement Les pages suivantes fournissent des informations de base pour l’entraînement. Pour obtenir les résultats souhaités, il est indispensable de s’informer sur les différents points relatifs à la préparation d’un programme d’entraînement en général et sur l’utilisation de votre appareil à l’aide de cette notice ! Pour améliorer sa santé... - Page 77 CONSIGNES POUR L’ENTRAÎNEMENT Exercices d’étirement pour la musculature des jambes Les exercices d’étirement décrits sur les pages suivantes conviennent aussi bien pour l’échauffement que pour la phase de repos après l’entraînement. Il ne faut cependant pas oublier que, pendant la phase d’échauffement, les étirements doivent être brefs (env.
- Page 78 CONSIGNES POUR L’ENTRAÎNEMENT Exercice 1 : étirement du quadriceps (face avant de la cuisse) S’appuyer contre le mur avec une main et saisir un pied avec la main libre ,comme indiqué puis effectuer l’étirement de la face avant de la cuisse. Pour cela, tirer le talon le plus haut possible (sans ressentir de douleurs) en direction du fessier.
-
Page 79: Vue Éclatée
VUE ÉCLATÉE... -
Page 80: Liste Des Pièces
LISTE DES PIÈCES N° N° de la Désignation Spécification Qté de la Désignation Spécification Qté pièce pièce G-17 Capot droit (HIPS) Console (ABS) SM2581-67 Vis pour la console M5x10mm G-18 Capot gauche (HIPS) Set de l'axe G-19 Boulon M4x50mm G-20 boulon+Vis M4x30mm Vis pour la console... -
Page 81: Nettoyage Et Entretien / Données Techniques
NETTOYAGE ET ENTRETIEN / DONNÉES TECHNIQUES Nettoyage et entretien Pour éviter les accidents causés par des pièces qui se desserrent, il est conseillé de contrôler régulièrement (environ toutes les 2 ou 4 semaines, selon leur fréquence d’utilisation) toutes les pièces démontables (vis, écrous, etc). -
Page 82: Conditions De Garantie
Dans le cadre du travail continu d’amélioration des produits, Pour d’accessoires ou de pièces de rechange, veuillez contacter : nous nous réservons le droit de service@skandika.de procéder à des modifications Centre de service clients : MAX Trader GmbH, Wilhelm-Beckmann-Str. 19, 45307 techniques et de design. - Page 84 Vertrieb & Service durch / Sales & Service by Ventes et services par MAX Trader GmbH Wilhelm-Beckmann-Straße 19 45307 Essen Germany SF-1600 Atlantis DE_GB_FR Ver. 2.1...
Need help?
Do you have a question about the Ergometer Atlantis and is the answer not in the manual?
Questions and answers