Advertisement
Quick Links
Advertisement

Related Manuals for fantastic furniture Ashford Lowline Medium


Summary of Contents for fantastic furniture Ashford Lowline Medium
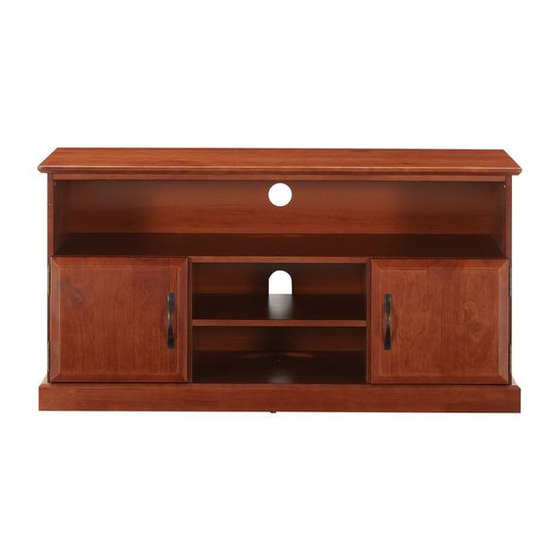
- Page 1 Version 2.0 Ashford Lowline Medium www.fantasticfurniture.com.au...
- Page 2 WARNING: ENSURE THE WALL STRAP IS ATTACHED TO AVOID SERIOUS INJURY. To avoid any serious or fatal injury, this product has been provided with a wall strap to prevent toppling. We strongly recommend that this product is permanently fixed to the wall or other suitable surface. Fixing devices are not included since different surface materials require different attachments.
-
Page 3: Assembly Checklist
Assembly checklist Make sure you have all the required tools. Read through the instructions carefully Never use power tools unless instructed. before you begin. Identify and lay out all of the components Unless instructed, do not fully tighten screws before you begin assembly. until the item is fully assembled. -
Page 4: What You Need
What You Need Part LIst To Assemble the Product Box 1: Top Panel (P1); Left Side (P2); Right Side (P3); Front Rail (P4); Big Shelf (P5); 2 x Centre Divider (P6); Small Shelf (P7); Bottom Panel (P8); Front Plinth (P9); 2 x Side Plinth (P10);... - Page 5 Step 1 You will need: 4 x Cam Bolts (H1) (P6) x 2 12 x Wooden Dowels (H3) Phillips head screwdriver Mallet Step 2 Veneer banding edge face up You will need: 4 x Cam (P6) (H2) Phillips head screwdriver (P7) This is how a cam nut works..
- Page 6 Step 3 You will need: (H3) x 8 (P11) 4 x Cam bolts (H3) x 2 (H1) 10 x Wooden Dowels (H1) x 4 (H3) (P8) Phillips head screwdriver Mallet Step 4 You will need: (P11) 2 x Wood Screws (H4) Phillips head screwdriver...
- Page 7 Step 5 You will need: 4 x Cam bolts (H1) Phillips head screwdriver Step 6 You will need: (H2) x 4 4 x Cam (H2) Phillips head screwdriver This is how a cam nut works..(P8) The head of the cam bolt goes into the open mouth of the cam nut.
- Page 8 Step 7 Veneer banding edge face up (P6) You will need: 4 x Cam (P7) (P6) (H2) Phillips head screwdriver (P8) (H2) x 4 This is how a cam nut works..The head of the cam bolt goes into the open mouth of the cam nut.
- Page 9 Step 9 You will need: 4 x Cam (P5) (P6) (H2) Phillips head screwdriver (P8) (P6) This is how a cam nut works..(H2) x 4 The head of the cam bolt goes into the open mouth of the cam nut. You then turn the cam nut so it tightens over the bolt.
- Page 10 Step 11 (H4) x 3 You will need: 3 x Wood Screws (H4) (P10) Phillips head screwdriver (P2) Bevelled edge on side plinth face up Step 12 You will need: 5 x Cam (H2) Phillips head (P5) screwdriver (P8) This is how a cam nut works..(P2) The head of the cam bolt goes into the open...
- Page 11 Step 13 You will need: (H4) x 3 3 x Wood Screws (H4) (P3) Phillips head screwdriver (P10) Bevelled edge on side plinth face up Step 14 You will need: (P3) 5 x Cam (H2) Phillips head screwdriver (H2) x 5 This is how a cam nut works..
- Page 12 Step 15 With paper lamination face inside (P13) Step 16 (H1) x 6 You will need: 6 x Cam bolts (H1) Phillips head screwdriver (P1) Fix Cam Bolts to Top Panel (P1). www.fantasticfurniture.com.au PAGE 12...
- Page 13 Step 17 You will need: 4 x Wood Screws (H4) Phillips head screwdriver (P1) Step 18 (P1) You will need: 6 x Cam (H2) Phillips head screwdriver (P3) (H2) x 6 This is how a cam nut works..The head of the cam bolt goes into the open mouth of the cam nut.
- Page 14 Step 19 You will need: 4 x Nuts (H9) 4 x Wood Screws (P13) (H10) 4 x Wood Screws (P14) (H15) 4 x Wood Screws (H17) Phillips head screwdriver (P13) (P14) (P9) Move Back panels apart a little bit, and screw in Wood Screws(H15) between the Back Panels.
- Page 15 (H12) x 4 Step 20 (H12) x 4 (H11) x 2 (H11) x 2 You will need: 2 x Wood Screws (H7) (P12) 2 x Washer (H8) 4 x Hinge (P12) (H11) (H7) x 2 8 x Wood (H8) x 2 Screws (H12) Phillips head...
- Page 16 Step 22 You will need: Phillips head screwdriver We strongly advise that you use the wall safety strap provided to prevent the unit toppling. Fix Wall Strap (H18) to back of the Top Panel by using Wood Screw (H19) and Washer (H20).
- Page 17 Step 23 You will need: Phillips head screwdriver Screw and Wall Plug are not provided. Please use appropriate fixtures for your wall. Seek advice from a qualified trades person on how to attach safety strap to the wall . Move the Lowline to the final position.
- Page 18 www.fantasticfurniture.com.au PAGE 18...
Need help?
Do you have a question about the Ashford Lowline Medium and is the answer not in the manual?
Questions and answers