Table of Contents
Advertisement
Available languages
Available languages
Quick Links
Advertisement
Chapters
Table of Contents

Related Manuals for ProLights Z2500DIGITAL


Summary of Contents for ProLights Z2500DIGITAL
- Page 1 Z2500DIGITAL DIGITAL PROJECTOR Manuale Utente User Manual...
- Page 2 Music & Lights S.r.l. si riserva ogni diritto di elaborazione in qualsiasi forma delle presenti istruzioni per l’uso. La riproduzione - anche parziale - per propri scopi commerciali è vietata. Al fine di migliorare la qualità dei prodotti, la Music&Lights S.r.l. si riserva la facoltà di modificare, in qualunque momento e senza preavviso, le specifiche menzionate nel presente manuale di istruzioni.
-
Page 3: Table Of Contents
4. 1 Manutenzione e pulizia del sistema ottico 4. 2 Informazioni sugli errori 4. 3 Risoluzione dei problemi Certificato di garanzia Contenuto dell'imballo: • Z2500DIGITAL • Cavo di sicurezza • Supporti omega (2pz.) • 8GB scheda di memoria SD • Manuale utente... -
Page 4: Sicurezza
Z2500DIGITAL ATTENZIONE! Prima di effettuare qualsiasi operazione con l’unità, leggere con attenzione questo manuale e conservarlo accuratamente per riferimenti futuri. Contiene informazioni importanti riguardo l’installazione, l’uso e la manutenzione dell’unità. SICUREZZA Avvertenze generali • I prodotti a cui questo manuale si riferisce sono conformi alle Direttive della Comunità Europea e per- tanto recano la sigla . -
Page 5: Informazioni Generali
Z2500DIGITAL le schegge prodotte dall’eventuale scoppio della lampada. Le lenti devono essere obbligatoriamente montate; devono inoltre, se visibilmente danneggiate, essere sostituite con ricambi originali. • Sostituire immediatamente la lampada se danneggiata o deformata dal calore. • Se è necessario sostituire la lampada, utilizzare un guanto che non lasci pelucchi; evitare contatto di- retto con le mani. -
Page 6: Introduzione
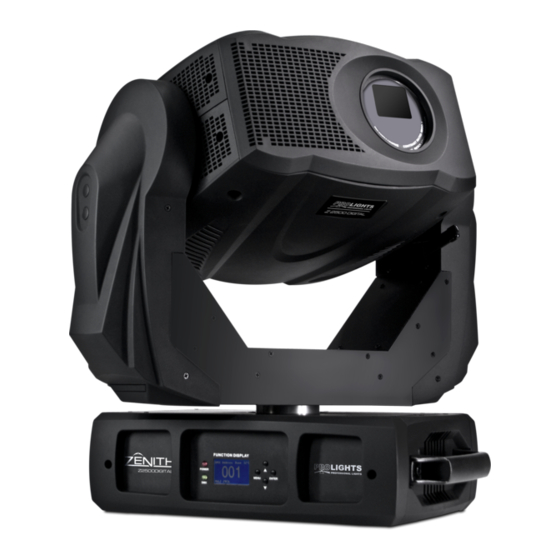
- 1 - INTRODUZIONE 1.1 DESCRIZIONE Prolights Z2500DIGITAL è un proiettore digitale a testa mobile, concepito per combinare i vantaggi della generazione di effetti digitali con le caratteristiche dei tradizionali proiettori a corpo mobile. La sorgente luminosa è composta da una lampada di 180W per un emissione di 2500 ANSILumen con tecnologia di riproduzione ed elettronica DLP. - Page 7 Z2500DIGITAL • Selezione modalità di riproduzione colori • Selezione formato video: 1:1, 16:9, 4:3, Automatic • Riflessione su asse X e Y dell’immagine • Correzione trapezoidale della riproduzione +/- 40° (keystone) • Cattura d’immagine (Freeze) • Selezione sorgente Input: SD, CVBS, S-Video, VGA Elettronica: • Memoria interna: 8Gb (SD card) con immagini e video prememorizzate...
-
Page 8: Sintesi Funzioni Canali Dmx
Z2500DIGITAL 1.3 SINTESI FUNZIONI CANALI DMX MODE1 Channel Function in MODE1 Channel Function in MODE1 Layer2 Zoom Macro Pan Fine Layer2 Rotation Tilt Layer3 Picture Directory/Filter Picture Tilt Fine Layer3 Picture Number Pan/Tilt Speed Layer3 Center Offset Pan/Tilt Macro Layer3 Center Rotation... - Page 9 Z2500DIGITAL Channel Function in MODE2 MODE2 Pan Fine Tilt Tilt Fine Pan/Tilt Speed Shutter Picture/Video Video Number Video Speed Layer1 Picture Number/Color Layer1 Picture Number/Preset Color Layer2 Picture Directory Layer2 Picture Number Layer3 Picture Directory/Filter Picture Layer3 Picture Number Picture Macro...
-
Page 10: Elementi Di Comando E Collegamenti
Z2500DIGITAL 1.4 ELEMENTI DI COMANDO E DI COLLEGAMENTI 15 17 DMX OUT DMX IN 1.0m RoHS FUNCTION DISPLAY series POWER Z 2 5 0 0 D I G I T A L VIDEO IN S-VIDEO IN VGA IN POWER MENU... - Page 11 Z2500DIGITAL 1. TESTA MOBILE 11. DMX IN (XLR 5 poli): 2. BRACCIO GIREVOLE 1 = massa, 2 = DMX -, 3 = DMX +, 4 N/C, 5 N/C 3. LEVA di blocco/sblocco movimento TILT. 12. DMX OUT (XLR 3 poli): 4.
-
Page 12: Installazione
Z2500DIGITAL - 2 - INSTALLAZIONE 2.1 LAMPADA Si raccomanda l’uso di lampade OSRAM E20.8 (cod. 800190). Assicurarsi che la lampada sia compatibile con il voltaggio dell’impianto elettrico usato. Se lampada viene fatta operare con un voltaggio superiore al suo voltaggio nominale potrebbe essere danneggiata o la sua durata notevolmente ridotta. Inoltre, per proteggere la lampada, spegnere sempre prima la lampada tramite pannello di controllo o controller DMX quindi lasciare attiva la ventola affinché... -
Page 13: Montaggio
2.3 MONTAGGIO Fig.4 Lo Z2500DIGITAL può essere collocato su un piano solido. Inoltre, grazie alle possibilità di fissaggio sulla doppia staffa, l’unità può essere montata anche a testa in giù, su una traversa (fig.6). Per il fissaggio occor- rono dei supporti robusti per il montaggio. -
Page 14: Funzioni E Impostazioni
è pronta. Dopo l’uso spegnere l’unità con l’interruttore. 3.2 IMPOSTAZIONE BASE Il proiettore Z2500DIGITAL dispone di un display LCD e di 4 pulsanti per l’accesso alle funzioni del pannello di controllo e la loro gestione (fig.7). FUNCTION DISPLAY... - Page 15 Z2500DIGITAL Ogni volta che si accende l’unità, tutti i motori verranno ripristinati alla loro posizione di partenza; il di- splay si presenterà come in fig.8. Durante questa fase, qualora si presentassero errori del sistema, è pos- sibile premere il tasto MENU per visualizzare le informazioni relative al problema riscontrato. Dopo che l’unità...
-
Page 16: Struttura Menu
Z2500DIGITAL 3.3 STRUTTURA MENU DMX settings DMX Address DMX Channel Mode Mode 1 (54) Mode 2 (29) View DMX Value WDMX Setting Active Retransmit Reset Memory Standby Settings Standby Mode Keep Scene Edit Standby Scene Fixture Settings Pan Inverse Tilt Inverse... - Page 17 Z2500DIGITAL Display Setting Normal Display Direction Inverse Auto Backlight Auto Off Backlight Intensity 1 - 10 Temperature Unit °C °F Fixture Test Auto Test Manual Test Fixture Information Fixture use time Lamp On time Exit Reset Time Firmware Version MENU Reset Functions Pan &...
-
Page 18: Configurazione Canali Dmx
Z2500DIGITAL 3.4 CONFIGURAZIONE CANALI DMX Lo Z2500DIGITAL dispone di 2 configurazioni dei canali DMX a cui si può accedere dal pannello di con- trollo. • Premere il tasto MENU e selezionare attraverso i tasti direzionali la voce [DMX Settings], quindi premere il tasto ENTER per confermare la scelta. -
Page 19: Indirizzamento Dmx
DMX per il primo canale DMX. Se, per esempio, sull’unità di comando è previsto l’indirizzo 33 per coman- dare la funzione del primo canale DMX, si deve impostare sullo Z2500DIGITAL l’indirizzo di start 33. Le altre funzioni del pannello saranno assegnate automaticamente agli indirizzi successivi. -
Page 20: Collegamenti Della Linea Dmx
Z2500DIGITAL 3.9 COLLEGAMENTI DELLA LINEA DMX La connessione DMX è realizzata con connettori standard XLR. Utilizzare cavi schermati, 2 poli ritorti, con impedenza 120Ω e bassa capacità. Per il collegamento fare riferimento allo schema di connessione riportato di seguito: DMX - INPUT... -
Page 21: Tabella Canali Dmx
Z2500DIGITAL 3.11 TABELLA CANALI DMX Mode1: 54ch Ch Function in the 54 channel mode DMX value Ch Function in the 54 channel mode DMX value SHUTTER PAN 0 - 540° 000 - 255 Blackout 000 - 007 PAN FINE 000 - 255... - Page 22 Z2500DIGITAL Ch Function in the 54 channel mode DMX value Ch Function in the 54 channel mode DMX value Number 03 024 - 031 Layer1 Picture Directory 08 064 - 071 Number 04 032 - 039 Layer1 Picture Directory 09...
- Page 23 Z2500DIGITAL Ch Function in the 54 channel mode DMX value Ch Function in the 54 channel mode DMX value Layer1 Picture 21 168 - 175 Layer2 Picture Directory 09 072 - 079 Layer1 Picture 22 176 - 183 Layer2 Picture Directory 10...
- Page 24 Z2500DIGITAL Ch Function in the 54 channel mode DMX value Ch Function in the 54 channel mode DMX value Layer3 Picture Directory 10 080 - 087 Layer2 Picture 23 184 - 191 Layer3 Picture Directory 11 088 - 095 Layer2 Picture 24...
- Page 25 Z2500DIGITAL Ch Function in the 54 channel mode DMX value Layer3 Picture 24 192 - 199 Layer3 Picture 25 200 - 207 Layer3 Picture 26 208 - 215 Layer3 Picture 27 216 - 223 Layer3 Picture 28 224 - 231...
- Page 26 Z2500DIGITAL Ch Function in the 54 channel mode DMX value Ch Function in the 54 channel mode DMX value Fast - Slow clockwise rotation 128 - 189 Distortion (Max-Min) 010 - 128 Opposite Distortion (Max-Min) 129 - 255 Stop 190 - 193...
- Page 27 Z2500DIGITAL Mode2: 29ch Ch Function in the 29 channel mode DMX value Ch Function in the 29 channel mode DMX value PAN 0 - 540° 000 - 255 VIDEO NUMBER Number 00 000 - 007 PAN FINE 000 - 255...
- Page 28 Z2500DIGITAL Ch Function in the 29 channel mode DMX value Ch Function in the 29 channel mode DMX value Layer1 Picture Directory 05 040 - 047 Layer1 Picture 18 144 - 151 Layer1 Picture Directory 06 048 - 055 Layer1 Picture 19...
- Page 29 Z2500DIGITAL Ch Function in the 29 channel mode DMX value Ch Function in the 29 channel mode DMX value LAYER2 PICTURE NUMBER Layer3 Picture Directory 12 096 - 103 Layer2 Picture 0 000 - 007 Layer3 Picture Directory 13 104 - 111...
- Page 30 Z2500DIGITAL Ch Function in the 29 channel mode DMX value Picture Macro 1 043 - 085 Picture Macro 2 086 - 127 Picture Macro 3 128 - 170 Picture Macro 4 171 - 212 Picture Macro 5 213 - 255...
- Page 31 Z2500DIGITAL Ch Function in the 29 channel mode DMX value 156 - 207 Auto 208 - 255 MIRROR Normal 000 - 063 Flip Horizontal 064 - 128 Flip Vertical 129 - 191 Flip Horizontal 192 - 255 KEYSTONE Normal 000 - 009...
- Page 32 Z2500DIGITAL 3.13 IMPOSTAZIONI DISPOSITIVO È possibile modificare i seguenti parametri, relativi al dispositivo, seguendo la medesima procedura: • Premere il tasto MENU per accedere alla funzione e attraverso i tasti direzionali scorrere fino a quando sul display non appare [Fixture Settings], quindi premere il tasto ENTER.
- Page 33 Z2500DIGITAL 3.14 IMPOSTAZIONI LAMPADA È possibile modificare i seguenti parametri, relativi alla lampada, seguendo la medesima procedura: • Premere il tasto MENU per accedere alla funzione e attraverso i tasti direzionali scorrere fino a quando sul display non appare [Lamp Setting], quindi premere il tasto ENTER.
- Page 34 Z2500DIGITAL 3.15 IMPOSTAZIONI DISPLAY È possibile modificare i seguenti parametri, relativi al display, seguendo la medesima procedura: • Premere il tasto MENU per accedere alla funzione e attraverso i tasti direzionali scorrere fino a quando sul display non appare [Display Setting], quindi premere il tasto ENTER.
- Page 35 Z2500DIGITAL • Nuovamente attraverso i tasti direzionali eseguire la calibratura impostando un valore [0 - 255]. • Premere il tasto ENTER per confermare l'impostazione. 3.17 INFORMAZIONI SUL PROIETTORE • Premere il tasto MENU e selezionare attraverso i tasti direzionali la voce [Fixture Information], quindi pre- mere il tasto ENTER per confermare la scelta.
- Page 36 Z2500DIGITAL Fixture Maintenance • Nella modalità [Special Function] selezionare attraverso i tasti direzionali la funzione [Fixture Maintenance]. • Per confermare premere il tasto ENTER. • Selezionare [Interval] e premere il tasto ENTER se si vuole visualizzare sul display l'intervallo di tempo tra due interventi relativi alla manutenzione.
- Page 37 Z2500DIGITAL Rimozione della scheda di memoria Effettuare la rimozione della scheda di memoria quando non è in corso un'operazione di accesso ai dati in essa contenuti; per evitare danneggiamenti all'unità, alla scheda di memoria oppure la perdita dei dati. • Assicurarsi che l'unità sia spenta oppure che siano portati a zero tutti i valori dei canali.
- Page 38 Z2500DIGITAL Cartella video • 31 cartelle di video: “Video001 ……Video031”. • 992 (31 x 32) video, al massimo possono essere contenuti. • 32 video possono essere contenute in ciascuna cartella ed esse possono essere modificati. • Far riferimento al diagramma dei nomi riportato di seguito se si vuole modificare i video:...
- Page 39 Z2500DIGITAL - 4 - MANUTENZIONE 4.1 MANUTENZIONE E PULIZIA DEL SISTEMA OTTICO • Durante gli interventi, assicurarsi che l’area sotto il luogo di installazione sia libera da personale non qualificato. • Spegnere l’unità, scollegare il cavo di alimentazione ed aspettare finché l’unità non si sia raffreddata.
- Page 40 Z2500DIGITAL 4.3 RISOLUZIONE DEI PROBLEMI Anomalie Possibili cause Controlli e rimedi Mancanza di alimentazione di rete Verificare la presenza della tensione alimentazione • • Fusibile bruciato Sostituire il fusibile con uno dello stesso tipo • • Il proiettore non funziona...
-
Page 43: Z2500Digital
3. 21 Memory SD card 4 Maintenance 4. 1 Maintenance and cleaning the unit 4. 2 Error information 4. 3 Trouble shooting Warranty Packing content • Z2500DIGITAL • Safety cable • Omega clamps (2 pz.) • 8GB memory SD card • User manual... -
Page 44: General Instructions
Z2500DIGITAL WARNING! Before carrying out any operations with the unit, carefully read this instruction manual and keep it with cure for future reference. It contains important information about the installation, usage and maintenance of the unit. SAFETY General instruction • The products referred to in this manual conform to the European Community Directives and are there- fore marked with . -
Page 45: General Information
Z2500DIGITAL by a lamp exploding. The lenses must be mounted and, if visibly damaged, they have to be replaced with genuine spares. • The lamp shall be changed if it has become damaged or thermally deformed. • When fitting a lamp, always use gloves or soft lint free cloth never touch it with your bare hands. -
Page 46: Introduction
- 1 - INTRODUCTION 1.1 DESCRIPTION Prolights Z2500DIGITAL is a digital luminaire conceived to combine in one fixture the effects of digital projectors with features of traditional moving-heads. The light source is based on a 180W discharge lamp emitting 2500 ANSILumen output with DLP screen- ing technology. - Page 47 Z2500DIGITAL • Video format selection: 1:1, 16:9, 4:3, Auto • X & Y Mirror • Keystone function +/-40° • Freeze function • Source selection: SD card, CVBS, S-Video, VGA Electronics • Internal Memory: 8Gb (through SD card) for picture/video storage • 2 DMX configurations available: 29/54 channels...
-
Page 48: Dmx Channel Summary
Z2500DIGITAL 1.3 DMX CHANNEL SUMMARY MODE1 Channel Function in MODE1 Channel Function in MODE1 Layer2 Zoom Macro Pan Fine Layer2 Rotation Tilt Layer3 Picture Directory/Filter Picture Tilt Fine Layer3 Picture Number Pan/Tilt Speed Layer3 Center Offset Pan/Tilt Macro Layer3 Center Rotation... - Page 49 Z2500DIGITAL Channel Function in MODE2 MODE2 Pan Fine Tilt Tilt Fine Pan/Tilt Speed Shutter Picture/Video Video Number Video Speed Layer1 Picture Number/Color Layer1 Picture Number/Preset Color Layer2 Picture Directory Layer2 Picture Number Layer3 Picture Directory/Filter Picture Layer3 Picture Number Picture Macro...
-
Page 50: Operating Elements And Connections
Z2500DIGITAL 1.4 OPERATING ELEMENTS AND CONNECTIONS 15 17 DMX OUT DMX IN 1.0m RoHS FUNCTION DISPLAY series POWER Z 2 5 0 0 D I G I T A L VIDEO IN S-VIDEO IN VGA IN POWER MENU ENTER DMX OUT... - Page 51 Z2500DIGITAL 1. MOVING HEAD 11. DMX IN (5-pole XLR): 2. ROTARY ARM 1 = ground, 2 = DMX -, 3 = DMX +, 4 N/C, 5 N/C 3. LEVER for locking and unlocking the rotary 12. DMX OUT (3-pole XLR): arms (TILT movement).
-
Page 52: Installation
Z2500DIGITAL - 2 - INSTALLATION 2.1 LAMP We recommend that you use OSRAM E20.8 (cod. 800190). Make sure that the lamp you use is compatible with local voltage. If the lamp is operated with a voltage surpassing its nominal operating voltage, it can be damaged or its service life reduced considerably. -
Page 53: Mounting
Fig.4 The Z2500DIGITAL may be set up on a solid and even surface. By means of the fixing facilities of the base plate, the unit can also be mounted upside down to a cross arm. The base plate is shown in fig.5. For fixing, stable mounting clips are required. -
Page 54: Functions And Settings
Switch on the unit with the power switch (15). The unit will run built-in program to reset all motors to their home position. Shortly after that the Z2500DIGITAL is ready for operation. After operation, switch off the unit with the power switch. - Page 55 Z2500DIGITAL Every time you turn on the unit, it will run built-in program to reset all motors to their home position, the display will show as fig.8, you may hear some noises for about 20 seconds. It will show warning sign if it goes wrong during resetting and you can press the MENU button to view the error information.
-
Page 56: Menu Structure
Z2500DIGITAL 3.3 MENU STRUCTURE DMX settings DMX Address DMX Channel Mode Mode 1 (54) Mode 2 (29) View DMX Value WDMX Setting Active Retransmit Reset Memory Standby Settings Standby Mode Keep Scene Edit Standby Scene Fixture Settings Pan Inverse Tilt Inverse... - Page 57 Z2500DIGITAL Display Setting Normal Display Direction Inverse Auto Backlight Auto Off Backlight Intensity 1 - 10 Temperature Unit °C °F Fixture Test Auto Test Manual Test Fixture Information Fixture use time Lamp On time Exit Reset Time Firmware Version MENU Reset Functions Pan &...
-
Page 58: Dmx Configuration
• Press MENU button back to the last menu or let the unit idle one minute to exit menu mode. The tables on page 19 indicate the operating mode and DMX value. The Z2500DIGITAL is equipped with 3/5-pole XLR connections. -
Page 59: Dmx Addressing
3.8 DMX ADDRESSING To able to operate the Z2500DIGITAL with a light controller, adjust the DMX start address for the first a DMX channel. If e. g. address 33 on the controller is provided for controlling the function of the first DMX channel, adjust the start address 33 on the Z2500DIGITAL. -
Page 60: Connection Of The Dmx Line
Z2500DIGITAL 3.9 CONNECTION OF THE DMX LINE DMX connection employs standard XLR connectors. Use shielded pair-twisted cables with 120Ω imped- ance and low capacity. The following diagram shows the connection mode: DMX - INPUT DMX - OUTPUT XLR plug XLR socket... -
Page 61: Dmx Control
Z2500DIGITAL 3.11 DMX CONTROL Mode1: 54ch Ch Function in the 54 channel mode DMX value Ch Function in the 54 channel mode DMX value SHUTTER PAN 0 - 540° 000 - 255 Blackout 000 - 007 PAN FINE 000 - 255... - Page 62 Z2500DIGITAL Ch Function in the 54 channel mode DMX value Ch Function in the 54 channel mode DMX value Number 03 024 - 031 Layer1 Picture Directory 08 064 - 071 Number 04 032 - 039 Layer1 Picture Directory 09...
- Page 63 Z2500DIGITAL Ch Function in the 54 channel mode DMX value Ch Function in the 54 channel mode DMX value Layer1 Picture 21 168 - 175 Layer2 Picture Directory 09 072 - 079 Layer1 Picture 22 176 - 183 Layer2 Picture Directory 10...
- Page 64 Z2500DIGITAL Ch Function in the 54 channel mode DMX value Ch Function in the 54 channel mode DMX value Layer3 Picture Directory 10 080 - 087 Layer2 Picture 23 184 - 191 Layer3 Picture Directory 11 088 - 095 Layer2 Picture 24...
- Page 65 Z2500DIGITAL Ch Function in the 54 channel mode DMX value Layer3 Picture 24 192 - 199 Layer3 Picture 25 200 - 207 Layer3 Picture 26 208 - 215 Layer3 Picture 27 216 - 223 Layer3 Picture 28 224 - 231...
- Page 66 Z2500DIGITAL Ch Function in the 54 channel mode DMX value Ch Function in the 54 channel mode DMX value Fast - Slow clockwise rotation 128 - 189 Distortion (Max-Min) 010 - 128 Opposite Distortion (Max-Min) 129 - 255 Stop 190 - 193...
- Page 67 Z2500DIGITAL Mode2: 29ch Ch Function in the 29 channel mode DMX value Ch Function in the 29 channel mode DMX value PAN 0 - 540° 000 - 255 VIDEO NUMBER Number 00 000 - 007 PAN FINE 000 - 255...
- Page 68 Z2500DIGITAL Ch Function in the 29 channel mode DMX value Ch Function in the 29 channel mode DMX value Layer1 Picture Directory 05 040 - 047 Layer1 Picture 18 144 - 151 Layer1 Picture Directory 06 048 - 055 Layer1 Picture 19...
- Page 69 Z2500DIGITAL Ch Function in the 29 channel mode DMX value Ch Function in the 29 channel mode DMX value LAYER2 PICTURE NUMBER Layer3 Picture Directory 12 096 - 103 Layer2 Picture 0 000 - 007 Layer3 Picture Directory 13 104 - 111...
- Page 70 Z2500DIGITAL Ch Function in the 29 channel mode DMX value Picture Macro 1 043 - 085 Picture Macro 2 086 - 127 Picture Macro 3 128 - 170 Picture Macro 4 171 - 212 Picture Macro 5 213 - 255...
-
Page 71: Standby Setting
Z2500DIGITAL Ch Function in the 29 channel mode DMX value 156 - 207 Auto 208 - 255 MIRROR Normal 000 - 063 Flip Horizontal 064 - 128 Flip Vertical 129 - 191 Flip Horizontal 192 - 255 KEYSTONE Normal 000 - 009... -
Page 72: Fixture Setting
Z2500DIGITAL 3.13 FIXTURE SETTING The parameters described below can be changed: • Enter menu mode, select [Fixture Settings] and confirm with ENTER button. • Press UP/DOWN button to select: [Pan Inverse] , [Tilt Inverse], [P/T Feedback], [Bl.o.P/T Moving], [Sw.Source Delay] or [Image Auto Inverse]. -
Page 73: Lamp Setting
Z2500DIGITAL 3.14 LAMP SETTING The parameters of lamp described below can be changed in this way: • Enter menu mode, select [Fixture Settings] and confirm with ENTER button. • Press UP/DOWN button to select: [On/Off], [State/Power On], [Off via DMX], [On if DMX On], [Off if DMX Off] or [Ignition Delay]. -
Page 74: Display Setting
Z2500DIGITAL 3.15 DISPLAY SETTING The parameters of lamp described below can be changed in this way: • Enter menu mode, select [Display Setting] and confirm with ENTER button. • Press UP/DOWN button to select: [Display Direction], [Backlight Auto Off], [Backlight Intensity] or [Temperature Unit]. -
Page 75: Fixture Information
Z2500DIGITAL 3.17 FIXTURE INFORMATION • Enter menu mode, select [Fixture Information] and confirm with ENTER button. • You can view the following information. Fixture use time Working hour meter (fixture hours). • Press UP/DOWN button to select [Fixture Use Time]. -
Page 76: Special Functions
Z2500DIGITAL 3.19 SPECIAL FUNCTIONS • Enter menu mode, select [Special Functions] and confirm with ENTER button. • Press UP/DOWN button to select: [Fixture Maintenance] or [Factory Setting]. Fixture Maintenance • Select Fixture Maintenance, press ENTER button to confirm, press UP/DOWN button to select [Interval] or [Remain Time]. - Page 77 Z2500DIGITAL Remove the memory card Do not remove the memory card in the middle of an operation when the card is being accessed. Removing the card in the middle of an operation may damage the memory card as well as the device, and data stored on the card may be corrupted.
- Page 78 Z2500DIGITAL Video Folder • 31 video folders: “Video001 ……Video031”. • At most it can contain 992 (31 x 32) videos. • Each folder can put at most 32 videos in it. Videos are changeable; please refer to the following diagram to name your own files if you want to change videos:...
-
Page 79: Maintenance
Z2500DIGITAL - 4 - MAINTENANCE 4.1 MAINTENANCE AND CLEANING THE UNIT • Make sure the area below the installation place is free from unwanted persons during setup. • Switch off the unit, unplug the main cable and wait until the unit has cooled down. -
Page 80: Troubleshooting
Z2500DIGITAL 4.3 TROUBLESHOOTING Problems Possible causes Checks and remedies No mains supply Check the power supply voltage • • Faulty fuse Replace a burnt-out fuse by one of the same • • type only Fixture does not light up Incorrect setting DMX Check setting DMX •... - Page 81 Place Stamp Here Affrancare Spett.le Music&Lights S.r.l. Via Appia Km 136.200 04020 Itri (LT) Italy "...
- Page 84 Music & Lights S.r.l. entertainment technologies Via Appia km 136,200 - 04020 Itri (LT) ITALY ISO 9001:2008 tel. +39 0771 72190 fax +39 0771 721955 Certified Company www.musiclights.it info@musiclights.it...
Need help?
Do you have a question about the Z2500DIGITAL and is the answer not in the manual?
Questions and answers