Table of Contents
Advertisement
Quick Links
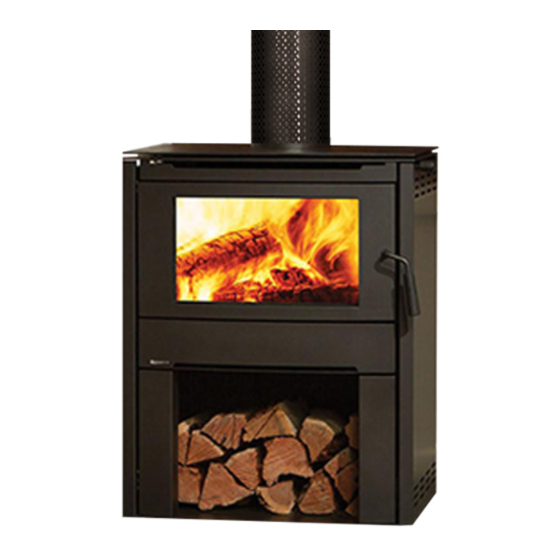
CS1203
Alterra™
Freestanding
Wood Stove
Owner's & Installation Manual
Tested by:
Installer: Please complete the details on the back cover
and leave this manual with the homeowner.
Homeowner: Please keep these instructions for future reference.
FPI FIREPLACE PRODUCTS INTERNATIONAL LTD. 6988 Venture St., Delta, BC Canada, V4G 1H4
919-048a
11/26/14
Advertisement
Table of Contents

Related Manuals for Regency Alterra CS1203


Summary of Contents for Regency Alterra CS1203
- Page 1 CS1203 Alterra™ Freestanding Wood Stove Owner's & Installation Manual Tested by: Installer: Please complete the details on the back cover and leave this manual with the homeowner. Homeowner: Please keep these instructions for future reference. FPI FIREPLACE PRODUCTS INTERNATIONAL LTD. 6988 Venture St., Delta, BC Canada, V4G 1H4 919-048a 11/26/14...
- Page 2 The pride of workmanship that goes into each of our products will give you years of trouble-free enjoyment. Should you have any questions about your product that are not covered in this manual, please contact the REGENCY DEALER in your area.
-
Page 3: Safety Label
CS1203 Wood Stove. We have printed a copy of the contents here for your review. NOTE: Regency units are constantly being improved. Check the label on the unit and if there is a difference, the label on the unit is the correct one. -
Page 4: Table Of Contents
Lower Surround reversal ..........19 Door reversal ...............20 Wood Storage ..............21 Ashlip Installation............21 Blower/Fan installation ..........22 Fan Operation..............22 Fan wiring ..............22 OPERATING INSTRUCTIONS Operating Instructions ..........22 First Fire ..............22 Draft Control ..............22 Ash Disposal..............23 Safety Guidelines And Warnings .........24 Regency CS1203 Freestanding Wood Stove... -
Page 5: Dimensions
DIMENSIONS UNIT DIMENSIONS Shown with optional 27-1/8” (689mm) blower installed. 6" flue collar 17-1/8” (436mm) 17-1/8” (436mm) 19-1/16” (485mm) 26-3/4”(680mm) Regency CS1203 Freestanding Wood Stove... -
Page 6: Installation
Be aware that local Codes and Regulations may floor protector. override some items in this manual. Check with 13) Your Regency Wood stove is not to be connected your local inspector. 7) The floor protector must be of non-combustible to any air distribution duct. -
Page 7: Minimum Clearance To Combustible Materials
Mobile Home Close Clearance (To be installed with required pipe components) "C" Vent single wall pipe is not approved for Mobile Home installations. (Refer to Mobile Home Instructions.) From Unit From Corner From Flue Center-line CS1203 11" 7" 7" 24-1/2" 14.5" 19-3/4" Regency CS1203 Freestanding Wood Stove... - Page 8 MEASUREMENTS "FROM UNIT" ARE FROM THE SIDE SHIELDS OF THE STOVE TO A SIDE WALL OR TO A CORNER, AND FROM THE REAR HEAT SHIELD TO A BACK WALL The Regency Freestanding models have been alcove approved and must be installed with a listed double wall connector to the ceiling level.
-
Page 9: Step By Step Chimney And Connector Installation
6) Fasten the raincap with spark screens (if re- quired) to the top of your chimney. 7) For optimum efficiency when installing into a masonry chimney, size accordingly, i.e. the 6" (152mm) flue dia. is 28.28 sq.in. Horizontal Installation Regency CS1203 Freestanding Wood Stove... -
Page 10: Masonry Chimney
The chimney must be the required height above the roof or other obstructions for safety and proper draft operation. The space heater is to be connected to a factory-built chimney conforming to CAN/ULC-S629, Standard for 650 C Factory-Built Chimneys. Regency CS1203 Freestanding Wood Stove... -
Page 11: Combustible Wall Chimney Connector Pass-Throughs
24 gage minimum sheet metal supports. See that the supports are fastened securely to wall surfaces on all sides. Make sure fasteners used to secure chimney flue liner. Regency CS1203 Freestanding Wood Stove... -
Page 12: Recommended Heights For Woodstove Flue
= 4 ft. one "T" = 3 ft. Total Addition (at sea level) = 9 ft. Recommended Flue Height Elevation Example a) Example b) 1000' 18.72' 21.84' 2000' 19.44' 22.68' 5000' 21.60' 25.20' 8000' 23.76' 27.72' Regency CS1203 Freestanding Wood Stove... -
Page 13: Mobile Home Installation
WARNING: Operate only with door fully closed - open feed door to feed fire only. 4" outside air kit Secured to floor with 2 lag bolts. Regency CS1203 Freestanding Wood Stove... -
Page 14: Listed Components For Mobile Home Installation
INSTALLATION LISTED COMPONENTS FOR MOBILE HOME INSTALLATION The Regency CS1203 is approved for installation in a Mobile Home if one of the following pipe systems is used. U.S. Installation* Qty.Part # Description METALBESTOS SSII 6DCC Connector Qty. Part # Description... -
Page 15: Stainless Smoke Deflector Installation
To replace the deflector, loosen off both bolts and slide defector upward and out. Install new defector and hand tighten bolts. Ensure positive location of the defector prior to hand tightening. WARNING: Operation of the unit with out proper installation of smoke deflector will void warranty. Regency CS1203 Freestanding Wood Stove... -
Page 16: Baffle And Tube Installation
4) Important: push both baffle bricks so they are tight against the side walls. Note: When getting the chimney cleaned, remove the baffle bricks for access to the flue, then replace them when cleaning is completed. Handle stored on hangar in wood storage area. Regency CS1203 Freestanding Wood Stove... -
Page 17: Side Panel Installation
Failure to do this will result in burn stains on panels which you will be unable to remove. Not protected by product warranty. 4) Install Regency logo on to the 1) Bend the metal tab (located in the top front corner of the side panels to left side panel - by snapping a 45°... -
Page 18: Ash Drawer Option
- it is directly below the upper ash dump plate.) by removing the two nuts and bolts holding the 2 plates together from underneath the stove. Ash Dump Plates Ash Plug Keep ash removal tool handy for maintenance - see ash disposal in operating instructions. 918-919 06/14/10 Regency CS1203 Freestanding Wood Stove... -
Page 19: Lower Surround Reversal
5) Remove and rotate both the male part of the latch 180° - located on the inside of the lower surround door. Install the latch on the opposite side of the door. Door latch - male portion Regency CS1203 Freestanding Wood Stove... -
Page 20: Door Reversal
4) Flip the door hinge 180° - install on the left side of the unit with 2 bolts. 5) Reattach the door catch assembly on the right side with 2 bolts from step Door 9) Reattach the door to the door hinge. Hinge Door Catch Regency CS1203 Freestanding Wood Stove... -
Page 21: Wood Storage
Tabs on ashlip Store wood behind door opening OPTIONAL ASHLIP INSTALLATION 1) Open lower surround door. Final install of Ashlip 2) Ashlip to be positioned just below the ashdrawer (if installed). Ashlip to be positioned here Regency CS1203 Freestanding Wood Stove... -
Page 22: Blower/Fan Installation
CAUTION: Label all wires prior to disconnection hazard and should be plugged directly into a properly when servicing controls. Wiring errors can cause grounded three-prong receptacle. Do not cut or remove improper and dangerous operation. the grounding prong from this plug. Regency CS1203 Freestanding Wood Stove... -
Page 23: Operating Instructions
(Leaving Regency Stove causing a draft down your the door slightly open will help your fire start chimney. If this occurs, slightly open a window more rapidly.) -
Page 24: Ash Disposal
2) Always leave 1/2 to 1 inch of ash in the bottom of the firebox. This helps in easier starting and a more uniform burn of your fire. Replace ash plug when ashes have been removed. Regency CS1203 Freestanding Wood Stove... -
Page 25: Safety Guidelines And Warnings
Failure to do so can result in a serious chimney fire. 7) Your Regency stove can be very hot. You may be seriously burned if you touch the stove while it is operating, keep children, clothing and furniture away. -
Page 26: Maintenance
If the door gasket requires replacement 7/8" diameter fresh wood. This allows the wood to achieve material must be used. Regency uses AMATEX # 10- 863KR 7/8" dia. gasket. A proper high temperature the charcoal stage faster and burns up any gasket adhesive is required. -
Page 27: Parts List
* Not available as a replacement part 942-110 Ash drawer plug 076-911 Ash Drawer Assembly 076-004 Fan Opening Cover 076-010 Back Shield 074-954 Air tube 033-953 Air tube 073-955 Baffle set 076-913 Ashlip 820-483 Smoke Deflector Regency CS1203 Freestanding Wood Stove... -
Page 28: Fan Assembly
Fan Housing Front 222-022 Fan Housing Bottom 222-036 Sensor Mount 200-227 Fan Bracket Right Hand 200-228 Fan Bracket Left Hand 200-229 Fan Housing Back 910-157/P Fan 910-142 Thermodisc FIRE BRICK Part # Description 076-960 Firebrick Set Regency CS1203 Freestanding Wood Stove... - Page 29 NOTES Regency CS1203 Freestanding Wood Stove...
- Page 30 NOTES Regency CS1203 Freestanding Wood Stove...
-
Page 31: Warranty
The authorized selling dealer is responsible for all in-fi eld service work carried out on your Regency product. FPI will not be liable for results or costs of workmanship from unauthorized service persons or dealers. - Page 32 Installer: ___________________________________________________________ Phone #: ___________________________________________________________ Date Installed: ______________________________________________________ Serial No.: __________________________________________________________ Regency, Alterra are trademarks of FPI Fireplace Products International Ltd. Printed in Canada © Copyright 2011, FPI Fireplace Products International Ltd. All rights reserved. Regency CS1203 Freestanding Wood Stove...
Need help?
Do you have a question about the Alterra CS1203 and is the answer not in the manual?
Questions and answers