
Subscribe to Our Youtube Channel
Related Manuals for Bras MAESTRALE EXTRA 12.1


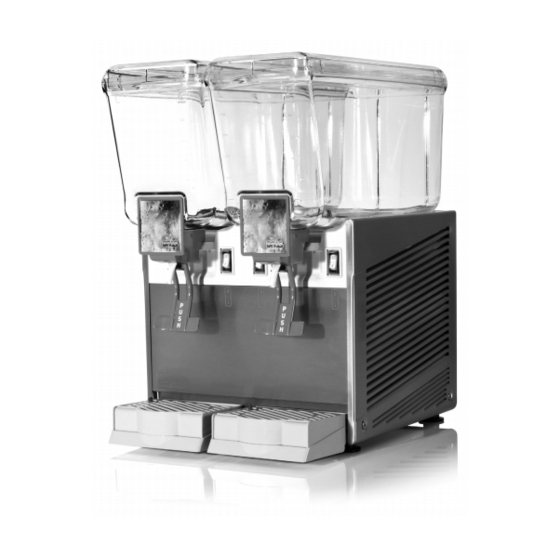
Summary of Contents for Bras MAESTRALE EXTRA 12.1
- Page 1 MAESTRALE EXTRA MANUALE D’ISTRUZIONI OPERATOR’S MANUAL CARNET D’INSTRUCTIONS GEBRAUCHSANWEISUNG MANUAL DE INSTRUCCIONES...
-
Page 2: Dichiarazione Di Conformità Ce
DISTRIBUTORE DI BEVANDE FREDDE - Marca: BRAS INTERNAZIONALE S.p.A. - Fabbricante: BRAS INTERNAZIONALE S.p.A. - Modelli: MAESTRALE EXTRA 12.1 - 12.2 - 12.3 - 12.4 - 20.1 - 20.2 - 20.3 - 20.4 230V 50Hz sono conformi alle seguenti Normative:... -
Page 3: Garanzia
Bras Internazionale s.p.a., un 2. Per garanzia si intende la sostituzione o riparazione gratuita delle parti compo- esborso superiore al prezzo versato dall'acquirente per l'acquisto del prodotto. -
Page 4: Caratteristiche Tecniche
I T A L I A N O M A E S T R A L E - E X T R A 1 ISTRUZIONI DI SICUREZZA ELET- 3 CARATTERISTICHE TECNICHE TRICA 12.1 12.2 12.3 12.4 20.1 20.2 20.3 20.4 Contenitori trasparenti smontabili Prima di collegare elettricamente il distributore, controllare Capacità... -
Page 5: Istruzioni Per L'uso
Controllare che il distributore non abbia subito danni da tra- Non smontare la vasca, non rimuovere mescolatori o pan- sporto. In caso contrario, provvedere immediatamente ad effet- nelli per pulizia o manutenzione senza assicurarsi che il distri- tuare il reclamo presso il vettore. butore sia scollegato elettricamente. -
Page 6: Descrizione Dei Comandi
I T A L I A N O M A E S T R A L E - E X T R A 7. 1 DESCRIZIONE DEI COMANDI 7. 3 PULIZIA Il distributore è provvisto di un interruttore generale e, per ogni Pulizia e lavaggio sono fondamentali per garantire la perfetta contenitore, di un interruttore per il comando del relativo dispo- sitivo di agitazione (pompa nelle Linee BS e agitatore nella Li-... -
Page 7: Sanitizzazione Del Distribu- Tore Smontato
sto rimanga inattivo per lungo tempo dopo la sanitizzazio- Rubinetto a gravità: sfilare il pistone e quindi smontare la leva comando rubinetto (vedere figura 5). La sanitizzazione deve essere eseguita ogni qualvolta ven- ga rimesso in funzione il distributore con nuovo prodotto. Prima di iniziare le procedure descritte nel seguito lavarsi le mani con un sapone antibatterico. -
Page 8: Sanitizzazione Del Distribu- Tore Montato
I T A L I A N O M A E S T R A L E - E X T R A Svuotare i contenitori dalla soluzione sanitizzante attra- verso i rubinetti e poi eliminarla. Risciacquare con bevanda fresca in modo da togliere ogni possibile residuo di soluzione sanitizzante dal fondo dei conte- nitori. -
Page 9: Electrical Safety Instructions
1 ELECTRICAL SAFETY INSTRUCTIONS 4 INTRODUCTION Before connecting the dispenser to the mains, check that It is necessary to read all sections of this manual thoroughly to the voltage shown on the rating plate matches your electricity familiarize yourself with all aspects of the unit. supply. -
Page 10: Operating Procedures
EN GLIS H M A E S T R A L E - E X T R A The unit doesn’t come presanitized from the factory. Before serving products, the dispenser must be disassembled, cleaned and sanitized according to this handbook instructions (chapter 7.3 CLEANING AND SANITAZING PROCEDURES). -
Page 11: Cleaning And Sanitizing Procedures
dispensing handle (see figure 5). should remain dry. ATTENTION The access to the service area is restricted to persons having safety/hygiene knowledge and practical expe- rience on the appliance. 7. 3 CLEANING AND SANITIZING PROCEDURES figure 5 Cleaning and sanitizing of the dispenser are recommended to guarantee the conservation of the best product taste and the Slide drip tray out and empty it. -
Page 12: In-Place Sanitization
EN GLIS H M A E S T R A L E - E X T R A 7. 3. 3 SANITIZING Sanitizing should be performed immediately prior to starting the machine. Do not allow the unit to sit for extended periods of time after sanitization. -
Page 13: Maintenance (To Be Carried Out By Qualified Service Personnel Only)
cover, remove the lower part and replace the bulbs (using a 24- 28V 21W max bulbs). Reassemble the top cover and replace the fixing screws. figure 11 Daily: inspect the machine for signs of product leaks past seals and gaskets. If proper assembly does not stop leaks around seals or gaskets, check for improper lubrication, worn or damaged parts. -
Page 14: Caracteristiques Techniques
F R A N C A I S M A E S T R A L E - E X T R A 1 CONSIGNE DE SÉCURITÉ EN MATIÈRE 3 CARACTERISTIQUES TECHNIQUES ÉLECTRIQUE 12.1 12.2 12.3 12.4 20.1 20.2 20.3 20.4 Réservoirs transparents Avant d'effectuer le branchement électrique du distributeur,... -
Page 15: Description Des Commandes
7 MODE D'EMPLOI Contrôler que le distributeur n'eit pas été endommagé pendant le transport. Si c'est le cas, faire immédiatement une réclamation au transporteur. Laver et désinfecter le distributeur avant de l'utiliser en Placer le distributeur sur un comptoir en mesure d'en suivant les instructions fournies dans ce carnet au chapitre 7.3 supporter le poids, y compris à... - Page 16 F R A N C A I S M A E S T R A L E - E X T R A 7. 3. 1 DEMONTAGE Interrupteur de mélange Position 0 : Le dispositif de mélange est arrêté. ATTENTION Position I : Le dispositif de mélange est en Avant toute intervention de demontage, débrancher...
- Page 17 7. 3. 2 LAVAGE Essuyer les parties externes du distributeur sans utiliser de chiffons abrasifs. 7. 3. 4 REMONTAGE ATTENTION Introduire le tiroir égouttoir à sa place. Avant toute intervention de nettoyage, débrancher Robinet avec tube en cautchouc: Pousser (1) le levier de toujours électriquement le distributeur en retirant la fiche débit robinet et enfiler (2) le tuyau du robinet dans son siège de la prise.
-
Page 18: Entretien
F R A N C A I S M A E S T R A L E - E X T R A 8 ENTRETIEN Replacer le joint du réservoir sur l’évaporateur, en laissant la couronne plus épaisse en contact avec le plan égouttoir (voir figure 9). -
Page 19: Technische Daten
1 ANWEISUNGEN ZUR ELEKTRISCHEN 3 TECHNISCHE DATEN SICHERHEIT 12.1 12.2 12.3 12.4 20.1 20.2 20.3 20.4 Abnehmbare Klarsicht-Behälter stüc Bevor Sie den Dispenser an den Strom anschließen, stellen Sie sicher, dass die Netzspannung der auf dem Schild Fassungsvermögen Einzelbehälter, angegebenen entspricht. Schließen Sie den Dispenser an ein ungefähr Einphasen-Netz an. -
Page 20: Beschreibung Der Betriebsschalter
D E U T S C H M A E S T R A L E - E X T R A Stromversorgung des Geräts unterbrochen wurde. Das Gerät auf eventuelle Transportschäden überprüfen. Alle Schäden unverzüglich beim Speditionsunternehmen Bei der Handhabe und Zubereitung von Lebensmitteln reklamieren. -
Page 21: Nützliche Hinweise Während Des Gebrauchs
Behälter mit einem Schalter für die Betätigung des jeweiligen Dispensers. Die im folgenden beschriebenen Verfahren sind Rührwerks versehen (Pumpe in den BS-Linien und Rührwerk in allgemeiner Natur und können sich in Funktion der jeweils der AB - BS2M Linie). gültigen Gesundheitsvorschriften ändern. Ihre Funktionen sind folgende: Bevor der Dispenser zur Reinigung auseinander genommen wird, müssen die Behälter entleert werden. -
Page 22: Montage
D E U T S C H M A E S T R A L E - E X T R A 7. 3. 2 WASCHEN 2 Liter Wasser. Alle zu desinfizierenden Teile in die Lösung tauchen. Dabei die vom Hersteller angegebene Zeit einhalten Die desinfizierten Teile auf einer sauberen Fläche an der Luft trocknen lassen. -
Page 23: Desinfektion Des Montierten Dispensers
8 INSTANDHALTUNG Tauwasserschale (Bild 9). Austausch der Birnen im beleuchteten Deckel (Bild 11) : Entfernen Sie die Halteschrauben der oberen Abdeckung, Entfernen Sie den unteren Teil Untersetzen Sie die Birnen (24-28V 21W max.). Setzen Sie die obere Abdeckung wieder auf und befestigen Sie die Halteschrauben. -
Page 24: Caracteristicas Tecnicas
ES PAÑ OL M A E S T R A L E - E X T R A 1 INSTRUCCIONES DE SEGURIDAD 3 CARACTERISTICAS TECNICAS ELÉCTRICA 12.1 12.2 12.3 12.4 20.1 20.2 20.3 20.4 Contenedores transparentes Antes de conectar la alimentación eléctrica del distribuidor, desmontables verifique que la tensión de red sea la correcta, indicada en la Capacidad de cada contenedor,... -
Page 25: Instrucciones De Empleo
5 INSTALACION 6 PARA UN FUNCIONAMIENTO SEGURO Y CORRECTO Quitar el distribuidor del embalaje: guardar este último por si hubiera cualquier eventualidad. No utilizar el distribuidor antes de haber leído el presente manual de instrucciones. No utilizar el distribuidor si no está correctamente conectado a tierra. -
Page 26: Descripcion De Los Mandos
ES PAÑ OL M A E S T R A L E - E X T R A Para apagar las luces de la tapa es suficiente girarlo de Todos los distribuidores de este tipo deben despedir calor. 180°.(ver figura 2) Si el calor producido fuera excesivo, controlar que ninguna fuente de calor se encuentre cerca del distribuidor y, en modo particular, cerca de las rejillas de los paneles. -
Page 27: Higienizacion Del Distribuidor Desmontado
en las partes a lavar, en vez una solución demasiado diluida Grifo con tubo de goma: empujar la palanca mando grifo (1) y sacar (2) el tubo goma de salida desde su situación puede no limpiar bastante. No utilizar detergentes abrasivos. vertical en el fondo del contenedor (ver figura 4). -
Page 28: Higienizacion Del Distribuidor Montado
ES PAÑ OL M A E S T R A L E - E X T R A abajo la extremidad del tubo de goma hasta ajustarlo Poner la junta al evaporador, de modo que el borde de mayor ancho se quede en contacto con el plano recoge-gotas completamente (ver figura 6). -
Page 29: Manutencion (Solamente Por El Servicio Postventa)
Vaciar los contenedores de la solución para higienizar por medio de los grifos y luego eliminarla. Enjuagar con bebida fresca para quitar del fondo de los contenedores todo residuo posible de solución para higienizar. Secar la parte interior de los contenedores con una servilleta de papel desechable. - Page 30 M A E S T R A L E - E X T R A NOTE - NOTES- NOTES - ANMERKUNGEN - NOTAS:...
- Page 31 NOTE - NOTES- NOTES - ANMERKUNGEN - NOTAS:...
- Page 32 02457-00099 V 7.1 20C18...
Need help?
Do you have a question about the MAESTRALE EXTRA 12.1 and is the answer not in the manual?
Questions and answers