Table of Contents
Advertisement
Available languages
Available languages
Quick Links
Advertisement
Table of Contents
Troubleshooting

Related Manuals for Bisonte BTA-10SG


Summary of Contents for Bisonte BTA-10SG
- Page 1 Manual de utilizare User manual Motocultor pe benzina, pg. 6 Gasoline Tiller, pg. 33 BTA - 10SG / BTA - 13SG Italia Star Com Due S.R.L. Autostrada Bucuresti-Pitesti, km. 13/2, Loc. Chiajna, IF www.italiastar.ro 004/021.433.03.27 info@italiastar.ro...
- Page 2 Prin prezenta declaram ca echipamentul - Herewith we declare that the machine - Dichiara che il prodotto - С настоящото декларираме, че машината - Declaramos que el producto - Ezennel kijelentjük, hogy a gép BTA-1000 BTA-10SG Motocultor pe benzina Gasoline Tiller BTA-13SG...
- Page 3 Italia Star Com Due S.R.L. www.italiastar.ro 004/021.433.03.27 info@italiastar.ro...
- Page 4 Service autorizat:...
- Page 6 Vă mulțumim că ați ales motocultorul nostru! Acest manual conține informații cu privire la funcționarea și întreținerea motocultorului model BTA-10SG/BTA-13SG. Toate informațiile din acest manual se bazează pe cele mai recente informații despre produs disponibile în momentul imprimării acestui manual.
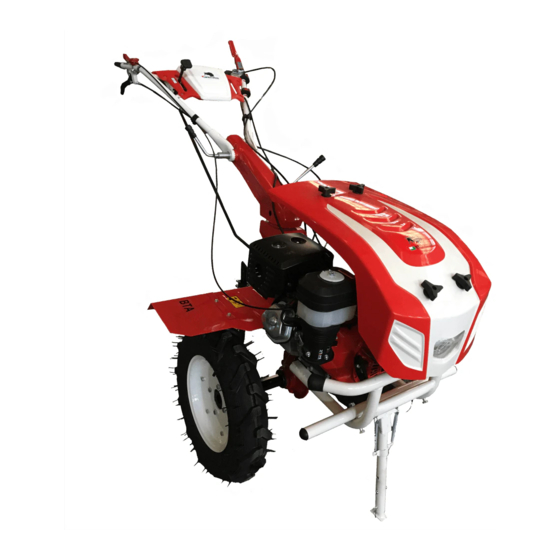
- Page 7 ●Combustibilul și uleiul lubrifiant trebuie să fie curate. ● când schimbați viteza, trebuie să deconectați ambreiajul. Capitolul 1 Profilul motocultorului Ⅰ specificații: Articole și modele BTA-13SG (13HP) BTA-10SG (10HP) Dimensiuni(L×W×H)mm 1755×1100×870 1800×1100x870 Lățimea maximă de arat 1350 (mm) Mini Adâncimea de arat 150~300...
- Page 8 Capitolul 2 Funcția principală a motocultorului Ⅰ Arat: Componentele rotative pentru prelucrarea solului sunt instalate pe ambele părți ale arborelui de antrenare al mecanismului de deplasare al mini-motocultor.ului Strângeți arborele cu două șuruburiM8×55. Atunci mini-motocultorul poate funcționa. (Uită-te la tabelul 2 și imaginea 2). Tabelul 2 Modul dispozitiv de 3 grupe...
- Page 9 Fixați corpul motocultorului, instalați roți de rulare pe ambele părți ale arborelui hexagonal și fixați roțile. Instalarea ghidonului: rotiți cele două discuri canelate de pe ghidon la dreapta cu discurile canulate de ambele părți ale plăcii discului. Acordați atenție reglării poziției ghidonului.
- Page 10 ①. Deblocați piulițele de pe tija șurubului. ②. rotiți instantaneu tija cu șurub până se vede cea mai scurtă parte a ghidonului. ③. Introduceți capul cablului în mufa ambreiajului din spatele cutiei de viteze și asigurați-vă că el se află în gaura mare a mufei. ④.
- Page 11 Șuruburi în spatele arborelui principal al cutiei de 10~12 viteze Șuruburi în spatele arborelui secundar al cutiei de 26~40 viteze Șuruburi între cadrul motorului și carcasa de rulare 35~40 Șuruburi pe capacul final al angrenajului de rulare 10.6~15 Șuruburi pe bara de tracțiune a angrenajului de 50~60 rulare Șuruburi între treapta de rulare și cutia de viteze...
- Page 12 Figura 9 5. Reumpleți rezervorul cu ulei numărul 90. (vă rugăm să consultați figura 9) Atenție: nivelul de combustibil nu trebuie să depășească semnul (1). 6. Faceți pregătirile de pornire conform instrucțiunilor pentru folosirea motorului pe benzină. Ⅳ pornire (atenție: maneta schimbătorului trebuie să fie în poziție neutră) ATENȚIE: Asigurați-vă...
- Page 13 (3) Rotiți ușor maneta clapetei de accelerație spre dreapta. a. MANETA DE ACCELERARE (4) Trageți ușor mânerul demarorului până când se simte rezistență, apoi trageți rapid. ATENȚIE: Nu permiteți mânerului demarorului să se lovească de motor. Întoarceți-l ușor pentru a preveni deteriorarea demarorului. (5) Pe măsură...
- Page 14 Chiar și cu jet de carburator adecvat, puterea motorului va scădea cu aproximativ 3-5% pentru fiecare creștere de altitudine de 305m (1.000 de picioare). Efectul altitudinii asupra puterii va fi mai mare dacă nu se efectuează nicio modificare a carburatorului. ATENȚIE: Funcționarea motocultorului la o altitudine mai mică...
- Page 15 direcționați) 3. Opriți funcționarea ①. Țineți bara ambreiajului cu mâna stângă pentru a deschide ambreiajul. ②. După reglarea manetei schimbătorului în poziția neutră, ar trebui să deblocați bara ambreiajului pentru a opri motocultorul. ③. Când este necesar să opriți, procedura trebuie efectuată conform instrucțiunilor motorului pe benzină...
- Page 16 spatele arborelui principal, luați manșonul cheii arborelui, împingeți fulia curelei sau fanta cheii de cuplare în cheie, apoi fixați-o cu șurub. Centura trapezoidală Modelul A este utilizat pentru secțiunea transversală a fantei fuliei curelei. Viteza rotativă nominală a fuliei curelei este de 3000r / m. atunci când are atașat mașini-unelte, puteți efectua astfel de lucrări multifuncționale: stropire, pulverizare chimică, treierare, secerare și generare de energie.
- Page 17 motocultorul la ralanti timp de 3 până la 5 minute pentru a-l spăla, apoi goliți complet uleiul. Vă rugăm să realimentați ulei și să efectuați rularea timp de 4 ore conform celei de-a patra proceduri din capitolul 3. Procedând astfel, motocultorul poate funcționa în stare normală. Ⅱ...
- Page 18 Capacitate ulei: 1.1L (1) BUȘON DE SCURGERE (2) CAPAC DE UMPLERE CU ULEI (3) NIVELUL SUPERIOR Spălați-vă pe mâini cu apa și săpun după ce ați atins ulei folosit NOTĂ: Vă rugăm să aruncați uleiul de motor folosit într-un mod care să fie compatibil cu mediul.
- Page 19 deoarece acest lucru va forța murdăria în fibre. (1) ELEMENT DE HÂRTIE (2) ELEMENT DE SPUMĂ 3. Curățarea cupei cu filtru de combustibil AVERTISMENT Benzina este extrem de inflamabilă și explozivă în anumite condiții. Nu fumați și nu permiteți flăcări de scântei în zonă. Rotiți supapa de combustibil în poziția OPRIT și scoateți cupa filtrului de combustibil și inelul O.
- Page 20 • Inspectați vizual bujia. Aruncați-l dacă izolatorul este crăpat sau ciobit. • Măsurați spațiul de conectare cu un instrument de măsurare. Spațiul trebuie să fie de 0,7-0,8 mm (0,028-0,031 in), corectați după cum este necesar prin îndoirea electrodului lateral. • Atașați șaiba de ștecher, înfiletați-o manual pentru a preveni filetarea încrucișată.
- Page 21 ce șaiba este comprimată. Dacă montați una veche, ar trebui să înșurubați doar 1 / 8-1 / 4 filet. Ⅲ Tabelul tehnic de întreținere al motocultorului (marca „0” indică conținutul întreținerii) Intervale de lucru și Lucrați cu jumătate Lucrați o În La doi ani Lucrați 3 luni...
- Page 22 Capitolul 5 Metoda de depanare a motocultorului Ⅰ Metoda de depanare a angrenajului de tăiere în pantă: Când uneltele de tăiere fac un zgomot anormal de puternic, ar trebui să verificați și să depanați imediat. Metodele de depanare sunt: 1. Curățarea dispozitivului de tăiere și a angrenajului de viteze (poza 8) ①...
- Page 23 Atenție: 1. Țineți apăsat, deblocați ghidonul de ambreiaj de două ori până la trei ori. Aceasta este de a verifica starea de lucru a ambreiajului. Dacă este anormal, ar trebui să depanați ambreiajul. 2. Dacă este depanat de mai multe ori și este încă în stare proastă, este cert că...
- Page 24 Capitolul 6 Depanarea Ⅰ Depanarea motorului pe benzină Când motorul nu poate porni: • Există suficient combustibil? • Este supapa de combustibil pornită? • A ajuns la carburator? Pentru a verifica, slăbiți butonul de evacuare cu supapa de combustibil. Combustibilul poate curge liber. Strângeți butonul de golire.
- Page 25 unul singur. Tabelul 6 Simptomă Soluție Motiv Defecțiune a ghidonului Reparați sau schimbați ambreiajului Daună la cablul schimbați ambreiajului Reglarea cablul sau Reglare proastă a furcii schimbarea furcii ambreiajului ambreiajului Eșuarea sudării arborelui Reparați sau schimbați furcii ambreiajului, brațului și cadrului Ambreiajul nu poate fi Schimbați știftul furcii Deformarea sau ruperea...
- Page 26 rotunde Piesa auxiliară este sever Schimbați piesa auxiliară uzată. Viteza de înclinare este Strângeți piulițele slabă Abraziune puternică pe Schimbați elementele gaura brațului brațului Viteza nu poate fi Arcul în arborele principal poziționată schimbați devine inutilizabil Arborele principal se mișcă: suruburile carcasei Strângeți șuruburile sunt slăbite Reglați maneta de...
- Page 27 Inelul O de pe arborele Schimbați inelul O principal devine φ 17×1.8 inutilizabil Există o scurgere Garnitura de ulei de pe de ulei a capacului Schimbați garnitura arborele principal devine posterior pe B25407 inutilizabilă arborele principal Schimbați inelul Inelul O de pe carcasă φ...
- Page 28 Distanța laterală a Reinstalați vitezei este prea îngustă Rotirea arborelui este Reglați prea mică Șuruburile se slăbesc Strângeți Există scurgeri de ulei Garnitura de etanșare Schimbați ale cutie de viteze este deteriorată Există scurgeri de ulei în secțiunea Garnitura de etanșare Schimbați garnitura exterioară...
- Page 29 Capitolul 7 Tabel de instrucțiuni privind instrumentele de atașare Tabelul 10 Număr Nume Unitate Utilizare Roțile pentru arat pe câmp Aratul pe câmp Dispozitiv de pompare a apei (pompă de apă centrifugă în 3 Pomparea apei timpi) Săpător de șanțuri Săparea șanțurilor Capitolul 8 Rulmenții motocultorului Tabelul 11...
- Page 30 folosește Rulment 30206 pentru presiune conducerea în pantă Folosit Rulment pentru 51104 simplu arborele cotit Italia Star Com Due S.R.L. www.italiastar.ro 004/021.433.03.27 info@italiastar.ro...
- Page 31 Service autorizat:...
- Page 33 ■ Something about this manual Thank you for choosing our tiller! ·This manual contains about operation and maintenance of BTA-10SG/13SG tillers. ·All contents in this manual are based on the latest information when the manual is printed. ·The manufacture has the right to revise the manual without any prior notice and will not bear any legal responsibility.
- Page 34 ATTENTION ●When starting engine, please turn gear lever to neutral position. ●When the machine is working, please pay attention to safety! ●Be careful about the rotary blades, because they may hurt you! ●When holding the backshift bar, the gear lever must be put in the neutral position.
-
Page 35: Table Of Contents
Contents Chapter1 Profile of tille r............1 Ⅰ: specification…………………………….…………………………1 Ⅱ : g e n e r a l p i c t u r e s … … … … … … … … … … … … … … . . . 1 Ch ap ter2 Main func tion o f tiller.………………………... -
Page 36: Chapter1 Profile Of Tiller
Chapter1 Profile of tiller Ⅰ specification: Items and models BTA-13SG BTA-10SG (10 HP) (13HP) Dimension(L×W×H)mm 1755×1100×870 1800×1100x870 Max tilling scope(mm) 1350 Tilling depth 150~300 Tillers Gear shifting -1, 1 ,0, 2 Main running-in method Machine grind-in Gear distance(mm) Productivity(m 550~1000... -
Page 37: Chapter2 Main Function Of Tiller
Chapter2 Main function of tiller ⅠRotary tillage: Rotary tillage components are installed on both sides of the driving shaft of tiller running gear. Tighten the shaft with two bolts M8×55. Then the tiller can work. (Look at table2 and Picture2). Table 2 3groups 5groups... -
Page 38: Chapter3 Operation And Application Of Tiller
Chapter3 Operation and application of tiller Ⅰun packing assembly(Picture4) 1. Fix the body of tiller, install running wheels on both sides of hexagonal shaft and fix the wheels with 2 bolts M8×55, 2 nuts M8. 2. Handle bar installation: turn the two fluted discs on the handlebar to right with the fluted discs on both sides of the disc plate. -
Page 39: Ⅲchecking And Refueling
①. Unlock nuts on the screw rod. ②. Instantaneously rotate the screw rod to show the shortest part of the handle bar. ③. Thread the cable head into clutch plug behind the gear box assy and make sure the head is in the big hole of the plug. ④. - Page 40 Name Moment(N.M) Flange and gasoline engine 20~25 Flange and gear box 35~40 Bolts behind the main shaft of gear box 10~12 Bolts on the backshift shaft of gear box 26~40 Bolts between the engine frame and running case 35~40 Bolts on the end cover of running gear 10.6~15 Bolts on the drag bar of running gear 50~60...
-
Page 41: Ⅳ : S T A R T I N G
Picture 9 5. Refuel the oil tank with num.90. (please refer to Picture 9) Attention: fuel level should not exceed above the mark (1). 6. Make fore starting preparations according to the gasoline engine instruction. Ⅳstarting(attention: the shift lever must be in the neutral position) CAUTION: Be sure the clutch is disengaged and the shift lever is in the neutral position to prevent sudden uncontrolled movement when engine starts. - Page 42 (3)Turn throttle lever slightly to the right. a.THROTTLE LEVER (4)Pull starter grip lightly until resistance is felt then pull briskly. CAUTION: Do not allow the starter grip to snap back against the engine. Return it gently to prevent damage to the starter. (5)As the engine warms up, gradually open the choke.
-
Page 43: Ⅴ. Operation
7.high altitude operation At high altitude, the standard carburetor air–fuel mixture will be excessively rich. Performance and fuel consumption will increase. High altitude performance can be improved by installing a smaller diameter main fuel jet in the carburetor and readjusting the pilot screw. If you always operate the tiller at altitude higher than 1,830m (6,000 feet) above sea level ask your authorized dealer to perform these carburetor modifications. -
Page 44: Ⅵconnection Of Attaching Tools
③. Slowly unlock the clutch bar to close the clutch. In this situation, tiller can run at slow gear. ④. Speed up properly with right hand, then tiller can run at a low speed of 5km/h. 2. Fast gear ①. Hold the clutch bar with left hand to open the clutch. ②. - Page 45 of rotary device on both sides of the hexagonal shaft with boltsM8×55. Attention: there are blade units on both sides; make sure the blade cutting edge works firstly when the tiller runs. After the rotary blades are installed, you must install the safety panel to prevent injures by blades.
-
Page 46: Ⅶ.attention Items Of Using Tiller
out such multifunctional work: bailing, sprinkling, chemical spraying, threshing, reaping and generating power. Ⅶ.Attention items of using tiller 1. When using tiller, you should pay attention to the working situation and sound of every part, check if the connection is good. There mustn’t be loosed connection. -
Page 47: Ⅱtechnical Maintenance Of Tiller
immediately. Afterwards, you should refuel adequate clean oil, run the tiller at idle speed for 3 to 5 minutes to wash it , then drain oil completely. Please refuel oil and carry out running-in for 4 hours according to the forth procedure of chapter3. By doing so, the tiller can work in normal condition. - Page 48 drainage ·Remove the oil filler cap and drain the oil. ·Refill with the recommended oil and check its level. Oil capacity: 0.6 L (1) DRAIN PLUG (2) OIL FILLER CAP (3) UPPER LEVER Wash your hands with soap and water after touching used oil. NOTE: Please dispose used motor oil in a manner that is compatible with the environment.
- Page 49 · Foam element: clean in warm soapy water, risen and allow to dry thoroughly or clean in high flash-point solvent and allow to dry. Dip the element in clean engine oil and squeeze out all the excess. The engine will smoke during initial start –up if too much oil is left in the foam.
- Page 50 1. Spark plug service Recommended spark plug: BPR5ES (NGK) W16EPR-U (NIPPONDENSO) To ensure proper engine operation, the spark plug must be properly gapped and free of deposits. ·Remove the spark plug cap. WARNING If the engine has been running the muffler will be very hot. Be careful not to touch the muffler.
-
Page 51: Ⅲ Technical Maintenance Table Of Tiller
·When mounting a new spark plug, you should screw 1/2 more thread with the wrench after the washer is compressed. If you are mounting an old one, you should only screw 1/8-1/4 more thread. Ⅲ Technical maintenance table of tiller(mark”0” indicates the maintenance contents) Work Per 2... -
Page 52: Chapter5 Debugging Method Of Tiller
Adjust operation parts Friction plate of clutch Gears and bearings Ⅳ.Long-period storage of tiller When tiller needs storing for a long period, the following measures should be taken to prevent tarnishing. 1. Keep gasoline engine with seal according to its instruction. 2. -
Page 53: Ⅱdebugging Method Of Backshift Gear And Cable
meanwhile, ensure clearance of gear Ⅱshaft is 0.05~0.15; or increase gasket Ⅱ,meanwhile, ensure clearance of gear Ⅰ is 0.05~0.15. ⅡDebugging method of backshift gear and cable When reverse of tiller is abnormal, you should debug the backshift handlebar and cable. As for the method, please refer to chapter3. Attention: 1.Hold, unlock backshift handlebar twice to three times, which is to put into gear. -
Page 54: Chapter6 Troubleshooting Of Tiller
① Unlock the handlebar elements, disengage the terminal fangs between the handlebar and handle frame ② Set the position of handle bar according to one’s height and habits. ③ Revolve the handlebar to let terminal fangs meet between the handlebar and handle frame. 2. -
Page 55: Ⅱ Troubleshooting Of Clutch
·Is there a spark from the spark plug? ·Remove spark plug cap. Clean any dirt around the spark plug base, then remove the spark plug. ·Install spark plug to the plug cap. ·Turn engine switch on. ·Grounding side electrode to any engine ground, pull recoil starter to see if sparks jump across the gap. -
Page 56: Ⅲtroubleshooting Of Gear-Box
runs normally after Check the jointing unlocking the handlebar, section between the Clutch fork shaft but the main shaft of gear locating bearing and becomes useless box does not run or runs pusher to make it slowly ) flexible Maladjustment of clutch Readjust clutch cable cable ⅢTroubleshooting of gear-box... -
Page 57: Ⅳtroubleshooting Of Running Gear
The backshift shaft Change the backshift shaft becomes curved Bolts behind the backshift Tighten the bolts shaft become loose Backshift shaft becomes loose The backshift shaft and Change case are not well fitted Bevel gear shaft and backshift shaft become Change curved Gear noise is too... -
Page 58: Ⅴtroubleshooting Of Other Parts
Lube in the case is Refuel lube according to insufficient the requirement Gear side clearance is Overheat Reinstall too narrow Shaft windage is too Readjust narrow There is oil leakage Bolts become loose Tighten of gear box Seal gasket is damaged Change There is oil leakage of outer-section of... -
Page 59: Chapter7 Instruction Table Of Attaching Tools
Chapter7 Instruction table of attaching tools Table 10 Number Name Unit Usage Rotary tilling wheels of paddy field Tilling in paddy field Water pumping device(centrifugal Water pumping water pump3-stroke) Ditcher Ditching Chapter8 Bearings of tiller Table 11 Number Model Name Specification Quantity Remark... - Page 60 Authorized service:...
Need help?
Do you have a question about the BTA-10SG and is the answer not in the manual?
Questions and answers