Advertisement
Advertisement

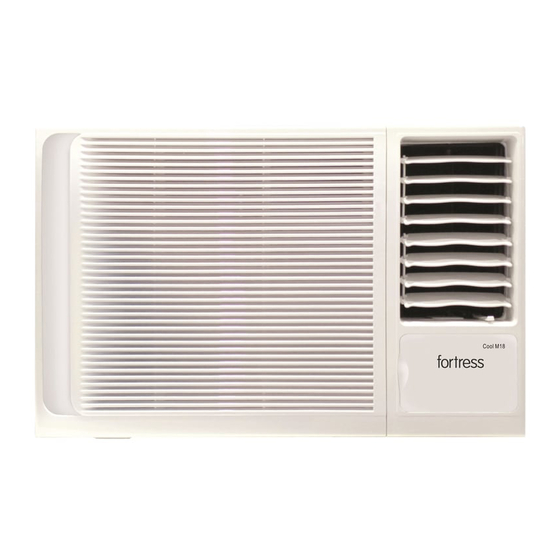
Related Manuals for Fortress Technologies FWAD08M18


Summary of Contents for Fortress Technologies FWAD08M18
- Page 1 Window Type Air Conditioner User Manual Model FWAD08M 18 FWAD10M 18 FWAD13M 18 FWAD19M 18 使用或安裝本產品前,請仔細閱讀本說明書,及所有安全注意事項, 並請妥善保存,以備日後參考查閱。 Before operating or installing the appliance, please read this manual and all the safety instructions thoroughly and retain it for future reference.
-
Page 2: Table Of Contents
CONTENTS SAFETY INSTRUCTION..............2 PARTS DESCRIPTION..............5 OPERATION INSTRUCTION ............6 INSTALLATION INSTRUCTION............13 TROUBLESHOOTING ..............16 SPECIFICATIONS................17 WARRANTY ..................18 Read This User Manual You can find many helpful information on how to use and maintain the air conditioner properly. Just a little preventive care on the parts can extend the life of the air conditioner. Read the troubleshooting tips before call the service centre. -
Page 3: Safety Instruction
SAFETY INSTRUCTION Please follow below instructions to prevent injury and property damage. Meanings of symbols in this user manual. Never do this. Always do this. WARNING Do not put the power cord near Close the door while the Do not damage or use an flammable gas or combustibles, such unspecified power cord. - Page 4 ! CAUTION When remove the air filter, Ventilate the room well when Do not clean the air do not touch the metal parts used together with a stove, conditioner inner with water. of the unit. etc. It may cause an injury. An oxygen shortage may occur.
- Page 5 SAFETY INSTRUCTION Before operation 1. Contact an installation specialist for installation. 2. Do not use a damaged or non-standard power cord. 3. Do not share the same outlet with other appliances. Usage 1. Exposure to direct airflow for a long period of time could be hazardous to the health.
-
Page 6: Parts Description
PARTS DESCRIPTION NOTE: The front panel and cabinet may be slightly different according to the models, but the functions are the same. The following illustration is for explanation purpose only, the actual shape of the machine may be slightly different. 1. -
Page 7: Operation Instruction
OPERATION INSTRUCTION Control Panel The control panel will look like the following: NOTE: The outline of the operation panel is based on typical model, the function is same with the actual machine even some differences may exist in appearance. Vent Control The vent control is located above the control panel. - Page 8 OPERATION INSTRUCTION OPERATION INSTRUCTION POWER: Press the POWER button to turn the unit on/off. (The TIMER button controls the auto stop feature of the unit.) MODE: Press the MODE button to select the appropriate operating mode. The mode selection including AUTO, COOL, FAN and DRY. The green indicator light beside the "MODE" button will illuminate to identify the mode selected.
- Page 9 OPERATION INSTRUCTION DRY: In the DRY mode, the air conditioner will generally operate in the form of a dehumidifier. COOL: The temperature setting are adjustable between 17 C to 30 C . Cooling begins auto- matically when the room temperature is 1 C above the set point, and stops when the room temperature is 1 C below the set point.
- Page 10 REMOTE CONTROL OPERATION CAUTIONS Use the remote control within a distance of 5 meters from the air conditioner. A sound of beep will be generated by the air conditioner when signals received. Never immerse the remote control in water or other liquids. Do not put it under direct sunshine. If the signal receiver on the air conditioner is exposed to direct sunshine, the air conditioner may be not function properly.
- Page 11 REMOTE CONTROL DISPLAY Mode display Display Information AUTO COOL HEAT Displayed when data transmitted. Displayed when remote controller is ON. Battery display(low battery detection) Not available for this unit Displayed when TIMER ON time is set. Displayed when TIMER OFF time is set. Show set temperature or room temperature, or time under TIMER setting.
- Page 12 OPERATION INSTRUCTION CAUTION NEVER operate the air conditioner without the air filter, as dust/dirt particles can cause equipment failure. CONTROL PANEL COVER Close the control panel cover and press the Grasp the right of the control panel cover and right of the cover again until it snaps into the pull it upwards to open it .
- Page 13 Drainage Back Drainage Different requirement for different type of air conditioner, there are two methods to treat the condensed water. See the following procedures to perform back drainage: 1. Fit the seal onto the drain joint (which is provided with the air conditioner accessory).
-
Page 14: Installation Instruction
INSTALLATION INSTRUCTION Select the best location AWNING AWNING FENCE FENCE About 10mm About 10mm Over 50cm Over 50cm 1. To avoid vibration and noise, make sure the unit is installed securely and firmly. 2. Install the unit where the sunlight does not shine directly. If the unit is installed under direct sunlight, build an awning to shade the cabinet. - Page 15 Installation of the Cabinet NOTE: UNIT CAN BE SUPPORTED BY A SOLID FRAME FROM BELOW OR BY A HANGER FROM A SOLID Step 1 OVERHEAD SUPPORT. Remove the air conditioner from the package, remove fixing FLASH OR SEAL AROUND EXTERNAL screws and slide the air conditioner out from the cabinet (Refer WALL FRAME OR ARCHITRAVE to Installation Steps).
- Page 16 Installation Steps Step 1. Remove the front panel and the air filter 1. Hold the tabs under the front panel, then uplift it outwards, and remove the front panel (See Fig.1). 2. Pinch the handle under the air filter and make the air filter arched, remove it from the slot from underside to upside (See Fig.2).
-
Page 17: Troubleshooting
TROUBLESHOOTING Please review the chart first before you call for service. Normal Operation You may hear a pinging noise caused by water being picked up and thrown against the condenser on rainy days or when the humidity is high. You may hear the thermostat click when the compressor turns on and off. Water will be collected in the base pan during high humidity or on rainy days .The water may overflow and drip from the outdoor side of the unit. -
Page 18: Specifications
SPECIFICATIONS BODY DIMENSION(mm) WIRING SIZE TYPES(Btu/h) (W x H x D) (mm ) 450x346x585 ≥3*1.0 ≤9000 600x380x560 ≥3*1.5 > 9000 and ≤12000 660x428x680 ≥3*2.5 ≥18000... -
Page 19: Warranty
WARRANTY The product has 3 years warranty from the date of purchase. The warranty shall not apply: A. to any product subjected to misuse, alteration, act of God, improper handling, improper transport, improper testing or unauthorized repair; B. to cosmetic problems or defects which result from normal wear and tear under ordinary use yet not affecting the performance or use of the product;... - Page 20 安全注意事項 產品零件介紹 操作說明 安裝說明 疑難小百科 規格表 保用期資料 本使用說明書提供了許多有關冷氣機正確使用與維護的實用提示。衹要稍加注意,就 能延長冷氣機的使用壽命。在疑難小百科中,您可以找到許多常見問題的解法方法。 聯絡維修中心前,請先瀏覽疑難小百科。 請聯絡授權的技術人員進行維修或保養本產品 。 請聯絡授權的技術人員安裝本產品 。 除非有安全人員的指導或協助下 , 並確保使用者的安全 , 否則此冷氣機不可由兒童 、 精神病人 、 殘疾人士及反應過慢之人士使用 。 切勿讓兒童把玩冷氣機 。 電源線袛能由廠方授權的技術人員或同權合資格的技術人員進行更換 , 以免發生意外 。 清潔或保養前,請先關掉電源與供電斷路器 。...
- Page 24 ON/OFF SHORT MODE TIMER TEMP TIMER SLEEP TURBO 2 ( ≤ 12000Btu ) 4 ( ≥ 18000Btu )
- Page 25 MODE...
- Page 26 便會以風速 HIGH...
- Page 27 便會以風速 並...
- Page 28 快捷(SHORTCUT )按鈕 :用於恢復當前設置或恢復以前的設置。 (如果室內機不支持此功能,則按下此按鈕時不會發生相應的 操作。) 在第一次連接電源時,如果按下SHORTCUT 按鈕,本機將在 AUTO模式下運行,26℃,風速為自動模式。 ON/OFF SHORT 當遙控器開啟時按下該按鈕,系統將自動恢復到以前的設置, 包括操作模式,設置溫度,風速和睡眠功能(如果啟用)。 TIMER MODE TEMP 如果超過 2 秒鐘,系統將自動恢復當前的操作設置,包括 TIMER 操作模式,設置溫度,風速和睡眠功能(如果啟用)。 SLEEP TURBO 定時開機 (TIMER ON )按鈕:按此按鈕,開啟自動啟動時間 順序。每按一次,將以 30 分鐘的增量增加自動定時設置。 fortress 當設置時間顯示10 時,每次按下將增加自動定時設置 60分鐘 增量。要取消自動定時程序,只需將自動啟動時間調整為 0.0。 定時停機 (TIMER OFF )按鈕:按此按鈕,啟動自動關閉時間 順序。每按一次,將以 30 分鐘的增量增加自動定時設置。 當設置時間顯示10 時,每次按下將增加自動定時設置...
- Page 29 顯示屏資料內容 模式顯示: 自動 製冷 除濕 製熱 送風 數據傳輸時顯示。 當遙控器開啟時顯示。 電池顯示(低電量檢測) 不適用於本機 TIMER ON 時間設置時顯示。 TIMER OFF 時間設置時顯示。 顯示設定溫度或室溫,或在 TIMER 設置下顯示時間。 在睡眠模式下顯示操作。 不適用於本機 不適用於本機 不適用於本機 風速指示: 低速 中速 高速 自動 注意: 圖中所示的所有指標均以清晰的介紹 為目的。 但是在實際操作中,只有顯 示窗口上顯示相對的功能符號。...
- Page 30 在沒有安裝濾塵網之前, 不能開啟冷氣機, 塵埃或污垢粒子會損害冷氣機設備 。...
- Page 31 並...
- Page 32 並...
- Page 33 並 並 位於 200 *...
- Page 34 掛...
- Page 35 疑難小百科 聯絡維修中心前請先看看下表 。 髒 冷氣機 製冷不夠 溢...
- Page 36 450x346x585 ≥3*1.0 ≤9000 600x380x560 ≥3*1.5 > 9000 ≤12000 660x428x680 ≥3*2.5 ≥18000...
- Page 37 保用期資料 由購買日期計正常使用下提供三年保用。 保用不包括下列各項: 產品錯誤使用、被更改、天災、因運輸拆卸不當、錯誤測試或不合格維修; 在正常使用情況下產生的正常損耗導致外觀問題或瑕疵而不影響產品功能; 如產品被拆開或更改; 產品的包裝、運輸費及出入口關稅或任何相關費用 在保用期內,所有正常使用下損壞的電器之檢查、維修及零件費均會獲得豁免。免費更換 的零件並不包括以下項目: • 各類隔塵網、外殼、塑膠附件及配件 • 非家庭使用或非個人用途之貨品 請妥善保存產品購買發票/單據。必須出示產品購買發票/單據方可獲三年保養服務。 如需要任何維修服務,請聯絡豐澤維修服務部 電話:2555-5788 注意事項 本產品必須插在或連接 220-240V 的專用插座, 並確保插頭完全插入插座後方能使用。切勿使用萬能 插座及延長電源線。 本產品屬高耗電量電器,不應與其他高耗電量電器共用插座。 此產品只作一般家庭用途。 環境保護 本產品使用壽命結束時請勿與一般家庭廢棄物一併丟棄。請將該產品放置於政府指定 的回收站。此舉能為環保盡一份心力。 重要信息 儘管本公司或其生產商受知會,在任何情況下本公司或其生產商將不須就任何聲明、承諾及保證 的索償而負責及不會向客戶或第三方承擔任何因使用或未能使用此產品所帶來直接的、非直接 的、非專業的、特殊的、偶然的、間接的、有代表性的或其他任何損傷的責任(包括但不限於身 體的損傷、財產的損失、公司盈利的損失、公司運作受中斷)。在任何情況下本公司或其生產商 所承擔之責任將不會超過此產品之購買金額。 。 產品如有任何技術規格更改不作另行通知...
- Page 40 16120300A06782...
Need help?
Do you have a question about the FWAD08M18 and is the answer not in the manual?
Questions and answers