
Subscribe to Our Youtube Channel
Related Manuals for Fortress Technologies FWAC08M13


Summary of Contents for Fortress Technologies FWAC08M13
-
Page 1: User Manual
Window Air Conditioner User Manual Model FWAC08M13 FWAC10M13 FWAC13M13 FWAC19M13 Before operating or installing the unit, please read this manual thoroughly and retain it for future reference. -
Page 2: Table Of Contents
CONTENTS 1. SAFETY INSTRUCTION ..............2 2. PARTS DESCRIPTION ..............5 3. OPERATION INSTRUCTION ............6 4. INSTALLATION INSTRUCTION ............10 5. TROUBLE SHOOTING ..............13 6. SPECIFICATIONS ................14 7. WARRANTY ..................15 Read This User Manual You can find many helpful information on how to use and maintain the air conditioner properly. -
Page 3: Safety Instruction
SAFETY INSTRUCTION Please follow below instructions to prevent injury and property damage. Meanings of symbols in this user manual. Never do this. Always do this. WARNING Close the door while the Do not put the power cord near Do not damage or use an flammable gas or combustibles, such unspecified power cord. - Page 4 ! CAUTION When remove the air filter, Ventilate the room well when Do not clean the air do not touch the metal parts used together with a stove, conditioner inner with water. of the unit. etc. It may cause an injury. An oxygen shortage may occur.
- Page 5 SAFETY INSTRUCTION Before operation 1. Contact an installation specialist for installation. 2. Do not use a damaged or non-standard power cord. 3. Do not share the same outlet with other appliances. Usage 1. Exposure to direct airflow for a long period of time could be hazardous to the health.
-
Page 6: Parts Description
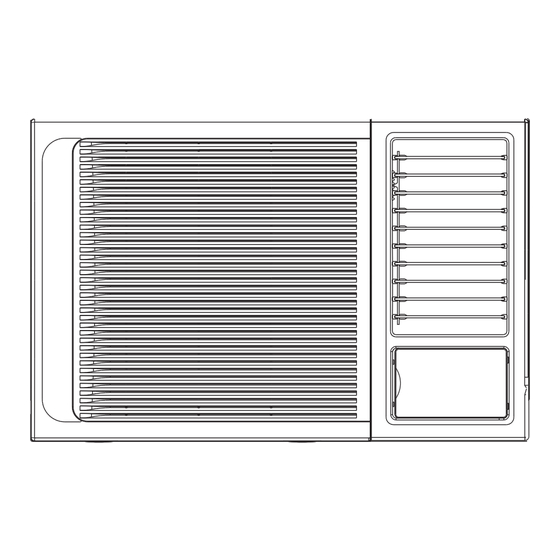
PARTS DESCRIPTION NOTE: The front panel and cabinet may be slightly different according to the models, but the functions are the same. The following illustration is for explanation purpose only, the actual shape of the machine may be slightly different. 1. -
Page 7: Operation Instruction
OPERATION INSTRUCTION Control Panel The control panel will look like the following: Types 7000~12000Btu/h Type 18000Btu/h AUTO SWING THERMOSTAT SELECTOR AUTO SWING COOLER COOL COOLER HIGH HIGH COOL COOL COOL HIGH HIGH COOL TEST MODE COOL TEST MODE SELECTOR THERMOSTAT PLEASE WAIT THREE MINUTES BEFORE RESTARTING PLEASE WAIT THREE MINUTES BEFORE RESTARTING NOTE: The outline of the operation panel is based on typical model, the function is same with the actual... - Page 8 OPERATION INSTRUCTION THERMOSTAT Thermostat The thermostat is used to set the desired room THERMOSTAT temperature when the unit is being operated in the COOL MODE. To set the desired room temperature, rotate the thermostat knob to the desired setting. After the set temperature is achieved the thermostat will automatically start and stop the compressor in order to maintain the desired set temperature.
- Page 9 Vent Control The vent control is located above the control panel. The operation method is different on different models (see the following figures). For maximum cooling efficiency, CLOSE the vent. This will allow internal air circulation. OPEN the vent to discharge stale air. CLOSE OPEN CLOSE...
- Page 10 Air Filter How to remove the air filter 1. Hold the tabs under the front panel, then uplift it outwards, and remove the front panel. 2. Pinch the handle under the air filter and make the air filter arched, remove it from the slot from underside to upside. 3.
-
Page 11: Installation Instruction
INSTALLATION INSTRUCTION Select the best location AWNING AWNING FENCE FENCE About 10mm About 10mm Over 50cm Over 50cm 1. To avoid vibration and noise, make sure the unit is installed securely and firmly. 2. Install the unit where the sunlight does not shine directly. If the unit is installed under direct sunlight, build an awning to shade the cabinet. - Page 12 Installation of the Cabinet NOTE: UNIT CAN BE SUPPORTED BY A SOLID FRAME FROM BELOW OR BY A HANGER FROM A SOLID Step 1 OVERHEAD SUPPORT. Remove the air conditioner from the package, remove fixing FLASH OR SEAL AROUND EXTERNAL screws and slide the air conditioner out from the cabinet (Refer WALL FRAME OR ARCHITRAVE to Installation Steps).
- Page 13 Installation Steps Step 1. Remove the front panel and the air filter 1. Hold the tabs under the front panel, then uplift it outwards, and remove the front panel (See Fig.1). 2. Pinch the handle under the air filter and make the air filter arched, remove it from the slot from underside to upside (See Fig.2).
-
Page 14: Trouble Shooting
TROUBLESHOOTING Troubleshooting Tips Please review the chart first before you call for service. Normal Operation You may hear a pinging noise caused by water being picked up and thrown against the condenser on rainy days or when the humidity is high. This design feature helps remove moisture and improve efficiency. -
Page 15: Specifications
SPECIFICATIONS BODY DIMENSION(mm) WIRING SIZE TYPES(Btu/h) (W x H x D) (mm ) 450x346x535 > 3*1.0 < 9000 > 600x380x560 3*1.5 > 9000 and <12000 > 18000 660x428x680 > 3*2.5... -
Page 16: Warranty
WARRANTY 1. The product has 2 years warranty from the date of purchase. 2. The warranty shall not apply: A. To any Product subjected to accident, misuse, neglect, alteration, Acts of- God, improper handling, improper transport, improper use, improper testing or unauthorized repair; B. - Page 21 ¿ Õ μ ÷ » ú Á ã ¼ þ Ã û Æ...
- Page 22 7000~12000Btu/h 18000Btu/h AUTO SWING THERMOSTAT SELECTOR AUTO SWING COOLER COOL COOLER HIGH HIGH COOL COOL COOL HIGH HIGH COOL TEST MODE COOL TEST MODE SELECTOR THERMOSTAT PLEASE WAIT THREE MINUTES BEFORE RESTARTING PLEASE WAIT THREE MINUTES BEFORE RESTARTING SELECTOR COOL COOL HIGH HIGH...
- Page 23 THERMOSTAT COOLER TEST MODE AUTO SWING...
- Page 27 200 *...
Need help?
Do you have a question about the FWAC08M13 and is the answer not in the manual?
Questions and answers