Advertisement
Quick Links
Advertisement

Subscribe to Our Youtube Channel
Related Manuals for Fenix Mistral 3.3


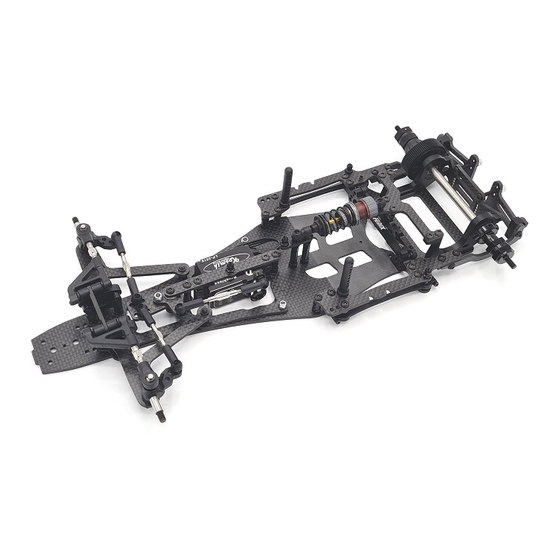
Summary of Contents for Fenix Mistral 3.3
- Page 1 Fenix Mistral 3.3 Fenix Mistral 3.3 Rev. 0.1 Oct 2021 Rev. 0.1...
- Page 2 Before building and operating your MISTRAL 3.3, YOU MUST read through all of the operating instructions and instruction manual and fully understand them to get the maximum enjoyment and prevent unnecessary damage. Read carefully and fully understand the instructions before beginning assembly.
- Page 3 Carbon Nut assembly Read me first!!! --------- --------- Mistral 3.3 use this kind of special nut in several places. Just take your time and the result will be great. Those comes already pre-assembled, but is always good to know “how to”, just in case of…...
- Page 4 Fenix Mistral 3.3 Bag A Front End assembly Please note that M33-9 are optimized for Ride GR offset wheels. 2 x G56038 Sphere holder 2 x M20-K3 6mm sphere Insert the sphere into the holder from the lower side Make 2 sets...
- Page 5 Fenix Mistral 3.3 Insert the group into the front arm Fix the sphere holder with the provided Oring Make 2 sets mirror like Note: Be sure that the sphere holder fit easily, you might have to enlarge the 8mm hole with some sandpaper.
- Page 6 Fenix Mistral 3.3 Note: Front arms are removed for sake of clarity. Install the G560039 suspension holder, use 2 x HW026 M3x12 + 2x HW0020 M3x16 countersunk screw. Use 4 x FX0088 5mm shims Note: Longer screws goes in the front Do not tight them now…...
- Page 7 Fenix Mistral 3.3 Set the distance at 13mm (Ride) Insert the G56-034 hinge pins and secure them with the HW031 M2x4 screw Steering hub Make 2 sets mirror like Insert the seeger into the kingpin Slide the kingping into the eyelet and the...
- Page 8 Those are be used to adjust the static caster. Setup of them is symmetric. Servo and servo saver are not included, Mistral 3.3 need a low profile or super low profile servo. Note: the dimension of the servo suggested Use the 4 x HW008 M3x8 countersunk screw to fix the FX022 servo mount.
- Page 9 Fenix Mistral 3.3 Assembled group. Servo saver should be vertical when servo is neutral. M33-10 servo holder assembly. Use 2 15mm post, according the servo, you might need to shim those by 0.5mm FX-FU48 Fix the with 1 HW0012 – 3 x 6mm countersunk.
- Page 10 Fenix Mistral 3.3 Assembly the steering linkage as shown. Take some care when insert the bearings in the carbon fibre. Note: you might have to enlarge the 8mm hole with some sandpaper. Do not exceed. Note: Take some time when aligning the carbon plates.
- Page 11 Fenix Mistral 3.3 Make 2 tie-rod with 22.5mm and 1 with 24mm Connect the 24 mm one to servo and the other 2 to the steering hubs Ball male stud should be used on the servo horn. Use one HW003 M3x8...
- Page 12 Bag B Motor Pod NOTE: Before start to assembly the rear end of Mistral 2-0, we strongly suggest you, to visit the Fenix Racing Youtube channel and look the “V-link suspension setup” video… Using 3 x HW012 M3x6 countersunk screw fix the V-link F2 to the M33-4 motor pod.
- Page 13 Fenix Mistral 3.3 Build 2 set of link using 2 x TR16 and 4 FX0037 - short Keep this dimensions. Fix the link over the V- link F2 Using 4 x HW012 countersunk screws, fix the motor holder to the motor pod.
- Page 14 Fenix Mistral 3.3 Fix the M33-6 wing stay to the group using 4 x HW008 M3x6 button screw. Tight the screws evenly using an “X” pattern Insert the ride height adjuster and the flanged bearings (bearings are in the differential bag)
- Page 15 Fenix Mistral 3.3 How about a cup of coffee now? You deserve it! While you drink it… you can read the manual… Bag C Rear V-link common parts Rev. 0.1...
- Page 16 Fenix Mistral 3.3 Prepare 2 sets – note the position of the spheres. Use 2 x HW0014 M2x 6 screws and 2 FX002 spheres each Prepare side spring group set as shown Assembly the 2 side dampers as shown Assembly...
- Page 17 Fenix Mistral 3.3 Prepare 2 mirror like side element, using M33-13 Fix the FU-FX48 and the body post using HW003 M3x8 button screw. Insert side spring group into the carbon fibre Note: special attention when “thread” the grub screw in the carbon...
- Page 18 Fenix Mistral 3.3 Note: See later in manual “angled link” explication Insert the G56042A spacer between the carbon side wing and the link sphere. Note: Newer G56042A allow to set the angled link in the easiest way. Install the side link you’ve prepared.
- Page 19 Fenix Mistral 3.3 Now you can couple the motor pod to the chassis group. M33-5 shock holder, using 4 by HW008 3x6 button screw. Side links can be installed using 2 x HW012 M3x6. Install now the side dampers To assembly the front wing.
- Page 20 Fenix Mistral 3.3 Bag D Central shock holder Cross battery Using 2 x HW007 M3x8 countersunk screw, fix 2 FX0054-26mm posts to the chassis Fix the M33-7 mini shock holder using 1 x HW003 M3x8 button screw, 1 x HW034...
- Page 21 Fenix Mistral 3.3 Shock Insert a seeger into the first seat on the shock shaft. Then your preferred piston (4 holes cylindrical suggested) and then insert a second seeger into the proper seat. Insert the o-ring into adjusting ring. Lubricating it –...
- Page 22 Fenix Mistral 3.3 Screw the cup holder on the shock shaft, insert your favourite spring and insert the spring holder as shown Please note: Pistons are supplied in 2 versions. Standard cylindrical holes and conical holes. Conical allows to choose “harder/softer”...
- Page 23 Fenix Mistral 3.3 Use 4 x HW003 M3x8 button screw and assembly the M20-6 wing holder to the shoulders Do not tight them fully now. Note: The peculiar shape of M20-8 allow most rear wing to be assembled also “inside”.
- Page 24 Also, check our Youtube channel for differential assembly tips. Tech area MISTRAL 3.3 represent a major breakthrough in the F1 class. Nothing comes close to this F1 model. We’ve had several drivers developing the car, from Club racers to ETS A-main finalist, we’d like to thank all of them for the time and dedication they put in this project.
- Page 25 Fenix Mistral 3.3 Most of the time, you’ll find a very comfortable setting using A2 or A3 position Of course the 2 connection link must have the same length!!! Here you can see how to set the V-link! Rev. 0.1...
- Page 26 Fenix Mistral 3.3 Stay in touch with us! Facebook Instagram Twitter Youtube Fenix-Racing Fenix racing shop Rev. 0.1...
Need help?
Do you have a question about the Mistral 3.3 and is the answer not in the manual?
Questions and answers