
Related Manuals for Yaesu FTM-3207DR


Summary of Contents for Yaesu FTM-3207DR
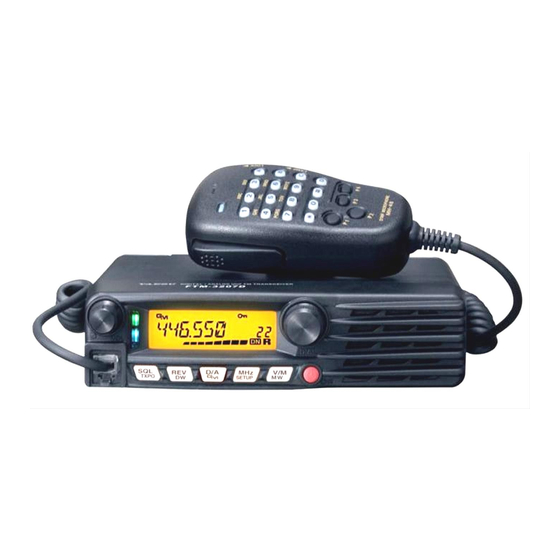
- Page 1 FTM-3207DR/DE Advance Manual UHF DIGITAL/ANALOG TRANSCEIVER C4FM/FM DIAL M H z V / M TXPO SETUP...
-
Page 2: Table Of Contents
Priority Channel Scanning (Dual Watch) ..............21 Priority Revert Mode ....................21 GM Function ........................22 GM Alert Beep ......................22 GM Polling Interval ....................... 22 Clone ..........................23 Setup (Menu) Mode ...................... 24 Menu Selection Details ....................27 FTM-3207DR/DE Advance Manual... -
Page 3: Basic Operation
(S1 - S8 or OFF). Default: OFF 4. Press and hold in the [ MHz ( SETUP )] key for one second to save the new setting and exit to normal operation. FTM-3207DR/DE Advance Manual... -
Page 4: Advanced Operation
Advanced Operation Programming the Key Assignments Default FTM-3207DR/DE key functions have been assigned to the Microphone [ P3 ] / [ P4 ] keys at the factory. The user may change these key function assignments, if quick access to another function is desired. -
Page 5: Split Tone Operation
Advanced Operation Split Tone Operation The FTM-3207DR/DE can be configured to operate in a “Split Tone” system via the Setup menu, to facilitate operation on repeaters using a mix of both CTCSS and DCS control. 1. Press and hold in the [ MHz ( SETUP )] key for one second to enter the Set mode. -
Page 6: Tone Search
3. Press the [ MHz ( SETUP )] key, and then rotate the DIAL knob to select “TSQL”. 4. Press and hold in the [ MHz ( SETUP )] key for one second to save the new setting and exit to normal operation. FTM-3207DR/DE Advance Manual... -
Page 7: Dcs Search
3. Press the [ MHz ( SETUP )] key, and then rotate the DIAL knob to select “DCS”. 4. Press and hold in the [ MHz ( SETUP )] key for one second to save the new setting and exit to normal operation. FTM-3207DR/DE Advance Manual... -
Page 8: Epcs (Enhanced Paging & Code Squelch) Operation
6. Press and hold in the [ MHz ( SETUP )] key for one second to lock in that tone and exit to normal operation. Note: The FTM-3207DR/DE does not recognize the order of the 1st tone and the 2nd tone. In other words, for example, the FTM-3207DR/DE considers both CTCSS pairs “05, 47”... -
Page 9: Activating The Enhanced Paging & Code Squelch System
5. To disable the Enhanced Paging & Code Squelch, just repeat the above procedure, rotating the DIAL knob to select “OFF” in step 3 above. When the Enhanced Paging & Code Squelch feature is activated, the “P” notation will appear on the right of the frequency display. FTM-3207DR/DE Advance Manual... -
Page 10: Dtmf Operation
DTMF Operation DTMF tones (Dual Tone Multi Frequencies) are the tones you hear when dialing from a telephone keypad. The FTM-3207DR/DE transceiver can transmit the DTMF codes by using the keys on the microphone or recalling registered number strings from memories. -
Page 11: Registering A Dtmf Code
7. When entry of all digits is complete, press and hold in the [ MHz ( SETUP )] key for one sec- ond to set the DTMF code and exit to normal operation. FTM-3207DR/DE Advance Manual... -
Page 12: Transmitting The Registered Dtmf Code
DIAL knob to select the desired speed (“50 MS”: High speed or “100 MS”: Low speed). 4. Press and hold in the [ MHz ( SETUP )] key for one second to save the new setting and exit to normal operation. FTM-3207DR/DE Advance Manual... -
Page 13: Setting Dtmf Autodialer Tx Delay Time
(50 MS / 250 MS / 450 MS / 750 MS / 1000 MS). Default: 450 MS 4. Press and hold in the [ MHz ( SETUP )] key for one second to save the new setting and exit to normal operation. FTM-3207DR/DE Advance Manual... -
Page 14: Memory Operation
To place the radio into the Memory Only mode, turn the transceiver OFF. Now press and hold in the [ V/M ( MW )] key while turning the transceiver ON. The VFO and Home Channel will now be disabled. To return to normal operation, repeat the above power-on procedure. FTM-3207DR/DE Advance Manual... -
Page 15: Naming A Memory Channel
[ V/M ( MW )] key for one second to save the label and exit. While operating in the Memory Recall mode, press the [ MHz ( SETUP )] key to toggle the display between indication of the frequency, and indication of the Alpha/Numeric label. FTM-3207DR/DE Advance Manual... -
Page 16: Scanning
DIAL knob to select the desired scan-re- sume mode. Default: 5.0 SEC 4. Press and hold in the [ MHz ( SETUP )] key for one second to save the new setting and exit to normal operation. FTM-3207DR/DE Advance Manual... -
Page 17: Memory Skip Scanning
“OFF” in step 4 above, after first recalling the currently blocked channel (the “Skipped” channel is accessible via manual channel selection methods using the DIAL knob in the Memory mode, whether or not it is locked out of the scanning loop). FTM-3207DR/DE Advance Manual... -
Page 18: Preferential Memory Scan
Scanning Preferential Memory Scan The FTM-3207DR/DE also allows setting up a “Preferential Scan List” of channels, which you can “flag” within the memory system. The flagged channels are designated by an “ ” icon when they are selected, one by one, for the Preferential Scan List. -
Page 19: Programmable Memory Scan (Pms)
Scanning Programmable Memory Scan (PMS) The FTM-3207DR/DE can be set to tune or scan only the frequencies between user- defined lower and band limits. Example: Set up a PMS channel by registering a lower frequency of 443.300 MHz, and an upper frequency of 447.000 MHz to the L1/U1 memory channels. -
Page 20: Scanning The Programmable Memory Channels
MH-48A6JA Microphone. Band Edge Beeper The FTM-3207DR/DE will automatically “beep” when the receive band edge is encoun- tered during scanning (either in standard VFO scanning or during PMS operation). Ad- ditionally, the band edge beep feature may be enabled to sound when the band edge frequency is reached while tuning the VFO, using the DIAL knob. -
Page 21: Priority Channel Scanning (Dual Watch)
Scanning Priority Channel Scanning (Dual Watch) The FTM-3207DR/DE’s scanning features include a two-channel scanning capability which allows operating on a VFO, Memory channel, or Home channel, while periodically checking a user-defined Memory Channel for activity. If a station received on the Memory Channel is strong enough to open the Squelch, the scanner will pause on that station in accordance with the Scan-Resume mode setting of Menu item “SCAN RSM 37”... -
Page 22: Gm Function
DIAL knob to select the desired polling interval (NORMAL or LONG). Default: NORMAL 3. Press and hold in the [ MHz ( SETUP )] key for one second to save the new setting and exit to normal operation. FTM-3207DR/DE Advance Manual... -
Page 23: Clone
Clone The FTM-3207DR/DE includes a convenient “Clone” feature, which allows the memory and configuration data from one transceiver to be transferred to another FTM-3207DR/ This can be particularly useful when configuring a number of transceivers for a public service operation. -
Page 24: Setup (Menu) Mode
Pin 3: GND Setup (Menu) Mode The FTM-3207DR/DE Setup (Menu) mode, already described in parts of many previous chapters, is easy to activate and setup. The Menus may be used to configure many of transceiver parameters, some of which have not been detailed previously. Use the following procedure to activate the Setup (Menu) mode: 1. - Page 25 OFF/S1 to S8 Activates/Deactivates the Automatic Re- 34: RPT ARS ON/OFF peater Shift feature. 35: RPT FREQ Sets the magnitude of the Repeater Shift. 0.00 - 150.00 (MHz) ø 36: RPT SFT Sets the Repeater Shift direction. -RPT/+RPT/SIMPLEX SIMPLEX FTM-3207DR/DE Advance Manual...
- Page 26 49: W-DGID Setting of the WIRES-X DGID AUTO/DGID01-99 AUTO 50: MY CALL Sets your station call sign - - - - - - - - - - ø: Depends on the transceiver version. FTM-3207DR/DE Advance Manual...
-
Page 27: Menu Selection Details
Function: Shifting of the CPU clock frequency. Available Values: A / B Default: A This function is only used to move a spurious response “birdie”, should it fall on a desired frequency. Select “A” for the normal operation. FTM-3207DR/DE Advance Manual... - Page 28 Function: Sets the information pop-up time. Available Values: 2 SEC / 4 SEC / 6 SEC / 8 SEC / 10 SEC / 20 SEC / 30 SEC / 60 SEC / CONTINUE / OFF Default: 10 SEC FTM-3207DR/DE Advance Manual...
- Page 29 21 GM INTVL Function: Selects the automatic GM beacon interval. Available Values: NORMAL / LONG Default: NORMAL 22 LCD DMMR Function: Setting of the front panel display’s illumination level. Available Values: LEVEL 1 - LEVEL 4 Default: LEVEL 4 FTM-3207DR/DE Advance Manual...
- Page 30 6. When the desired opening message is completed, press the [ D/A ( GM )] key momen- tarily to confirm the message, then press and hold in the [ MHz ( SETUP )] key for one second to save the settings and exit to normal operation. FTM-3207DR/DE Advance Manual...
- Page 31 Function: Activates/Deactivates the Automatic Repeater Shift feature.. Available Values: ON / OFF Default: ON 35 RPT FREQ Function: Sets the magnitude of the Repeater Shift. Available Values: 0.00 - 150.00 MHz Default: Depends on the transceiver version. FTM-3207DR/DE Advance Manual...
- Page 32 Digital Coded Encoder/Decoder RV TONE: Reverse CTCSS Decoder (Mutes receiver when matching tone is received) PAGER: Enhanced Paging & Code Squelch Note: See also Set Mode Item “39 SQL EXP” regarding additional selections available during “Split Tone” operation. FTM-3207DR/DE Advance Manual...
- Page 33 Available Values: FAST / SLOW Default: FAST 47 VER DISP Function: Displays the transceiver software version. Available Values: DSP / CPU 48 W/N DEV Function: Reduction of the Microphone Gain/Deviation and receiver bandwidth. Available Values: WIDE / NARROW Default: WIDE FTM-3207DR/DE Advance Manual...
- Page 34 4. To make a correction, press the [ SQL ( TXPO )] key to backspace the cursor; now re-en- ter the correct letter/number. 5. When the desired call sign is entered, press and hold in the [ MHz ( SETUP )] key for one second to save the settings and exit to normal operation. FTM-3207DR/DE Advance Manual...
- Page 35 Copyright 2017 YAESU MUSEN CO., LTD. All rights reserved. No portion of this manual may be reproduced without the permission of YAESU MUSEN CO., LTD. YAESU MUSEN CO., LTD. Tennozu Parkside Building 2-5-8 Higashi-Shinagawa, Shinagawa-ku, Tokyo 140-0002 Japan YAESU USA 6125 Phyllis Drive, Cypress, CA 90630, U.S.A.
Need help?
Do you have a question about the FTM-3207DR and is the answer not in the manual?
Questions and answers