Advertisement
Quick Links
Advertisement

Related Manuals for Norsonic 140


Summary of Contents for Norsonic 140
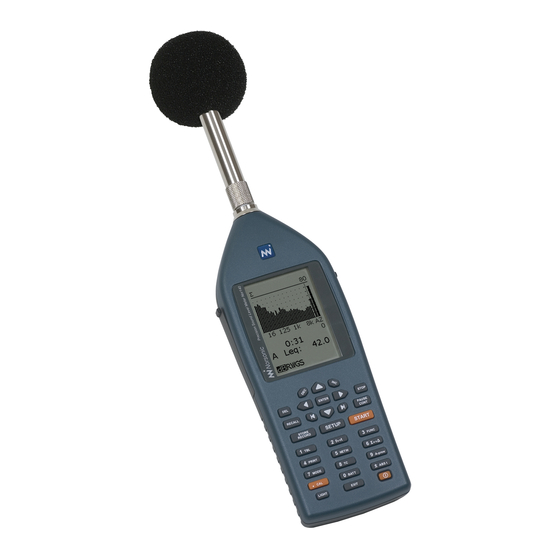
- Page 1 Norsonic 140 User Guide Getting the Settings Right...
- Page 2 Nor-140 - Front/Standby Screen Explained Current Measurement Duration Display Range Values. Adjusted using inc & dec keys. Note this Does not alter the measurement Current Date Range Current Time Time Constant & Function Graphical dB reading (Currently Fast Sound Pressure Level).
- Page 3 Nor-140 Storing Methods Automatic – Automatic saving, Repeat – Repeat measurement duration and save until stopped, Syncro – Synchronise with the clock, Manual – Waits for Store/Record key to be pressed before saving.
- Page 4 Nor-140 - Clock Make sure ‘set clock’ is highlighted before pressing enter.
- Page 5 Nor-140 – Input & Corrections For most assessments the input type should be standard with the Pol. Volts set to On. If very lowlevels are measured on the front screen then it is likely that the voltage to the microphone is turned off.
- Page 6 Nor-140 – Outdoor Mic Corrections Horizontal/Vertical is the direction of sound Use ‘inc’ or ‘dec’ keys to cycle Pol Volt needs to be on for standard hitting the microphone. Typically Vertical is only through the input type settings. free-field microphones to work...
- Page 7 Nor- 140 Measurement Durations To move between boxes – type the number, press enter, use arrow keys to move to next box. Resolution reduced using ‘inc’ and ‘dec’ keys.
- Page 8 Nor-140 L(t) Parameters Press button 5 to scroll between For Noise Nuisance you only really need Leq. SPL is If you have option 7 on the Nor-140 you will see ‘A’ down the side, weighting networks required for BS4142. 1/3 Leq gives 1/3 octave...
- Page 9 Nor-140 Frequency Mode 1/3 = 6.3Hz – 20kHz The latest version of the 140 can now show the Leq for (standard microphone measurement capabilities) specific frequency ranges in the table view. 1/3w = 0.4Hz – 20kHz (for use with This does not affect the standard results...
- Page 10 Nor-140 Measurement Trigger Manual – Start key starts measurement, Clock (press 1 when highlighted) – measurement starts at specified time and runs for measurement duration, External – Link to external control, Level Above – (press 1 when highlighted) set dB level to exceed before measurement starts.
- Page 11 Nor-140 Level Trigger To activate audio recordings without the handswitch you can use the level trigger option. This is in set-up 6) Trigger – 2) Record Trigger and then change the external to off (handswitch) and the level to on. Press button 1 with the Level ‘On’...
- Page 12 Nor-140 Recording Settings Enter Max duration at the top. The other settings should be as above for best quality audio that can be played on the average PC. In order to have the hamdswitch as a start/stop button – set the duration to 0...
- Page 13 Nor-140 Saving Settings & Recalling When in the main standby screen press the Store/Record key and a set-up number will appear at the top of the screen with a ‘S’ to indicate it has been saved. To load the set-up press the ‘Recall’ key and make sure the letters In the top right say ‘INT’...
- Page 14 Running Measurements...
- Page 15 Nor-140 Button 1 - Table Functions Button 1 again returns you Button 1 displays table of Button 1 again displays table to the main screen figures. of percentiles.
- Page 16 Nor-140 Button 2 – Frequency Analysis Use cursor to select Button 1 displays table of Button 1 again shows stats at frequency figures. that highlighted frequency...
- Page 17 NR and NC rating displayed at the end of the In the frequency screen – measurement. This is in the latest version of scroll right to the bottom the 140 and due out next year on the 145s and 150s...
- Page 18 Nor-140 Button 3 – Function Display Sound Pressure Level...
- Page 19 Nor-140 Button 9 – A Pre-weighting Display...
- Page 20 Single Axis Vibration & FFT Assessment...
- Page 21 Nor-140 Vibration The units for the front screen can be changed in the Miscellaneous menu screen...
- Page 22 Nor-140 Vibration To power the accelerometer you need to change the input type to IEPE (or ICP on older versions of the Nor-140)
- Page 23 Nor-140 Vibration Change the frequency mode to have a ‘w’ next to 1/3 to widen the frequency bands down to 0.4Hz...
- Page 24 Nor-140 FFT Option View window can be Select ‘Mode’ (button 7) and X = Frequency changed by using the up option 6 Y = Level and down arrow keys...
- Page 25 Nor-140 FFT - Set-up and Measurement Use set up and measurement duration to set the number of averages (NA), the duration of sample and the resolution. Use the left and right cursor keys to highlight the tonal frequency (89.36Hz in...
- Page 26 Notes...
Need help?
Do you have a question about the 140 and is the answer not in the manual?
Questions and answers