
Subscribe to Our Youtube Channel
Related Manuals for One Stop Systems PE3RR


Summary of Contents for One Stop Systems PE3RR
- Page 1 3 Slot PCI Expansion-Dual PSU PCIe to PCI Expansion Systems 3 Slot PCI Expansion System (Dual PSU) SKU: PE3RR /PE3RR.3.3 www.onestopsystems.com...
-
Page 2: Table Of Contents
Advisories ..........................................6 Safety Instructions ....................................... 7 Introduction ............................. 9 General Specifications ....................................9 Parts List ........................................10 Overview of PE3RR ....................................11 Pre-Installation Information ..................................12 Tools Required for Installation ................................12 Hardware Installation ........................13 Installation-Procedures Overview ................................14 Open Enclosure ....................................... - Page 3 Remove slot covers and install PCI cards ..............................35 Install PCI Cards ....................................... 35 5.3.1 Types of Signaling PCI cards to use ............................... 36 Connecting PE3RR to Laptop ......................39 Laptop Installation ....................................39 How to check OSS Ec34 ................................... 40 6.2.1 Windows 7 Operating System ..............................
- Page 4 PCI Card Conflicts ....................................73 11.3 Power-On Sequence for Advanced Configurations ..........................73 11.4 Troubleshooting Advanced Configurations ............................73 Appendix C Compliance ......................74 12.1 FCC ........................................74 12.2 Industry Canada ....................................74 12.3 CE ........................................74 PE3RR PCI Expansion| 4...
-
Page 5: Preface
General and Technical Information Chapter 8: Explains where to get Technical Support & FAQ Appendix A: Explains the Bus Hierarchy Appendix B: Information on connecting multiple expansion units Appendix C: Provides information on FCC Regulatory Compliance PE3RR PCI Expansion| 5... -
Page 6: Advisories
Disclaimer: We have attempted to identify most situations that may pose a danger, warning, or caution condition in this manual. However, OSS does not claim to have covered all situations that might require the use of a Caution, Warning, or Danger indicator. PE3RR PCI Expansion| 6... -
Page 7: Safety Instructions
Also, before connecting a cable, make sure both connectors are correctly oriented and aligned. CAUTION Do not attempt to service the system yourself except as explained in this manual. Follow installation instructions closely. PE3RR PCI Expansion| 7... - Page 8 Handle all sensitive components at an ESD workstation. If possible, use anti-static floor pads and workbench pads. Handle components and boards with care. Do not touch the components or contacts on a board. Hold a board by its edges or by its metal mounting bracket. PE3RR PCI Expansion| 8...
-
Page 9: Introduction
Mac OS X Version 10.4.x + Linux Kernel 2.6.x + Warranty: 1 Year Return to Factory Available Options: 1.5-meter cable (PN: SUBCBL1.5HF) PCI Express Host Card: PEHIFX1 PCI Host Card: for desktops: PCIHIF68 ExpressCard/54 or 34: EC54 or EC34 PE3RR PCI Expansion| 9... -
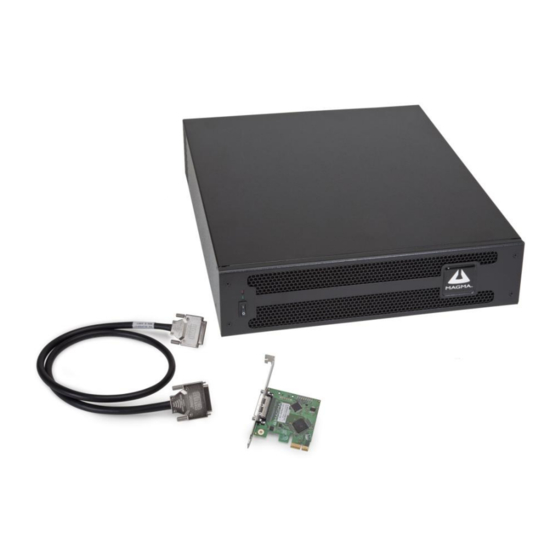
Page 10: Parts List
PCI expansion cable (1-meter or 1.5-meter) Expansion board & Backplane (installed) Power Supply (installed) Dual (2) U.S. Standard 115V power cord Fan (installed) Rack mount Ears (to be installed by user) Rubber feet (to be installed by user) User’s Manual PE3RR PCI Expansion| 10... -
Page 11: Overview Of Pe3Rr
One Stop Systems Overview of PE3RR PE3RR PCI Expansion| 11... -
Page 12: Pre-Installation Information
Gather all of the necessary tools required for installation • Read this manual Tools Required for Installation To complete the installation of the OSS product you will need a Phillips-head screwdriver and ESD wrist strap to prevent electrostatic discharge. PE3RR PCI Expansion| 12... -
Page 13: Hardware Installation
If no separate instructions are available, remove the cover by using instructions in Step 1. Then remove the card as normal. If no PCI card is visible, then continue with the cable installation. PE3RR PCI Expansion| 13... -
Page 14: Installation-Procedures Overview
This way you can troubleshoot the problem more easily and efficiently. If everything works well and there are no configuration issues, you can proceed with the installation of the remaining third party PCI cards. Always refer to or read the “3 party manufacturer installation guide” for further instructions. PE3RR PCI Expansion| 14... -
Page 15: Open Enclosure
Loosen the four screws from the front and three screws from the back. Slide the enclosure cover backward to disengage it from the guides at the front of the enclosure by firmly grasping the edges of the cover lip and pulling the cover backward about 1” until it clears the front hold- down, and then lift the cover off. PE3RR PCI Expansion| 15... -
Page 16: Install Host Interface Card
Install Host Interface Card The PCI Express (PCIe) Host interface card allows you to connect the PE3RR and PE3RR-3.3V expansion chassis units to a PCI Express host computer. The host system requires at least an x1 PCIe connector to facilitate this host card. -
Page 17: Install Pci Cards
Position the OSS expansion chassis so that the supplied PCI expansion cable will conveniently reach from the connector of the Host Card to the connector on the back of the chassis. Attach the PCI expansion cable to the 68-pin connector of the Host Interface card and secure it using the cable’s captive thumbscrews. PE3RR PCI Expansion| 17... -
Page 18: Connect Power Cord
100 to 240 Vac. A U.S. and Canadian 125 V power supply cord is provided with this product. If using this product outside of the U.S. or Canada, please use locally available power supply cords. PE3RR PCI Expansion| 18... -
Page 19: Recheck The Installation
‘computer lock-up’ and potential data loss. STOP DO NOT TURN ON THE OSS EXPANSION CHASSIS UNTIL YOU HAVE SHUT DOWN YOUR COMPUTER COMPLETELY! It can cause a system lockup and loss of any unsaved data. PE3RR PCI Expansion| 19... -
Page 20: Power On Computer
This equipment is not suitable for use in location where children likely to be present. This equipment should be installed in restricted area, closed and ignition proven cabinet/shelter. Equipment may be supplied by 100-240V, 50-60Hz network. PE3RR PCI Expansion| 20... -
Page 21: Verify Installation
The OSS PCIe host card has 8 LED indicators. A Normal operating PCIe host card will display 5 solid green LEDs. Three LEDs are illuminated dimmer: D12, D13 and D14 Two LEDS are illuminated brighter: D3 and D2 PE3RR PCI Expansion| 21... -
Page 22: Front Led
Red LED: this is a storage / hard disk drive LED. The red LED is not being utilized with this product PE3RR model. This red LED is for an old SCSI and IDE hard disk drives, the red LED comes on when a hard disk drive is attached. -
Page 23: Board Power Led Indicator
One Stop Systems 3.1.3 Board Power LED indicator PE3RR PCI Expansion| 23... -
Page 24: Software Installation
One Stop Systems Software Installation OSS PE3RR expansion unit requires no driver, or software on any operating systems. Software Check You need to check and verify whether your OSS hardware is properly detected via computer Operating System. The following information will guide you to perform this task on different Operating Systems. -
Page 25: Identifying Vendor Id For Oss Hardware
Under the "Property" click the drop down arrow and select "Hardware Ids". It will display the Vendor information of the device. It will display the Vendor ID for the OSS PCIe host card and Expansion board. OSS Host Card, Vendor ID: 104C PE3RR PCI Expansion| 25... - Page 26 Next, try to verify the installation again, as shown above. If you are still having problems, review Chapter 6, Troubleshooting before contacting OSS Technical Support at (760) 745-9883. Additional troubleshooting help is available on the web at www.OSS.com under the Support section. PE3RR PCI Expansion| 26...
-
Page 27: How To Check Pci Cards
Mac OS 10.7 and above 4.4.1 How to check OSS device Select “About This Mac” under the Apple Icon. Then click the “More Info” button. Select System Report. Next, click on the PCI card item, see picture below. PE3RR PCI Expansion| 27... -
Page 28: How To Check Pci Cards
In Mac OS 10.7 and above, the OSS hardware is transparent to the system. You will not see a PCI to PCI bridges. In order to check and verify whether the OSS PE3RR is working you have to plug in a PCI cards. Only the PCI cards in the expansion chassis will be detected or recognized. -
Page 29: Mac Os 10.3.X & 10.4.X
Select “About This Mac” under the Apple Icon. Then click the “More Info” button. Next, click on the PCI Card item. You should see a pci-bridge device listed under PCI as shown below: Any PCI Cards you install in the expansion chassis will appear behind the pci-bridge device. PE3RR PCI Expansion| 29... -
Page 30: Mac Os 10.2.X
Type lspci –vvv | grep ‘Texas\|Pericom’ command on the terminal window. See output below. The Texas Instruments PCI Express-to-PCI Bridge is the host card. The Pericom PCI to PCI bridge is the expansion board (expansion chassis). PE3RR PCI Expansion| 30... - Page 31 For example looking at the lspci –vvv | grep “PCI Bridge” output (see picture below) we will query on the PCI Bridge Texas Instruments. Open the terminal window and type lspci –s 01:00.0 -vvv, see output below. PE3RR PCI Expansion| 31...
- Page 32 One Stop Systems Looking at the lspci –vvv | grep “PCI Bridge” output below, we will query on the Pericom PCI Bridge. Type lspci –s 02:04.00 –vvv command on the terminal window, see output below. PE3RR PCI Expansion| 32...
-
Page 33: How To Check Pci Cards
You can view the detailed device information of a specific device, you would need the slot number in the domain:bus:slot.func format. For example looking at the lspci –vtt output (see picture below) we will query on the Intel Ethernet Controller card. Open the terminal window and type lspci –s 03:05.0 -vvv, see output below. PE3RR PCI Expansion| 33... - Page 34 One Stop Systems PE3RR PCI Expansion| 34...
-
Page 35: Installation Of Pci Cards
Before you proceed with the installation of your PCI cards, you must first verify the card type you are installing. There are certain types of cards that you cannot install in the OSS PE3RR expansion slot. The OSS PE3RR uses 5V 32/64Bit PCI slot connector . -
Page 36: Types Of Signaling Pci Cards To Use
5.3.1 Types of Signaling PCI cards to use Types of compatible PCI signaling cards that you can plug in to the PE3RR unit are Universal PCI 3.3V & 5V (32-Bit Cards) & PCI 5V (32-Bit cards) Universal PCI 3.3V & 5V (64-Bit cards) & PCI 5V (64bit cards) Once you have determined that you have the correct PCI card, proceed with the installation. - Page 37 The 3 slot Expansion unit comes into two types of PCI slot connectors. A 5V 32/64Bit and 3.3v 32/64Bit Compatible PCI slot connectors. Model PE3RR uses 5V 32/64Bit PCI slot connector Model PE3RR3.3V uses 3.3v 32/64Bit PCI slot connectors. Only Install a PCI 5v card into a 5v 32/64 Bit PCI slots. Only Install a PCI 3.3v card into a 5v 32/64 Bit PCI slots.
- Page 38 Windows Device manager if you are running Windows OS Apple System Profiler if you are running MAC OS If you are running Linux, you need to launch the terminal window and run multiple commands. Follow the procedures discussed in Chapter 3. PE3RR PCI Expansion| 38...
-
Page 39: Connecting Pe3Rr To Laptop
Connecting PE3RR to Laptop You can connect your OSS PE3RR expansion chassis to any laptop computers using an expresscard34 and / or Cardbus card. You need to identify the type of slot available in your laptop . If you have an express card slot, you need to use an ExpressCard34 ( model: Ec34). -
Page 40: How To Check Oss Ec34
PCI Bridge beneath it. When installed correctly, you will see two instances of PCI standard PCI-to-PCI Bridge. ExpressCard34 6.2.1.1 How to check OSS device The first PCI standard PCI Express to PCI/PCI-X Bridge is the OSS Express card. Beneath the first bridge, is the OSS expansion board in the expansion chassis. PE3RR PCI Expansion| 40... - Page 41 The first PCI standard PCI-to-PCI bridge is the OSS Cardbus card. The second standard PCI-to-PCI bridge is the main chip on the OSS expansion board in the chassis. Any 3 party PCI cards you installed in the expansion chassis will show up or appear beneath the 2 PCI standard PCI-to- PCI Bridge. PE3RR PCI Expansion| 41...
-
Page 42: Apple Mac Operating System
OSS expansion chassis is operating properly. This is normal on some Mac Operating system, the OSS devices are transparent. The first PCI-to-PCI Bridge is the OSS ExpressCard34 (Ec34). The vendor ID for the Express card 34 device is 104c. PE3RR PCI Expansion| 42... - Page 43 One Stop Systems The 2 PCI-to-PCI Bridge is the OSS expansion board. It is the main chip on the expansion board in the chassis. The vendor ID for the chip of the Expansion board34 device is 12D8. PE3RR PCI Expansion| 43...
-
Page 44: Linux Operating System
Linux Operating System You can check and verify if the OSS express card and expansion chassis are detected on Linux Operating System. This section is only applicable to OSS PE3RR expansion unit with Expresscard34. ExpressCard34 6.2.3.1 How to check OSS device You can use the following commands to check on OSS devices. - Page 45 One Stop Systems 6.2.3.2 How to check PCI cards You can check on the PCI cards in the OSS 3slot expansion chassis. Type lspci –vtt command on the terminal window, see output below PE3RR PCI Expansion| 45...
-
Page 46: Troubleshooting
If it still hangs up, try a different card – this one is probably bad (or has driver problems). If the second cards works, troubleshoot the first card. If the second card also fails, call Technical Support. PE3RR PCI Expansion| 46... -
Page 47: My Pci Card Doesn't Work
For MAC: Check Apple System profiler. On newer Mac OS Operating systems such as 10.7 and above, the OSS expansion system will be transparent to the OS. Only the PCI card will show up, if it is working or if it is supported by the Operating System. PE3RR PCI Expansion| 47... -
Page 48: Support For 3Rd Party Pci Cards
To fix this, click Update Driver. To update the device message is displayed: "The <type> device loader(s) for this driver where <type> is the DevLoader such as FLOP, ESDI, device could not load the device driver. (Code 2) " SCSI, and so on. PE3RR PCI Expansion| 48... - Page 49 To resolve this issue, follow the recommended solution. If that does not work, try removing the device from Device Manager and using the Add New Hardware wizard to re-detect it. Obtain the updated drivers if the error still occurs. PE3RR PCI Expansion| 49...
-
Page 50: Device Manager Error Symbols
The Properties button displays the properties for the other Finally, consult with the hardware manufacturer for device. More than likely, the other device will also have one of updated drivers. these Device Manager error codes. Device Manager error symbols PE3RR PCI Expansion| 50... -
Page 51: General Technical Information
This is where the 68pin cable is attached. Jack-screw A turnable screw that secure the bracket and cable. Gold contact connector that is plugged in directly into PCIe slot of the host computer PCIe connector motherboard. PE3RR PCI Expansion| 51... -
Page 52: Expansion Board & Backplane
This is where the wire for the On/ Off button is attached to. Power LED Connector This is where the front green LED indicator is attached. PCI slot Holds the PCI card. 68-pin Connector This is where the other end of 68pin cable is attached. PE3RR PCI Expansion| 52... - Page 53 Bridge Chip system memory address space 20pin ATC Power Connector J1: This is where the ATX power supply is attached that provides power to the entire board. PE3RR PCI Expansion| 53...
-
Page 54: Fan Control Switch (S1)
When is it ON, the fan is running at maximum speed. When it is OFF, the Thermistor controls the speed of the fan. When fan is set to OFF, you will a ticking sound or pulsating sound emanating from the fan, this is normal. PE3RR PCI Expansion| 54... -
Page 55: How To Remove Backplane
Unscrew the two jack-screws from the back of the unit. Remove four screws from the backplane. Slowly pull the board out from the expansion chassis. Unplug the ATX 24-pin power cable from the board. Disconnect the On/Off and front led power assembly cables. PE3RR PCI Expansion| 55... - Page 56 One Stop Systems Unscrew the two jack-screws from the back of the unit. Remove four screws from the backplane. Slowly pull the board out from the expansion chassis. PE3RR PCI Expansion| 56...
-
Page 57: How To Remove Fans
There are two fans located on the front of the expansion unit. Fan1 is for PCI card and Fan2 is for the power supply. 8.5.1 Removing Fan 1 Disconnect the Fan power cable. Cut off the four rubber mounts. Remove the fan from the bracket. PE3RR PCI Expansion| 57... -
Page 58: Removing Fan 2
8.5.2 Removing Fan 2 Remove the four mounting screws from the front plate. Slowly pull the front plate out from the chassis. Cut off the four rubber mounts from the fan. Disconnect the Fan power cable. PE3RR PCI Expansion| 58... -
Page 59: Fan Specifications
One Stop Systems Fan Specifications PE3RR PCI Expansion| 59... -
Page 60: How To Remove / Replace Power Supply
Unscrew the thumbscrew located on the back, simply grab the handle, and slowly pull the power supply out from the housing. NOTE: When installing a new power supply, it is highly recommended to use the same or similar power supply. PE3RR PCI Expansion| 60... -
Page 61: Power Supply Specification
One Stop Systems Power Supply Specification The current PE3RRR model uses a 420 Watt Dual Redundant power supply PE3RR PCI Expansion| 61... -
Page 62: Load Resistor
I.e. supplying clean and constant current to the 3.3V and 5V lines. Even though a card might use 3.3V signaling some chips on the board might be using the 5V for some other function and therefore these 3.3V signaling cards might not need a load resistor. 8.9.1 5v Load Resistor Installation PE3RR PCI Expansion| 62... -
Page 63: Alarm Reset Button
PCIe x1 Host Card Please contact Sales Power Cord Please contact Sales Expansion board Please contact Sales Backplane Please contact Sales Power Supply Please contact Sales Load Resistor Please contact Sales Fan (80X80X25) Please contact Sales PE3RR PCI Expansion| 63... -
Page 64: How To Get More Help
OSS cannot be responsible for any physical damage to the product or component pieces of the product that are damaged due to inadequate packing. Physical damage sustained in such a situation will be repaired at the owner’s expense in accordance with Out of Warranty Procedures. PE3RR PCI Expansion| 64... -
Page 65: Frequently Asked Questions (Faq)
- No, using an adapter like express card-to-pcmcia card or vice versa is not going to work with the OSS expansion unit. The OSS hardware will not be detected or recognized. 10. My PCIe host card is only showing two green LEDs after powering up the host computer, do I have a bad Host card ? PE3RR PCI Expansion| 65... - Page 66 - No, older OSS expansion units have Dec Bridge chip that is not compatible with Mac Pro tower. 17. Can I upgrade my 3slot expansion board and backplane to the latest revision ? - Yes, as long as the expansion board and backplane are mechanically the same form factor as your original boards. PE3RR PCI Expansion| 66...
-
Page 67: Appendix A Bus Hierarchy
The key point in the figure of the 3-slot topology is that the connecting cable between the host card and the 3-slot backplane is actually a PCI bus itself. This is shown on Windows Device Manager, see picture below. PE3RR PCI Expansion| 67... - Page 68 One Stop Systems PE3RR PCI Expansion| 68...
-
Page 69: Appendix B Need More Slots
Toll Booths you have to slow down a “nanosecond” for, the longer it will take you (your data) to get from the PCI Card to the CPU and back again. Under most circumstances, the effect cannot even be detected. However, under other conditions, it can be important to know about. PE3RR PCI Expansion| 69... -
Page 70: Fan-Out
Chapter 3 Verify Installation for guidance in verifying the proper installation of your Expansion System. The following image shows the Windows Device Manager display when a Windows PC has 2 Expansion Systems connected in a “Fan-Out” configuration. PE3RR PCI Expansion| 70... -
Page 71: Daisy-Chaining
Verify your configuration Before you start installing your PCI cards, you should confirm that everything is in proper working order. Refer to Chapter 3 Verify Installation for guidance in verifying the proper installation of your Expansion System PE3RR PCI Expansion| 71... -
Page 72: Combination Configurations
These combinations are only limited by the available slots and/or slot types: PCIe or PCI. You will need to keep an eye on your system performance and make any adjustments that may be required, either to PCI card location or to Expansion System configuration, to obtain maximum performance. PE3RR PCI Expansion| 72... -
Page 73: Pci Card Conflicts
PCI Slot that the Host Interface Card is in before you can properly identify the correct expansion chassis and ultimately the card. This is only an issue if you have multiples of the same type of card installed. PE3RR PCI Expansion| 73... -
Page 74: Appendix C Compliance
Cet appareil numériqué de la classe A est conformé à la norme NMB-003 du Canada. 12.3 CE The product(s) described in this manual complies with all applicable European Union (CE) directives. OSS will not retest or recertify systems or components that have been reconfigured by customers. PE3RR PCI Expansion| 74... - Page 75 OSS MANUAL PN: 25-098-034 MFG: OSS PE3RR User Manual...
Need help?
Do you have a question about the PE3RR and is the answer not in the manual?
Questions and answers