Table of Contents
Advertisement
Quick Links
Advertisement
Table of Contents

Related Manuals for iXsystems TrueNAS R Series


Summary of Contents for iXsystems TrueNAS R Series
- Page 1 TrueNAS R-Series Unified Storage Arrays ® Basic Setup Guide Version 1.1...
-
Page 2: Table Of Contents
.............. Copyright © 2021 iXsystems, Inc. All rights reserved. All trademarks are the property of their respective owners. -
Page 3: Introducing The Truenas R-Series
1.2 Requirements It is recommended to have these tools available when installing an R-Series system in a rack: • #2 Philips head screwdriver • Flat head screwdriver • Tape measure • Level Support: 855-473-7449 or 408-943-4100 Page 1 Email: support@ixsystems.com... -
Page 4: R10
16 SSD drive trays with up to 16 drives installed Accessory kit with 2 IEC C13 to NEMA 5-15P power cords, 2 IEC C13 to C14 cords, and a set of velcro cable ties Support: 855-473-7449 or 408-943-4100 Page 2 Email: support@ixsystems.com... -
Page 5: Ports And Indicators
1. Power supplies #1 and #2 2. Serial port 3. 1Gb Ethernet Out of Band Management port and two USB 2.0 ports 4. Two USB 3.0 ports 5. Two 10Gb SFP+ networking ports 6. VGA monitor port Support: 855-473-7449 or 408-943-4100 Page 3 Email: support@ixsystems.com... -
Page 6: R20
2 SSD drive trays with up to 2 SSDs installed Accessory kit with 2 IEC C13 to NEMA 5-15P power cords, 2 IEC C13 to C14 cords, and a set of velcro cable ties Support: 855-473-7449 or 408-943-4100 Page 4 Email: support@ixsystems.com... -
Page 7: Ports And Indicators
3. 1Gb Ethernet Out of Band Management port and two USB 2.0 ports 4. Two USB 3.0 ports 5. Two 10Gb SFP+ networking ports 6. VGA monitor port 7. SSD Drive Bays Support: 855-473-7449 or 408-943-4100 Page 5 Email: support@ixsystems.com... -
Page 8: R40
48 SSD drive trays with up to 48 drives installed Accessory kit with 2 IEC C13 to NEMA 5-15P power cords, 2 IEC C13 to C14 cords, and a set of velcro cable ties Support: 855-473-7449 or 408-943-4100 Page 6 Email: support@ixsystems.com... -
Page 9: Ports And Indicators
1. Power supplies #1 and #2 2. Serial port 3. 1Gb Ethernet Out of Band Management port and two USB 2.0 ports 4. Two USB 3.0 ports 5. Two 10Gb SFP+ networking ports 6. VGA monitor port Support: 855-473-7449 or 408-943-4100 Page 7 Email: support@ixsystems.com... -
Page 10: Racking The R10, R20, Or R40
Follow this procedure to slide out and attach the second chassis rail to the other side of the system. Support: 855-473-7449 or 408-943-4100 Page 8 Email: support@ixsystems.com... -
Page 11: Install The Rack Rails
The rail kit includes additional M5 screws that can be used to secure the system to the rack rails. Support: 855-473-7449 or 408-943-4100 Page 9 Email: support@ixsystems.com... -
Page 12: Handling Drive Trays
To remove a drive tray, push the button on the right end of the tray to release the tray locking arm. Gently swing the arm until it is stops, then pull the tray out from the system. Support: 855-473-7449 or 408-943-4100 Page 10 Email: support@ixsystems.com... -
Page 13: Hard Drive Trays (R20)
To remove a hard drive tray, press the locking arm release at the right side of the tray front. Swing the arm out until it completely stops, then pull the tray free from the system. Support: 855-473-7449 or 408-943-4100 Page 11 Email: support@ixsystems.com... -
Page 14: Bezel
Removing the bezel requires sliding the front latch to the right and pulling the bezel forward (1). To lock the bezel in place, insert the key and rotate the lock to the left (2). Support: 855-473-7449 or 408-943-4100 Page 12 Email: support@ixsystems.com... -
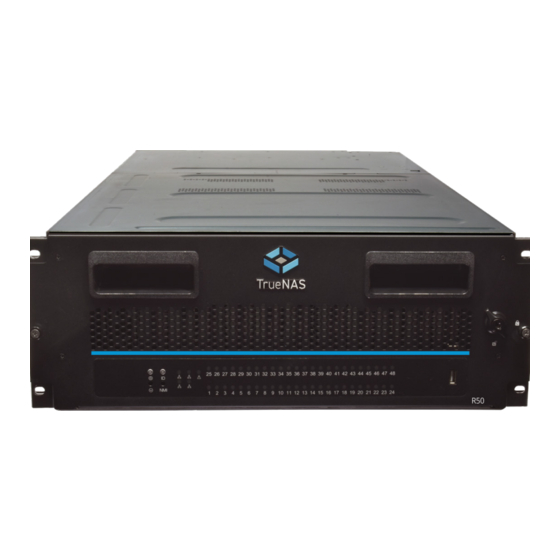
Page 15: R50
3 NVMe drive trays with up to 3 drives installed Accessory kit with 2 IEC C13 to NEMA 5-15P power cords, 2 IEC C13 to C14 cords, a set of velcro cable ties, and bags with installation hardware Support: 855-473-7449 or 408-943-4100 Page 13 Email: support@ixsystems.com... -
Page 16: Ports And Indicators
USB 2.0 ports 2. Power Supplies #1 and #2 6. Two USB 3.0 ports 3. System fans 7. Two 10Gb SFP+ networking ports 4. Serial port 8. VGA monitor port Support: 855-473-7449 or 408-943-4100 Page 14 Email: support@ixsystems.com... -
Page 17: Racking The R50
Skip one attach point, then attach the final three cage nuts to the next three descending attach points. Attach another six cage nuts to the same attach points on the other rear rack rail. Topmost attach point Rear cage nut locations Bottommost attach point Support: 855-473-7449 or 408-943-4100 Page 15 Email: support@ixsystems.com... - Page 18 Two people at minimum should lift the R50. Align the grooves on the sides of the system with the rails and slide the system forward until it is flush with the front of the rack. Use four M5 screws to secure the system to the rack. M5 Screw M5 Screw M5 Screw M5 Screw Support: 855-473-7449 or 408-943-4100 Page 16 Email: support@ixsystems.com...
-
Page 19: Managing Drives
Open the drive bay by unlocking the front (1), loosening the captive thumbscrews (2), and using the handles (3) to pull the bay forward. To insert the drive bay back into the system, slide the blue release catches on each rail and push the bay forward. Support: 855-473-7449 or 408-943-4100 Page 17 Email: support@ixsystems.com... - Page 20 (1). Slide the drive into the tray, push in the plastic release tabs on each side of the tray and push the tray downwards to install the drive into the system (2). Close the slot cover and make sure it clicks into place (3). Support: 855-473-7449 or 408-943-4100 Page 18 Email: support@ixsystems.com...
- Page 21 To install a new drive in an NVMe tray, align the drive connectors with the back of the tray. Push the screw holes on the side of the drive into the fixed pegs on the tray, then push the drive down over the flexible pegs until the drive clicks into place. Support: 855-473-7449 or 408-943-4100 Page 19 Email: support@ixsystems.com...
-
Page 22: Cabling An R-Series System
9.1 R50 SAS Connections When purchased with a SAS expansion card, the R50 can connect to two Expansion Shelves. This diagram shows connecting an R50 to two iXsystems ES102s: Support: 855-473-7449 or 408-943-4100 Page 20 Email: support@ixsystems.com... -
Page 23: Connecting To The Truenas Web Interface
It is available by clicking Guide in the TrueNAS web interface or going directly to https://www.truenas.com/docs/. The TrueNAS Documentation Hub also provides an online version of this Guide and documentation of other iXsys- tems products at https://www.truenas.com/docs/hardware/. 12 Contacting iXsystems For assistance, please contact iX Support: Contact Method Contact Options https://support.ixsystems.com... - Page 24 Support: 855-473-7449 or 408-943-4100 Page 22 Email: support@ixsystems.com...
Need help?
Do you have a question about the TrueNAS R Series and is the answer not in the manual?
Questions and answers