Table of Contents
Advertisement
Quick Links
Assembly Instructions
Mode d'assemblage
CALL US FIRST
1-877-PREPAC1
1-877-773-7221
Mon - Fri
7am - 4pm PST
10am - 7pm EST
•
For help with assembly
•
If you have received a damaged or defective part or are
missing hardware.
We will process replacement parts
less. Parts are shipped via
Before you call please:
1) Record the following information from the shipping label
on the outside of the box. You will need it for warranty
purposes:
• Ship To Name
• Sales Order Number
2) Note the
product model number.
3) Review the contents of your shipment to determine
what you are missing.
Online Option:
Fill out the Replacement Parts Order form in the Product
Support section of our website: www.prepacmfg.com
Pour le service en français, contactez s'il vous plaît votre détaillant.
Required
Tools /
Outils nécessaires
Screwdrivers
Tournevis
in 2 business days or
UPS Ground or mail.
Optional Tools / Outils Facultatif
Using a power screwdriver will speed up assembly.
Phillips Head
À pointe
Caution
Do not over tighten any screw. The last few turns of each
screw should be done very slowly or by hand.
Flat Head
Principal plat
Utiliser la puissance un tournevis
accélérera l'assemblée.
Attention
Hammer
Marteau
Au-dessus de ne serrer aucune vis. Les derniers
tours de chaque vis devraient être faits très lentement ou à
la main.
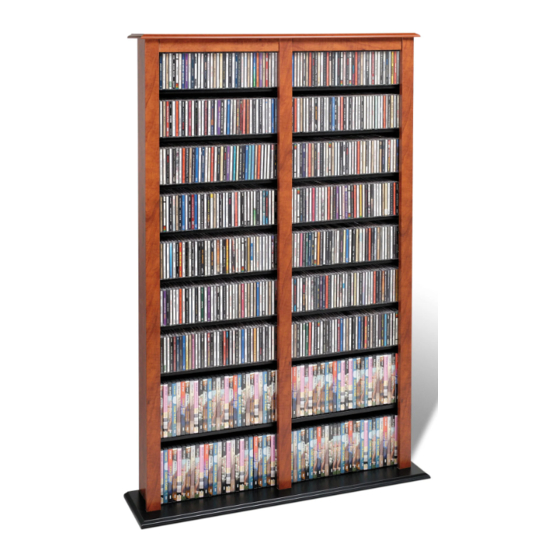
Double Barrister Tower
Haute Étagère Barrister
Double Largeur
Model # MB-0800
This product is shipped in
1 carton
1 of 1
Prepac Manufacturing Ltd.
6705 Dennett Place
Delta, BC V4G 1N4
LB-0496-R
2013-05-29
Advertisement
Table of Contents

Summary of Contents for Prepac MB-0800
- Page 1 Double Barrister Tower Haute Étagère Barrister Double Largeur Assembly Instructions Mode d’assemblage Model # MB-0800 This product is shipped in 1 carton CALL US FIRST 1-877-PREPAC1 1 of 1 1-877-773-7221 Mon - Fri 7am - 4pm PST 10am - 7pm EST •...
- Page 2 Tower Parts / Pièces de la tour Left Side (1) Top / le Dessus (1) Côté gauche TP-0911 Black / Noir SL-0910 Black / Noir TP-0991 Cherry / Cerise SL-0990 Cherry / Cerise TP-0281 Oak / Chêne SL-0230 Oak / Chêne Right Side (1) Center Gable (1) Côté...
- Page 3 Insert cams into the top of each side. Insert cams in the unlocked Insérez les ferrures dans le dessus de chaque côté. position, with the opening facing toward the hole for Ferrure connecting rod. Insérez les ferrures dans la position déverrouillée, de fa çon à...
- Page 4 Attach top to sides & center gable and tighten cams. Fixez le dessus aux côtés et au pignon central et serrez les ferrures. Locked Unlocked Turn 210° Tack Glide Patin à clou Attach bottom with Confirmat screws. Then, hammer Tack Glides Confirmat into bottom as shown.
- Page 5 Turn moldings over and align with the holes on the cabinet sides and gables. Press down firmly on the molding to secure in place. Retourner les moulures et aligner avec les trous des côtés et pignons de coffret. Enfoncer fermement sur le moulure pour fixer en place. Align holes on top moldings with plastic dowels in the top.
- Page 6 Attach backer using ¾” nails. Leave 2-3” space from each corner. Posez le dos à l’aide des clou ¾”. Laissez des 2 ou 3 po. l’espace de chaque coin. ¾" Nail Clou de ¾" 3" 2" Position nails in the center of the board Placer les clous au centre de la planche Insert metal dowels into shelf holes and add shelves.
- Page 7 Secure media tower to wall using the Cable Ties (see next step for details) Fixez le produit au mur en utilisant l’attache pour câble (voir la prochaine étape pour des détails) With the #6-¾” screw, attach one of Attach the 2nd mounting base to the wall 2” lower than the the mounting bases to one of the one on the cabinet gables 1 inch from the top.
- Page 8 Soin de meubles Furniture Care Q. Comment est-ce que je nettoie vos produits ? How do I clean your products? A. Nous recommandons que vous essuyez simplement We recommend that you simply wipe your vos produits avec un propre, tissu humide et puis séchons products with a clean, damp cloth and then dry immédiatement avec un autre tissu propre pour maximiser immediately with another clean cloth to maximize...


Need help?
Do you have a question about the MB-0800 and is the answer not in the manual?
Questions and answers