Table of Contents
Advertisement
Advertisement
Table of Contents

Subscribe to Our Youtube Channel
Related Manuals for LaboGene CoolSafe Basic 55-4


Summary of Contents for LaboGene CoolSafe Basic 55-4
- Page 1 SOLUTIONS TECHNIQUES pour laboratoires industries &...
- Page 2 Nos compétences et services associés Qualification Installation Métrologie Distribution Maintenance Location Réparation Conseil Qualité Étude Formation Une équipe de spécialistes...
- Page 3 INSTRUCTION MANUAL CoolSafe Basic & Pro Size 4-9-15 – Temperature -55-95-100-110 Item No. 700749 06012017QA01 Page 1 of 20 CopyRight © 2017...
- Page 4 Instruction manual for CoolSafe Symbols used in this manual Note Used to direct attention to a special item. Warning Used in case of danger of a serious accident or lethal injury. Caution Used in case of danger of medium or minor injuries or physical damage. This document is the original instruction manual in accordance with the current Machinery Directive.
-
Page 5: Table Of Contents
Instruction manual for CoolSafe Table of contents Introduction ..................4 Safety precautions ................4 General information ................4 Safety..................... 4 Installation .................... 5 Installation of CoolSafe ................5 Installation of vacuum pump ..............5 Installation of accessories ............... 6 Functional description ................. 6 Control panel .................. -
Page 6: Introduction
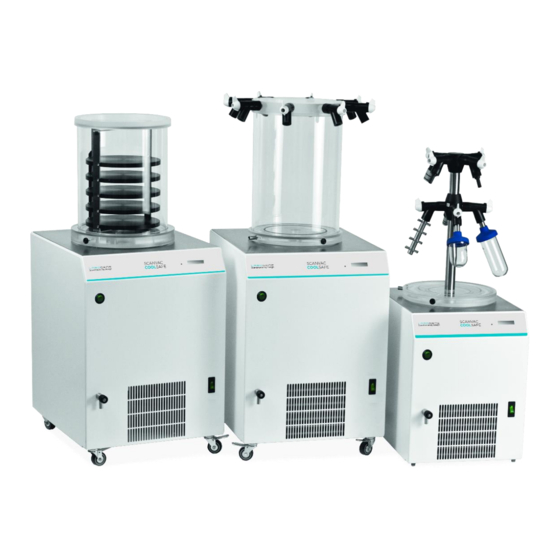
Instruction manual for CoolSafe Introduction This manual covers the CoolSafe models Basic and Pro. The models are: CoolSafe Basic: 55-4, 55-9 and 110-4 CoolSafe Pro: 55-4, 55-9, 55-15, 95-15, 100-9 and 110-4. CoolSafe 4-15 l is an outstanding and versatile range of advanced bench-top freeze dryers. They are the product of more than 40 years’... -
Page 7: Installation
On table models the vacuum pump must be placed near to the freeze dryer. LaboGene recommends the VacuuBrand RZ2.5 rotary vane pump for which a variety of protection accessories, against aggressive materials are available. The vacuum pump outlet/exhaust is fitted with an oil mist filter as standard. -
Page 8: Installation Of Accessories
Check the oil level on the pump and fill it if necessary. The oil level sight glass should be 1/2 - 3/4 full. LaboGene recommends that when the pump is running the gas ballast valve is in the open position. Installation of accessories The CoolSafe Basic or Pro is a basic unit and must be equipped with the necessary accessories to run a specific freeze-drying process. -
Page 9: Valves And Connections
Instruction manual for CoolSafe The Pro models display is the same with the exception that condenser pressure is displayed as shown below. Valves and connections The CoolSafe is equipped with several valves and connections that makes the freeze-dryer function and operate correctly. Each must be set correctly and plugged in correctly to make the CoolSafe operational. -
Page 10: Electrical Vacuum Valve
Instruction manual for CoolSafe 4.2.3 Electrical vacuum valve All models are equipped with an electrical vacuum valve. It is operated via a switch located on the front of the cabinet. Do not open the vacuum valve until the AWO-indicator is green. 4.2.4 Drain valve The drain valve is placed on the front of the cabinet. -
Page 11: User Interface
Instruction manual for CoolSafe User interface On start-up, the display will show the CoolSafe model designation, the software version number and the total number of hours the unit has run since last reset of the hour counter. When running the display will show the current status of the unit and the AWO-indicator will either show constant or blink with the color appropriate (see below). -
Page 12: Preparations
Instruction manual for CoolSafe Preparations Check that the CoolSafe ice condenser is free from ice and water, and that all valves i.e. the drain valve is closed. Check that there is no water in the drain valve. Note Do not use any tools to close valves, as they will easily be damaged. Check that the gas ballast valve on the vacuum pump is open at all times. -
Page 13: Freeze Drying Using Chambers
Instruction manual for CoolSafe Start the creation of vacuum by opening the vacuum valve and check that the AWO- Indicator stays green indicating OK for freeze-drying. Connect a flask to an appropriate cone on the rubber valve. Turn the rubber valve to position (B). -
Page 14: Stopping The Vacuum Pump
Instruction manual for CoolSafe Cold shelves Make sure that the vacuum valve is closed. Mount the chamber and shelf arrangement. Check that all connections are tight and the chamber is closed. If heated shelves are to be used, refer to the controller manual. Open the chamber place the frozen material on the shelves in the chamber. -
Page 15: Maintenance
Instruction manual for CoolSafe Maintenance CoolSafe freeze-dryer The air-cooled condenser must be cleaned minimum once a year. Use a vacuum cleaner and remove any dust in the cooling ribs on the front. Rubber valves, black O-rings and valves on the manifold and black O-rings on chambers should be greased with an ultra-thin layer of vacuum grease and wiped off with a soft cloth every 3-4 months. - Page 16 Instruction manual for CoolSafe leak from the drain-this can be done placing a finger over the drain spigot, you will feel if there is a leak. Check the seal on the acrylic plate of the chamber that interfaces with the top stainless steel part of the CoolSafe.
-
Page 17: The Freeze-Drying Process
Instruction manual for CoolSafe The Freeze-drying process To understand the freeze-drying process, this section describes the theory for the process in short. For more detailed information about freeze-drying please consult available literature. All material in free form will exist in one of three states: Vapour, liquid or solid. As shown in the diagram for water, the physical state is dependent on the surrounding pressure and the temperature. -
Page 18: Technical Specifications
Instruction manual for CoolSafe In the third step, water that is strongly bound to the solids of the sample (called sobbed water) is converted to vapour and removed from the product, this process being referred to as de-sorption. Removing moisture in the de-sorption phase or secondary drying phase, is done at a higher product temperature and at the lowest possible pressure Technical Specifications CoolSafe -55 °C... -
Page 19: Coolsafe -95 °C And -100 °C
Instruction manual for CoolSafe CoolSafe Basic or Pro 5 5 - 15 Unit Item Digital read-out of temperature Yes – Pro only Digital read-out of pressure Ultimate temperature at 20°C room temperature °C Power requirements V/Hz 230/50-60 Power consumption Insulation Condenser capacity Condenser capacity per 24 hours Total volume of Condenser... -
Page 20: Coolsafe -110 °C
Instruction manual for CoolSafe CoolSafe Basic or Pro 1 0 0 -9 Unit Item Digital read-out of temperature Yes – Pro only Digital read-out of pressure Ultimate temperature at 20°C room temperature °C -100 Power requirements V/Hz 230/50-60 Power consumption Insulation Condenser capacity Condenser capacity per 24 hours... -
Page 21: Declaration Of Conformity
Instruction manual for CoolSafe Declaration of conformity Item No. 700749 06012017QA01 Page 19 of 20 CopyRight © 2017... -
Page 22: Annex - Pressure Of Aqueous Vapor
Instruction manual for CoolSafe Annex - Pressure of Aqueous Vapor Temperature Pressure Temperature Pressure Temperature Pressure Temperature Pressure 6,103 -9,2 2,789 -18,4 1,204 -27,6 0,488 -0,2 6,003 -9,4 2,741 -18,6 1,182 -27,8 0,479 -0,4 5,906 -9,6 2,693 -18,8 1,159 -28,0 0,468 -0,6 5,810... - Page 23 LABO AND CO 50 avenue de Grosbois 94440 Marolles-en-Brie Tel : 01 45 98 74 80 Fax : 01 45 98 77 23 contact@laboandco.com Gardez un œil sur laboandco.com laboandco.com...
Need help?
Do you have a question about the CoolSafe Basic 55-4 and is the answer not in the manual?
Questions and answers
[Inquiry Regarding Installation of a 3-Way Valve on the Drain Port of CoolSafe] I am currently using a CoolSafe system in our laboratory, and I would like to inquire about a possible modification. Specifically, I am considering installing a 3-way PTFE valve on the drain port of the unit in order to allow for solvent drainage without interrupting the vacuum operation. Could you please advise whether this kind of modification is acceptable and safe for the instrument? Would installing a 3-way valve on the drain port affect vacuum integrity or cooling performance? Are there any recommendations or precautions you can provide regarding such a setup? Thank you in advance for your assistance. I look forward to your guidance.
The manual specifies that the drain valve must be checked for leaks and that it uses a specific Teflon plug to ensure sealing. There is no mention of using a 3-way PTFE valve. Installing a non-standard valve like a 3-way PTFE valve may compromise vacuum integrity or introduce leaks if not properly sealed. It may also affect cooling performance if the system cannot maintain a proper vacuum. Therefore, it is not confirmed to be safe or compatible.
This answer is automatically generated