
Related Manuals for LaboGene CoolSafe 100-9 Touch Superior XS


Summary of Contents for LaboGene CoolSafe 100-9 Touch Superior XS
- Page 1 INSTRUCTION MANUAL CoolSafe 100-9 Touch Superior XS CoolSafe 95-15 Touch Superior XL Item No. 700637 CopyRight © 2016...
- Page 2 This document is the original instruction manual in accordance with the current Machinery Directive. This document is the reference for any translation of this instruction manual. In case of doubts or uncertainties the text in the original instruction manual is the valid. LaboGene ApS Industrivej 6-8 Vassingerød...
-
Page 3: Table Of Contents
Instruction manual for CoolSafe Table of contents Introduction ........................4 Safety precautions ......................4 General information ......................4 Safety ..........................4 Installation .......................... 5 Installation of CoolSafe ......................5 Installation of vacuum pump ....................5 Installation of accessories ....................6 Functional description....................... -
Page 4: Introduction
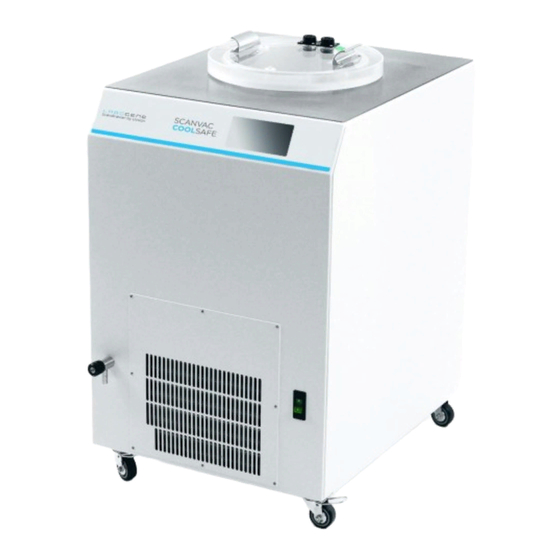
The CoolSafe 100-9 Touch Superior XS has a 9 litre condenser with lowest reachable temperature of -100 °C and comes complete with a 3 shelf chamber that is located inside the condenser. -
Page 5: Installation
Check the oil level on the pump and fill it if necessary. The oil level sight glass should be 1/2 - 3/4 full. LaboGene recommends that when the pump is running the gas ballast valve is in the open position. Item No. 700637... -
Page 6: Installation Of Accessories
UP and DOWN arrows on the right side of the display to scroll through the menu items. To return to the previous menu press the LaboGene logo placed in the lower right hand corner of the screen. -
Page 7: Valves And Connections
Instruction manual for CoolSafe Running mode Manual Time and date Status Menu item in focus The status line at the top of the display shows the running mode of the freeze dryer, i.e. Manual or Auto running freeze drying process, the actual stage of the freeze drying process, i.e. standby, pre- freezing, primary drying and secondary drying. -
Page 8: Power Supply For Heating Of And Temperature Signals From Shelves
Instruction manual for CoolSafe 4.2.3 Power supply for heating of and temperature signals from shelves The rack and shelves placed inside the condenser is connected to the control system through two cables placed on the back of the cabinet. Temperature signal from shelves Product temperature signal Power for heating in shelves For temperature regulation purposes, the temperature in each shelf is measured using a PT 100... -
Page 9: Pressure Regulation Valve (Optional)
During freeze drying all time, pressure and temperature data is stored on the SD card at one minute intervals. The data saved on the SD card is formatted for use in the LaboGene freeze drying software package. From the software the data can be formatted and saved in an Excel compatible format. -
Page 10: Operation
Instruction manual for CoolSafe of all installed components. Further a screen makes it possible to see the time, pressure and temperature of the system in real-time. This mode of operation is described in a separate manual for this option. SD card Mini USB Operation The touch control system is designed and developed for running the CoolSafe freeze dryers... -
Page 11: Main Menu
Opens the setup menu. Service Opens the service menu. Info Opens the information screen. Press the LaboGene logo for 2-3 seconds to lock the display for input. Unlock press again. Touch screen - locked Menu Action Press the LaboGene logo for 2-3 seconds to lock the display for input. -
Page 12: Current Shelf Temperatures
Scroll down to highlight menu item, press Reset error to reset error counter. Press the LaboGene logo to return to the main menu. Press the LaboGene log for 2-3 seconds to lock the display for input. Unlock press again. -
Page 13: Set-Point Pressure
Decrease set-point by 0,001 hPa/Torr. Accept change in set-point. Increase set-point by 0,001 hPa/Torr. Press the LaboGene logo to return to the manual menu. Press the LaboGene log for 2-3 seconds to lock the display for input. Unlock press again. -
Page 14: Programme List
Item Action List of programmes 1 to 10. Press the desired programme to activate. Press the LaboGene logo to return to the auto menu. Press the LaboGene log for 2-3 seconds to lock the display for input. Unlock press again. -
Page 15: 6.3.2.2 Alarm Pressure
Decrease set-point by 0,1 hPa/Torr. Accept change in set-point. Increase set-point by 0,1 hPa/Torr. Press the LaboGene logo to return to the auto menu. Press the LaboGene log for 2-3 seconds to lock the display for input. Unlock press again. -
Page 16: 6.3.3.2 Alarm Pressure
Action Press the individual numerical boxes to Pre-freeze 1 - 5 change the values. Press the LaboGene logo to return to the pre-freeze menu. Press the LaboGene log for 2-3 seconds to lock the display for input. Unlock press again. -
Page 17: 6.3.3.4 Secondary Drying
Action Press the individual numerical boxes to Pre-freeze 1 - 5 change the values. Press the LaboGene logo to return to the primary drying menu. Press the LaboGene log for 2-3 seconds to lock the display for input. Unlock press again. -
Page 18: Release
The progress of the pressure release can be followed on the moving bar graph at the top of the screen. Press the LaboGene logo to return to the main menu. Press the LaboGene log for 2-3 seconds to lock the display for input. Unlock press again. -
Page 19: Status For De-Icing Process
Ice condenser temp. temperature. Displays the remaining time of the de- Programme step time ice process. Press the LaboGene logo to return to the de-ice menu. Press the LaboGene log for 2-3 seconds to lock the display for input. Unlock press again. -
Page 20: Pressure Selection
Pressure selection Touch screen – as opened Item Action Press the preferred pressure unit. Press the LaboGene logo to return to the setup menu. Press the LaboGene log for 2-3 seconds to lock the display for input. Unlock press again. -
Page 21: Service
Reset period timer service. The timer is active when the vacuum pump is running. Press the LaboGene logo to return to the main menu. Press the LaboGene log for 2-3 seconds to lock the display for input. -
Page 22: Error Situations, Status And Error Codes
Instruction manual for CoolSafe Error situations, status and error codes Power failure If the freeze dryer is running in manual or auto mode during a short period of power failure – less than 10 minutes, the freeze dryer will start up in the same mode and continue the ongoing process, using the same parameters, in manual mode, and continue running the active programme if in auto mode. -
Page 23: Error Codes
10 mm oil level (preferably it should be empty). Switch on the CoolSafe and the vacuum pump. The lowest temperature (-100 °C on the CoolSafe 100-9 Touch Superior XS and -95 °C with CoolSafe 95-15 Touch Superior XL) should be achieved within 60 minutes. -
Page 24: Pre-Freezing And Freeze Drying
Instruction manual for CoolSafe Pre-freezing and freeze drying The CoolSafe 100-9 Touch Superior XS and CoolSafe 95-15 Touch Superior XL shelf modules are specifically designed to be placed inside the condenser chamber, to allow for automatic pre- freezing in 5 steps and freeze drying in 10 steps without any further manipulations. -
Page 25: Stopping The Vacuum Pump
Instruction manual for CoolSafe If the electric de-icing option is not fitted: Ensure the CoolSafe is switched off and the vacuum has been released. Leave the condenser open to the atmosphere, introduce warm water into the condenser until it is released from the walls of the condenser. Then remove the ice. -
Page 26: Vacuum Pump
Instruction manual for CoolSafe The rubber must appear shiny, smooth and without cracks. All silicone gaskets need only dust removal (do not use any vacuum grease). Vacuum pump See the vacuum pump instruction manual for maintenance according to supplier’s recommendation. Maintenance for a vacuum pump in general will be to: Check the oil volume and colour conditions regularly. -
Page 27: The Freeze-Drying Process
Instruction manual for CoolSafe If leak(s) are found on the seals, clean both the surface of the s/steel and the seal, using a clean tissue slightly wetted with alcohol. Check that the lid of the chamber is located correctly, again check that the seal is OK as previous. -
Page 28: Technical Specifications
USB port for LaboGene software/SD card for data 3 Electric heated shelves ø180, for pre freeze and freeze drying, max 5 shelves Accessories For accessories please contact your local LaboGene distributor or visit LaboGene’s web site www.labogene.com where brochures are available. -
Page 29: Declaration Of Conformity
Instruction manual for CoolSafe Declaration of conformity Item No. 700637 Page 29 of 30 01012016QA01 CopyRight © 2016... -
Page 30: Annex - Pressure Of Aqueous Vapor
Instruction manual for CoolSafe Annex - Pressure of Aqueous Vapor Temperature Pressure Temperature Pressure Temperature Pressure Temperature Pressure 6,103 -9,2 2,789 -18,4 1,204 -27,6 0,488 -0,2 6,003 -9,4 2,741 -18,6 1,182 -27,8 0,479 -0,4 5,906 -9,6 2,693 -18,8 1,159 -28,0 0,468 -0,6 5,810...
Need help?
Do you have a question about the CoolSafe 100-9 Touch Superior XS and is the answer not in the manual?
Questions and answers