Table of Contents
Advertisement
Available languages
Available languages
Quick Links
Advertisement
Chapters
Table of Contents

Related Manuals for Eaton DX 1000 LAN


Summary of Contents for Eaton DX 1000 LAN
- Page 1 Eaton DX LAN 1-3KVA TOWER ENGLISH ESPAÑOL...
- Page 2 ENGLISH………….………………...…..1 ESPAÑOL………………………...……37...
-
Page 3: Table Of Contents
CONTENT 1. Safety Warnings ................3 1.1 Installation ..................3 1.2 Operation .................... 4 1.3 Maintenance ..................5 2. Product introduction ................. 7 2.1 Functions description ................. 7 2.2 Mode description ................8 2.3. Description of commonly used symbols .......... 13 2.4 Front panel .................. - Page 4 6. Transport and Storage ..............35 6.1 Please transport the UPS only in the original packaging....35 6.2 The UPS must be stored in the room where it is ventilated and dry.
-
Page 5: Safety Warnings
1. Safety Warnings CAUTION: SEE INSTALLATION INSTRUCTIONS BEFORE CONNECTING TO THE SUPPLY. 1.1 Installation ⚫ Condensation may occur if the UPS is moved directly from a cold to a warm environment. The UPS must be absolutely dry before being installed. Please allow an acclimatization time of at least two hours. ⚫... -
Page 6: Operation
⚫ For PLUGGABLE EQUIPMENT, the socket-outlet shall be installed near the equipment and shall be easily accessible. ⚫ Use No. 10AWG (for 3K output wire) and No. 12AWG (for 2K output wire), 75°C copper wire and 12 lb-in Torque force when connecting to terminal block. -
Page 7: Maintenance
⚫ Ensure that no liquid or other foreign objects can enter the UPS. ⚫ The UPS can be operated by any individual without previous experience. 1.3 Maintenance ⚫ The UPS operates with hazardous voltages. Maintenance should be carried out only by qualified maintenance personnel. ⚫... - Page 8 c) Wear rubber gloves and boots. d) Do not lay tools or metal parts on top of batteries. e) Disconnect charging source prior to connecting or disconnecting battery terminals. f) Determine if battery is inadvertently grounded. If inadvertently grounded, remove source from ground. Contact with any part of a grounded battery can result in electrical shock.
-
Page 9: Product Introduction
2. Product introduction 2.1 Functions description ⚫ This product is a true online double-conversion UPS (Uninterruptible Power Supply). It provides perfect protection for critical load such as computer system. It can eliminate almost all mains power disturbances. The input AC current can be corrected to a wave following the mains voltage, so it is a high power factor system. -
Page 10: Mode Description
2.2 Mode description The different strings could be displayed on the LCD screen corresponding to their own operating modes, and they are illustrated as the following table. At any time, only one normal operating string or fault string is presented. But the warning, even several warnings could appear in a certain normal operating mode at one time. - Page 11 ■ The No output mode ⚫ Bypass mode Bypass mode means that the UPS provides the power through the internal bypass way to load directly without any regulation. If the controller detects the mains is abnormal, it will shut off the output to protect the load.
- Page 12 ⚫ Line mode Line mode means that the mains input is rectified/converted by the AC/DC section and then inverted to stable output by DC/AC section. In line mode, the output is clean and good to the loads. If the mains get abnormal, the UPS will transfer to battery mode without interrupt.
- Page 13 ■ The Battery mode ⚫ Battery test mode In this mode, the UPS will stop the AC/DC section and discharge the battery while mains input is normal. If the controller found the battery is error, it will transfer back to line mode immediately, and warning by display to see whether the battery needs to be replaced.
- Page 14 ⚫ EPO (Emergency Power Off) It is also called RPO (Remote Power Off). Turn off the EPO switch could occur RPO .On LCD display, the mode string is “EPO”. It is a special status in which the UPS would shut the output off and alarm.
-
Page 15: Description Of Commonly Used Symbols
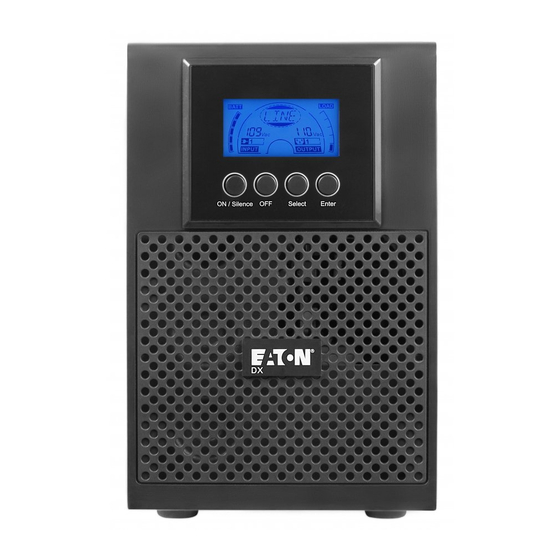
2.3. Description of commonly used symbols Some or all of the following symbols may be used in this manual. It is advisable to familiarize yourself with them and understand their meaning: 2.4 Front panel 2.4.1 LCD display Display Panel... - Page 16 ⚫ LCD display Display Function Display Function Input Information Output Information It indicates input It indicates output voltage/frequency value, voltage/frequency which are displayed value, which are alternately. displayed alternately. It indicates the input is connected with mains, and It indicates the Output the input power is supplied plug.
- Page 17 2.4.2 BUTTON Switch Function Turn on UPS system: By pressing the ON-Button “I” the UPS ON-Button system is turned on. Deactivate acoustic alarm: By pressing this Button an acoustic alarm can be deactivated in the battery mode. Do the battery test: By pressing this Button the UPS can do the battery test in the Line mode or ECO mode.
-
Page 18: Rear Panel
2.5 Rear panel DX 1000 LAN DX 2000 LAN... - Page 19 DX 3000 LAN...
-
Page 20: Product Specification
2.6 Product specification 2.6.1 Model description This manual is applicable to the following models: Model name DX 1000 LAN DX 2000 LAN DX 3000 LAN Power rating 1000VA/900W 2000VA/1800W 3000VA/2700W 2.6.2 Environment specification Model name DX 1000 LAN DX 2000 LAN... - Page 21 2.6.4 Electrical Specification Model name DX 1000 LAN DX 2000 LAN DX 3000 LAN Power 1000VA/900W 2000VA/1800W 3000VA/2700W Input Current (Max.) Voltage Range 85~150VAC @ full load (55~150VAC @ half load) Frequency Range 46 ~ 54Hz @ 50Hz system / 56 ~ 64Hz @ 60Hz system ≧0.97 @ full load...
-
Page 22: Communication Port
2.6.5 Standards EN 62040-1 Safety UL1778 Conduction FCC PART 15 Class A Radiation FCC PART 15 Class A Harmonics IEC/EN 61000-3-2 Flicker IEC/EN 61000-3-3 IEC/EN 61000-4-2 Level 3 IEC/EN 61000-4-3 Level 3 IEC/EN 61000-4-4 Level 4 SURGE IEC/EN 61000-4-5 Level 4 IEC/EN 61000-4-6 Level 3 IEC/EN 61000-4-8... -
Page 23: Installation
3. Installation 3.1 Unpacking and Inspection 3.1.1 Unpack the package and check the contents. The shipped package contains: ⚫ 1 UPS ⚫ 1 user manual 3.1.2 Inspect the appearance of the UPS to see if there is any damage during transportation. Do not turn on the unit and notify the dealer immediately if there is any damage or lack of some parts. - Page 24 5) Install the external battery as following: a) Warning: Make sure the mains input have been cut off. b) Switch off the battery breaker if there is a battery breaker. c) Remove the cover of external battery terminal of UPS. d) Warning: Pay highly attention to the rating battery voltage marked on the rear panel, the connection with wrong battery voltage may cause permanent damage of the UPS.
-
Page 25: Installation For Communication Software (Optional)
Check the wiring and voltage of the battery pack. Make sure the polarity and voltage is correct, and the wires are fastened. 6) Connect the loads to the UPS through the outlet sockets. 7) Connect the input power cord of UPS to mains 3.4 Installation for communication software (optional) 1) Connect the communication cable between UPS and PC. -
Page 26: Operation
4. Operation 4.1 Start the UPS with mains (AC source) 1) If the UPS is a long back up time model, with external battery banks, please switch on the battery breaker first; 2) If the wiring is correct, turn on the mains breaker in your building. Then the power supply inside the UPS will be started automatically, the fans will run, and the LCD will display with bypass mode or standby mode. -
Page 27: Connect Loads To Ups
4.3 Connect loads to UPS After the UPS is turned on, you can switch on the loads. 1) It is recommended to switch on the load one by one. The Load grids level will indicate the load capacity in line mode. 2) If it is necessary to connect the inductance load such as a printer to the UPS, the start-up power should be considered for calculating the capacity of the UPS, because the power... -
Page 28: Test The Batteries
the alarming level, the buzzer will beep hurry (once every sec) to remind the user that the battery is low level and the UPS will be shutdown automatically soon. The user could switch off some non-critical loads to avoid the shutdown alarming and prolong the backup time. -
Page 29: Turn Off The Ups With Battery (Dc Source) Only
3) If you want to turn off the output of UPS and shut down the UPS completely, you have to cut off the mains input of UPS. Note: please make sure all the loads are prepared or turned off for your operation before you shut down the UPS system. 4) After you cut off the mains input of UPS to shut down. -
Page 30: Operation In Fault Mode
4.11 Operation in fault mode icon 1) In case the Fault/Warning is lightened constantly and the buzzer beep continuously, it shows that there must a fatal error happen to the UPS and it is operating in abnormal mode. 2) If fault happens, please notes and record what the display shows, the display information is very important for the trouble shooting. - Page 31 In bypass or no output mode, pressing the “Select” button on the LCD panel for more than one second, “100Vac” will flicker on the screen. And if pressing the “Select” button continuously again, the flickering character string would display “110Vac”, next to“115Vac”, “120Vac”, “127Vac”, “50Hz”, “60Hz”, “BPE”(means bypass enable), “BPd”(means bypass disable), “ECO”, “UPS”...
- Page 32 Step 2: The flickering figure would change to “120” after pressing the “Select” button three times again. Step 3: Pressing the “Enter” button the new setting output voltage has been confirmed, turn on the UPS and the output is change to 120V.
-
Page 33: Maintenance
5. Maintenance 5.1 Typical Trouble Shooting (1) Trouble shooting according to warning indication. LCD WARNING Possible cause Action CODE CHGF Charger failed Make sure the charger is ok. Check the ventilation of the TEPH Temperature High UPS, check the ambient temperature. - Page 34 (2) Trouble shooting according to fault indication Possible LCD FAULT CODE Action cause Remove all the loads. Turn off the UPS. Check whether the output of UPS and loads is Output short SHOR short circuit. Make sure the circuit short circuit is removed, and the UPS has no internal faults before turning on again.
- Page 35 Note 1: when the UPS failed, the Fault/Warning icon will be lightened constantly, and the buzzer will beep continuously. The backlight becomes red Note 2: When the UPS is fault, it will stop the power conversion of mains or battery. Note 3: If the fault can’t be shoot, please contact the distributor or service center.
-
Page 36: Battery Maintenance
5.2 Battery Maintenance The battery used for standard models are valve regulated sealed lead-acid maintenance free battery. It should be charged regularly in order to maximize the expected life of the battery. When being connected to the utility power, whether the UPS is turned on or not, the UPS keeps charging the batteries and also offers the protective function of overcharging and over-discharging. - Page 37 6. Transport and Storage 6.1 Please transport the UPS only in the original packaging. 6.2 The UPS must be stored in the room where it is ventilated and dry.
- Page 39 CONTENIDO 1. Advertencias de seguridad ............39 1.1 Instalación ..................39 1.2 Operación ..................40 1.3 Mantenimiento .................. 41 2. Introducción del producto ............. 43 2.1 Descripción de las funciones ............43 2.2 Descripción de los modos ..............44 2.3. Descripción de símbolos de uso frecuente ........49 2.4 Panel frontal ..................
- Page 40 6. Transporte y almacenamiento ............72 6.1 Transporte el UPS solo en el embalaje original......72 6.2 El UPS debe almacenarse en una habitación ventilada y seca..72...
-
Page 41: Advertencias De Seguridad
1. Advertencias de seguridad PRECAUCIÓN: VEA LAS INSTRUCCIONES DE INSTALACIÓN ANTES DE CONECTARSE A LA RED ELECTRICA. 1.1 Instalación ⚫ Puede ocurrir condensación si la UPS se traslada directamente de un ambiente frío a uno cálido. La UPS debe estar totalmente seca antes de instalarla. -
Page 42: Operación
⚫ Un dispositivo apropiado de desconexión deberá instalarse en el cableado del edificio, como protección contra cortocircuitos. ⚫ Para EQUIPO ENCHUFABLE, la toma de corriente deberá estar instalada cerca del mismo y tendrá que ser de fácil acceso. ⚫ Utilice 10AWG (para el cableado de salida de 3K) y 12AWG (para el cableado de salida de 2K), cable de cobre de 75°C y un torque de 12 lb-pul para la conexión al bloque de terminales. -
Page 43: Mantenimiento
⚫ No retire ni desconecte el cable de entrada cuando el UPS esté encendido. Esto elimina la tierra de protección del UPS y de las cargas conectadas. ⚫ Asegúrese de que no ingresen líquidos u otros objetos extraños en el UPS. ⚫... - Page 44 ⚫ Una batería puede presentar un riesgo de descarga eléctrica y alta corriente de cortocircuito. Adopte las siguientes medidas de precaución al trabajar con baterías: a) Quítese relojes, anillos u otros objetos metálicos. b) Utilice herramientas con mangos aislados. c) Use guantes y botas de goma.. d) No coloque herramientas o piezas metálicas sobre las baterías.
-
Page 45: Introducción Del Producto
2. Introducción del producto 2.1 Descripción de las funciones Salida de UPS Entrada de red Batería ⚫ Este producto es un UPS (fuente de alimentación ininterrumpida) con tecnología doble conversión en línea. Proporciona una perfecta protección para cargas críticas, como los sistemas informáticos. Puede eliminar casi todas las perturbaciones de la red eléctrica. -
Page 46: Descripción De Los Modos
2.2 Descripción de los modos Diferentes códigos podrían mostrarse en el panel de control, correspondientes a sus propios modos de operación, los cuales se ilustran en la siguiente tabla. En cualquier momento, un único código de modo normal de operación o falla será indicado. Por otra parte, una advertencia, o incluso varias advertencias podrían aparecer en un cierto modo normal de operación al mismo tiempo. - Page 47 ■ Modo sin salida ⚫ Modo Bypass El modo Bypass significa que el UPS proporciona la energía requerida por la carga a través de la vía de derivación interna sin ninguna regulación. Si el controlador detecta que la red eléctrica es anormal, apagará...
- Page 48 ⚫ Modo Línea El modo Línea significa que la entrada de red es rectificada por el convertidor AC/DC y luego convertida a una salida estable con el inversor DC/AC. En modo Línea, la salida es limpia y adecuada para las cargas. Si la red eléctrica se vuelve anormal, el UPS se transferirá al modo batería sin interrupción.
- Page 49 ■ Modo Batería ⚫ Modo prueba de Batería En este modo, el UPS detendrá el convertidor AC/DC y descargará la batería mientras la entrada de la red eléctrica es normal. Si el controlador determina que la batería se encuentra defectuosa, volverá...
- Page 50 2) Es importante saber que el tiempo de transferencia de la salida del UPS desde el modo ECO al modo batería es inferior a 10ms. El panel de control en modo ECO es igual al del modo Bypass. El código "ECO" indica que el UPS está funcionando en el modo ECO. ⚫...
-
Page 51: Descripción De Símbolos De Uso Frecuente
2.3. Descripción de símbolos de uso frecuente Algunos o todos de los siguientes símbolos pueden ser utilizados en este manual. Es recomendable familiarizarse con ellos y comprender su significado: Símbolos y Explicación Símbolo Explicación Explicación Símbolo 2.4 Panel frontal 2.4.1 Panel de control Panel de control... - Page 52 ⚫ Pantalla Pantalla Función Pantalla Función Información de entrada Información de salida Muestra Muestra alternadamente los alternadamente los valores de voltaje y frecuencia valores de voltaje y de salida. frecuencia de salida. Indica que la entrada está conectada a la red y la Indica la toma de potencia está...
- Page 53 2.4.2 BOTONES Botón Función Encendido del UPS: Al presionar el botón ON *I", el sistema UPS Botón ON se enciende. Desactivar alarma acústica: al presionar este botón, se puede desactivar una alarma acústica en el modo batería. Realizar la prueba de batería: al presionar este botón, el UPS puede hacer la prueba de batería en el modo Línea o en el modo ECO.
-
Page 54: Panel Trasero
2.5 Panel trasero Ventiladores Línea de Entrada Tomas de Salida DX 1000 LAN Conector de Batería Ventiladores Tomas de Salida Línea de Entrada Terminales de Salida DX 2000 LAN... - Page 55 Conector de Batería Fusibles Ventiladores Tomas de Salida Línea de Entrada Terminales de Salida DX 3000 LAN...
-
Page 56: Especificaciones Del Producto
2.6 Especificaciones del producto 2.6.1 Descripción de los modelos Este manual es aplicable a los siguientes modelos: Modelo DX 1000 LAN DX 2000 LAN DX 3000 LAN Potencia nominal 1000VA/900W 2000VA/1800W 3000VA/2700W 2.6.2 Especificaciones del entorno Modelo DX 1000 LAN... - Page 57 2.6.4 Especificaciones eléctricas Modelo DX 1000 LAN DX 2000 LAN DX 3000 LAN Potencia nominal 1000VA/900W 2000VA/1800W 3000VA/2700W Input Corriente (Max.) 85~150VAC @ plena carga (55~150VAC @ media Rango de Voltaje carga) Rango de Frecuencia 46 ~ 54Hz @ 50Hz / 56 ~ 64Hz @ 60Hz ≧0.97 @ plena carga...
-
Page 58: Puerto De Comunicación
2.6.5 Normas EN 62040-1 Seguridad UL1778 Conducción FCC PART 15 Clase A Radiación FCC PART 15 Clase A Armónicos IEC/EN 61000-3-2 Parpadeo IEC/EN 61000-3-3 IEC/EN 61000-4-2 Nivel 3 IEC/EN 61000-4-3 Nivel 3 IEC/EN 61000-4-4 Nivel 4 SURGE IEC/EN 61000-4-5 Nivel 4 IEC/EN 61000-4-6 Nivel 3 IEC/EN 61000-4-8... -
Page 59: Instalación
3. Instalación 3.1 Desembalaje e inspección 3.1.1 Desembale la caja y verifique el contenido. El paquete enviado contiene: ⚫ 1 UPS ⚫ 1 manual de usuario 3.1.2 Inspeccione la apariencia del UPS para ver si ocurrió algún daño durante el transporte. No encienda la unidad y notifique al distribuidor inmediatamente si existiera algún daño o falta de alguna pieza. - Page 60 4) Asegúrese de que la tierra de protección sea correcta. 5) Instale la batería externa de la siguiente manera: Advertencia: Asegúrese de que la entrada de red se encuentre cortada. Apague el interruptor de batería si existe dicho interruptor. Retire la cubierta de los terminales de la batería externa del UPS.
-
Page 61: Instalación Para Software De Comunicación (Opcional)
Nota: ¡Siempre conecte el cable de tierra primero! Conecte el enchufe del cable de la batería externa al bloque de terminales de la batería externa en el panel posterior del UPS. Verifique el cableado y el voltaje de la batería. Asegúrese de que la polaridad y el voltaje sean correctos, y que los cables estén debidamente ajustados. -
Page 62: Operación
4. Operación 4.1 Encendido del UPS con red principal (Fuente AC) 1) Si el UPS tiene banco externo de batería, active primero el interruptor de batería. 2) Si el cableado es correcto, active el interruptor de red en su edificio. Luego, la fuente de alimentación dentro del UPS se iniciará... -
Page 63: Conexión De Cargas Al Ups
2) Presione el botón de ON del panel frontal del UPS de forma continua durante más de 1 segundo. El buzzer sonará una vez. Después de unos segundos, el UPS se encenderá en el modo normal (modo línea) y generará el voltaje especificado. 3) Después que el UPS encienda en el modo batería, el buzzer sonará... -
Page 64: Carga De Baterías
4.4 Carga de baterías 6) Después que el UPS esté conectado a la red eléctrica principal, el cargador funcionará y cargará las baterías automáticamente en modo bypass o modo línea. 7) Se sugiere cargar las baterías durante 10 horas antes de usar. De lo contrario, el tiempo de respaldo puede ser menor que el valor estándar. -
Page 65: Apagado Del Ups Con Red Principal (Fuente Ac)
batería, excepto que se muestra el código "TEST". Entonces, puede verificar el nivel de batería en este modo. 4.7 Apagado del UPS con red principal (Fuente AC) 1) En primer lugar, apague el UPS (inversor) para pasar al modo bypass, presionando el botón OFF continuamente durante más de 1 segundo. -
Page 66: Operación En Estado De Advertencia
para desactivarla. Por otra parte, la alarma se habilitará cuando la batería esté baja para recordarle que debe apagar la carga pronto. Si la alarma es demasiado molesta en modo bypass, puede presionar el botón ON de forma continua durante más de 1 segundo para desactivarla. -
Page 67: Configuración Mediante El Panel De Control
función de encendido/apagado automático. Esta función puede ser configurada mediante el software. El envío del comando PET habilita esta función y el envío del comando PDT deshabilita esta función. Esta función esta deshabilitada por defecto, pero si la función de encendido/apagado automático está habilitada, las tomas del segmento 2 cortarán su salida cuando esté... - Page 68 presionando el botón "ON". El UPS pasará al modo bypass después de seleccionar "BPE" y pasará al modo sin salida después de seleccionar "BPd". El cambio de modo estará activo solo después de encender el UPS. Aquí hay un ejemplo para cambiar el voltaje de salida de 110Vac a 120Vac a través del panel de control.
- Page 69 Paso 3: Al presionar el botón "Enter" se confirma la configuración del nuevo voltaje de salida. Encienda el UPS y la salida cambiará a 120V.
-
Page 70: Mantenimiento
5. Mantenimiento 5.1 Solución de problemas típicos (1) Solución de problemas según el código de advertencia. CODIGO DE Posible causa Acción ADVERTENCIA Verifique que el cargador se CHGF Falla de Cargador encuentra bien. Verifique la ventilación del TEPH Alta Temperatura UPS y revise la temperatura ambiente. - Page 71 (2) Solución de problemas según el código de falla. CODIGO DE Posible causa Acción FALLA Remueva todas las cargas. Apague el UPS. Verifique si la salida del UPS o las cargas Cortocircuito de SHOR están en cortocircuito. Asegúrese salida de eliminar el cortocircuito y que el UPS no tenga fallas internas antes de volver a encenderlo.
- Page 72 Nota 1: Cuando el UPS falla, el ícono de falla/advertencia se iluminará constantemente buzzer sonará continuamente. La luz de fondo se volverá roja. Nota 2: Cuando el UPS falla, detendrá la conversión de energía desde la red eléctrica o la batería. Nota 3: Si la falla no puede ser solucionada, comuníquese con el distribuidor o centro de servicio.
-
Page 73: Mantenimiento De Batería
5.2 Mantenimiento de Batería La batería utilizada es del tipo plomo-ácido, sellada y regulada por válvula que no requiere mantenimiento. Debe cargarse regularmente para maximizar la vida útil esperada para la batería. Cuando se conecta a la red eléctrica, ya sea que el UPS esté... - Page 74 6. Transporte y almacenamiento 6.1 Transporte el UPS solo en el embalaje original. 6.2 El UPS debe almacenarse en una habitación ventilada y seca.
- Page 75 614-40055-00...
Need help?
Do you have a question about the DX 1000 LAN and is the answer not in the manual?
Questions and answers