
Related Manuals for Hans Grohe AXOR Bouroullec 19670401


Summary of Contents for Hans Grohe AXOR Bouroullec 19670401
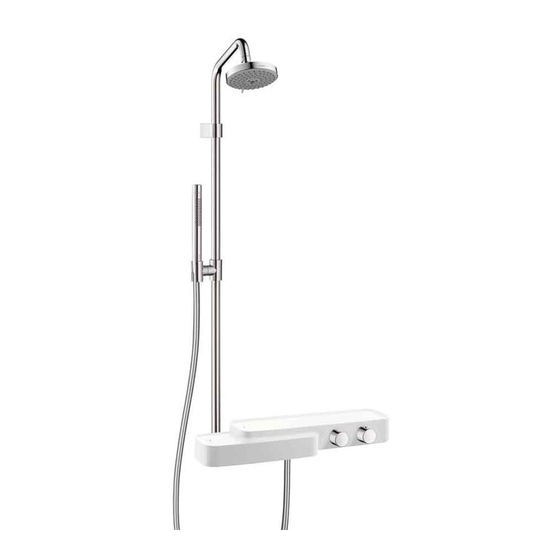
- Page 1 EN Installation / User Instructions / Warranty FR Instructions de montage / Mode d'emploi / Garantie ES Instrucciones de montaje / Manejo / Garantía Bouroullec 19670401...
-
Page 2: Technical Information
English Technical Information Recommended water pressure 15 - 75 psi Max. water pressure 145 psi Recommended hot water temp. 120° - 140° F* Max. hot water temp 176°F* Flow rate - showerhead 2.5 gpm Flow rate - handshower 2.5 gpm *Please know and follow all applicable local plumbing codes when setting the temperature on the water heater. Installation Considerations • For best results, Hansgrohe recommends that this unit be installed by a licensed, professional plumber. • Please read over these instructions thoroughly before beginning installation. Make sure that you have all tools and supplies needed to complete the installation. • The installer should be sure that the mounting loca- tion for this product is flat (no projecting joints or tiles) and that the wall is suitable for the installation of this product. • The included mounting hardware is suitable for solid surface walls, such as concrete, concrete wallboard, dense natural stone, brick, gypsum wallboard/ plaster fiberboard surfaced with tile, marble, or stone. Hansgrohe is not responsible for the cost of alternate mounting hardware. • Do not use the showerpipe as a grab bar. Tools Required / Outiles Utiles / •... -
Page 3: Datos Tecnicos
Français Español Données techniques Datos tecnicos Pression d’eau recommandée 15 - 75 psi Presión recomendada en servicio 15 - 75 psi Pression d’eau maximum 145 psi Presión en servicio max. 145 psi Température recommandée 120° - 140° F* Temperatura recomendada del 120� - 140� F* d'eau chaude agua caliente Température maximum d'eau chaude 176°F* Temperatura del agua caliente max. 176�F* Capacité nominale - pomme de douche 2.5 gpm Caudal máximo - ducha cabezal 2.5 gpm Capacité nominale - douchette 2.5 gpm Caudal máximo - teleducha 2.5 gpm * Vous devez connaître et respecter tous les codes de plom- *Debe conocer y cumplir todos los códigos locales apli- berie locaux applicables pour le réglage de la température cables para ajustar la temperatura del calentador de agua. du chauffe-eau. À prendre en considération pour Consideraciones para la l’installation instalación... - Page 4 16¼" 1¾" 2" 26° 12⅛" ⅞" 8½" 4⅝" 14½" 3½" 26⅛" 8⅛" 6½" 5⅞" 1⅛" 5⅝" 8¾"...
- Page 5 Replacement Parts / Pièces détachées / Repuestos 97983000 95810000 96179000 97984000 96477000 27495001 98714000 94074000 28532001 98181000 (18x2) 94246000 95793000 98282000 98212000 (41x2) 98913000 95785000 95791000 95792000 98701000 95784000 (27½") 98212000 (41x2) 95791000 98131000 95783000 98283000 (15x2.5) (15¾") 98913000 95715000 94184000 95725000 98127000...
-
Page 6: Installation
English Roughing-in This unit requires ½" NPT male nipples, extending ⅜" outside the surface of the finished wall, for the hot and cold water supplies. Installation Hold the mounting plate over the nipples. " 8 ½ Make sure that the plate is level. Mark the positions of the screw holes. -
Page 7: Piezas Interiores
Français Español Pièce intérieure Piezas interiores Cette pièce nécessite des raccords mâles NPT de ½ Esta unidad requiere de niples macho NPT de ½", po dépassant de ⅜ po à l’extérieur de la surface que sobresalga ⅜" de la superficie de la pared du mur fini, pour les conduites d’alimentation en eau terminada, para los suministros de agua caliente y de chaude et froide. agua fría. Installation Instalación Mettez la plaque de montage sur les raccords. Coloque la placa de montaje sobre los niples. Assurez-vous que la plaque est au niveau. Asegúrese de que la placa quede nivelada. Marquez les positions des trous de vissage. Marque las posiciones de los orificios para tornillos. - Page 8 English Drill the screw holes. Install the anchors. ¼" / 6 mm Seal the wall around the anchors using waterproof sealant. Failure to seal the wall may lead to water damage. ⅜" / 10 mm ¼" / 6 mm ⅜" / 10 mm Wrap the threads on the nipples using Teflon tape. Install the threaded connections on the nipples. Tighten them using a 10 mm Allen wrench (not included). The connections should extend 1⅝" – 1¾" outside the surface of the finished wall. Seal the wall around the nipples using waterproof sealant. Failure to seal the wall may lead to water damage.
- Page 9 Français Español Percez les trous. Perfore los orificios. Installez les chevilles. Instale los pernos de anclaje. Scellez le mur autour des chevilles à l'aide d'un agent Selle la pared alrededor de los pernos con un sella- d'étanchéité. dor impermeable. Si le mur n’est pas scellé, l’eau Si no se sella la pared, pueden pro- pourrait éventuellement causer des ducirse daños por acción del agua. dommages. Enveloppez les filets des raccords avec du ruban Envuelva las roscas de los niples con cinta de Teflon. Téflon. Instale las conexiones roscadas en los niples. Installez les raccordements filetés sur les raccords.
- Page 10 English If the nipples are slightly too close together, or are slightly too far apart, remove the knockouts from the mounting plate. Install the top mounting piece. Install the mounting plate. Tighten the bolts. 13 mm...
- Page 11 Français Español Si les raccords sont légèrement trop rapprochés Si los niples están demasiado juntos, o demasiado ou trop éloignés l’un de l’autre, retirez les alvéoles separados, retire los troqueles de la placa de sectionnables de la plaque de montage. montaje. Installez la plaque de montage supérieure. Instale la placa de montaje superior. Installez la plaque de montage. Instale la placa de montaje. Serrez les boulons. Apriete los pernos.
- Page 12 English Remove the bottom plate from the housing assembly. 6 mm Install the housing assembly on the mounting plate. Install the washers and nuts on the connections and studs. Do not overtighten the nuts as damage to the housing may result. 13 mm 24 mm...
- Page 13 Français Español Retirez la plaque de fond du capot. Retire la placa inferior del conjunto de alojamiento. Installez le capot sur la plaque de montage. Instale el conjunto de alojamiento en la placa de montaje. Installez les rondelles et les écrous sur les raccorde- Coloque las arandelas y las tuercas en las conexio- ments et les goujons. nes y los espárragos. Ne serrez pas trop les écrous car No apriete excesivamente las tuercas vous pourriez endommager le capot. ya que puede dañar el alojamiento.
- Page 14 English Install the check valves. Install the hose adapters. Connect the hot hose to the hot supply and the cold hose to the cold supply. If the hoses are not connected to the proper supplies, the thermostatic mixer cannot function correctly, caus- ing a scald hazard. Use two wrenches, as shown, to pre- vent the hoses from twisting. 10 mm 24 mm Turn the water on at the main.
- Page 15 Français Español Installez les clapets de non-retour. La flèche doit Instale las válvulas de retención. La flecha debe pointer en direction de l’écoulement d’eau. apuntar en la dirección del caudal de agua. Installez les adaptateurs. Instale los adaptadores. Raccordez la conduite d'alimentation en eau chaude Conecte el suministro de agua caliente a la entrada à l’orifice d’entrée pour l’eau chaude, et la conduite de agua caliente y el suministro de agua fría a la d'alimentation en eau froide à l’orifice d’entrée pour entrada de agua fría. l’eau froide. Si los suministros no se conectan a las Lorsque les conduites d’alimentation entradas correctas, la válvula mez- ne sont pas raccordées aux orifices cladora termostática no funcionará d’entrée appropriés, le mélangeur adecuadamente, lo que resultará...
- Page 16 English Remove the screw from the pipe assembly. 5 mm Install the pipe. The shower arm can only be adjusted to the desired angle during installation. Adjustment during showering is not possible.
- Page 17 Français Español Retirez la vis. Retire el tornillo. Installez le tuyau. Instale el caño. Le bras de la douchette ne peut etre El brazo rociador de la teleducha regle qu’une seule fois pendant solo puede ajustarse una vez l’installation sur l’angle voulu. durante la instalacion en el angulo deseado.
- Page 18 English Install and tighten the screw. 5 mm Install the showerhead. 17 mm Install the bottom plate. Overtightening the screws will dam- age the housing. 6 mm...
- Page 19 Français Español Serrez la vis. Apriete el tornillo. Installez la pomme de douche. Instale el cabezal de la ducha. Installez la plaque de fond. Instale la placa inferior. Ne serrez pas trop les écrous car No apriete excesivamente las tuercas vous pourriez endommager le capot. ya que puede dañar el alojamiento.
- Page 20 English Place a rubber hose washer in the short hose end. Connect this end to the hose supply. Place the screen washer in the long hose end. Connect this end to the handshower. Rest the handshower in the holder.
- Page 21 Français Español Placez la rondelle en caoutchouc noir dans l’une des Coloque la arandela de goma negra en un extremo extrémités du tuyau. Fixez cette extrémité au robinet de la manguera. Acople este extremo al grifo de la de baignoire. bañera. Placez le tamis dans l’autre extrémité du tuyau. Fixez Coloque la arandela de filtro en el otro extremo de cette extrémité à la douchette. la manguera. Acople este extremo a la ducha de mano. Déposez la douchette dans son support. Apoye la ducha de mano en el soporte.
- Page 22 Justify the handle /Réglez la poignée / Ajuste el mando 2 mm ° 1 0 0 2 mm 2 mm 3 mm...
- Page 23 Set the high temperature limit stop/ Réglez la butée de limite d’eau chaude / Fije el tope de límite de alta temperatura 3 mm ° 1 0 0 2 mm...
- Page 24 User Instructions / Instructions de service / Manejo harder / plus difficile / mas dificil easier / plus facile / plus facile...
- Page 25 Maintenance / L'Entretien / Mantenimiento 24 mm 24 mm 6 mm...
-
Page 26: Troubleshooting
Troubleshooting Fault Cause Remedy Insufficient water - Supply pressure inadequate - Check water pressure - Filters are dirty - Clean filters on the thermo cartridge - Shower filter seal dirty - Clean filter seal between shower and hose Crossflow, hot water being forced - Check valves dirty or leaking - Clean check valves, replace if into cold water pipe, or vice versa, necessary when mixer is closed Spout temperature does not - Handle is not justified - Justify the handle correspond with temperature set - Hot water temperature too low - Increase hot water temperature to 120 ºF to 140 ºF Temperature regulation not - Thermo cartridge dirty or worn - Replace thermo cartridge possible Instantaneous heater didn't work - Filters are dirty - Clean or replace filters with thermostat - Check valve(s) dirty or worn - Replace check valves Showerpipe outputs hot water and - Not a product defect: hot and - Connect the hoses to the opposite cold water, but does not mix supplies... -
Page 27: Localización De Fallas
Localización de fallas Problema Causa Solución Sale poca agua - Presión insuficiente - Comprobar presión - Filtros del cartucho sucio - Limpie los filtros sobre el cartucho - Filtro de la ducha / teleducha sucio - Limpie/cambiar filtros entre flexo y ducha Flujo de agua cruzada agua - Válvula antirretorno sucia o pierde - Limpie / cambiar válvula caliente entra en la tubería del agua fría o al revés Temperatura del agua no - Termostato no ha sido ajustado - Ajuste el termostato corresponde a lo marcado - Temperatura del agua demasiado - Aumentar temperatura del agua baja no hay caliente a 120 ºF to 140 ºF. No es posible regular la - Termoelemento calcificadat - Cambie el termoelemento temperatura Calentador instantáneo no se - Filtro de la ducha sucio - Limpie/cambiar filtros enciende en combinación con el - Válvula anti-retorno cerrada - Cambie la válvula anti-retorno termostato... - Page 28 Cleaning / Nettoyage / Limpieza scale remover détartrant desincrustante > 1 min...
- Page 29 Cleaning Recommendation for Hansgrohe Products Modern bathroom faucets, kitchen faucets and shower products are made from different materials to comply with the needs of the market with regard to design and functionality. To avoid damage to the product, it is necessary to take proper care of For best results: • Prevent the buildup of mineral scale and /or soap residue by cleaning your Hansgrohe product(s) when needed. • Select a cleaning agent specifically intended for the type of product. • Do not use these types of cleaners as they will cause damage to your Hansgrohe product: Any cleaning agent containing hydrochloric acid, formic acid, lye, or acetic acid. Abrasive cleaning powders, pads, or brushes. Steam cleaners. “No rinse” cleaning agents. • Always follow the instructions provided by the manufacturer of the cleaning agent. • Do not mix cleaning agents, unless directed by the manufacturer. • Do not spray cleaners directly onto the product as drops could enter openings and gaps and cause damage. When using spray cleaners, spray the cleaner onto a soft cloth or sponge. • Always rinse your Hansgrohe product thoroughly with clear water and polish dry with a soft cloth after cleaning. Important • Residue from soaps and shampoos can cause damage. Rinse the product with clean water after each use. • Residue from basin/tub/tile cleaner can cause damage to faucets and fittings. Immediately rinse any overspray from the Hansgrohe product.
-
Page 30: Indications Importantes
• Après le nettoyage rincez avec suffisamment d’eau claire pour éliminer les restes de produits attachés. • L’utilisation d’appareil de nettoyage à vapeur n’est pas autorisée, car les températures importantes peuvent détériorer les produits. Indications importantes • Les produits pour le corps comme les savons liquides, les shampooings ou les gels de douche peuvent causer des détériorations. • Ici aussi on doit: Après l’utilisation rincer soigneusement les restes avec de l’eau. Conseil de nettoyage • Les deteriorations imputables à un mauvais entretien ne peuvent être pris en considération par notre garantie. • Par l’action d’un nettoyant sur les revêtements déjà endommagé il se produit une aggravation des dégâts. Recomendación de limpieza para los productos de Hansgrohe Hoy en día, las griferías de baño y de cocina así como duchas modernas se componen de materiales muy distintos para satisfacer las exigencias del mercado respecto al diseño y la funcionalidad. Para evitar daños y reclamaciones hay que tener en cuenta ciertos aspectos tanto en el uso como en su limpieza. -
Page 31: Limited Consumer Warranty
Limited Consumer Warranty This product has been manufactured and tested to the highest quality standards by Hansgrohe, Inc. (“Hansgrohe”). This warranty is limited to Hansgrohe products that are purchased by a consumer in the United States or Canada after March 1, 1996, and installed in either in the United States or in Canada. WHO IS COVERED BY THE WARRANTY This warranty extends to the original purchaser only. This warranty is non-transferable. WHAT IS COVERED BY THE WARRANTY The warranty covers only your Hansgrohe manufactured product. Hansgrohe warrants this product against defects in material or workmanship as follows: Hansgrohe will replace at no charge for parts only or, at its option, replace any product or part of the product that proves defective because of improper workmanship and/or material, under normal installation, use, service and maintenance. If Hansgrohe is unable to provide a replacement and repair is not practical or cannot be made in timely fashion, Hansgrohe may elect to refund the purchase price in exchange for the return of the product. LENGTH OF WARRANTY Replacement or repaired parts of products will be covered for the term of this warranty, as stated in the following two sentences. If you are a consumer who purchased the product for use primarily for personal, family or household purposes, this warranty extends for as long as you own the product and the home in which the product is originally installed. If you purchased the product for use primarily for any other purpose, including, without limitation, a commercial purpose, this warranty extends only (i) for 1 year, with respect to Hansgrohe & Commercial products, and (ii) for 5 years, with respect to Axor products. THIS WARRANTY DOES NOT COVER, AND HANSGROHE WILL NOT PAY FOR: A. Conditions, malfunctions or damage not resulting from defects in material or workmanship. - Page 32 EXCLUSIONS AND LIMITATIONS REPAIR OR REPLACEMENT (OR, IN LIMITED CIRCUMSTANCES, REFUND OF THE PURCHASE PRICE) AS PROVIDED UNDER THIS WARRANTY IS THE EXCLUSIVE REMEDY OF THE PURCHASER. HANSGROHE NEITHER ASSUMES NOR AUTHORIZES ANY PERSON TO CREATE FOR IT ANY OTHER OBLIGATION OR LIABILITY IN CONNECTION WITH THIS PRODUCT.
Need help?
Do you have a question about the AXOR Bouroullec 19670401 and is the answer not in the manual?
Questions and answers