Table of Contents
Advertisement
Quick Links
Installation, Operating
and Service Instructions
for use by heating contractor
Vitotrans 300, S3HA Series
Indirect Fired Domestic Hot Water Unit – Single Wall
Vitotrans 300, D3HA Series
Indirect Fired Domestic Hot Water Unit – Double Wall
VITOTRANS 300
5833 275 - 04
12/2019
CAUTION
The Vitotrans 300 S3HA and D3HA
series are not suitable for steam
heating applications.
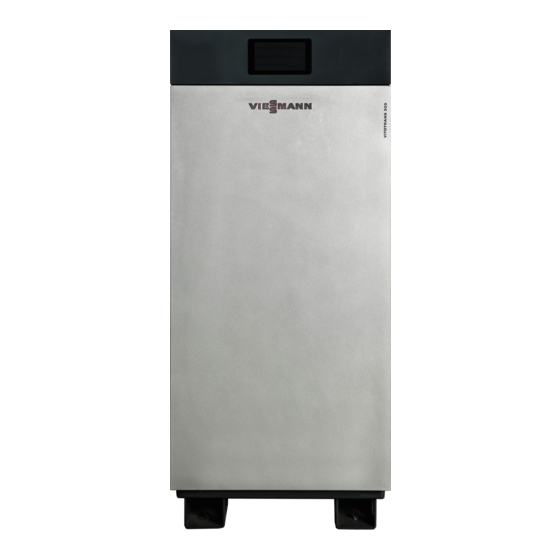
Product may not be exactly as shown
IMPORTANT
Read and save these instructions
for future reference.
Please file in Service Binder
Advertisement
Table of Contents

Subscribe to Our Youtube Channel
Related Manuals for Viessmann S3HA Series


Summary of Contents for Viessmann S3HA Series
- Page 1 Installation, Operating and Service Instructions for use by heating contractor Vitotrans 300, S3HA Series Indirect Fired Domestic Hot Water Unit – Single Wall Vitotrans 300, D3HA Series Indirect Fired Domestic Hot Water Unit – Double Wall VITOTRANS 300 CAUTION The Vitotrans 300 S3HA and D3HA series are not suitable for steam heating applications.
-
Page 2: Safety, Installation And Warranty Requirements
Introduction Vitotrans 300 Installation, Operating and Service Safety, Installation and Warranty Requirements Please ensure that these instructions are read and understood before commencing installation. Failure to comply with the instructions listed below and details printed in this manual can cause product/property damage, severe personal injury, and/or loss of life. -
Page 3: Table Of Contents
Contents Vitotrans 300 Installation, Operating and Service Page Introduction Safety, Installation and Warranty Requirements ....2 Licensed professional heating contractor ....2 Product documentation ..........2 Advice to owner .............2 Warranty ...............2 Safety Important Regulatory and Installation Requirements ..5 Codes ..............5 Mechanical room ............5 Working on the equipment ........5 Instructing the system user ........6 Initial startup ............6... - Page 4 Contents Vitotrans 300 Installation, Operating and Service Page Operation Putting the Unit into Operation ........45 User Interface ............45 Fault Notification ............46 Menu ..............46 Settings ..............46 Information ............47 Trending ............. 48 Alarms ..............49 Shutting Down the System ........49 Troubleshooting ............50 Service Safety Instructions ...........51...
-
Page 5: Important Regulatory And Installation Requirements
In any circumstance, a non-toxic fluid must be used. Ensure a copy of the Safety Data Sheet (SDS) is supplied to the operator/ultimate owner of the system. The use of Viessmann supplied “Tyfocor- HTL” solar fill is recommended for the solar heating circuit. -
Page 6: Instructing The System User
Contact Viessmann for additional copies. - Wiring diagram CAUTION For the Vitotrans 300 S3HA series only the heat transfer medium must be water or other non-toxic fluid having a toxicity rating or class of 1, as listed in clinical toxicology of commercial products, 5th edition. -
Page 7: About These Instructions
General Information Vitotrans 300 Installation, Operating and Service About These Instructions Take note of all symbols and notations intended to draw attention to potential hazards or important product information. These include “WARNING”, “CAUTION”, and “IMPORTANT”. See below. Warnings draw your attention to the presence of WARNING potential hazards or important product information. -
Page 8: General Installation Information
Viessmann System Technology. For system combinations, please install only Install isolation valves in all heating, domestic piping feasible combinations listed in the Viessmann Price List. and recirculation piping as necessary to service all Please note that the following examples are simplified equipment properly (e.g. -
Page 9: Connecting To The Heating System - Closely Spaced Tees
Installation Vitotrans 300 Installation, Operating and Service Connecting to the Heating System - Closely Spaced Tees Branch off from main heating system supply. Maximum spacing between tees is 4X the pipe diameter. Legend The system heat source (boiler) should be set to supply A Vitotrans 300 water to the Vitotrans 300 at least 20ºF (11ºC) higher B Vitotrans supply... -
Page 10: Connecting To The Heating System - Direct Boiler
Installation Vitotrans 300 Installation, Operating and Service Connecting to the Heating System – Direct Boiler Connection The Vitotrans 300 may be connected directly to a hot Legend water heating boiler when following the system design A High Mass Boiler (example: CM2) considerations below;... -
Page 11: Single Direct
Installation Vitotrans 300 Installation, Operating and Service Single Direct Vitotrans 300 with ..direct connection to building DHW system. Legend A Vitotrans 300 Single Vitotrans 300, for use with direct / instantaneous domestic hot water heating. For use with long steady B Water softening equipment draws of DHW. -
Page 12: Single Direct With Dhw Storage Tank
Installation Vitotrans 300 Installation, Operating and Service Single Direct with DHW Storage Tank Vitotrans 300 with ..DHW DHW storage tank, for system applications where low or fluctuating DHW flow rates may occur, to prevent short-cycling of the system and to provide added comfort through DHW recirculation. -
Page 13: Multiple Direct
Installation Vitotrans 300 Installation, Operating and Service Multiple Direct Multiple Vitotrans 300 with ..direct connection to building DHW system. Legend Multiple Vitotrans 300, for use with direct / instantaneous A Vitotrans 300 domestic hot water heating. For use with long steady B Water softening equipment draws of DHW. -
Page 14: Multiple Direct With Dhw Storage Tank
Installation Vitotrans 300 Installation, Operating and Service Multiple Direct with DHW Storage Tank Multiple Vitotrans 300 with ..DHW storage tank, for system applications where low or fluctuating DHW flow rates may occur, to prevent short-cycling of the system and to provide added comfort through DHW recirculation. -
Page 15: Single Solar Direct With Dhw Storage Tank
Installation Vitotrans 300 Installation, Operating and Service Single Solar Direct with DHW Storage Tank Vitotrans 300 with ..DHW storage tank, for system applications where low or fluctuating DHW flow rates may occur, to prevent short-cycling of the system and to provide added comfort through DHW recirculation. -
Page 16: Multiple Solar Direct With Dhw Storage Tank
Installation Vitotrans 300 Installation, Operating and Service Multiple Solar Direct with DHW Storage Tank Multiple Vitotrans 300 with ..DHW storage tank, for system applications where low or fluctuating DHW flow rates may occur, to prevent short-cycling of the system and to provide added comfort through DHW recirculation. -
Page 17: Recommended Minimum Service Clearances
Installation Vitotrans 300 Installation, Operating and Service Recommended Minimum Service Clearances To enable convenient installation and maintenance, observe the stated clearance dimensions. Maintain the minimum clearances where space is tight. S3HA D3HA S3HA D3HA S3HA D3HA Models (610) (610) (610) (610) (610) (610) -
Page 18: Unpacking And Placing The Unit
Installation Vitotrans 300 Installation, Operating and Service Unpacking and Placing the Unit Remove the packaging from the Vitotrans. The Vitotrans can be positioned using a forklift, using the openings provided on the front, rear and sides. It is essential to use appropriate lifting devices certified for lifting to a minimum of the Vitotrans weight. -
Page 19: Installation Fittings
Installation Vitotrans 300 Installation, Operating and Service Installation Fittings Proper piping practice 2 imperfect threads Support piping by proper suspension method. Piping must not rest on or be supported by Vitotrans. When installing the supplied valves to the domestic cold water supply and the domestic hot water supply of the Vitotrans 300 it is recommended that a thread sealant specifically for use with stainless steel pipe is used. -
Page 20: Waterside Connections
Installation Vitotrans 300 Installation, Operating and Service Waterside Connections 1. Install the heating system supply and return valves A. 2. Install the domestic hot and domestic cold water valves B. Legend A 2b in. heating system valve B 2 in. low lead domestic water valve Note: Make all connections free of load and torque stresses. -
Page 21: Drain Connections
Installation Vitotrans 300 Installation, Operating and Service Drain Connection Note: Pipe and fittings are field supplied. 1. Connect the piping A and B to the Vitotrans drip pan and then to the floor drain. Legend A c in. street elbow B c in. -
Page 22: Electrical Connections
Installation Vitotrans 300 Installation, Operating and Service Electrical Connections Accessing the junction box 1. Remove left rear side panel retaining nut and washer. 2. Lift left rear side panel handles and remove panel. 3. Remove junction box retaining screws. 4. Remove junction box cover panel. - Page 23 Installation Vitotrans 300 Installation, Operating and Service Electrical Connections (continued) Heat demand Terminal Block X2 Dry contact heat demand to building management system or heating system Connect the heat demand dry contacts from terminal block X2 terminals 1 and 2 to the external demand of the heat source control (building management system or heating system).
- Page 24 Cable types (on site): system by an authorized contractor. H 2-core cable, CAT5, screened Functions All Viessmann appliances are connected with RJ45 The integrated BACnet (IP) of the Vitotrans 300 enables connectors. system users to utilize the following functions in...
- Page 25 Installation Vitotrans 300 Installation, Operating and Service Electrical Connections (continued) Pump connections for systems with a DHW storage tank Terminal Block X2 Provide disconnect means and overload protection as required. Power Supplies Note: The dry contact relays for the DHW tank loading pump and DHW re-circ pump have a maximum rating of 2 FLA.
- Page 26 Installation Vitotrans 300 Installation, Operating and Service Electrical Connections (continued) Temperature sensor for systems with a DHW storage tank Terminal Block X3 DHW storage tank temperature sensor Legend A DHW DHW storage tank temperature sensor (terminal block X3, terminals 1 and 2) Note: See complete system layouts starting on page 8.
- Page 27 Installation Vitotrans 300 Installation, Operating and Service Electrical Connections (continued) Main power supply Terminal Block X1 Provide disconnect means and overload protection as required. Power Supply 240VAC/1Ph/60Hz L1/L2/N/G 20 Amps (full load Amperage) WARNING The control must be grounded. Ensure that ‘L’, ‘N’ and ‘G’ are not interchanged. WARNING Incorrectly executed electrical installations can lead to injuries from electrical current and result in appliance...
- Page 28 Installation Vitotrans 300 Installation, Operating and Service Electrical Connections (continued) Closing the junction box 1. Reinstall junction box cover panel. 2. Secure cover panel with retaining screws. 3. Position side panel using handles (bottom first). 4. Secure panel with retaining nut and washer and close handle.
-
Page 29: Initial System Fill
Installation Vitotrans 300 Installation, Operating and Service Initial System Fill Domestic (potable) water quality Water treatment should be considered in areas with IMPORTANT known problems, such as where a high mineral content and hardness exist (see chart below). Only use antifreeze specific for hydronic heating systems. -
Page 30: Commissioning And Initial Start-Up
Installation Vitotrans 300 Installation, Operating and Service Commissioning and Initial Start-up Note: Check the heating system pressure. Maximum operating pressure: ..150 psi (10.3 bar) Minimum operating pressure: ....13 psi (0.9 bar) 1. Open the hydronic connection pottable water valves C and E. -
Page 31: User Interface
Installation Vitotrans 300 Installation, Operating and Service User Interface Log into the system by entering the following Username and Password and tap Log In; Username: contractor Password: viservice From the home screen select menu From the menu select Settings +. The ‘settings +’... -
Page 32: Instantaneous
Installation Vitotrans 300 Installation, Operating and Service Instantaneous Units – The Units switch can be toggled to change between Imperial units (ºF / GPM) and Metric units (ºC / L/min.). DHW Setpoint – This is the DHW setpoint adjustable from 100ºF to 190ºF (38ºC to 88ºC). -
Page 33: Dhw Recirculation Pump
Installation Vitotrans 300 Installation, Operating and Service DHW Recirculation Pump DHW Recirc Pump – This option is only available if external tank function has been selected. When the ‘DHW recirc pump’ is set in the yes position, the pump will run according to the set time schedule. - Page 34 Installation Vitotrans 300 Installation, Operating and Service Time Schedule (continued) To add additional run times per day, touch and hold on the desired day outside of the blue area. When the pop- up menu appears, select “Create Event”. A block of time will appear for the day you selected and it will read false.
- Page 35 Installation Vitotrans 300 Installation, Operating and Service Time Schedule (continued) If the same schedule is required for multiple days, it can be set for one day, then copied to other days. This can be done by touching and holding on the day outside of the blue area, then selecting “Copy Day”...
-
Page 36: Sanitation Function
Installation Vitotrans 300 Installation, Operating and Service Sanitation Function Sanitation function – When the ‘Tank Sanitation Mode’ is set to ‘ON’, the start time and temperature setpoint hours will appear on the display. The Vitotrans 300 will perform a sanitation cycle for the external tank once per day at the selected time. -
Page 37: System Information
Installation Vitotrans 300 Installation, Operating and Service System Information Select menu . then select the Information + button to display the Information screen. This screen displays the current system operating status (no adjustments can be made from this screen). Pumps System Pump A Operational status of main system pump A, will run anytime there is demand for DHW. -
Page 38: Commissioning
Installation Vitotrans 300 Installation, Operating and Service Commissioning Devices Required for Commissioning: WARNING PC Laptop with Ethernet port and web browser application The MANUFACTURER access level allows for changes CAT5 / RJ45 network cable to be made that can alter the function of the Vitotrans 300. - Page 39 Installation Vitotrans 300 Installation, Operating and Service Commissioning (continued) 6. BACnet General: The “Controller Name” and “Device ID” can be changed. Network IP Ports: H IP Port 1 H BBMD (BACnet/IP Broadcast Management Device) H Foreign Device Use BBMD and Foreign Device when communication with a different network is required.
- Page 40 Commissioning (continued) 7. System Information: The controller firmware can be updated; Contact Viessmann Service for assistance with this function. Extensions: No Changes can be made to the settings within this tab. Location/Time: The date and time can be updated by clicking “Get Current...
-
Page 41: Vitotrans 300 Bacnet (Ip) Points
Installation Vitotrans 300 Installation, Operating and Service Vitotrans 300 BACnet (IP) Points WARNING Attempting to modify points listed as „Do Not Change“ will result in undesired operation. Name Object ID Read / Write Note / Description DHW Temp T1A analogInput:101 Read only DHW Dual Temp Sensor A (ºF) DHW Temp T1B... - Page 42 Installation Vitotrans 300 Installation, Operating and Service Vitotrans 300 BACnet (IP) Points (continued) Name Object ID Read / Write Note / Description Boiler Dmd binaryOutput:103 Writable Do Not Change DHW Recirc Pump Cmd binaryOutput:104 Writable Do Not Change External Tank Loading Pump Cmd binaryOutput:105 Writable Do Not Change...
-
Page 43: Domestic Hot Water Production
Overview Vitotrans 300 Installation, Operating and Service Domestic Hot Water Production WARNING The DHW fixed high limit is factory set to 210°F (99°C). Do Not Ajust! WARNING Domestic hot water temperatures over 125°F (52°C) can cause severe burns instantly or death from scalds. Children, disabled and elderly are at highest risk of being scalded. -
Page 44: Temperature
Overview Vitotrans 300 Installation, Operating and Service Temperature Approximate time / temperature relationships in scalds ºF (ºC) 120 (49) more than 5 min. ºF (ºC) 125 (52) 1b to 2 min. ºF (ºC) 130 (54) about 30 sec. ºF (ºC) 135 (57) about 10 sec. -
Page 45: Putting The Unit Into Operation
Operation Vitotrans 300 Installation, Operating and Service Putting the Unit into Operation Turn main power on using the switch located on the rear of the Vitotrans 300. User Interface User Interface Once logged in, the Home Screen will be displayed (the home screen provides a system overview with the following information;... -
Page 46: Fault Notification
Operation Vitotrans 300 Installation, Operating and Service Fault Notification If a fault has occurred, an “Alarm!” will be displayed in the top right corner of the screen. For detailed fault information refer to page 49. User Interface Menu From the home screen select menu The following items will be displayed: Home Settings... -
Page 47: Information
Operation Vitotrans 300 Installation, Operating and Service Information Displays the current operating condition. Pumps System Pump A Operational status of main system pump A, will run anytime there is demand for DHW. System Pump A Speed Modulating signal to pump A (20%-80%) System Pump B Operational status of main system pump B, may run in conjunction with pump A when there is demand for DHW. -
Page 48: Trending
Operation Vitotrans 300 Installation, Operating and Service Trending This screen will display the historical data points in 15-minute intervals over a 1-day period. The following historical trends will be displayed on a vertical axis: DHW Supply Temp DCW Temp DHW Flow Supply Return System Flow... -
Page 49: Alarms
Operation Vitotrans 300 Installation, Operating and Service Alarms This screen will display the fault or alarm status of the sensors and components of the Vitotrans 300. For service contact a heating contractor. The following are the possible faults that may occur accompanied by a status message): System Pump Communication System Pump Dead Head... -
Page 50: Troubleshooting
Operation Vitotrans 300 Installation, Operating and Service Troubleshooting Note: Carry out measures in the described order. Issues System Characteristics Measures The Vitotrans is off. Screen is blank after touch. Turn the Vitotrans ON. Check main power supply breaker. DHW is not hot enough. DHW temperature not as hot as Check DHW setpoint and increase if necessary. -
Page 51: Safety Instructions
For replacements, use only original spare parts supplied or approved by Viessmann. Checking the high limit safety cut-out setting The high limit safety cut-out is preset to 210°F (99°C). -
Page 52: Service Equipment
Technical Data Manual Assortment of Hex keys Wiring diagrams Flashlight For installation of the heating system, please refer also Cleaning supplies to the technical literature of other Viessmann System Plastic hand brush Technology devices: Cleaning/service brush Installation Instructions for accessories Vacuum cleaner... -
Page 53: Preparing For Service
Service Vitotrans 300 Installation, Operating and Service Preparing for Service Power 1. Turn the main power switch to the OFF position (lockout provisions are provided on the switch). Removing the panels 1. Remove the top locknuts. 2. Using handles lift and remove the side panels. 3. - Page 54 Service Vitotrans 300 Installation, Operating and Service Preparing for Service (continued) Accessing the junction box 1. Remove junction box retaining screws. 2. Remove junction box cover panel. Isolating from system hydronics and draining the Vitotrans 1. Turn the hydronic connection valves to the closed position.
-
Page 55: Heating System Wye Strainer
Service Vitotrans 300 Installation, Operating and Service Heating System WYE Strainer CAUTION Hot surface, Do Not Touch. Allow to cool before servicing. IMPORTANT See preparing for service starting on page 53. 1. Remove filter cap retaining bolts. 2. Remove filter retaining cap. 3. -
Page 56: Heat Exchangers
Service Vitotrans 300 Installation, Operating and Service Heat Exchangers IMPORTANT Allow to cool before servicing. See preparing for service starting on page 53. Note: Check for visible leaks on the heat exchanger (double wall only). If leakage is found, replace heat exchanger. 1. -
Page 57: Descaling Pump
Service Vitotrans 300 Installation, Operating and Service Descaling Pump WARNING DISCONNECT POWER BEFORE SERVICING THE VITOTRANS. IMPORTANT Allow to cool before servicing. See preparing for service starting on page 53. 1. Isolate the descaling pump, by closing the 2 descaling pump isolation valves. -
Page 58: System Pump
WARNING Do not attempt to alter the configuration of the internal pump. In case of replacement, only use genuine Viessmann replacemenrt parts. Failure to do so will compromise the functionality of the Vitotrans 300. Replacing pump communication card 1. With the pump head cover off, disconnect cables from the communication card. - Page 59 Service Vitotrans 300 Installation, Operating and Service System Pump (continued) Check pump wiring All wiring is routed back to the main control, refer to the wiring diagram on pages 71 and 72 for internal connections. WARNING DISCONNECT POWER BEFORE SERVICING THE VITOTRANS. 1.
-
Page 60: System Faults
Service Vitotrans 300 Installation, Operating and Service System Faults System faults are displayed on the touch screen user Note: Carry out measures in the described order. interface. All system faults are saved to the fault memory. System Fault System Characteristics Cause Measures Display... -
Page 61: System Pump Warning Codes
Service Vitotrans 300 Installation, Operating and Service System Pump Warnings Codes System pump warnings are displayed on the touch screen Note: Carry out measures in the described order. user interface as a ‘Pump P1 Warning’. System pump (P1) ‘Pump P1 Warning’ is saved to the fault memory. warning codes are displayed at the system pump. -
Page 62: Sensors And Fhl Location
Service Vitotrans 300 Installation, Operating and Service Sensors and FHL Location Legend A DCW temperature sensor (T2) B Flow sensor C System return temperature sensor (T4) D DHW temperature sensor (T1A/B) E DHW storage tank temperature sensor (T5) (when optional DHW storage tank is used) F Fixed high limit... -
Page 63: Temperature Sensors
Service Vitotrans 300 Installation, Operating and Service Temperature Sensors Temperature sensor (NTC 10k ) 1. Locate the sensor in the junction box and remove leads. 2. Check the sensor resistance and compare it with the curve. 3. In the case of severe deviation, check the installation and replace the sensor if required. -
Page 64: Fixed High Limit
Service Vitotrans 300 Installation, Operating and Service Fixed High Limit Operation The limit switch is factory preset to 210ºF (99ºC) Shuts off pump when DHW temperature exceeds high limit setting. The pump will not restart until the temperature drops to the high limit setting minus the temperature differential, and the manual reset switch is reset. -
Page 65: Completion Of Service
Service Vitotrans 300 Installation, Operating and Service Completion of Service Close drain valves and open system hydronic valves 1. Close drain valve and remove drain hose. 2. Turn the hydronic connection valves to the open position. 3. Check for leaks and correct any leaks before proceeding. Reinstalling the junction box cover 1. - Page 66 Service Vitotrans 300 Installation, Operating and Service Completion of Service (continued) Reinstalling the panels 1. Insert the bottom of the lower front panel in place and push to close. 2. Secure with retaining screws. 3. Using handles lift and install the side panels. 4.
-
Page 67: Putting The Unit Into Operation After Service
Service Vitotrans 300 Installation, Operating and Service Putting the Unit into Operation After Service Accessing Control for Contractor Service Levels Turn main power on using the switch located on the rear of the Vitotrans 300. User Interface Log into the system by entering the following Username and Password and tap Log In;... -
Page 68: Fault History
Service Vitotrans 300 Installation, Operating and Service Fault History The following faults will allow the system to continue to operate and when the fault is corrected the fault will automatically reset: DHW Temperature Sensor DCW Temperature Sensor Return Temperature Sensor Tank Temperature Sensor Flow Sensor Press the Alarm History button on the menu pane to... -
Page 69: Maintenance Mode / Relay Test
Service Vitotrans 300 Installation, Operating and Service Maintenance Mode / Relay Test Select menu . then press the Maintenance button to allow access to testing and service functions. To activate the ‘override’ (to test the outputs) select the button of the desired output. -
Page 70: Maintenance Mode
Service Vitotrans 300 Installation, Operating and Service Maintenance Mode Service Mode - (S3HA/D3HA 60 & 90 only) Turn on the ‘Service Mode’ slide the switch to the on position. This function allows reduced operation the Vitotrans 300 while being serviced so that DHW production can continue uninterrupted. -
Page 71: Wiring Diagram - S3Ha 30, D3Ha 30, S3Ha 60 And D3Ha 60
Wiring Vitotrans 300 Installation, Operating and Service Wiring Diagram - S3HA 30, D3HA 30, S3HA 60 and D3HA 60 Legend WARNING A Power supply 240VAC/1Ph/60 Hz L1/L2/N/G B Boiler demand (dry contact) DISCONNECT POWER BEFORE SERVICING THE VITOTRANS. C Building DHW re-circulation pump (dry contact) D DHW storage tank (dry contact) CAUTION E BACnet (IP) communication RJ45... -
Page 72: Wiring Diagram - S3Ha 90 And D3Ha 90
Wiring Vitotrans 300 Installation, Operating and Service Wiring Diagram - S3HA 90 and D3HA 90 Legend WARNING A Power supply 240VAC/1Ph/60 Hz L1/L2/N/G B Boiler demand (dry contact) DISCONNECT POWER BEFORE SERVICING THE VITOTRANS. C Building DHW re-circulation pump (dry contact) D DHW storage tank (dry contact) CAUTION E BACnet (IP) communication RJ45... -
Page 73: Technical Data
65-150 65-150 65-150 Dual Dual circulating pump *2 *1 Overall height does not include leveling feet or seismic brackets. *2 The heating system circulating pump is built for the Vitotrans 300 and any replacement parts must be ordered from Viessmann. -
Page 74: Dimensions
Specification Vitotrans 300 Installation, Operating and Service Dimensions Dimensions Models S3HA 30 D3HA 30 S3HA 60 D3HA 60 S3HA 90 D3HA 90 in. (mm) 26½ (673) 26½ (673) 26½ (673) 26½ (673) 26½ (673) 26½ (673) in. (mm) 62¼ (1584) 62¼... -
Page 75: Parts List
D3HA 90 7725002jjjjjjjjj Ordering Parts: Please provide Model and Serial Number from rating plate A when ordering replacement parts. Order replacement components from your Viessmann distributor. Overview of Assemblies A Rating Plate with Serial Number (affixed on Control Assembly cover,... - Page 76 7725000jjjjjjjjj D3HA 60 7725001jjjjjjjjj D3HA 90 7725002jjjjjjjjj Parts for Enclosure Assembly 0001 Top panel 0002 Side panel 0003 Front panel, top 0004 Nameplate, “Viessmann” 0005 Front panel, bottom 0006 Handle (each) Other Parts (not illustrated) 0007 Label GRY/CLR “VITOTRANS 300”...
- Page 77 Parts Vitotrans 300 Installation, Operating and Service Parts List (continued) Model No. Serial No. S3HA 30 7723997jjjjjjjjj D3HA 30 7725000jjjjjjjjj Parts for Single Heat Exchanger Units 0001 Plate heat exchanger LC 110, 2 in. *1 0002 Flex pipe, 2 x 18 in. SS *2 0003 Nipple, 2 x 2 in.
- Page 78 Parts Vitotrans 300 Installation, Operating and Service Parts List (continued) Model No. Serial No. S3HA 60 7723998jjjjjjjjj D3HA 60 7725001jjjjjjjjj Parts for Double Heat Exchanger Units 0001 Plate heat exchanger LC 110, 2 in. *1 0002 Flex pipe, 2 x 18 in. SS *2 0003 Nipple, 2 x 2 in.
- Page 79 Parts Vitotrans 300 Installation, Operating and Service Parts List (continued) Model No. Serial No. S3HA 90 7723999jjjjjjjjj D3HA 90 7725002jjjjjjjjj Parts for Triple Heat Exchanger Units 0001 Plate heat exchanger LC 110, 2 in. *1 0002 Flex pipe, 2” x 18 in. SS *2 0003 Nipple, 2 x 2 in.
- Page 80 Parts Vitotrans 300 Installation, Operating and Service Parts List (continued) Model No. Serial No. S3HA 30 7723997jjjjjjjjj S3HA 60 7723998jjjjjjjjj D3HA 30 7725000jjjjjjjjj D3HA 60 7725001jjjjjjjjj Parts for Control Assembly for units with a single head pump 0001 Circuit breaker, 20A 2P 0002 Fuse T 0.5A (set of 5) 0003 Circuit breaker, 0.5A 1P 0004 Fuse F 4A (set of 5)
- Page 81 Parts Vitotrans 300 Installation, Operating and Service Parts List (continued) Model No. Serial No. S3HA 90 7723999jjjjjjjjj D3HA 90 7725002jjjjjjjjj Parts for Control Assembly for units with a dual head pump 0001 Circuit breaker, 20A 2P 0002 Fuse T 0.5A (set of 5) 0003 Circuit breaker, 0.5A 1P 0004 Fuse F 4A (set of 5) 0005 Circuit breaker, 10A 2P...
- Page 82 Parts Vitotrans 300 Installation, Operating and Service Parts List (continued) Model No. Serial No. S3HA 30 7723997jjjjjjjjj S3HA 60 7723998jjjjjjjjj S3HA 90 7723999jjjjjjjjj D3HA 30 7725000jjjjjjjjj D3HA 60 7725001jjjjjjjjj D3HA 90 7725002jjjjjjjjj Parts for Hydraulics Connection Pipe for Boiler Water Supply 0001 Connection pipe 1, heating supply 0002 Clamp, 2½...
- Page 83 Parts Vitotrans 300 Installation, Operating and Service Parts List (continued) Model No. Serial No. S3HA 30 7723997jjjjjjjjj S3HA 60 7723998jjjjjjjjj S3HA 90 7723999jjjjjjjjj D3HA 30 7725000jjjjjjjjj D3HA 60 7725001jjjjjjjjj D3HA 90 7725002jjjjjjjjj Parts for Hydraulics Connection Pipe for Boiler Water Return 0001 Connection pipe, heating return 0002 Clamp, 2½...
- Page 84 Parts Vitotrans 300 Installation, Operating and Service Parts List (continued) Model No. Serial No. S3HA 30 7723997jjjjjjjjj S3HA 60 7723998jjjjjjjjj S3HA 90 7723999jjjjjjjjj D3HA 30 7725000jjjjjjjjj D3HA 60 7725001jjjjjjjjj D3HA 90 7725002jjjjjjjjj Parts for Hydraulics Connection Pipe for Domestic Hot Water *1 0001 Connection pipe, DHW hydraulic SS 0002 Clamp, 2 in.
- Page 85 Parts Vitotrans 300 Installation, Operating and Service Parts List (continued) Model No. Serial No. S3HA 30 7723997jjjjjjjjj S3HA 60 7723998jjjjjjjjj S3HA 90 7723999jjjjjjjjj D3HA 30 7725000jjjjjjjjj D3HA 60 7725001jjjjjjjjj D3HA 90 7725002jjjjjjjjj Parts for Hydraulics Connection Pipe for Domestic Cold Water *1 0001 Connection pipe, DCW hydraulic SS 0002 Strainer, 2 in.
-
Page 86: Installation Fittings
D3HA 90 7725002jjjjjjjjj Ordering Parts: Please provide Model and Serial Number A when ordering replacement parts. Order replacement components from your Viessmann distributor. Parts 0002 Ball valve, 2½ in. 0003 Ball valve, 2 in. *1 0004 Immersion sensor, for low-loss header... -
Page 87: Maintenance
Maintenance Vitotrans 300 Installation, Operating and Service Maintenance Interval Maintenance Weekly Double-Wall heat exchangers only. Check for leakage. Quarterly Every three months. Check the operation of the high limit switch install on the DHW manifold. Semi-annually Evert six months. Check the strainers on both the boiler water and the domestic water piping side. - Page 88 Vitotrans 300 Installation, Operating and Service Scan for digital copy of this document...
Need help?
Do you have a question about the S3HA Series and is the answer not in the manual?
Questions and answers