Viessmann Vitodens 200-W Replacement Instructions Manual
Hide thumbs
Also See for Vitodens 200-W:
- Installation and service instructions manual (188 pages) ,
- Installation instructions manual (184 pages) ,
- Service instructions manual (150 pages)

Related Manuals for Viessmann Vitodens 200-W


Summary of Contents for Viessmann Vitodens 200-W
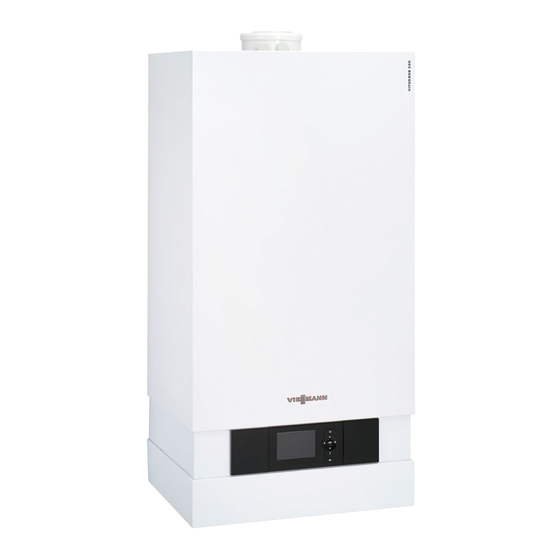
- Page 1 Vitodens 200-W & Vitodens 222-F Heat Exchanger Replacement Instructions For use by heating contractor For use with: Vitodens 200-W, B2HB 19, 26, 35 Vitodens 222-F, B2TB 19, 35 Vitodens 200-W Vitodens 222-F 5834 998 - 03 01/2019...
-
Page 2: Heat Exchanger Replacement
When replacing parts, use who is qualified and experienced in the installation, service, and original Viessmann or Viessmann approved replacement parts. maintenance of hot water boilers. There are no user serviceable parts on the boiler, burner or control. - Page 3 Removing the Front Covers (B2HB 19, 26 and 35) Removing the Front Covers (B2TB 19 and 35) IMPORTANT IMPORTANT Prior to removing any panels ensure that gas and power is shut off. Prior to removing any panels ensure that gas and power is shut off. Removing the front panels Removing the front panels 1.
- Page 4 Note: For Vitodens 200-W, B2HB and Vitodens 222-F, B2TB, Drain water from the heat exchanger through the sediment faucet drain valve. For Vitodens 222-F, B2TB the sediment faucet is located down stream of the boiler pump. Discontent the wiring from the burner, heat exchanger and fan as indicated below:...
- Page 5 Note: For Vitodens 200-W, B2HB and Vitodens 222-F, B2TB, Disconnect the venting system. 5834 998 - 03...
- Page 6 Note: For Vitodens 200-W, B2HB and Vitodens 222-F, B2TB, Using the T-20 Torx bit or 7 mm nut driver, remove the 4x nuts 1 which secure the vent pipe adaptor 2 to the boiler cabinet. Carefully remove the vent pipe adaptor 2.
- Page 7 Note: For Vitodens 200-W, B2HB and Vitodens 222-F, B2TB, For units found with additional sealing ring (adaptor piece); remove and dispose of them (this rework kit resolves this design). Dispose of this adaptor piece 5834 998 - 03...
- Page 8 Note: For Vitodens 200-W, B2HB and Vitodens 222-F, B2TB, Disconnect from plug #15 and carefully remove the flue gas sensor from the flue gas channel. (Do not use tools to pull out the sensor as it could damage it) 5834 998 - 03...
- Page 9 Note: For Vitodens 200-W, B2HB and Vitodens 222-F, B2TB, Using an adjustable wrench, disconnect the gas supply pipe from the gas valve. Remove and discard the old green gas valve gasket. 5834 998 - 03...
- Page 10 Note: For Vitodens 200-W, B2HB and Vitodens 222-F, B2TB, Using the T-30 Torx bit, loosen and remove the 4x bolts from the burner door assembly. Carefully remove burner door assembly and store in a safe place. CAUTION To avoid damage to the burner, do not lay burner on its cylindrical burner tube or touch the burner tube mesh.
- Page 11 Note: For Vitodens 200-W, B2HB and Vitodens 222-F, B2TB, Use the foam packaging material from the new heat exchanger to protect the control from leaking water. CAUTION Residual water may leak out during disassembly 5834 998 - 03...
- Page 12 Note: For Vitodens 200-W, B2HB and Vitodens 222-F, B2TB, Using side cutters, remove the tie wrap which secures the rubber condensate hose to the heat exchanger. Remove the condensate hose from the heat exchanger. 5834 998 - 03...
- Page 13 Note: For Vitodens 200-W, B2HB and Vitodens 222-F, B2TB, Remove the retaining clips on the return pipe 1 and supply pipe 2 by squeezing the end and pulling out. Vitodens 200-W, B2HB 19, 26, 35 Vitodens 200-W, B2HB 19, 26, 35 (Only)
- Page 14 Note: For Vitodens 200-W, B2HB and Vitodens 222-F, B2TB, Remove the #3 sensor to avoid damaging it during removal of the heat exchanger Using the T-30 Torx bit, loosen and remove the supply pipe from the heat exchanger nipple. #3 Sensor...
- Page 15 Note: For Vitodens 200-W, B2HB boilers only, Use an adjustable wrench to disconnect the return pipe connection from the elbow. (located on the lower right hand side of boiler) 5834 998 - 03...
- Page 16 Note: For Vitodens 222-F, B2TB boilers only, Remove the boiler control unit to gain access to the heat exchanger for removal. Removing the boiler control unit 1. Using a flat head screwdriver, release the retaining tabs 1 on each side of the control unit. 2.
- Page 17 Note: For Vitodens 222-F, B2TB boilers only, Using the screw driver, push the metal tab towards the rear of the boiler. This will release the fastening clip 1 from the plastic pipe clip which supports the return pipe. Be careful not to drop the clip. Loosen the union nut 2 and disconnect the return pipe from the boiler circulating pump 3.
- Page 18 Note: For Vitodens 222-F, B2TB Boilers, Carefully pull the return pipe towards the front left side of the boiler. This will allow the return pipe to be disconnected from the front plastic pipe clip 1 and the rear plastic pipe clip 2. Front of boiler Rear of boiler Note: The rear plastic pipe clip 2 is located behind the DHW...
- Page 19 Note: For Vitodens 200-W, B2HB and Vitodens 222-F, B2TB, Disconnect the return pipe from the heat exchanger by pulling down. 5834 998 - 03...
- Page 20 Note: For Vitodens 200-W, B2HB and Vitodens 222-F, B2TB, Using the 10 mm nut driver, loosen and remove the 4x nuts while supporting the heat exchanger. Bend the rating plate out of the way prior to removing the heat exchanger from the cabinet.
- Page 21 Note: For Vitodens 200-W, B2HB and Vitodens 222-F, B2TB, Reassembly: With the new heat exchanger on the floor, carefully insert the new flue gas sensor (supplied in the kit) into the flue gas channel. It is recommended that this operation be done prior to installing the heat exchanger in the boiler cabinet.
- Page 22 Note: For Vitodens 200-W, B2HB and Vitodens 222-F, B2TB, Using the T-30 Torx bit, unscrew the cold water return pipe from the old heat exchanger. The new heat exchanger is supplied with the o-ring pre-installed. Lubricate this o-ring with the supplied lubricant prior to installing the return pipe on the new heat exchanger.
- Page 23 Note: For Vitodens 200-W, B2HB and Vitodens 222-F, B2TB, Insert the new heat exchanger into the boiler cabinet. 5834 998 - 03...
- Page 24 Note: For Vitodens 200-W, B2HB and Vitodens 222-F, B2TB, While supporting the heat exchanger, use the 10 mm nut driver to reinstall the 4x nuts which secure the heat exchanger to the rear wall. Torque the nuts to 44 lb.in (5 Nm).
- Page 25 Note: For Vitodens 200-W, B2HB and Vitodens 222-F, B2TB, Remove the old o-ring and replace it with a new one from the gasket set (supplied). Lubricate the newly installed o-ring with the supplied lubricant, then install the pipe from below.
- Page 26 Note: For Vitodens 222-F, B2TB boilers only, Carefully reinstall the return pipe by pushing into the rear plastic pipe clip 1, then into the front plastic pipe clip 2. Visually check that the return pipe and rubber gaskets are properly seated before proceeding to the next step. Note: The rear plastic pipe clip 1 is located behind the DHW circulation pump and the bottom rear corner of boiler cabinet...
- Page 27 Note: For Vitodens 222-F, B2TB boilers only, Reinstall the metal fastening clip 1 on the plastic pipe clip supporting the return pipe. Reconnect the return pipe to the boiler circulating pump 3 by tighten the union nut 2. IMPORTANT Replace the old flat gasket with a new one prior to assembling the union nut 2 to the boiler pump 3 (gasket is included in the kit).
- Page 28 Note: For Vitodens 200-W, B2HB boilers only, Remove the old flat gasket and replace with the new (green) one supplied in the kit. Using an adjustable wrench, reassemble and tighten the return pipe connection elbow. 5834 998 - 03...
- Page 29 Note: For Vitodens 200-W, B2HB and Vitodens 222-F, B2TB, Attach retaining clip for return pipe (ensure correct seating). Verify that the larger diameter faces down and smaller diameter faces up. Smaller Diameter Larger Diameter 5834 998 - 03...
- Page 30 Note: For Vitodens 200-W, B2HB boilers only, Remove the old o-ring and replace it with a new one from the gasket set (supplied). Lubricate the newly installed o-ring with the supplied lubricant, then install the pipe from below Connect the supply pipes and install the retaining clip (ensure correct fit).
- Page 31 Note: For Vitodens 200-W, B2HB and Vitodens 222-F, B2TB, Lubricate the heat exchanger o-ring with the supplied lubricant, then connect the supply pipe. Using T-30 Torx bit, tighten the supply pipe retaining bolt. 5834 998 - 03...
- Page 32 Replacing the condensate trap (Vitodens 200-W, B2HB and Vitodens 222-F, B2TB) Using one hand support the lower (grey) portion of the condensate trap. Carefully pull back on the retaining clip to release the condensate trap assembly from the boiler cabinet.
- Page 33 Note: For Vitodens 200-W, B2HB and Vitodens 222-F, B2TB, Using one hand hold the upper (black) portion of the condensate trap in place 1. Carefully twist 2 and pull down 3 at the same time to release the lower (grey) portion from the upper (black) portion of the assembly.
- Page 34 Note: For Vitodens 200-W, B2HB and Vitodens 222-F, B2TB, Once the lower (grey) portion of the condensate trap has released, keep it upright to prevent spillage 1. Remove the upper (black) condensate tube from the inside of the boiler cabinet 2.
- Page 35 Note: For Vitodens 200-W, B2HB and Vitodens 222-F, B2TB, Carefully tip the (grey) condensate trap 1, which will slowly drain water via the condensate hose 2. Remove the condensate hose 2 from the condensate trap 1 and pour remaining water into a suitable drain.
- Page 36 Note: For Vitodens 200-W, B2HB and Vitodens 222-F, B2TB, Prepare to replace the original condensate trap (black & grey version) with the replacement condensate trap version shown below: 5834 998 - 03...
- Page 37 Note: For Vitodens 200-W, B2HB and Vitodens 222-F, B2TB, Insert the replacement condensate trap from the bottom of the boiler cabinet 1. Secure in place using the supplied fixing fork 2. (The finished assembly should look like the image on the right)
- Page 38 Note: For Vitodens 200-W, B2HB and Vitodens 222-F, B2TB, Reconnect the grey condensate hose 1 (removed earlier) onto the new condensate trap 2. Ensure that the condensate hose is adequately sloped downward, promoting proper draining of condensate. Air gap IMPORTANT Pipe ventilation must take place between the siphon trap and the neutralization unit (if applicable).
- Page 39 Note: For Vitodens 200-W, B2HB and Vitodens 222-F, B2TB, Upon installing the condensate trap assembly (1+2+3), fill the condensate trap 4 with a minimum of 10 fl. oz. (0.3 liters) of water. IMPORTANT Check for leaks between the condensate trap and discharge hose.
- Page 40 Reinstalling the heat exchanger (black) condensate hose Vitodens 200-W, B2HB 19, 26, 35 Vitodens 222-F, B2TB 19, 35 Install the new style condensate hose. Reinstall the existing condensate hose * See next page for correct orientation of the hose. The connection of the new condensate trap is 3/4 in. (20 mm) taller The connection of the new condensate trap is about 2 in.
- Page 41 Note: For Vitodens 200-W, B2HB and Vitodens 222-F, B2TB, When installing the black condensate hose be sure that it is orientated correctly. The condensate hose end having the double lip 1, is to be installed on the new condensate trap 2.
- Page 42 Note: For Vitodens 222-F, B2TB Boilers, Verify that the black condensate hose is installed such that it slopes down towards the condensate trap. 5834 998 - 03...
- Page 43 Note: For Vitodens 200-W, B2HB and Vitodens 222-F, B2TB, With the condensate hose installed on the heat exchanger, secure in place using the cable tie provided 1. Using side cutters, trim remaining length of cable tie for a clean appearance 2.
- Page 44 Reassembly of the burner and wiring (Vitodens 200-W, B2HB and Vitodens 222-F, B2TB) Remove the old burner gasket and replace with the new one supplied in the kit. 5834 998 - 03...
- Page 45 Note: For Vitodens 200-W, B2HB and Vitodens 222-F, B2TB, Continue reassembling the boiler, by carefully placing the burner assembly on the heat exchanger. Start by installing the 4x bolts by hand (prevents cross threading). Using T-30 Torx bit, diagonally tighten the bolts 1, 2, 3 and 4 on the burner door assembly to a torque of 58 lb.in (6.5 Nm).
- Page 46 Note: For Vitodens 200-W, B2HB and Vitodens 222-F, B2TB, Install a new (orange) flat fiber gasket supplied in the kit and connect the gas line to the gas valve. Using an adjustable wrench, firmly tighten the gas line nut. [Do not exceed a torque of 132 lb.in (15 Nm)]...
- Page 47 Note: For Vitodens 200-W, B2HB and Vitodens 222-F, B2TB, Re-connect the wiring for the burner, heat exchanger and fan assembly as shown below: Legend A Plug #15 (flue gas temp sensor) B Plug #47 & spade terminal (fixed high limit)
- Page 48 Note: For Vitodens 200-W, B2HB and Vitodens 222-F, B2TB, Using the T-20 Torx bit, install the 2x screws holding the flue gas channel 1 to the boiler cabinet. Carefully install the new vent pipe adaptor 2 supplied in the kit. Install the air intake 3 cover if required.
- Page 49 Note: For Vitodens 200-W, B2HB and Vitodens 222-F, B2TB, Reinstall the venting system on the boiler 1. Verify that the flue gas sensor 2 is properly seated in the flue gas collector. 5834 998 - 03...
- Page 50 Note: For Vitodens 222-F, B2TB boilers only, Reinstall the boiler control unit. Reinstalling the boiler control unit 1. Lift the control unit upwards such that it is in a vertical position. 2. Carefully align the control unit such that the pivot point aligns with the slot on each side.
- Page 51 Restarting the Boiler Bleed (Vent) Air from Boiler Heat Exchanger 1. Connect power and turn on gas. During the venting program, the circulation pump will be alternately switched on and off for 30 seconds respectively over a period of 20 2.
- Page 52 Reinstalling the Front Enclosure Panel (B2HB 19, 26 and 35) Reinstalling the Front Enclosure Panel (B2TB 19 and 35) IMPORTANT IMPORTANT Fitting the front panels Fitting the front panels 1. Return control to the upright operating position 1. Reinstall the burner cover. 2.
- Page 53 O content at the boiler vent pipe adaptor. Note: The Vitodens 200-W, B2HB boiler comes factory set for operation with natural gas and altitudes up to 5,000 ft. (1,500 m). The MatriX cylinder burner of this boiler is preset for the entire gas group.
- Page 54 Perform Combustion Analysis (Check CO Setting) 4. Measure CO and O content at boiler vent pipe adaptor. If the measured values deviated by more than 1% from the ranges for the respective fuel type listed in the right column or in the table on the next page.
- Page 55 Combustion Analysis Record Measurements Actual Test Results Setpoint Values Static pressure “w.c. max. 14 “w.c. Running pressure (supply pressure) “w.c. 4-14 “w.c. Natural gas “w.c. 10-14 “w.c. Liquid Propane gas Check gas type Carbon dioxide content CO H at lower end of rated input range vol.
- Page 56 Viessmann Manufacturing Company Inc. Viessmann Manufacturing Company (US) Inc. 750 McMurray Road 45 Access Road Waterloo, Ontario • N2V 2G5 • Canada Warwick, Rhode Island • 02886 • USA 1-888-414-9157 1-833-799-4976 5834 998 - 03 www.viessmann.ca/recall • recall@viessmann.ca www.viessmann.com • recall@viessmann-us.com...
Need help?
Do you have a question about the Vitodens 200-W and is the answer not in the manual?
Questions and answers